A 1/8 inch carbide end mill is crucial for cleanly cutting High-Density Polyethylene (HDPE), preventing melting and ensuring precise, chatter-free results in your milling projects. This guide shows you why and how to use it effectively.
Mastering HDPE: Why a 1/8 Inch Carbide End Mill is Your Go-To Tool
Hey, makers! Daniel Bates here from Lathe Hub. Ever tried cutting HDPE, that super common, super tough plastic, and ended up with a melty mess or rough, chipped edges? It’s a frustrating experience many of us have faced when starting out. The good news is, the right tool makes all the difference. Today, we’re diving deep into why specifically a 1/8 inch carbide end mill is an absolute game-changer for working with HDPE. We’ll explore its unique benefits, how to choose the right one, and the best practices for getting those clean, professional cuts you’re aiming for. Get ready to tackle your HDPE projects with newfound confidence!
Understanding HDPE and Its Machining Challenges
High-Density Polyethylene, or HDPE, is everywhere. From cutting boards and outdoor furniture to plumbing pipes and containers, its durability, chemical resistance, and low cost make it a favorite material. However, these very properties present unique challenges when you want to machine it, especially with a CNC mill.
The Melting Point Problem
HDPE has a relatively low melting point. When you machine it with tools that generate a lot of heat, the plastic doesn’t cut cleanly; it starts to soften and melt. This leads to:
- Gummy Chips: Instead of clean shavings, you get sticky, plastic strings that clog your flutes and gum up your workpiece.
- Poor Surface Finish: Melted plastic reflows onto the cut surface, leaving it rough, uneven, and visually unappealing.
- Tool Loading: The gummy material clings to the end mill, reducing its effectiveness and potentially leading to tool breakage.
- Dimensional Inaccuracy: Heat can cause the HDPE to expand and then contract unevenly, affecting the final dimensions of your part.
The Importance of Chip Evacuation
Proper chip evacuation is critical for any machining operation, but it’s even more so with plastics like HDPE. If chips aren’t cleared away from the cutting zone quickly, they trap heat and contribute to melting. A tool’s geometry and flute design play a massive role here.
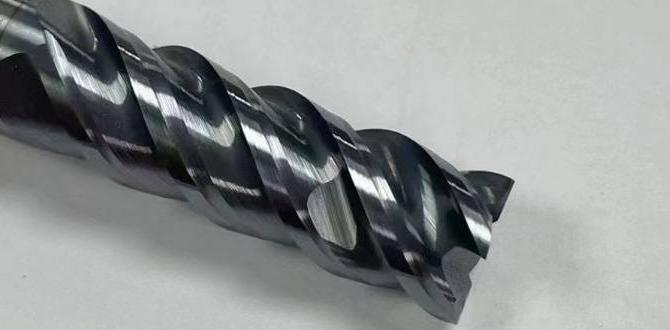
Why a 1/8 Inch Carbide End Mill is Ideal for HDPE
Now, let’s talk about why a small, 1/8 inch carbide end mill is often the star player when it comes to machining HDPE. It boils down to a few key advantages:
1. Carbide vs. HSS: The Heat Advantage
Carbide (tungsten carbide) is a much harder and more heat-resistant material than High-Speed Steel (HSS). When cutting HDPE, friction is a major contributor to melting. Carbide tools can withstand higher temperatures generated during cutting, which means they are less likely to transfer that heat directly into the plastic, keeping it cooler and firmer.
2. The Benefits of a Smaller Diameter (1/8 Inch)
The 1/8 inch (3.175 mm) diameter offers several critical benefits for HDPE:
- Reduced Cutting Forces: Smaller diameter tools require less force to cut. This means less stress on your CNC machine’s spindle and frame, and crucially, generates less heat through friction.
- Better Chip Load Control: With a smaller diameter, you can use finer chip loads. This means you’re removing material in smaller, more manageable pieces, further reducing heat buildup and improving chip evacuation.
- Access to Tight Details: For intricate designs, small features, or tight corners, a 1/8 inch end mill is often the only tool that can fit.
- Less Material Removal Per Revolution: Each flute removes less material per rotation, contributing to a cooler cut and smoother operation.
3. Flute Count and Geometry: The Secret Sauce
For HDPE, the flute count and design of your end mill are paramount.
- 2 Flutes: Generally, end mills with fewer flutes (like two) are preferred for plastics. This provides larger flute volumes, which are excellent for clearing chips effectively. More flutes mean more cutting edges, generating more heat and potentially poorer chip evacuation in softer materials.
- High Rake Angle: Tools designed for plastics often have a high rake angle (the angle of the cutting face). A positive rake angle helps to shear the plastic cleanly, rather than pushing or “smearing” it, leading to a smoother cut and less heat.
4. The Shank: Considerations for Rigidity
When looking at 1/8 inch end mills, you’ll see different shank lengths. For HDPE and minimizing deflection, a shank that’s not excessively long is often beneficial. However, if your project requires reaching deep into a part, you might need a longer shank. In such cases, a “long reach” style end mill made from solid carbide is essential. The article keyword mentions a “1/2 shank long reach for HDPE,” which suggests a 1/2 inch diameter shank paired with a 1/8 inch cutting head. This provides excellent rigidity for prolonged reach, significantly minimizing deflection. While a full 1/2 inch shank is robust, ensure your machine’s collet can accommodate it. Often, a 1/8 inch shank is more practical for small mills.
Choosing the Right 1/8 Inch Carbide End Mill for HDPE
Not all 1/8 inch carbide end mills are created equal, especially when it comes to plastics. Here’s what to look for:
Key Features to Seek:
- Material: Solid Carbide is a must.
- Flutes: 2 flutes are generally best for HDPE.
- Coating: Uncoated carbide is often preferred for plastics as coatings can sometimes add friction or load up. However, some specialized coatings (like ZrN – Zirconium Nitride) can offer improved lubricity and heat resistance. If you do opt for a coated tool, ensure it’s specifically recommended for plastics.
- Geometry: Look for mills with a high helix angle and a sharp, polished cutting edge. A high helix angle helps with chip evacuation by “pulling” chips up and out of the cut. A polished edge reduces friction and prevents plastic from sticking.
- Specific Plastic Milling End Mills: Some manufacturers offer end mills specifically designed for plastics. These often have polished flutes, aggressive rake angles, and optimized flute geometry.
Types of 1/8 Inch Carbide End Mills:
Here’s a breakdown of common types and their suitability for HDPE:
| End Mill Type | Description | Suitability for HDPE | Pros for HDPE | Cons for HDPE |
|---|---|---|---|---|
| 2-Flute, Uncoated, High Helix | Standard geometry with two open flutes and a steep helix angle. | Excellent | Great chip evacuation, minimized heat buildup, clean cuts. | Can sometimes be less durable than lower helix angles if pushing too hard. |
| 2-Flute, Polished/Mirror Finish | Features highly polished flutes to reduce friction and plastic adhesion. | Excellent | Significantly reduces sticking and melting, leading to smoother finishes. | May be slightly more expensive than standard mills. |
| Single Flute (Plastic Specific) | Designed with a single, large flute optimized for plastic chip evacuation. | Very Good to Excellent | Massive chip capacity, very effective at preventing melting. | Can be less stable and more prone to vibration on some machines compared to 2-flute mills. |
| “O” Flute (Single Flute) | A specialized type, often with a V-shaped cutting edge. | Good (for specific applications) | Can produce very smooth finishes, good for engraving. | Not ideal for general milling due to chip evacuation limitations and potential for melting if not used very carefully. |
| Ball End Mill | Has a rounded tip. | Good (for 3D contouring/engraving) | Essential for creating rounded internal corners and 3D shapes. | Less efficient for pocketing or flat surfaces than a flat end mill. |
For general milling, pocketing, and contouring HDPE, a 2-flute, uncoated, high helix, polished carbide end mill is usually the best all-around choice. If you frequently work with plastics and want the absolute best finish, look for end mills specifically branded for plastic machining.
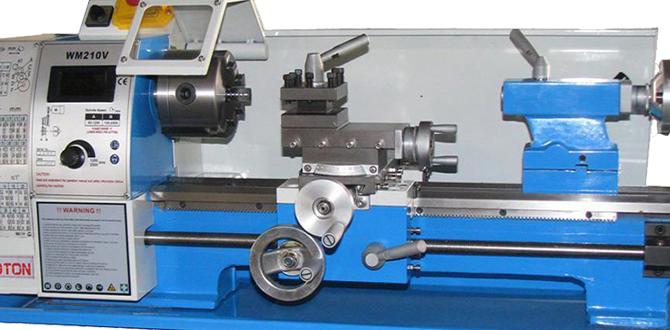
Setting Up Your CNC for Cutting HDPE
Once you have the right tool, proper machine and cut settings are crucial. This is where the magic happens to ensure those clean, melty-free results.
Spindle Speed (RPM) and Feed Rate
This is the most critical balance to get right. Your goal is to remove material efficiently without generating excessive heat. The key concept here isChip Load. Chip load is the thickness of the chip that each cutting edge removes. Too thin a chip means rubbing and heat; too thick and you risk overloading the tool and machine.
General Starting Points for 1/8 Inch Carbide End Mill in HDPE:
These are starting points and may need adjustment based on your specific machine, HDPE thickness, and end mill geometry. Always make test cuts!
- Spindle Speed (RPM): Often, a moderate to higher spindle speed works well for HDPE because it allows for faster feed rates, which helps clear chips. Start around 10,000 – 18,000 RPM.
- Feed Rate (IPM or mm/min): This should be set to achieve an optimal chip load. For a 1/8 inch 2-flute end mill, a chip load of 0.001″ to 0.003″ per tooth is a good starting range.
Calculation Example:
Let’s say you want a chip load of 0.002″ per tooth.
- Feed Rate = Spindle Speed (RPM) x Number of Flutes x Chip Load per Tooth
- Feed Rate = 12,000 RPM x 2 flutes x 0.002″ = 48 inches per minute (IPM)
You might need to adjust the RPM up or down to hit the desired feed rate or to manage heat. A common approach is to set your desired chip load and then adjust RPM to get a suitable feed rate. Some CAM software can help calculate these values.
Depth of Cut (DOC) and Stepover
- Depth of Cut (DOC): For HDPE, it’s often best to take lighter depths of cut. This means making more passes to get to your final depth. Instead of plunging 1/4″ deep in one go, try 0.06″ to 0.125″ per pass. Lighter DOC ensures the tool isn’t overloaded and helps manage heat.
- Stepover: This is the amount the end mill moves sideways with each pass when clearing an area. For roughing, a stepover of 30-50% of the tool diameter is common (0.0375″ to 0.0625″ for a 1/8″ mill). For finishing passes, a smaller stepover of 10-20% can create a smoother surface.
Cooling and Lubrication (Optional but Recommended)
While HDPE doesn’t require flood coolant like metal, some form of cooling or lubrication can dramatically improve results:
- Air Blast: A directed stream of compressed air can help blow chips away and cool the cutting zone. Many CNC machines have an air blast option.
- Mist Coolant: A mist coolant system dispenses a fine spray of lubricant and coolant. This is very effective at reducing heat and improving surface finish in plastics.
- Cutting Fluid/Lubricant: For manual operations or if an air blast/mist system isn’t available, a small amount of a plastic-friendly cutting fluid applied directly to the cut can help. Avoid heavy oils that can gum up.
The material you are cutting HDPE with also matters. For example, if you are machining aluminum, you’d use different coolant strategies than when machining HDPE.
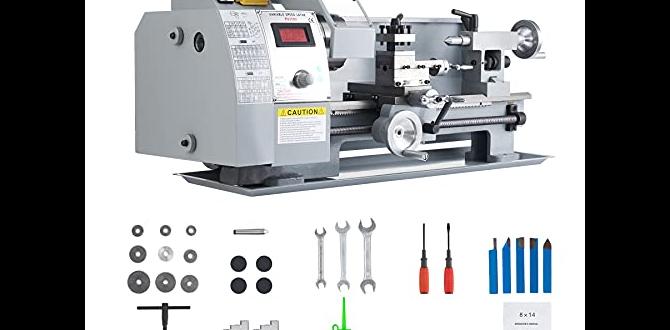
Step-by-Step Guide: Milling HDPE with a 1/8 Inch Carbide End Mill
Let’s walk through a typical milling operation, assuming you have your HDPE sheet securely fixtured to your CNC machine.
Step 1: Prepare Your Workpiece and Machine
- Secure the HDPE: Ensure the HDPE sheet is firmly clamped or vacuum-fixtured to your machine bed. Any movement during cutting will ruin your part and can be dangerous. Use clamps that won’t interfere with the cutting path.
- Clean the Machine: Make sure your machine’s bed and the area around your workpiece are free of dust and debris.
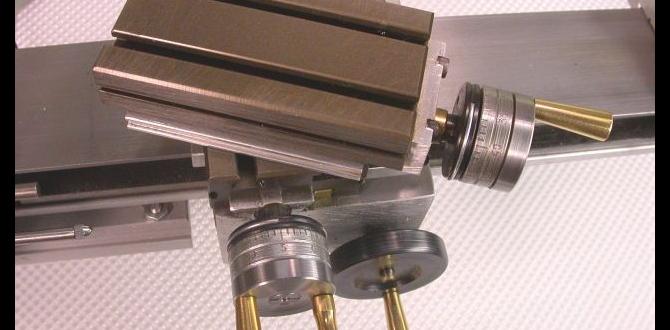
- Install the End Mill: Carefully insert your chosen 1/8 inch carbide end mill into your machine’s collet. Ensure it’s seated properly and tightened securely to prevent runout or slippage.
- Set Work Zero (Origin): Accurately set your X, Y, and Z zero points according to your CAM program. For Z zero, usually, the machine’s bed or the top surface of the HDPE is used.
Step 2: Set Up Your Cutting Parameters
- Load Your CAM File: Transfer your G-code or cutting program to your CNC controller.
- Review Speeds and Feeds: Double-check your programmed spindle speed (RPM), feed rate (IPM), depth of cut (DOC), and stepover values. Refer to the recommendations above and any manufacturer guidelines for your specific end mill.
- Prepare Cooling/Chip Evacuation: If using an air blast or mist system, ensure it’s turned on and directed at the cutting zone.
Step 3: Perform a Test Cut (Highly Recommended!)
- Dry Run: Most controllers have a “dry run” or “program run without spindle” feature. Use this to watch the machine execute the toolpath and ensure it stays within the bounds of your material and doesn’t crash into clamps.
- Shallow Test Cut: Make a small, shallow test cut in a scrap piece of HDPE or an inconspicuous area of your main part. Use a very light depth of cut (e.g., 0.010″).
- Observe the Chips: Watch the chips being produced. Are they small, dry, and easily blown away? Or are they long, stringy, and melty?
- Adjust if Necessary:
- Melty/Stringy Chips: Increase feed rate, decrease spindle speed, or both. Ensure your DOC is light.
- Too Much Vibration/Noise: Decrease feed rate or DOC. Ensure the end mill is sharp and properly installed.
- No Chips/Rubbing: Increase feed rate or spindle speed.
Step 4: Execute the Main Cut
- Start the Spindle: Once you’re confident with your test cut and parameters, start the spindle to your programmed RPM.
- Begin the Cut: Initiate the cutting program.
- Mind the Chips: Keep an eye on chip evacuation. If you see chips starting to pack or melt, don’t hesitate to pause the machine (if safe to do so) and clear them manually or adjust airflow. Continually monitor for signs of melting.
- Listen to Your Machine: Pay attention to the sound of the cut. A smooth, consistent hum is good. Grinding, chattering, or screaming noises indicate a problem that needs immediate attention.
Step 5: Post-Cutting Inspection
- Allow to Cool: Let the workpiece and the cut edges cool down slightly before handling, as they can still be warm.
- Inspect the Cuts: Examine the cut edges for cleanliness, absence of melting, and accuracy of dimensions.
- Clean Up: Remove any burrs or plastic fuzzies with a deburring tool or fine sandpaper.
Troubleshooting Common HDPE Machining Issues
Even with the right tools and settings, you might encounter problems. Here’s how to tackle them:
Issue: Melting and Gummy Chips
- Cause: Too much heat, not enough chip evacuation, feed rate too slow, or depth of cut too deep.
- Solution:
- Increase feed rate.
- Decrease depth of cut.
- Increase spindle speed (carefully).
- Improve air blast or introduce mist coolant.
- Ensure you are using a 2-flute or single-flute mill designed for plastics.