Carbide end mills easily banish frustrating fiberglass chatter, giving you smooth, clean cuts every time. Learn how the right end mill and simple techniques make a huge difference for your projects.
Working with fiberglass can be a fantastic way to create durable and interesting parts for your projects. But if you’ve ever tried to machine it, you’ve probably run into a common and annoying problem: chatter. Chatter is that nasty vibration that leaves rough, wavy surfaces on your workpiece, making your finished product look amateurish and potentially weakening it. It’s frustrating, especially when you’re aiming for that smooth, professional finish. Don’t worry, though! This common issue has a surprisingly simple and effective solution. We’re going to explore how using the right carbide end mill can be your secret weapon against fiberglass chatter, leading to cleaner cuts and far less frustration.
Understanding Fiberglass Chatter
Before we dive into the solution, let’s quickly understand why chatter happens when machining fiberglass. Fiberglass is a composite material, meaning it’s made of different components bonded together. This gives it strength but also makes it prone to vibration during cutting. When your cutting tool engages the material, if the forces aren’t balanced or if the tool isn’t sharp enough, it can repeatedly lift and drop away from the surface of the material. This rapid back-and-forth motion is chatter. It’s often worse with certain types of fiberglass or when using tools that aren’t ideal for the material. The result is a noisy, vibrating cut and a surface that looks like a washboard. For beginners, this can be a real confidence killer, making you think your machine or your skills – rather than the material and the tool – are the problem.
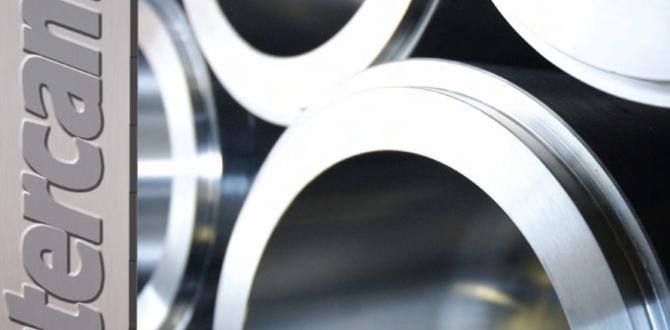
The Carbide End Mill: Your Chatter Slayer
So, what makes a carbide end mill so special for cutting fiberglass and eliminating chatter? It comes down to a few key characteristics:
Material Hardness: Carbide is an incredibly hard material. This means it can maintain a sharp edge even when cutting tough composites like fiberglass. A sharp tool cuts cleanly, reducing the force needed and, consequently, the likelihood of vibration.
Edge Geometry: The design of the cutting edges on an end mill is crucial. For fiberglass, specific geometries can help shear the material cleanly rather than just pushing through it, which is a major cause of chatter.
Flute Design: The flutes are the helical grooves that spiral around the end mill. Their depth, angle, and number all play a role in clearing chips and maintaining a smooth cut.
Why Not Other Tools?
You might wonder why a standard HSS (High-Speed Steel) end mill or even a router bit might not perform as well. HSS is softer, so it dulls much faster when machining abrasive fiberglass, leading to increased chatter. While some router bits can work, they often aren’t designed for the precision and specific cutting actions needed to prevent chatter in composites. An end mill, especially a specialized one, is built for more controlled material removal.
Choosing the Right Carbide End Mill for Fiberglass
This is where the rubber meets the road, or rather, the end mill meets the fiberglass. Not all carbide end mills are created equal, especially when it comes to combating chatter in this material. Here’s what to look for:
Key Features to Consider:
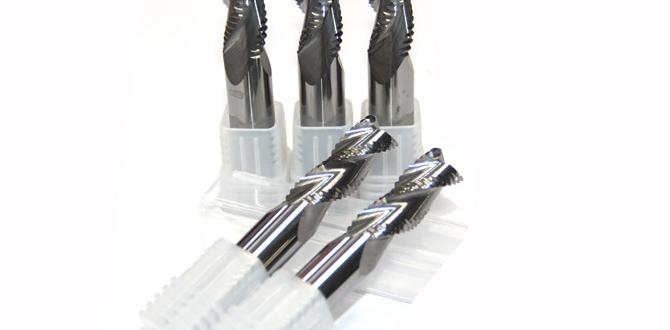
Number of Flutes: For fiberglass, a 2-flute or 3-flute end mill is generally recommended.
2 Flutes: These offer excellent chip clearance, which is vital for composites that can produce a lot of dust. Good chip evacuation helps prevent the tool from getting clogged and reduces heat buildup, both of which can contribute to chatter.
3 Flutes: These provide a smoother finish and better rigidity than 2-flute mills in some applications, but they can also pack chips more readily in softer materials. For fiberglass, it’s often a balance between the two. Many machinists find 2-flute helix end mills to be the sweet spot for reducing chatter.
Helix Angle: The helix angle refers to the steepness of the spiral flute.
High Helix (e.g., 45° to 60°): These are excellent for cutting softer materials and composites like fiberglass. A steeper helix angle shears the material more effectively, leading to a cleaner cut and reduced chatter. It bites into the material with less tendency to grab and vibrate.
Standard Helix (e.g., 30°): Still viable, but a high helix will usually outperform it for chatter reduction in fiberglass.
Coating: While not always strictly necessary, a specialized coating can further improve performance.
ZrN (Zirconium Nitride) or TiAlN (Titanium Aluminum Nitride): These coatings enhance lubricity, reduce friction, and increase the tool’s hardness and thermal resistance. This means a sharper edge for longer and less material buildup on the tool, both contributing to smoother cuts and less chatter.
End Type:
Square End: This is the most common type and is perfectly suitable.
Ball End: Used for creating curved surfaces or slots, less relevant for simple chatter reduction in most straight-line milling.
Diameter and Length:
Diameter: Common sizes like 1/8 inch, 1/4 inch, or 1/2 inch are readily available. The size you choose depends on the detail of your work. Smaller diameters are great for intricate cuts but can be more prone to deflection and chatter if not used correctly.
Length (Reach): For general work, a standard length is fine. However, a long reach end mill can provide more flexibility for deeper cuts without needing to reposition the workpiece or spindle as much. When looking for a solution to chatter, ensure the tool’s length doesn’t compromise rigidity. A shorter, stouter end mill is generally more rigid than a long, thin one, which can help reduce vibration.
Recommended End Mill for Fiberglass Chatter:
Based on these factors, a 2-flute, high helix (45-60°), carbide end mill, potentially with a ZrN coating, in a diameter suitable for your work (e.g., 1/8 inch or 1/4 inch), will be your best bet for tackling fiberglass chatter. The keywords you might search for include “carbide end mill 1/8 inch 2 flute high helix fiberglass” or “carbide end mill 1/4 inch 2 flute fiberglass chatter.
Essential Machining Parameters for Fiberglass
Beyond just the tool, how you use it makes a massive difference. Getting your machining parameters right is crucial for a chatter-free experience.
Spindle Speed (RPM)
This is how fast the end mill rotates. For fiberglass, you generally want to keep the RPM relatively high but not excessively so.
General Range: 15,000 – 30,000 RPM is a good starting point for many hobbyist CNC machines and manual mills.
Why it Matters: Higher RPM coupled with appropriate feed rates helps the tool “shear” the material cleanly, rather than rubbing or pushing. If your RPM is too low, the tool will tend to scrape and vibrate.
Feed Rate
This is how fast the tool moves through the material. This is arguably more critical than RPM for chatter.
Key Principle: Match your feed rate to your RPM and the chip load you want. A good rule of thumb is to aim for a feed rate that results in small, manageable chips. If you’re getting dust, you’re likely feeding too slowly or have too much engagement.
Starting Point: For a 1/4 inch end mill, you might start at 20-40 inches per minute (IPM) and adjust. A common calculation involves RPM, number of flutes, and desired chip load (e.g., 0.002 – 0.005 inches per flute).
If you hear chatter, increase your feed rate.
If you’re getting rubbing or melting, your feed rate might be too slow, or your RPM too high, or your tool dull.
Depth of Cut (DOC) and Stepover
These define how much material you remove with each pass.
Depth of Cut (DOC): For fiberglass, it’s often best to use a light depth of cut. This means taking many shallow passes rather than one deep, aggressive cut.
Why: Deep cuts put a lot of stress on the tool and the material, increasing the chance of vibration. A shallow DOC allows the high-helix end mill to do its shearing work effectively without being overloaded.
General Guideline: Start with a DOC that’s no more than 1-2 times the tool diameter. For a 1/4″ end mill, start with 1/8″ to 1/4″ DOC and adjust.
Stepover: This is the amount the tool advances sideways in each pass when milling a larger area.
Key Principle: A moderate stepover is usually best. Too large a stepover can lead to uneven cutting forces and chatter. Too small a stepover can lead to inefficient cutting and potentially rubbing.
General Guideline: Aim for a stepover of 20-50% of the tool diameter. For a 1/4″ end mill, 0.05″ to 0.125″ stepover is a good starting range.
Table Example: Recommended Machining Parameters for Fiberglass
To get you started, here’s a table with some suggested parameters. Always test these on a scrap piece first and adjust based on your specific machine, setup, and the fiberglass material.
| Parameter | Recommended Value for Fiberglass Chatter Reduction | Notes |
| :————- | :———————————————— | :————————————————————————————– |
| End Mill | 2-Flute, High Helix (45-60°), Carbide | Ideal for shearing composites and chip evacuation. |
| RPM | 15,000 – 30,000 | Higher RPM helps shear cleanly. Adjust based on sound and chip formation. |
| Feed Rate | 20 – 60 IPM (Inches Per Minute) | Adjust to match RPM and DOC. Aim for small, defined chips, not fine dust. |
| Depth of Cut (DOC) | 0.06″ – 0.25″ (approx. 1/16″ to 1/4″) | Keep cuts shallow for reduced vibration and chatter. Never exceed 1-2x tool diameter. |
| Stepover | 20% – 50% of tool diameter (e.g., 0.05″ – 0.125″ for 1/4″ end mill) | Moderate stepover for consistent cutting forces. |
| Coolant/Lubrication | Optional (Compressed air is often sufficient) | Can help with chip evacuation and cooling, but avoid if it creates a sticky mess. |
Setting Up Your Machine for Success
The best tool and parameters can be undermined by a poor setup. Here are some tips for ensuring your machine is ready to deliver those smooth, chatter-free cuts.
Workholding is Key
Secure the Material: Your fiberglass workpiece must be clamped down extremely well. Any movement in the material will translate directly into chatter. Use clamps, vises, or even double-sided tape if suitable for the material and cut depth.
Rigid Fixturing: Whenever possible, mount your workpiece directly to the machine bed or a very rigid sub-plate. Avoid fixturing that relies on flexible materials.
Minimize Spindle Runout and Vibration
Clean Tool Holder: Ensure your R8 collet, ER collet chuck, or any tool holder is perfectly clean. Dust or debris can cause the end mill to run out slightly, leading to uneven cutting and chatter.
Proper Tool Insertion: Make sure the end mill is seated correctly and fully within the collet or holder.
Balance: If you’re using high-speed CNC machines, balanced tooling can be important to reduce vibration at higher RPMs.
Spindle Condition: While harder for beginners to address, a worn spindle bearing will introduce vibration.
Tool Length and Rigidity
Shorten the Stick: Use the shortest possible end mill that can reach your workpiece. A longer end mill has more flex and is more prone to chatter. If you need to make a deep cut, consider making multiple setups with shorter tools rather than one long plunge.
Avoid Cantilevering: Try not to have too much of the end mill sticking out of the collet or holder without support.
Step-by-Step: Machining Fiberglass Chatter-Free
Let’s walk through the process of milling fiberglass with your new carbide end mill, keeping chatter at bay.
Step 1: Prepare Your Workspace and Machine
1. Safety First: Put on your safety glasses! You’ll also want a dust mask or respirator, as fiberglass dust can be irritating.
2. Cleanliness: Ensure your milling machine bed and the area around your workpiece are clean and free of debris.
3. Dust Collection: If you have a dust collection system, set it up. Fiberglass machining creates fine particulate that you don’t want to breathe or have settle in your machine’s mechanisms. Your local occupational safety and health administration often has guidelines on dust control. For instance, the Occupational Safety and Health Administration (OSHA) offers resources on controlling airborne contaminants in workshop environments.
Step 2: Secure Your Fiberglass Workpiece
1. Position: Place your fiberglass piece on the milling machine table.
2. Clamp It Down: Use clamps or a vise to secure the workpiece. Ensure the clamps won’t interfere with the cutting path. For thinner materials, consider using a backing board and double-sided tape for extra hold.
Step 3: Install the Carbide End Mill
1. Clean Holder: Make sure your collet and collet nut are perfectly clean.
2. Insert End Mill: Insert the correct diameter, 2-flute carbide end mill into the collet. Make sure it’s seated firmly.
3. Install in Spindle: Tighten the collet nut and insert the tool holder into your machine’s spindle.
Step 4: Set Up Tool and Workpiece Zero
1. Z-Axis Zero: Carefully bring the end mill down to the top surface of your fiberglass workpiece (or your zero datum). Set your Z-axis zero.
2. X and Y Axis Zero: Position and set your X and Y axis zeros according to your design. Edge finders or probe systems can help with accuracy.
Step 5: Input Machining Parameters
1. Your CNC Controller or Manual Settings: Input the recommended RPM, Feed Rate, Depth of Cut, and Stepover values.
2. Start Conservatively: If unsure, start at the lower end of the recommended ranges. You can always increase them if the cut is too slow or not aggressive enough.
Step 6: Perform the Cut
1. Dry Run (Optional but Recommended): On many CNC machines, you can run the program with the spindle off to verify toolpaths and ensure no collisions.
2. Engage Spindle: Start the spindle at your chosen RPM.
3. Initiate Feed: Begin the cutting process.
4. Listen and Observe: Pay close attention to the sound of the cut. A smooth, consistent hum is good. Any chattering, grinding, or high-pitched squealing indicates a problem.
If you hear chatter, immediately pause or stop and check your parameters. Often, a slight increase in feed rate or a slight decrease in depth of cut can resolve it.
5. Chip Evacuation: Watch how the chips are clearing. If they’re building up, you might need a slightly faster feed rate or a shallower DOC to improve evacuation.
Step 7: Inspect and Refine
1. Examine the Surface: Once the cut is complete, carefully inspect the surface of the fiberglass. It should be smooth and free from the tell-tale lines of chatter.
2. Adjustments: If chatter is still present, review your parameters:
Try increasing the feed rate slightly.
Try decreasing the depth of cut slightly.
Ensure your end mill is still sharp. Dull tools are a major culprit.
Confirm your workpiece is absolutely rigid.
This iterative process of observation and adjustment is key to mastering any machining operation.
Troubleshooting Common Fiberglass Machining Issues
Even with the right tools and techniques, you might encounter snags. Here’s a quick troubleshooting guide:
| Problem | Cause | Solution |
| :——————— | :——————————————————————– | :—————————————————————————————————————————————————————————————————————————————————————————————————————————————————————————————————— |
| Chatter / Vibration | Tool not sharp, incorrect RPM/feed, too deep of cut, poor workholding, tool deflection. | Use a sharp 2-flute high-helix carbide end mill. Increase feed rate, decrease DOC. Ensure rigid clamping. Reduce tool stick-out. For manual machining, consider using a variable speed spindle to fine-tune RPM. |
| Melting / Gummy Cuts | Feed rate too slow, RPM too high, insufficient chip clearance, dull tool. | Increase feed rate. Decrease RPM. Ensure adequate chip evacuation (try a 2-flute instead of 3-flute). Use compressed air to clear chips. Verify tool sharpness. |
| Rough Surface Finish | Tool nearing end of life, incorrect parameters, tool deflection. | Replace or sharpen the end mill. Lighten DOC and moderate stepover. Verify tool rigidity and workholding. |
| Excessive Dust |