Mastering Your Metal Lathe: A Beginner’s Guide to Fundamental Operations
Hey there, fellow makers! Daniel Bates here, your guide from Lathe Hub. Ever looked at a metal lathe and thought, “Wow, that’s a powerful beast, but how do I even start?” You’re not alone! Metal lathes are incredible tools for shaping metal, but for newcomers, they can seem a bit intimidating. Don’t worry, though. My goal is to break down the basics so you can jump in with confidence and start creating. We’ll cover the essentials, from understanding your lathe to making your first cuts. Get ready to turn metal into your next masterpiece!
Understanding Your Metal Lathe: The Heart of Your Workshop
Before we turn anything, let’s get acquainted with the star of the show: the metal lathe. Think of it as the ultimate craftsman’s tool for shaping metal with incredible precision. It spins a piece of metal very fast, and a cutting tool moves along it to remove material and create the desired shape. Knowing its parts will make everything else much easier and, more importantly, safer.
Key Components of a Metal Lathe
Every metal lathe, big or small, has a few core parts that do the heavy lifting. Here’s a quick rundown:
- Headstock: This is the side where the magic starts. It houses the motor and the spindle, which spins the workpiece. It’s the driving force of the lathe.
- Tailstock: Located on the opposite end from the headstock, the tailstock supports longer workpieces, can hold drills or reamers, and helps with tapering.
- Bed: The long, sturdy base of the lathe. It provides a stable foundation and guides the carriage. Imagine it as the lathe’s backbone.
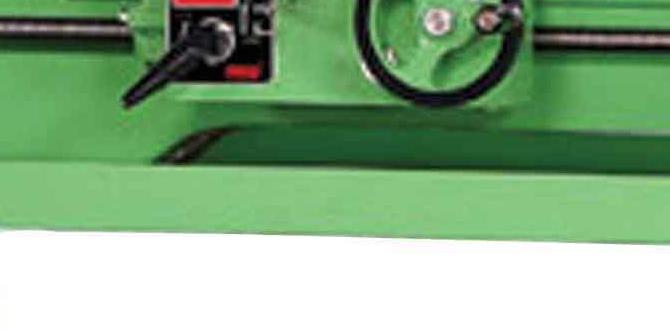
- Carriage: This assembly moves along the bed and carries the cutting tool. It allows you to feed the tool into the workpiece to remove material.
- Tool Post: Mounted on the carriage, this holds your cutting tools securely in place.
- Leadscrew and Feed Rod: These powered shafts enable the carriage to move automatically for precise cuts like threading or long, straight turning.
- Cross Slide and Compound Rest: These are mounted on the carriage and allow for finer adjustments and cuts, like facing or creating angles.
Getting a feel for these parts and what they do is your first big step. Safety should always be your top priority when working with any machinery. Always read your lathe’s manual and follow recommended safety procedures. Safety glasses are non-negotiable, and keeping your workspace clean and free of distractions is crucial.
Essential Tools and Accessories for Lathe Beginners
You’ve got your lathe, now what? To start turning, you’ll need a few key tools and accessories. Don’t feel like you need the fanciest gear right away; good quality essentials will serve you well as you learn.
Your First Set of Cutting Tools
The cutting tool is what shapes your metal. For beginners, it’s often best to start with tool bits that can be easily shaped or bits that are pre-ground for common operations. High-Speed Steel (HSS) is a great material to start with as it’s forgiving and easy to resharpen.
- High-Speed Steel (HSS) Tool Bits: These can be ground to create various shapes needed for turning, facing, and threading.
- Parting Tool: Essential for cutting pieces of material off the end of your workpiece.
- Knurling Tool: Used to create a textured grip on a workpiece.
- Drill Chuck: Attaches to the tailstock to hold drill bits for drilling holes in your workpiece.
As you progress, you might explore carbide tooling, which offers better performance for harder materials and faster cutting, but can be more brittle and demanding on your machine. For now, HSS is your trusty starting point.
Measuring and Marking Tools
Precision is key in machining. Having accurate measuring tools will ensure your parts meet specifications.
- Calipers (Vernier or Digital): For measuring outside and inside diameters.
- Micrometer: For highly precise external measurements.
- Ruler or Tape Measure: For general length measurements.
- Center Punch: For marking precise center points for drilling.
- Layout Fluid (Dykem): For marking surfaces to scribe lines.
Workholding Essentials
You need to hold your workpiece securely in the lathe. This is absolutely critical for safety and accurate machining.
- Three-Jaw Chuck: The most common type, used to grip cylindrical stock from the outside or inside.
- Four-Jaw Independent Chuck: Useful for gripping odd-shaped or off-center workpieces.
- Faceplate: Used to mount larger or irregularly shaped workpieces.
- Live Center: Fits into the tailstock and spins with the workpiece, supporting the end of long shafts without causing friction.
Always ensure your workpiece is securely held before turning the lathe on. A loose part can become a dangerous projectile.
First Steps: Setting Up Your Lathe and Workpiece
Now that we’ve got the tools, let’s get your lathe ready for action. This is where preparation meets possibility.
Mounting a Workpiece: The Three-Jaw Chuck
For most beginner projects, you’ll be starting with a round bar of metal held in a three-jaw chuck. It’s like a mechanical vise that grips your material evenly.
- Clean the Chuck and Spindle: Ensure both the chuck’s mount and the lathe’s spindle nose are clean and free of debris.
- Mount the Chuck: Align the chuck with the spindle threads and screw it on. For threaded spindles, tighten it securely by hand, then use the chuck key with a slight tap – check your manual for the exact procedure. For a cam-lock spindle, align the keys and lock it in place.
- Insert Your Material: Open the chuck jaws using the chuck key. Insert your metal stock into the jaws, making sure it’s long enough for your project plus some extra for gripping.
- Grip the Material: Tighten the jaws evenly using the chuck key. Turn the key until the jaws grip the stock firmly. Periodically rotate the chuck and tighten the jaws again on different points to ensure the material is held concentrically (centered). You want it snug, but don’t overtighten and deform the stock.
Tool Installation and Alignment
Next, we’ll put your cutting tool in the tool post. Proper height and alignment are crucial for good cuts and preventing tool breakage.
- Install the Tool Post: If you have a quick-change tool post, select an appropriate tool holder. For a simpler rocker-type tool post, you might place tool bits directly.
- Insert the Tool Bit: Place your HSS tool bit into the tool post or holder. For basic turning, the cutting edge of the tool should be at the exact center height of the workpiece spindle.
- Align the Tool: Use a ruler or an indicator to verify the tool bit’s cutting edge is perfectly aligned with the spindle’s center height. If it’s too high, it can rub; too low, and it might dig in.
- Secure the Tool: Tighten clamping bolts firmly to hold the tool post and tool bit securely.
A quick check: Spin the chuck by hand with the tool bit lightly engaged. Does it rub? Is it too high or low? Small adjustments now save a lot of trouble later.
Beginner Lathe Operations: Your First Cuts
This is it – the moment of truth! Let’s make some chips. We’ll start with the most fundamental operations: facing and turning.
Facing: Flattening the End of Your Workpiece
Facing is done to create a flat surface on the end of your workpiece, perpendicular to the lathe’s axis. It’s often the first operation on any part.
- Set Up: Ensure your workpiece is securely gripped and your facing tool is set at spindle center height, positioned to cut from the outside edge towards the center.
- Engage the Cross Slide: This is the handwheel that moves the tool perpendicular to the bed.
- Start the Lathe: Turn the lathe on at a slow to medium speed. Consult your machine’s manual or charts for recommended speeds based on material and diameter. Generally, softer metals and larger diameters run slower.
- Take a Light Cut: Slowly turn the cross slide handwheel to feed the tool into the rotating workpiece. You should hear and see chips forming.
- Make a Full Pass: Feed the tool across the entire face of the workpiece, from the outside edge to just before the center.
- Measure and Repeat: Stop the lathe, move the tool away, and measure the face with your calipers. If it’s not flat or to the desired thickness, repeat the process with slightly deeper cuts until you achieve a smooth, flat surface. Remove any burrs.
Plain Turning: Reducing Diameter
Plain turning (or ‘turning between centers’ if using a live center) is how you reduce the diameter of your workpiece to create a cylindrical shape.
- Set Up: If you’re not turning between centers, your workpiece is held in the chuck. Use a turning tool (often a left-hand turning tool for HSS bits) set at spindle center height. Position it at the end of the workpiece where you want to start reducing the diameter.
- Start the Lathe: Set an appropriate speed for the material and diameter.
- Engage the Carriage Feed: The carriage is what moves the tool parallel to the bed. For plain turning, you’ll use the feed rod to move the carriage automatically, or you can use the handwheel for manual control. Start with manual for better feel.
- Take the First Cut (Roughing): Feed the tool into the workpiece and engage the carriage feed, moving the tool along the length of the part. Take a light cut initially to establish a baseline.
- Measure and Dial In: Stop the lathe, measure the diameter where you made the cut. Compare this to your desired dimension.
- Subsequent Cuts: For subsequent cuts, decide how much material you want to remove (e.g., 0.020 inches). Admire your dial on the cross slide or carriage handwheel to set the depth of cut. Make another pass.
- Finishing Cuts: For a smooth finish, take light finishing cuts. This involves a slower feed rate and a very shallow depth of cut.
Remember to keep your cuts consistent. Avoid stopping the feed mid-cut, as this can lead to minor ridges on your part. Always let the tool complete its pass. If you’re working with longer pieces, using a tailstock live center can significantly improve stability and reduce vibration.
Safety First: Best Practices for the Novice Machinist
I can’t stress this enough: safety is paramount. A metal lathe is a powerful tool, and respect for it is essential. Accidents often happen when people get complacent or cut corners.
Your Safety Checklist:
- Eye Protection: Always wear safety glasses. A full face shield is even better, especially when there’s a risk of flying chips.
- No Loose Clothing or Jewelry: Roll up sleeves, remove rings, watches, and necklaces. Tie back long hair. These can easily get caught in rotating machinery.
- Proper Workpiece Mounting: Double-check that your workpiece is securely held in the chuck or between centers.
- Tool Post Security: Ensure your cutting tool and tool post are firmly tightened.
- Clear the Area: Keep your workbench and the area around the lathe clear of tools, rags, and other clutter.
- Know Your Stops: Be aware of the carriage stops and limit switches to prevent collisions.
- Use the Right Speeds and Feeds: Consult charts or your machine’s manual. Too fast can be dangerous and produce poor results; too slow can burn tools.
- Never Leave a Running Lathe Unattended: Always be present and attentive when the machine is on.
- Stop the Lathe for Measurements/Adjustments: Don’t try to measure or adjust while the spindle is spinning unless specifically instructed for certain operations by experienced professionals.
- Learn How to Stop Quickly: Know where the emergency stop button or power switch is located.
Familiarize yourself with the specific safety features of your lathe model. If you’re unsure about any operation, seek guidance from an experienced machinist or consult reliable resources. Organizations like OSHA provide excellent safety guidelines for machining operations, which are invaluable for understanding best practices: OSHA Machine Guarding.
Intermediate Techniques: Expanding Your Horizons
Once you’re comfortable with basic turning and facing, it’s time to explore some slightly more advanced, yet still beginner-friendly, techniques.
Taper Turning
A taper is a gradual decrease in diameter along the length of a workpiece. Lathes have ways to create these.
- Using the Compound Rest: You can swivel the compound rest to a desired angle and then manually feed it to create a taper. This is good for short tapers.
- Using the Taper Attachment: More commonly, a dedicated taper attachment is used. This guides the cross slide along a specific angle set by a graduated bar, allowing the carriage to create the taper automatically.
Always check the taper angle needed and ensure your attachment or compound rest is set accurately. Take light, finishing passes for a smooth result.
Grooving and Undercutting
Creating grooves or undercuts adds functionality and features to your parts. This is often done with a specialized grooving tool.
- Setting Up: Position the grooving tool at the desired location on your workpiece. Ensure it’s at center height.
- Depth of Cut: The width of your grooving tool determines the groove’s width. Feed the tool radially (into the part) to the desired depth.
- Feed Rate: A slower feed rate is typically best for grooving to avoid chatter and ensure a clean cut.
- Clear Chips: Grooving can produce long chips, so ensure they are cleared safely.
- Undercuts: These are often needed behind a shoulder to allow for tool clearance in mating parts. They are created similarly to grooves.
Be cautious with grooving tools, especially on smaller lathes or thinner materials, as they can be prone to chatter. A rigid setup and appropriate cutting speeds are essential.
Threading: Adding Screw Threads
Threading with a lathe is a rewarding skill that allows you to create fasteners and mating parts. It requires careful setup and a specific technique.
- Change Gearbox or Change Gears: To cut threads, you need to engage the leadscrew. This often involves setting up specific gears on your lathe (or selecting a threading ratio on a gearbox) to match the thread pitch you want to cut. Always refer to your lathe’s threading chart.
- Select a Threading Tool: You’ll need a specialized threading tool bit or insert, ground or shaped to the correct thread angle (e.g., 60 degrees for Unified National threads).
- Set the Tool Height: The threading tool must be set precisely at spindle center height.
- Align the Tool: For single-point threading, the tool’s cutting edge should be perpendicular to the workpiece axis and aligned with the lead screw’s travel.
- Scratch Cut: Engage the leadscrew and make a very light “scratch cut” across the workpiece. Stop the lathe before the tool reaches the end of the thread, disengage the leadscrew, and return the carriage manually. This is crucial for aligning for the next pass.
- Subsequent Passes: Re-engage the leadscrew at the same starting point for the next pass. Gradually deepen the cut with each pass until the thread reaches the desired major diameter.
- Using the Compound Rest: Often, only the compound rest is used to feed the threading tool radially into the workpiece for subsequent passes. This reduces the forces on the leadscrew mechanism.
Threading requires patience and accuracy. Rushing this process can lead to incorrect threads or damage to your leadscrew. For more information on specific thread types, resources like Machinery’s Handbook (a quintessential reference for machinists) are invaluable.
Troubleshooting Common Lathe Problems
Even with the best intentions, you might run into issues. Here’s a look at some common problems and how to fix them.
| Problem | Possible Causes | Solutions |
|---|---|---|
| Chatter or Vibration | Tool bit not sharp
|

