A 1/8-inch carbide end mill is a fantastic choice for detailed work on plywood. Its small size allows for intricate cuts and fine details, making it perfect for hobbyists and makers who need precision. This tool is ideal for creating clean edges and sharp corners in plywood projects, providing a professional finish.
Hey there, fellow makers! Daniel Bates here, your guide from Lathe Hub. Ever stare at a sheet of plywood, brimming with project ideas, but feel a bit daunted by how to bring those intricate designs to life? You’re not alone! Getting those clean lines, sharp corners, and detailed cutouts can sometimes feel like a puzzle. That’s where the magic of a small but mighty tool comes in. Today, we’re going to dive into the world of the 1/8-inch carbide end mill, a real workhorse for anyone tackling plywood. We’ll break down exactly why this tool is so essential and how you can use it to achieve impressive results. Get ready to boost your confidence and unlock some amazing possibilities for your projects!
Why the 1/8-Inch Carbide End Mill is Your Plywood Pal
When you’re working with plywood, especially for detailed projects or hobbyist creations, the size and type of cutting tool make a huge difference. You might be tempted to reach for a router bit, and that’s often a great option, but for finer, more controlled cuts, especially on CNC machines or precision routers, the 1/8-inch carbide end mill shines. Let’s talk about why this specific tool is so well-suited for the job.
Understanding Your End Mill: What Does 1/8-Inch Mean?
The “1/8-inch” refers to the diameter of the cutting head of the end mill. This small diameter is absolutely crucial for several reasons:
- Intricate Detail: A smaller diameter allows you to cut much finer lines and more detailed shapes than a larger bit. Think about engraving tiny text, creating delicate scrollwork, or cutting out complex puzzle pieces.
- Tight Radii: When your design has tight inside corners, a smaller diameter tool can get closer to achieving a true 90-degree angle. A larger end mill will always leave a radius equal to its own diameter in inside corners.
- Reduced Tear-Out: For plywood, which can be prone to splintering or tear-out, a smaller, sharper tool like a carbide end mill can often make a cleaner cut. This is especially true when paired with the right feed rates and speeds.
The Power of Carbide
Now, let’s talk about “carbide.” This isn’t just any metal; it’s a composite material made from tungsten carbide powder mixed with cobalt. This combination gives end mills:
- Superior Hardness: Carbide is incredibly hard, much harder than high-speed steel (HSS). This means it can cut through materials like plywood with exceptional ease and maintain its sharp edge for much longer.
- Heat Resistance: Plywood, especially denser types, can generate a lot of friction and heat when cut. Carbide’s natural resistance to heat allows it to perform consistently without dulling quickly or melting its way through the material.
- Durability: For repetitive tasks or projects involving many cuts, carbide’s durability means fewer tool changes and a more reliable cutting experience.
Why 1/8-Inch Carbide is a Sweet Spot for Plywood
Combining a 1/8-inch diameter with carbide material creates a tool that’s:
- Precise: Perfect for detailed work where larger bits would be too crude.
- Sharp: Capable of making very clean cuts in plywood, minimizing tear-out.
- Long-Lasting: Resists wear, so you can complete more projects before needing a replacement.
When working with plywood, you’re often looking for clean edges and the ability to reproduce intricate designs. A 1/8-inch carbide end mill is designed to deliver just that. It’s a tool that moves you beyond basic shapes and into the realm of detailed craftsmanship.
Key Features to Look For in a 1/8-Inch Carbide End Mill for Plywood
Not all 1/8-inch carbide end mills are created equal, especially when you’re focusing on plywood. To get the best results, you’ll want to pay attention to a few specific features. These details can significantly impact the quality of your cuts and the longevity of your tool.
Flute Count: The More, The Merrier for Wood?
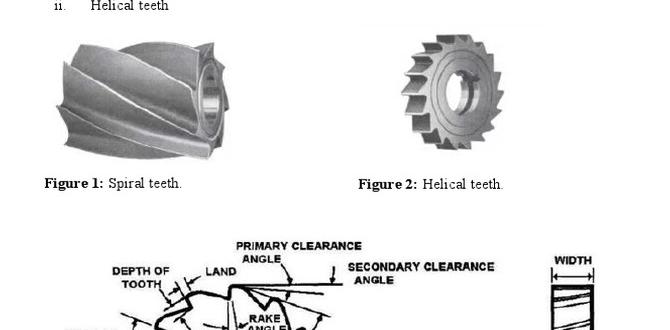
Flutes are the spiral grooves on the cutting edges of the end mill. They serve to clear chips away from the cutting area. For plywood machining, flute count is an important consideration:
- 2-Flute End Mills: These are often favored for woodworking and plastics. With fewer flutes, there’s more open space between them, which is great for chip evacuation. Plywood can produce stringy chips, and good chip clearance prevents them from gumming up the flutes, leading to a cleaner cut and less heat buildup.
- 3-Flute or 4-Flute End Mills: While excellent for metals, these can sometimes overload with chips when cutting softer materials like plywood, especially at faster feed rates. However, some specialized 3-flute “O-flute” or “single flute” bits designed for plastics and wood might also work very well due to their specific geometry and chip clearance design. For general plywood work, 2-flutes are a very safe and effective bet.
Coating: Adding an Extra Layer of Performance
Many high-quality end mills come with specialized coatings. For plywood, you’re generally not dealing with the extreme heat of machining metals, so specialized metal coatings aren’t always necessary. However, some coatings can still offer benefits:
- Uncoated Carbide: Perfectly fine for many plywood applications. The natural properties of carbide are usually sufficient.
- TiN (Titanium Nitride): A common, cost-effective coating that adds some hardness and lubricity, potentially helping with chip flow and reducing friction.
- TiCN, TiAlN, etc.: These are more advanced coatings typically used for tougher materials or higher-temperature applications. While they won’t hurt in plywood, they might be overkill and add unnecessary cost.
Focus on a good quality, sharp carbide bit. If an uncoated options cuts cleanly and lasts well, it’s a great choice. If a coated bit offers enhanced chip flow at a reasonable price, that’s a bonus.
Helix Angle: The Bite of the Bit
The helix angle affects how the end mill engages the material. A steeper helix angle means fewer teeth are in contact with the material at any given moment, leading to a smoother cut and less chatter, but potentially slower material removal. A shallower helix angle can remove material faster but might lead to more vibration.
- Standard Helix (around 30 degrees): Good all-around performance.
- High Helix (45 degrees or more): Often good for softer materials like wood and plastics. They tend to shear the material more cleanly, reducing the tendency for tear-out.
For plywood, a standard or slightly higher helix angle can be beneficial for achieving smoother cuts.
Shank Diameter: Standard vs. Specialized Mounts
You’ll commonly find 1/8-inch end mills with a 1/8-inch shank, meaning the part that goes into your collet or tool holder is the same diameter as the cutting head. This is standard and works with most common collets. Sometimes, for specific machines, you might see end mills with a larger shank diameter (like 1/4-inch or 6mm) that have a smaller cutting head. This can offer increased rigidity if your machine supports it.
For most beginner setups and common routers or small CNC machines, a 1/8-inch shank is what you’ll be looking for.
Length: Standard vs. Extended Reach
Standard length end mills are perfectly adequate for most plywood projects. Extended reach or “long neck” end mills have a longer shank section that is unrelieved (no cutting edges), providing clearance for deeper cuts or reaching into cavities. For typical 2D cutting of plywood sheets, standard lengths are fine.
Material Suitability and Recommendations
While we’re focusing on plywood, it’s worth noting that a good 1/8-inch carbide end mill can also handle some plastics and softer metals. However, for plywood, the key is sharpness, good chip evacuation, and a geometry that minimizes tear-out.
Popular Choices & Considerations Based on Plywood Type:
Different plywood types have different characteristics:
- Baltic Birch Plywood: Known for its dense, void-free core and hardwood veneers. It cuts very cleanly but can be hard on tooling. A sharp carbide bit is essential.
- Standard Hardwood or Softwood Plywood: More prone to voids and inconsistent density. Chip evacuation becomes even more critical here to prevent tear-out.
- MDF (Medium-Density Fiberboard): Although not technically plywood, MDF is often machined similarly. It’s abrasive and can dull tools quickly. Carbide is a must, and a bit designed for plastics or wood can work well.
For most general plywood applications, consider a 2-flute, standard helix, uncoated or TiN coated carbide end mill with a 1/8-inch diameter and 1/8-inch shank. Brands like PreciseBits, Harvey Tool, or even reputable Amazon sellers specializing in CNC tooling can offer good options.
Using Your 1/8-Inch Carbide End Mill: A Step-by-Step Guide
Now that we’ve covered what makes a good end mill for plywood, let’s get down to actually using it. Safety and precision are key here. Whether you’re using a CNC machine or a handheld router, following these steps will help you achieve excellent results.
Step 1: Setting Up Your Workpiece and Machine
This is the foundation for any successful cutting operation.
- Secure the Plywood: Plywood MUST be securely clamped or secured to your workbench or CNC bed. Any movement during cutting will ruin your project and can be dangerous. Use clamps, double-sided tape, or vacuum hold-down systems.
- Prepare Your Machine:
- CNC Users: Ensure your CNC machine is calibrated, and its bed is flat.
- Handheld Router Users: Make sure the router base is flat and you have a stable surface to work on. Consider using a jig or template for precision.
- Clear the Area: Remove any clutter from your workspace. Ensure good lighting and ventilation, as cutting plywood can produce dust.
Step 2: Installing the End Mill
This is a critical step for safety and accuracy.
- Disconnect Power: FIRST, unplug your router or ensure your CNC is completely powered down.
- Use the Correct Collet: Select the right collet for your machine that matches the 1/8-inch shank of your end mill. A loose fit can cause runout (wobble) and poor cuts.
- Insert the End Mill: Place the end mill into the collet, ensuring it’s seated firmly.
- Tighten Securely: Tighten the collet nut using the appropriate wrench. Make sure it’s snug but avoid overtightening, which can damage the collet or the end mill shank. The end mill should be inserted deep enough into the collet so that the cutting flutes are completely clear of the collet. A common rule is to have at least half of the shank length gripped by the collet.
Step 3: Setting Your Zero Point (Origin)
This tells your machine where the starting point of your cut is.
- CNC Users: Use your machine’s control software to jog the machine so the tip of the 1/8-inch end mill is precisely at your desired X, Y, and Z zero points. This is often done by touching the tool to the surface of the material and then lowering it to the bed for the Z-zero.
- Handheld Router Users: Your “zero point” is where you manually start your cut according to your design or template.
Step 4: Determining Cutting Speeds and Feeds
This is one of the most complex but crucial parts. Getting speeds and feeds right prevents tool breakage, improves cut quality, and reduces wear.
-
What are Speeds and Feeds?
- Spindle Speed (RPM – Revolutions Per Minute): How fast the end mill spins.
- Feed Rate (IPM – Inches Per Minute or mm/min): How fast the machine moves the tool through the material.
-
For 1/8-Inch Carbide in Plywood:
- Spindle Speed: A good starting point is often between 18,000 and 24,000 RPM. Plywood is relatively soft, so higher speeds are generally good, but you need to balance this with the feed rate.
- Feed Rate: This is highly dependent on your specific plywood, the CNC machine’s rigidity, and the end mill’s design. For a 1/8-inch end mill, start conservatively. A good initial range might be 20-60 IPM (Inches Per Minute).
- Depth of Cut: For plywood, especially with a small 1/8-inch bit, it’s often best to cut in multiple shallow passes rather than one deep pass. Try a depth of cut of 1/8-inch (or even 0.08-0.10 inches) per pass. This significantly reduces the load on the tool and the machine, leading to cleaner cuts and preventing tool breakage.
- Consult Resources: Many CNC software packages have built-in calculators, or you can find online resources. For example, the Advanced Manufacturing section of the National Institute of Standards and Technology (NIST) provides valuable research and data for machining parameters, though you’ll need to extrapolate for specific tools on wood. Many tool manufacturers also provide recommended speeds and feeds for their bits like Harvey Tool. Always start slower and increase if the cut is clean and chip buildup is minimal.
Step 5: Performing the Cut
With everything set, it’s time to make the cut.
- Double Check Everything: Ensure your workpiece is secure, the end mill is installed correctly, and your zero point is set.
- Manual Test (Optional but Recommended): On scrap material, especially if using a CNC, run a simple test cut. This helps you hear and see if the speeds and feeds are appropriate. Listen for smooth cutting sounds and check the chip formation and cut quality.
- Send the Job (CNC): Start your CNC program.
- Monitor Constantly: Stay with your machine! Watch for unusual noises, excessive dust buildup, or signs of tool chatter. Be ready to hit the “pause” or “stop” button if anything seems wrong.
- Cooling/Chip Evacuation: For plywood, a dust collection system is essential. If you’re not using one, or if chips are still building up, you might need to use compressed air to blow chips out of the flutes and the cut path. Be aware that some setups might recommend mist cooling for wood, but be cautious as it can make dust build-up messy.
Step 6: Finishing and Inspection
Once the cutting is complete, it’s time to see your work.
- Allow the Machine to Stop: Let the spindle come to a complete stop before removing the workpiece.
- Carefully Remove Workpiece: Release the clamps and lift your cut piece away.
- Inspect the Cut: Examine the edges and details of your cut. Look for tear-out, fuzziness, or any inaccuracies.
- Clean and Deburr (if necessary): Very fine sanding or a deburring tool can be used to clean up any minor imperfections.
Safety First! Always:
- Wear Eye Protection: Always wear safety glasses or a face shield.
- Use Dust Collection: Plywood dust can be harmful. A good dust collection system or a respirator is a must.
- Secure Tools: Ensure end mills are properly seated and wrenches are put away before starting the machine.
- Know Your Machine: Understand its limitations and emergency stop procedures.
Achieving Precision: Tolerances and Techniques for Plywood
When you’re aiming for that almost-perfect fit in your plywood projects, whether it’s for a snug-fitting joint, a precise inlay, or a complex interlocking design, understanding tolerances and employing specific techniques is vital. The 1/8-inch carbide end mill, with its fine diameter, is perfectly suited for this level of detail.
Understanding Plywood Tolerances
Plywood isn’t a


