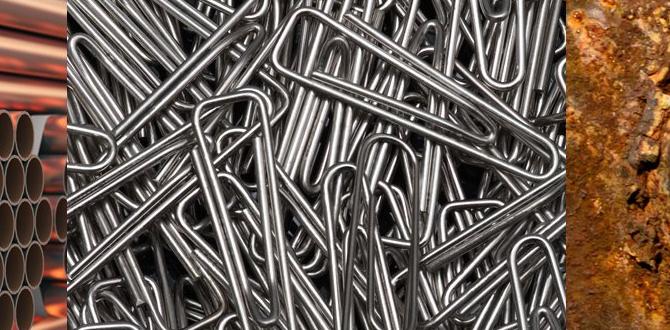
1/8 inch carbide end mills are perfect for dry cutting tasks on wood and plastics, offering precision without needing coolant. These tools excel at detailed work, creating clean cuts and features for hobbyists and makers.
Welcome to Lathe Hub! I’m Daniel Bates, and I love helping folks get started with metal lathes, milling, and woodworking. Today, we’re diving into a small but mighty tool: the 1/8 inch carbide end mill, specifically for dry cutting. If you’ve ever struggled with getting super precise cuts in wood or plastic, or found your tools just aren’t up to the task for fine details, you’re in the right place. Many beginners find these smaller end mills a bit mysterious, but they are absolute game-changers for intricate work. We’ll break down exactly what makes them special, how to use them safely and effectively, and what to look for. Get ready to take your projects to the next level!
Why Small Carbide End Mills Shine for Dry Cutting Wood
When you’re working with wood or plastics, especially on a CNC mill, the right cutting tool makes all the difference. For those fiddly details and precise cuts, a 1/8 inch carbide end mill is often the go-to choice. Why? Carbide is incredibly hard and can withstand high temperatures, which is crucial because, in dry cutting, we don’t have coolant to help manage heat. This means you get clean cuts even when things get warm. Plus, the small diameter allows for incredibly fine detail work that larger tools just can’t achieve. Think intricate inlays, tiny lettering, or delicate carvings. It’s all about precision and control, and a 1/8 inch carbide end mill delivers exactly that for a wide range of hobbyist and professional applications.
The ability to perform “dry cutting” is a major advantage, especially for wood. Coolant can saturate wood, causing swelling, warping, and making finishing much more difficult. Dry cutting with the right tool means your material stays clean and dry, ready for sanding and finishing immediately after machining. For many makers and hobbyists, avoiding the mess and complexity of a coolant system is a huge plus, and a 1/8 inch carbide end mill makes this perfectly feasible for suitable materials.
Understanding the 1/8 Inch Carbide End Mill
So, what exactly makes a 1/8 inch carbide end mill so special? Let’s break it down.
Carbide: The Material Matters
The “carbide” in the name refers to the material it’s made from – tungsten carbide, often mixed with cobalt. This material is exceptionally hard, far harder than high-speed steel (HSS). This hardness translates to:
- Longer Tool Life: Carbide tools can cut harder materials and stay sharp for much longer than HSS.
- Higher Cutting Speeds: Because it resists heat and wear so well, you can often run carbide tools at faster speeds and feeds.
- Better Finish: The rigidity and sharpness of carbide tools lead to cleaner, smoother cuts.
End Mill Geometry: What to Look For
End mills come in various shapes and numbers of flutes (the helical grooves along the cutting edge). For 1/8 inch carbide end mills used in wood and plastics, especially for dry cutting, here are key features:
Number of Flutes
This is crucial for dry cutting and working with softer materials like wood and plastic.
- 2-Flute End Mills: These are ideal for soft materials like wood and plastics for dry cutting. The extra-wide chip valleys (gullets) allow for excellent chip evacuation. Good chip evacuation is vital in dry cutting to prevent heat buildup and clogging. These are generally preferred for softer materials.
- 3-Flute End Mills: A good compromise. They offer better surface finish than 2-flute tools and can handle a slightly higher feed rate. They still provide decent chip clearance.
- 4-Flute End Mills: Typically used for harder materials or when a very fine finish is paramount. For wood and plastics, especially when dry cutting, they can sometimes struggle with chip evacuation and may lead to overheating or poor chip clearance if not used carefully with appropriate feed rates.
For beginners focusing on dry cutting wood and plastics with a 1/8 inch end mill, a 2-flute or 3-flute design is usually the best starting point.
Coating
While not always necessary for wood, some coatings can enhance performance:
- Uncoated: Perfectly fine for wood and many plastics.
- TiN (Titanium Nitride): Adds a little hardness and lubricity, can help slightly with heat management.
- AlTiN (Aluminum Titanium Nitride): Better for higher temperatures and harder materials, often overkill for plastics and wood unless you’re pushing the limits.
For most basic wood and plastic dry cutting, uncoated is perfectly adequate.
Helix Angle
This determines how “aggressive” the cut feels. Higher helix angles (e.g., 45 degrees) tend to provide a smoother cut and better finish, while steeper angles can help with chip evacuation.
Shank Diameter
While we’re focusing on a 1/8 inch cutting diameter, the shank (the part that goes into the collet or tool holder) can vary. Common shank sizes include 1/8 inch (3.175mm) or 1/4 inch (6.35mm), and sometimes 10mm for larger machines. An “extra long” version simply means the overall length of the tool is extended, allowing it to reach deeper into workpieces or fixtures. For a 1/8 inch end mill, an extended reach might be useful for specific carving or engraving tasks.
Keyword Integration Example: When searching for these tools, you might see terms like “carbide end mill 1/8 inch 10mm shank extra long for wood dry cutting.” This tells you it’s a carbide tool with a 1/8-inch cutting edge, a 10mm shank (meaning you’ll need a 10mm collet), and it’s designed with a longer body suitable for deeper cuts or specific applications in wood using dry cutting methods.
Types of 1/8 Inch Carbide End Mills for Dry Cutting
When you’re on the hunt for this specific tool, you’ll encounter variations tailored for different tasks:
- Single Flute: While rare for general end milling, single-flute bits exist and are sometimes used for very specific plastics or engraving. They offer maximum chip clearance but are generally not recommended for standard milling of wood.
- Two Flute (Square End): Excellent all-rounders for wood and plastics in dry cutting. The two flutes balance cutting ability with chip evacuation.
- Two Flute (Ball Nose): These have a rounded tip, perfect for creating rounded profiles, carving 3D surfaces, and creating smooth, contoured finishes.
- Three Flute (Square End): Offer a finer finish than two-flutes but with slightly reduced chip clearance.
- Engraving Bits: These are often very small (e.g., 1/32″ or 1/16″ tip diameter) with very fine tips and high flute counts or special geometries for intricate engraving. A 1/8″ end mill can also be used for slightly larger engraving tasks.
Essential Considerations for Dry Cutting with 1/8 Inch End Mills
Dry cutting is fantastic, but it requires a bit more attention to detail. Here’s what you need to keep in mind:
Material Choice
While the focus is on wood, 1/8 inch carbide end mills are also excellent for various plastics. The “best” material depends on your project, but generally:
- Wood: Softwoods (pine, poplar) are easier to cut and generate less heat than hardwoods (oak, maple). Plywood and MDF also machine well.
- Plastics: Acrylic, ABS, and polycarbonate machine beautifully dry. Avoid cutting PVC dry if possible, as it can release harmful fumes when heated; if you must, ensure excellent ventilation. Polystyrene is also delicate and machines well.
Tip: Always check the manufacturer’s recommendations for specific materials and cutting parameters. NIST provides valuable data on wood properties that can indirectly inform machining decisions.
Heat Management & Chip Evacuation
This is your BIGGEST concern with dry cutting. Heat is the enemy; it can:
- Dull the cutting edge quickly.
- Melt or gum up plastics.
- Cause burning on wood.
- Lead to tool breakage.
How to manage heat:
- Appropriate Feed and Speed: Don’t push the tool too hard. Slower feed rates and moderate spindle speeds are often better for dry cutting.
- Chip Load: This is the thickness of the material removed by each cutting edge per revolution. A good chip load carries heat away with the chip. For a 1/8 inch end mill on softer woods, a chip load might be around 0.002″ to 0.005″. Too small a chip load means you’re rubbing, not cutting, generating heat.
- Depth of Cut (DOC): Take shallower cuts. Instead of trying to remove 1/4″ of material in one pass, take multiple passes of, say, 1/8″ or less. This reduces the load on the tool and allows chips to clear more easily.
- Air Blast: A blast of compressed air directed at the cutting zone is incredibly effective. It blows chips away, keeping the area clean, and helps dissipate heat. Many CNC machines have this built-in, or you can rig up a simple solution.
- Breaks: On longer or deeper cuts, periodically lift the tool slightly from the cut (a “peck” or “ram” move) to clear chips.
Tool Runout and Tramming
For precise cuts, your end mill needs to run true. This means:
- Collet Quality: Use a good quality collet that matches your spindle taper. A worn or cheap collet can cause runout (the end mill wobbling).
- Tramming: Ensure your milling machine’s spindle is properly “trammed” – meaning the spindle axis is perfectly perpendicular to the worktable. Even a slight tilt can cause uneven cutting, burning, and poor finish, especially critical with small tools.
Best Practices for Dry Cutting with a 1/8 Inch Carbide End Mill
Let’s get practical. Here’s how to get the most out of your tiny carbide cutter.
- Secure Your Workpiece: This is paramount for safety and accuracy. Use clamps, double-sided tape (for lighter jobs), or a vacuum table to ensure your material doesn’t move during the cut.
- Select the Right End Mill: For most dry cutting of wood and plastics, a 2-flute or 3-flute carbide end mill with a square end is ideal. Consider ball nose for contoured work.
- Set Up Your Spindle: Ensure your collet is clean and the end mill is seated properly. Check for runout.
- Start with Conservative Settings: Don’t guess speeds and feeds. Consult resources or use a Metalworking calculator (many online tools can adapt for wood/plastic). A good starting point for soft wood might be around 18,000-24,000 RPM, with a feed rate that results in a chip load of roughly 0.002″ to 0.004″. Adjust based on sound and visual cues.
- Perform Shallow Passes: For a 1/8 inch end mill, a depth of cut (DOC) of 0.125″ (1/8 inch) or even less is often appropriate. Experiment to find what works best for your material and machine. For example, if you need to cut 1/2″ deep, take 4 passes instead of one.
- Use Air Blast: If possible, set up a compressed air line to blow away chips as they are generated. This is a game-changer for keeping the cut clean and cool.
- Listen to the Cut: A good cut will sound like a consistent “whoosh” or gentle slicing. A high-pitched squeal often indicates you’re rubbing (too slow feed, too fast speed, or dull tool). A dull thudding or chattering can mean the feed rate is too high, the depth of cut is too large, or the workpiece is vibrating.
- Watch for Burning: If wood starts to smoke excessively or turn brown, you’re generating too much heat. Slow down your feed rate, take shallower passes, or increase your air blast.
- Clean Up Chips Immediately: Don’t let chips pile up. They insulate the cutting area and re-cut, increasing heat and reducing finish quality.
- Eject the Tool Carefully: After the job is done, be sure to use an air blast to clear any lingering chips before the spindle stops completely. Make sure to remove the tool once fully stopped.
Safety First!
Machining involves inherent risks. Always:
- Wear safety glasses.
- Avoid loose clothing or jewelry.
- Never reach near a spinning tool.
- Ensure your workpiece is securely clamped.
- Be aware of chip ejection paths.
- Understand your machine’s emergency stop procedures.
For more in-depth safety guidelines, consult resources like those provided by OSHA on machine safety or your machine manufacturer’s manual.
Setting Up Your Machine for Dry Cutting
This is where the magic happens. Getting your machine dialed in correctly will ensure success.
CNC Router or Milling Machine Setup
If you’re using a CNC:
- Collet Selection: Use a high-quality collet that perfectly fits your end mill’s shank (e.g., a 1/8″ collet for a 1/8″ shank, or an adapter if you have a 10mm shank and need to adapt it).
- Workholding: Double-sided tape, screws, or clamps are essential. For wood, consider jigs or fixtures cut from MDF or plywood that can be easily replaced.
- Dust Collection: While not “coolant,” a good dust collection system is highly recommended when dry cutting wood or plastics. It keeps your machine cleaner, improves air quality, and helps clear chips slightly.
- Zeroing the Z-axis: Accurately set your zero point for the Z-axis. A touch plate or probe is ideal, but a feeler gauge or careful manual jogging can also work for beginners.
- Feeds and Speeds: This is critical. Use CAM software or manual methods to calculate appropriate speeds and feeds based on your material, tool diameter, and number of flutes.
Manual Milling Machine Setup
If you’re using a manual mill:
- Collet Chuck or R8 Collets: A collet chuck provides the best runout. If using R8 collets, ensure they are clean and properly seated.
- Workholding: Vise, clamps, or T-nuts in the table are your primary methods.
- Spindle Speed Control: Many manual machines have variable speed drives or belt changes to adjust RPM.
- Manual Feed: You’ll be controlling the feed rate using the handwheel. This requires practice and listening to the tool. Start slow and steady.
- Depth of Cut: Use the Z-axis dial to control depth. Take light cuts.
- Squaring Up: Ensure your workpiece is square to the table using a machinist’s square.
Technical Specifications and A Comparison Table
Here’s a quick look at how different types of 1/8 inch end mills might compare, focusing on dry cutting wood and plastic.
| Feature | 2-Flute Carbide (Square End) | 3-Flute Carbide (Square End) | 2-Flute Carbide (Ball Nose) | High-Speed Steel (HSS) End Mill |
|---|---|---|---|---|
| Primary Use Case (Dry Cutting Wood/Plastic) | Excellent all-rounder, good chip clearance | Fine finish, good for less demanding chip loads | 3D surfacing, carving, rounded profiles | Basic cuts, less demanding tasks, lower speeds |
| Chip Evacuation | Very Good | Good | Good | Fair to Good |
| Heat Resistance | Excellent | Excellent | Excellent | Fair |
| Tool Life (on Wood/Plastic) | Excellent |
Related Posts |