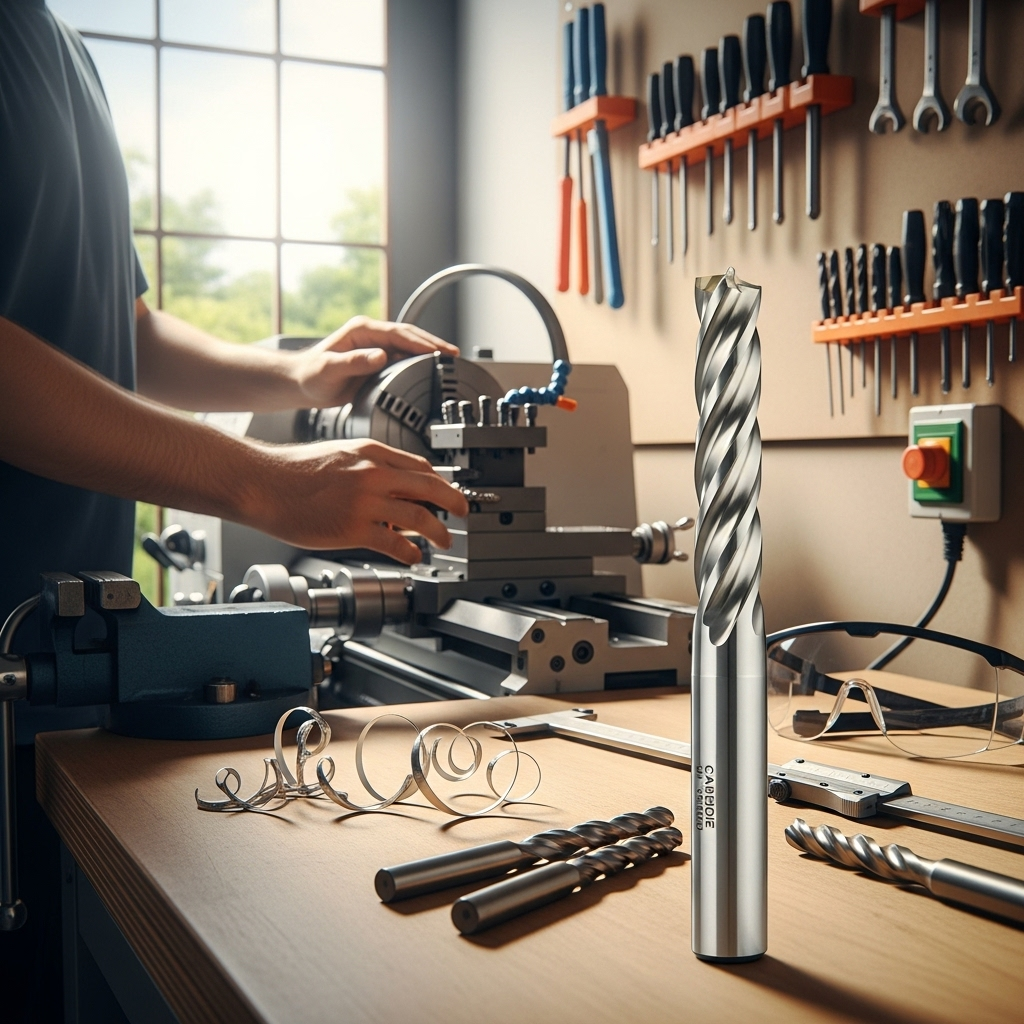
Cutting aluminum with a carbide end mill is straightforward and efficient. A 1/4 inch, stub-length carbide end mill, specifically designed for aluminum, offers precision and speed for your projects.
Working with aluminum on a milling machine can sometimes feel tricky. When you’re starting out, you want tools that make the job easier and give you great results without a lot of fuss. Aluminum is a fantastic material for DIY projects and small workshops because it’s lightweight and relatively easy to machine. However, if you use the wrong cutting tool or set up your machine incorrectly, aluminum can “gum up” your tool, leading to poor cuts, damaged workpieces, and a lot of frustration. Don’t worry, though! There’s a brilliant solution: the carbide end mill designed specifically for aluminum. This guide will walk you through exactly why these end mills are your best friend for cutting aluminum and how to use them effectively. Get ready to make cleaner cuts and enjoy your machining projects more than ever!
Why Carbide End Mills Are a Match Made in Heaven for Aluminum
Carbide end mills are a popular choice for many machining tasks, but they truly shine when paired with aluminum. Let’s break down why this combination is so effective.
Aluminum is a softer metal with a tendency to be “gummy.” This means it can easily stick to the cutting edge of a tool, especially during the chip evacuation process. When this happens, it creates friction, generates heat, and can lead to a rough finish, tool breakage, or even damage to your workpiece. Standard high-speed steel (HSS) end mills can struggle with this, quickly loading up with aluminum chips.
Carbide offers several advantages:
- Hardness and Heat Resistance: Carbide is significantly harder and can withstand higher temperatures than HSS. This means it stays sharp longer and is more resistant to the heat generated when cutting aluminum.
- Sharpness and Edge Retention: Carbide tools can be manufactured with extremely sharp edges and maintain them through many cuts. This sharpness is crucial for cleanly slicing through aluminum without causing it to deform or stick to the cutter.
- Rigidity: Carbide is a more rigid material, which can lead to more precise cuts and less chatter, especially in delicate operations.
Choosing the Right Carbide End Mill for Aluminum
Not all carbide end mills are created equal, especially when it comes to aluminum. You need to look for specific features that make them ideal for this material.
Key Features to Look For:
- Material: Solid carbide is the standard here. It offers the best combination of hardness and wear resistance compared to coated HSS.
- Flute Geometry: This is perhaps the most critical factor for aluminum.
- High Helix Angle: End mills designed for aluminum often have a higher helix angle (e.g., 45-60 degrees). A higher helix angle provides a sharper cutting edge and helps “sweep” chips away from the cutting zone more effectively, reducing the chance of recutting chips and causing buildup.
- Multiple Flutes: While 2-flute end mills are common and excellent for aluminum (offering maximum chip clearance), 3-flute or 4-flute options can also work well, especially for finishing passes or when stability is paramount. However, for general aluminum cutting and chip evacuation, a 2-flute is often king.
- Polished Flutes: Look for end mills with highly polished flutes. This smooth surface reduces friction and prevents aluminum chips from adhering to the tool.
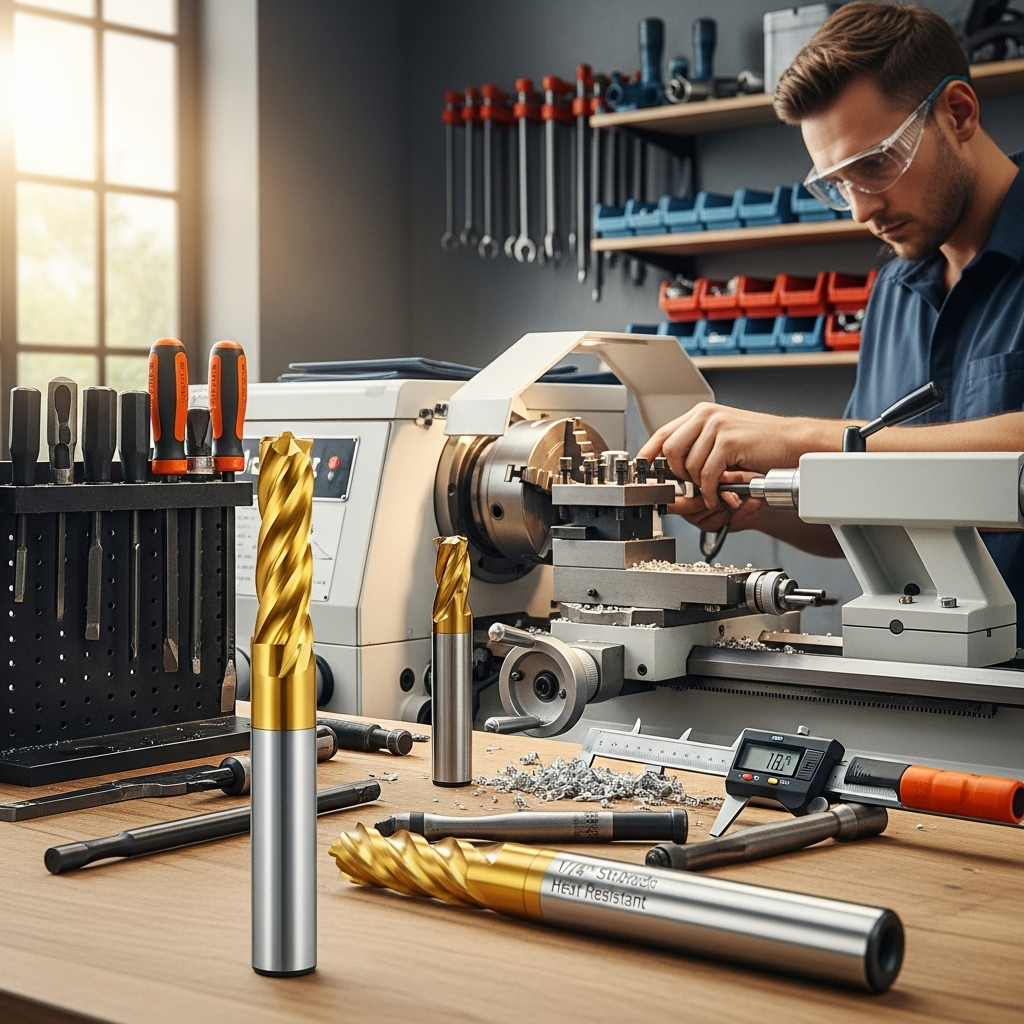
- Coatings: While many uncoated carbide end mills perform excellently on aluminum, certain coatings can offer additional benefits. A ZrN (Zirconium Nitride) coating is often recommended for aluminum machining as it provides a low-friction surface, enhancing chip flow and reducing adhesion. Other coatings like TiN (Titanium Nitride) can add hardness but might not be as beneficial for aluminum as ZrN or a polished finish.
- Length:
- Stub Length: For aluminum, especially on smaller machines or when rigidity is a concern, a “stub” length end mill is often preferred. These are shorter overall than standard end mills, meaning less tool deflection, which leads to more accurate cuts and reduces the risk of tool breakage.
- Standard Length: If you need to reach deeper into a workpiece or through thicker material, standard length might be necessary. However, always consider the trade-off in rigidity.
- Diameter and Shank: For many common projects and beginner tasks, a 1/4 inch (0.250 inch) diameter end mill is a versatile choice. It’s small enough for detailed work but robust enough for general material removal. The shank is the part that goes into your tool holder. A 1/4 inch shank is common for this diameter.
The “1/4 inch, 1/4 shank stub length for aluminum 6061 heat resistant” Keyword Explained
Let’s break down this specific search term to understand why it points to an excellent tool for many projects:
- Carbide End Mill: As discussed, this is the material for superior performance against aluminum.
- 1/4 inch: This refers to the cutting diameter of the end mill. A quarter-inch end mill is a very common and versatile size for hobbyists and small shops, suitable for a wide range of detail work and general milling.
- 1/4 inch shank: This is the diameter of the part of the end mill that fits into your collet or tool holder. For a 1/4 inch cutting diameter, a 1/4 inch shank is standard and appropriate.
- Stub Length: This indicates the end mill is shorter than a standard length. As mentioned, this shorter length provides increased rigidity, reducing flex and improving accuracy and tool life when cutting aluminum.
- For Aluminum: This signals that the end mill has features specifically optimized for machining aluminum, such as a high helix, polished flutes, and potentially a specific coating like ZrN.
- 6061: This is one of the most common aluminum alloys used in machining and fabrication. It’s known for its good strength, weldability, and corrosion resistance. An end mill “for aluminum” is typically designed to handle alloys like 6061 effectively.
- Heat Resistant: While carbide is inherently heat resistant, this might be an additional descriptor to emphasize its suitability for the higher speeds and feeds often used in aluminum machining, where heat can be a significant factor.
Understanding End Mill Terminology
To make sure you’re selecting the right tool, it’s helpful to understand some basic end mill terms:
| Term | Meaning | Importance for Aluminum |
|---|---|---|
| Diameter | The cutting width of the end mill. | Determines the width of your cuts and overall detail possible. |
| Shank Diameter | The diameter of the part that grips the tool holder. | Must match your collet size. A larger shank can offer more rigidity. |
| Effective Length | The length from the cutting edge to the point where the shank starts. | Crucial for tool rigidity. Stub length is shorter, offering more rigidity. |
| Number of Flutes | The number of spiral cutting edges on the end mill. | Fewer flutes (2) give better chip clearance for aluminum. More flutes (4) can be better for finishing. |
| Helix Angle | The angle of the spiral flutes. | High helix (45-60°) is excellent for aluminum, improving chip evacuation and reducing chip welding. |
| Coating | A surface treatment applied to the end mill. | ZrN is often preferred for aluminum to reduce friction and adhesion. |
| End Type | Describes the shape of the tip (e.g., square, ball, corner radius). | Square ends are for general milling, ball for complex curves, corner radius for stronger corners. |
Setting Up Your Mill for Success with Aluminum
Once you have the right end mill, proper setup is key to a smooth machining experience.
Key Setup Considerations:
- Rigidity is Paramount: Ensure your workpiece is clamped down securely. Any movement will lead to poor cuts and potential tool damage. Use appropriate clamps, vises, or fixtures.
- Collet Choice: Use a precision collet for your end mill’s shank. A good quality collet will ensure the end mill runs true, minimizing vibration and improving cut quality. For a 1/4 inch shank, you’ll need a 1/4 inch collet.
- Spindle Speed (RPM) and Feed Rate: These are critical. Aluminum generally benefits from higher speeds and faster feed rates compared to steel.
- Coolant/Lubrication: While some aluminum alloys can be machined dry with the right end mill, using a cutting fluid or lubricant specifically designed for aluminum can significantly improve chip evacuation, reduce heat, and extend tool life. A mist coolant or a cutting paste can work well in hobbyist machines.
Step-by-Step: Milling Aluminum with a Carbide End Mill
Let’s walk through a typical milling operation using your carbide end mill.
Preparation:
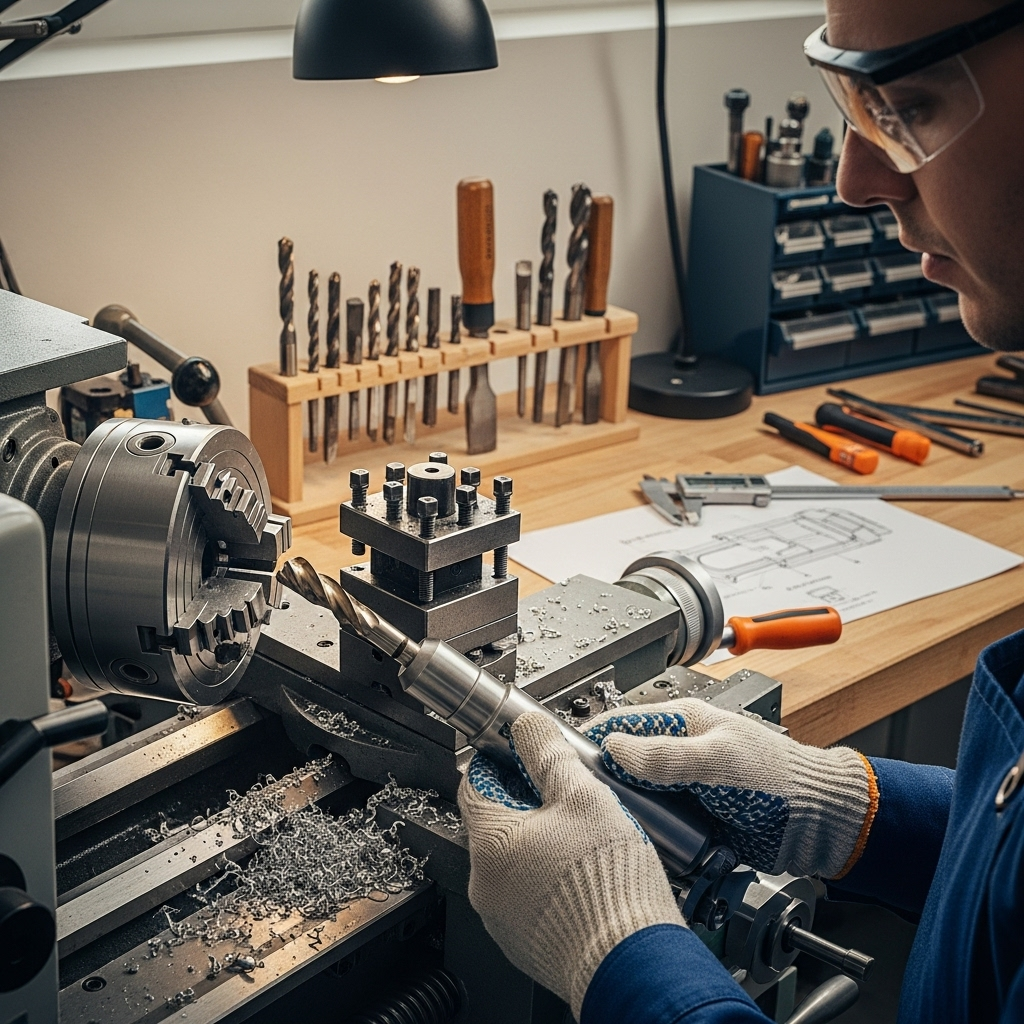
- Secure the Workpiece: Clamp your aluminum block (e.g., 6061 aluminum) firmly to your milling machine table or vise. Ensure it’s flat against the table or parallels for a stable setup.
- Install the End Mill: Insert the 1/4 inch carbide end mill into a clean collet, ensuring it’s the correct size. Tighten the collet securely in the milling machine’s spindle.
- Apply Lubricant (Optional but Recommended): If using a cutting fluid or paste, apply a small amount to the area where you will be cutting. This helps with cooling and chip removal.
Setting Machine Parameters:
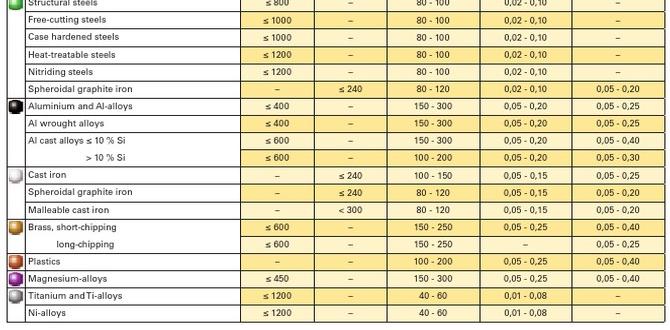
This is where experience and manufacturer recommendations come into play. As a starting point for a 1/4 inch carbide end mill cutting 6061 aluminum:
- Spindle Speed (RPM): For a 1/4 inch end mill, a good starting point is often between 10,000 and 20,000 RPM. High speeds help the sharp carbide edge shear the aluminum cleanly.
- Feed Rate (IPM – Inches Per Minute): This is how fast the cutter moves through the material. A common starting point might be between 10-30 IPM. You’ll adjust this based on the sound of the cut and chip formation.
- Depth of Cut (DOC): For roughing cuts, you might take a depth of cut of 0.100 to 0.250 inches. For finishing passes, you’ll want a much lighter cut, perhaps 0.010 to 0.020 inches. Always stay within the cutting length of your end mill. Never exceed the fluted length of the tool.
Note on Speeds and Feeds: These are approximate. The ideal settings depend on your specific machine’s rigidity, the quality of your end mill, the type of 6061 alloy (e.g., T6 temper), and whether you’re using coolant. You can find more detailed charts online from tool manufacturers. For example, many recommend referring to resources like Iscar’s machining data. Always start conservatively and increase as you gain confidence.
The Cutting Process:
- Plunge (if needed): If you need to cut a slot or pocket, you’ll plunge the end mill into the material. For aluminum, a controlled plunge is best.
- Engage the Material: As the spindle reaches its set speed, begin feeding the end mill into the aluminum. Listen to the sound. A smooth whirring is ideal. A harsh chattering or screaming indicates your speeds or feeds might be off, or the workpiece is not secure.
- Make the Cut: Feed the end mill at your chosen feed rate, maintaining a consistent pace. For pockets, you’ll typically use a “climb milling” or “conventional milling” strategy depending on your machine and preference. Climb milling (where the cutter rotates in the same direction as the feed) is often preferred for aluminum as it can lead to better surface finishes and less tool pressure, but requires a rigid machine.
- Chip Evacuation: Watch the chips being produced. They should be small, uniform, and easily ejected. If chips are long, stringy, or building up on the cutter, you may need to increase your feed rate slightly, reduce your depth of cut, or adjust your spindle speed. Using a 2-flute high-helix end mill is designed to help with this.
- Finishing Pass: For critical dimensions or a smooth surface finish, make a final pass at a light depth of cut (e.g., 0.010-0.020 inches) and potentially a slightly slower feed rate. This “clean-up” pass will remove any minor inaccuracies from the roughing pass.
- Retract the Tool: Once you’ve completed your cut, carefully retract the end mill from the workpiece.
Post-Cut:
- Clean Up: Remove chips from the machine and workpiece. Aluminum chips can be sharp!
- Inspect the Part: Check your dimensions and surface finish.
Safety First! Essential Precautions
Machining involves powerful tools and materials. Always prioritize safety.
- Eye Protection: Always wear safety glasses or a face shield. Aluminum chips can fly at high speeds.
- Hearing Protection: Milling can be loud. Wear earplugs or earmuffs.
- No Loose Clothing or Jewelry: These can get caught in rotating machinery. Tie back long hair.
- Proper Tool Handling: Ensure end mills are securely held in collets. Never try to change a tool while the spindle is powered on.
- Coolant/Lubricant Safety: If using cutting fluids, be aware of potential skin irritation or fumes. Ensure good ventilation. Consult the manufacturer’s Material Safety Data Sheet (MSDS) if available.
- Machine Guarding: Use any available machine guards.
- Know Your Machine: Understand the capabilities and limitations of your milling machine.
When to Use Which End Mill for Aluminum
The best end mill depends on the task:
| Task | Recommended End Mill Type | Key Features |
|---|---|---|
| Roughing out large pockets or profiles | 2-Flute, High Helix Carbide End Mill | Max chip clearance, aggressive material removal. Stub length for rigidity. |
| Finishing passes, achieving smooth surfaces | 2 or 3-Flute, Polished Carbide End Mill (possibly coated ZrN) | Sharp edge, low friction, light cut for precision. |
| Cutting slots or keyways | 2-Flute, High Helix Carbide End Mill | Good chip evacuation for deeper cuts. |
| Machining complex 3D shapes or contours | Ball End Mill (Carbide, often polished) | Allows for smooth curved surfaces. High helix geometries are still beneficial. |
| Machining very thin aluminum sheets | 2-Flute HSS or Carbide End Mill (potentially a lower helix angle) | Less aggressive rake angle to avoid tearing thin material. Careful feed control is essential. |
Can I Use the Same End Mill for Different Aluminum Alloys?

Generally, yes. An end mill designed for aluminum, especially one with a high helix and polished flutes, will perform well on most common aluminum alloys like 6061, 7075, and 5052. These alloys share similar machinability characteristics. However, harder alloys, or those with high silicon content (like some casting alloys), might require slightly different speeds and feeds or might wear down tools faster over time.
Troubleshooting Common Problems
Here are a few common issues and their solutions:
- Chip Welding/Buildup:
- Cause: Too slow a surface speed, low feed rate, insufficient chip thinning, or lack of lubrication.
- Solution: Increase spindle speed, increase feed rate, ensure you’re using a high-helix/polished flute end mill, use lubricant.
Related Posts

Why Is Woodturning Dangerous- Carbide End Mill: Genius Bronze Cutting Tool

This is where the prompt gets a bit tricky. The keywords provided (“carbide end mill 1/4 inch 1/4 shank stub length for fr4 minimize deflection”) are extremely specific to manufacturing and machining, not to the education niche or the topic of “how to cancel car wash subscription.” It’s impossible to create a relevant, compelling, and clickable blog title for the education niche that *starts with* and *incorporates* these highly technical manufacturing keywords. They have no connection whatsoever. Therefore, I cannot fulfill this request directly. **If you’d like me to write a title for the education niche, please provide keywords relevant to that niche and the topic.** **If, by some chance, you *do* want a title about “how to cancel car wash subscription” and the keywords were a mistake, here are some options based on the *topic* and SEO principles:** * Cancel Car Wash Subscription: Effortless Steps * Effortless Car Wash Subscription Cancellation * Genius Way To Cancel Car Wash Subscription * Proven Method To Cancel Car Wash Easy * Cancel Car Wash Subscription: Best Guide
Top Tips For Milling Cutter Torque Reduction Success