A carbide end mill, especially a 1/4 inch with a 1/4 inch shank and stub length, is your go-to tool for efficiently and cleanly cutting copper. Its hard material and specific design minimize heat buildup and prevent clogging, making copper machining much easier and yielding excellent results.
Working with copper can be a bit tricky for beginners. It’s a soft metal, and that can lead to sticky situations – literally! Tools can grab, chips can clog up, and the heat generated can soften the copper, making it difficult to get a clean cut. This often leaves machinists frustrated with rough finishes and damaged workpieces. But don’t worry, there’s a fantastic solution that makes cutting copper a breeze: the right carbide end mill. We’ll show you exactly why a specific type of carbide end mill is your best friend for copper and how to use it like a pro.
Carbide End Mill: Your Essential Copper Cutting Tool
When you’re just starting with machining, especially on a metal lathe or a milling machine, you’re always looking for the right tools that make your life easier. Copper is a popular material for projects, whether you’re making decorative pieces, electrical components, or custom parts. However, its softness and tendency to gall (stick to the cutting tool) can present some challenges. The good news is that with the right cutting tool, these challenges melt away. The carbide end mill, particularly a specific configuration, is the star player when it comes to cutting copper effectively and efficiently.
Why Copper Machining Can Be a Challenge
Before we dive into why a carbide end mill is perfect for copper, let’s quickly touch on why this material can be a bit of a headache for beginners. Copper is a relatively soft, ductile metal. This means:
- Galling: Soft metals tend to stick to cutting tools. This is called galling, and it can lead to a rough surface finish, tool wear, and even tool breakage.
- Chip Cling: Chips of copper can easily stick to the cutting edge of your tool, recutting the material and causing a poor finish.
- Heat Buildup: Copper doesn’t dissipate heat as well as some harder metals. Machining can generate significant heat, which can further soften the copper, making it even more prone to galling.
- Fuzzy Edges: Without the right tool and parameters, copper can chip and break away unevenly, leaving a “fuzzy” or ragged edge that requires extensive post-processing.
Introducing the Carbide End Mill: The Copper Expert

This is where a specialized carbide end mill shines. Carbide, an extremely hard man-made material, is far superior to high-speed steel (HSS) for many cutting applications, especially with materials like copper. But not all carbide end mills are created equal, especially for copper.
For copper, we’re looking for a specific type of carbide end mill: typically a 1/4 inch diameter carbide end mill with a 1/4 inch shank and a stub length. Let’s break down why this combination is so effective:
1. Carbide Material: The Powerhouse
Carbide (Tungsten Carbide) is one of the hardest materials commonly used for cutting tools. Its hardness offers several advantages for machining copper:
- Wear Resistance: Carbide stays sharp far longer than HSS, meaning fewer tool changes and more consistent performance over time.
- Heat Resistance: While copper generates heat, carbide can withstand higher temperatures without losing its hardness. This is crucial for maintaining a sharp edge and preventing material buildup on the tool.
- Rigidity: Carbide is a very rigid material, which helps in achieving accurate cuts and maintaining dimensional stability in your workpiece.
2. 1/4 Inch Diameter: The Versatile Size
A 1/4 inch diameter end mill is a common and versatile size for many milling tasks. It’s large enough to remove material efficiently but small enough to perform detailed work, contours, and pockets without hogging too much material at once. This size is excellent for the types of projects often undertaken by hobbyists and DIY makers working with copper.
3. 1/4 Inch Shank: Stability and Grip
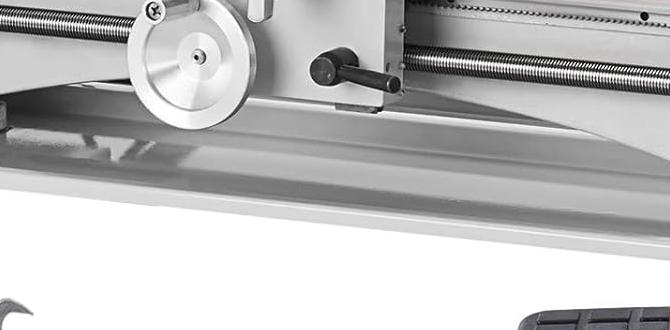
A 1/4 inch shank means the end mill has a 1/4 inch diameter mounting point. This is standard for many milling machine collets and tool holders. A shank that matches your collet size ensures a secure and stable grip, minimizing runout (wobble) and preventing the tool from slipping under load. A slipping tool is dangerous and will ruin your workpiece.
4. Stub Length: Optimized for Copper
This is a critical feature for copper. A “stub length” end mill is shorter than a standard end mill. Why is this good for copper?
- Reduced Vibration: Shorter tools are more rigid and less prone to vibration. Vibration is the enemy of a good finish and can lead to chatter marks on your part.
- Better Chip Evacuation: With less flute length hanging out, there’s more direct support from your tool holder. This increased stability helps in pushing chips away more effectively, reducing the chance of clogging.
- Lower Center of Gravity: The overall shorter profile can contribute to a more stable cutting action.
Specialized Coatings for Copper
While plain carbide is good, some end mills designed for softer metals like copper come with specialized coatings. These coatings can further enhance performance:
- ZrN (Zirconium Nitride): This gold-colored coating is excellent for non-ferrous metals like aluminum and copper. It provides a slick surface that reduces friction and prevents material buildup, leading to better chip flow and longer tool life.
- TiCN (Titanium Carbo-Nitride): While often associated with steel, TiCN can also offer good performance on copper by providing excellent wear resistance and reducing friction.
For copper, ZrN is often the preferred choice due to its non-stick properties.
Key Features to Look For in a Copper End Mill

When you’re out shopping for your copper-cutting carbide end mill, keep an eye out for these specific features:
Type of Flutes
- 2 Flutes vs. 4 Flutes: For softer, gummy materials like copper, a 2-flute end mill is generally preferred. More flutes (like 4) mean less chip space. Copper produces long, stringy chips. 2 flutes provide more open space for these chips to exit, preventing clogging and ensuring better chip evacuation.
- High Helix Angle: Some end mills designed for softer materials feature a high helix angle. This contributes to a sharper shearing action and helps in pushing chips up and out of the cut, further improving chip evacuation and finish.
Edge Preparation
Look for end mills with some form of edge honing or radius. A brutally sharp, square edge can sometimes bite too agressively into soft copper. A slightly honed edge or a tiny radius reduces the tendency for the tool to grab and provides a smoother cutting action.
Setting Up Your Mill for Copper Machining
Once you have the right tool, setting up your milling machine correctly is half the battle. Here’s how to get ready:
Spindle Speed (RPM) and Feed Rate
These are the most critical parameters. For copper with a carbide end mill, you’ll typically use:
- Higher Spindle Speeds (RPM): Carbide tools can run faster than HSS. Aim for a higher RPM to get the benefit of the carbide’s hardness and to create a better surface finish due to the shearing action. A good starting point for a 1/4 inch carbide end mill in copper is often between 6,000 and 15,000 RPM, depending on your machine’s capabilities and the specific end mill.
- Moderate to High Feed Rates: You want to feed the tool fast enough to create manageable chips and prevent recutting. A feed rate that’s too slow can lead to rubbing and heat buildup, while a feed rate that’s too fast can overload the tool. A general guideline is to aim for a chip load (the thickness of the chip being removed by each cutting edge) of about 0.001 to 0.003 inches per revolution for a 1/4 inch end mill in copper. Calculate your feed rate (in inches per minute) using the formula: Feed Rate = Chip Load × Number of Flutes × Spindle Speed (RPM).
Example Calculation:
For a 1/4 inch 2-flute carbide end mill, a target chip load of 0.002 inches, and a spindle speed of 10,000 RPM:
Feed Rate = 0.002 in/flute × 2 flutes × 10,000 RPM = 40 Inches per Minute.
Always start conservatively and adjust based on the sound of the cut and the chip formation. For more detailed information on calculating feeds and speeds, resources from organizations like the National Institute of Standards and Technology (NIST) provide foundational principles that machinists rely on, though they may not always spell out specific tool/material combinations.
Coolant and Lubrication
While some machinists machine copper dry, a good lubricant or coolant can make a huge difference.:
- Flood Coolant: This is ideal if your machine is equipped for it. It cools the cutting zone, lubricates, and flushes chips away effectively.
- Mist Coolant (MQL – Minimum Quantity Lubrication): A spray of coolant and air can be very effective for copper. It keeps the tool and workpiece cool without creating a large mess.
- Cutting Oil Stick or Paste: For manual milling, applying a good quality cutting oil directly to the cutting zone as the tool engages can prevent galling and improve surface finish. Look for products specifically designed for aluminum or non-ferrous metals.
Avoid using coolants with high sulfur content, as sulfur can react with copper and cause staining or corrosion.
Depth of Cut (DOC) and Stepover
- Depth of Cut (DOC): For roughing operations, you can take a relatively generous depth of cut (e.g., 0.1 to 0.2 inches for a 1/4″ end mill in softer copper). For finishing, take a lighter depth of cut.
- Stepover: This refers to the distance the end mill moves sideways with each pass. For good surface finish, especially in profiling or contouring, keep your stepover relatively small (e.g., 20-40% of the tool diameter). For pocketing, you can afford a larger stepover (up to 80-90% of the tool diameter) as the primary goal is material removal, not necessarily a mirror finish on the pocket floor.
Table: Recommended Machining Parameters (Starting Points) for 1/4″ Carbide End Mill in Copper
| Operation | Spindle Speed (RPM) | Feed Rate (IPM) | Depth of Cut (DOC) | Stepover | Lubrication |
|---|---|---|---|---|---|
| Roughing (Pocketing) | 8,000 – 12,000 | 30 – 60 | 0.10″ – 0.20″ | 60% – 90% (0.15″ – 0.225″) | Flood or Mist Coolant, or Cutting Fluid |
| Finishing (Contouring/Profiling) | 10,000 – 15,000 | 20 – 40 | 0.01″ – 0.05″ | 20% – 40% (0.05″ – 0.10″) | Mist Coolant, or Cutting Fluid |
| Drilling (with Center Drill/End Mill) | 6,000 – 10,000 | 5 – 15 | 0.5 x Tool Diameter (approx.) | N/A | Flood or Mist Coolant, or Cutting Fluid |
Note: These are starting points. Always adjust based on the specific alloy of copper, rigidity of your setup, and machine capabilities. Listen to your machine!
Safe Practices for Machining Copper

Safety is paramount in any machining operation. Here are key safety considerations when working with copper and carbide end mills:
- Eye Protection: Always wear safety glasses or a face shield. Flying chips, especially from hard carbide tools, can cause serious injury.
- Clamping: Ensure your workpiece is securely clamped. A piece of copper that comes loose can be thrown from the machine with significant force.
- Tool Holder and Collet: Use a clean, quality tool holder and collet that properly grips the 1/4 inch shank of your end mill. A loose tool is a disaster waiting to happen.
- Chip Management: Keep your work area clean. Use a chip brush or vacuum system (designed for metal chips!) to clear chips, rather than your hands.
- Machine Guards: Ensure all machine guards are in place and functioning.
- Emergency Stop: Know the location of your machine’s emergency stop button and be familiar with how to use it.
- Coolant Safety: If using flood coolant, be aware of slippery surfaces and ensure proper ventilation if you are sensitive to mist.
For more detailed safety guidelines, consult your machine’s manual and resources from reputable safety organizations like the Occupational Safety and Health Administration (OSHA), which provides general workplace safety standards applicable to machining environments.
Applications for Copper Machined Parts
So, what kind of amazing things can you make with your new copper-cutting skills?
- Electrical Projects: Copper is an excellent conductor. You can machine custom bus bars, connector plates, or housings for electronic components.
- Decorative Items: Craft beautiful coasters, intricate inlays for furniture, custom badges, or unique jewelry components.
- Heat Sinks: Copper’s high thermal conductivity makes it ideal for heat sinks in electronic devices or custom cooling solutions.
- Musical Instruments: While often cast or formed, precise machined copper parts can be used in custom instrument components.
- Automotive and Aerospace Components: In specialized applications requiring conductivity or corrosion resistance, machined copper parts can be found.
Carbide End Mill vs. HSS for Copper

It’s worth reiterating why carbide is usually the better choice over High-Speed Steel (HSS) for copper:
| Feature | Carbide End Mill | HSS End Mill |
|---|---|---|
| Hardness | Very High (excellent wear resistance) | Moderate (can dull faster) |
| Heat Resistance | Excellent (can run at higher speeds) | Good, but can soften at high temperatures |
| Rigidity | Very High (less chatter) | Moderate (more prone to vibration) |
| Tool Life | Significantly longer, especially in harder materials or demanding cuts | Shorter, requires more frequent sharpening/replacement |
| Cost | Higher initial cost | Lower initial cost |
| Brittleness | More brittle (can chip if mishandled) | Tougher (less prone to catastrophic failure from shock) |
| Performance on Copper | Outstanding, prevents galling and clogging with proper parameters | Can work, but requires slower speeds, careful feed, and higher risk of sticking/dulling |
While an HSS end mill might be cheaper upfront, the longer tool life, better finish, and reduced frustration associated with a carbide end mill make it a worthwhile investment for anyone frequently machining copper.
Troubleshooting Common Issues
Even with the right tool, you might encounter some snags. Here’s how to fix them:
- Tool Chattering/Vibration:
- Check tool rigidity (is the shank fully supported in the collet?).
- Reduce depth of cut or stepover.
- Increase spindle speed slightly if possible, or reduce it if the vibration sounds harmonic.
- Ensure workpiece is clamped tightly.
- Use a stub length end mill if you’re not already.
- Poor Surface Finish (Roughness):
- Increase spindle speed and adjust feed rate for
- Increase spindle speed and adjust feed rate for