Here is the article about metal lathes, milling tools, and wood lathes, formatted for WordPress.
This guide will help you understand the basics of metal lathes, milling tools, and wood lathes, making them accessible for beginners. You’ll learn about their functions, essential safety tips, and how to get started with your own projects, boosting your workshop confidence and creativity.
Welcome to Lathe Hub! Are you fascinated by the precision of metalworking or the smooth finish of a turned wood piece? Maybe you’ve seen these amazing machines and wondered if they’re just for seasoned pros. The truth is, with a little guidance, metal lathes, milling tools, and wood lathes can open up a whole new world of making for you. It can seem a bit daunting at first, with all the shiny metal and moving parts. But don’t worry – I’m here to break it all down into simple, easy-to-follow steps. We’ll cover what each tool does, how to stay safe, and what you need to get started on your first exciting projects. Get ready to build your confidence and unleash your inner maker!
Understanding Your Workshop’s Core Machines: Lathes and Mills
In any workshop focused on precision shaping and component creation, you’ll find certain tools that are fundamental. For beginners and experienced makers alike, understanding the differences and capabilities of a metal lathe, a milling machine, and a wood lathe is key. Each serves a unique purpose and offers distinct creative possibilities.
The Metal Lathe: Shaping Metal with Precision
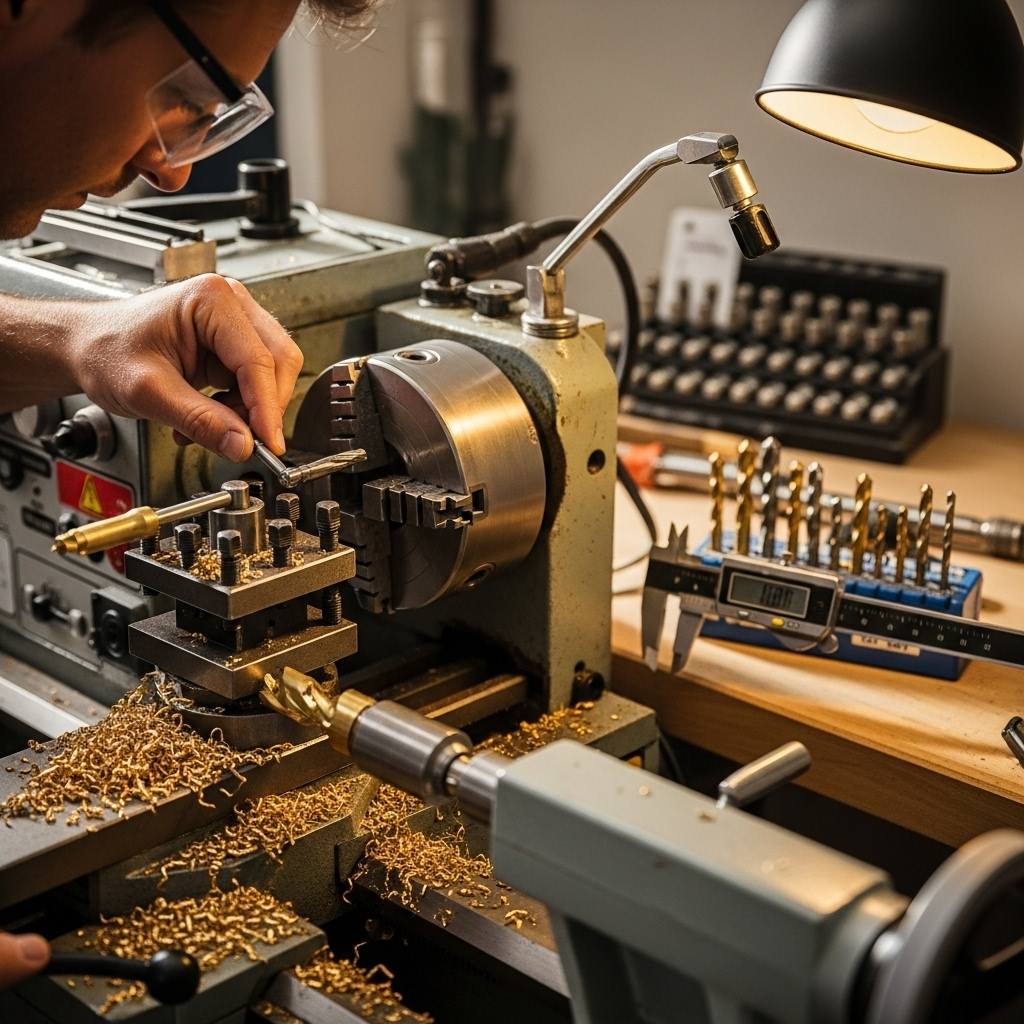
At its heart, a metal lathe is a machine tool used to shape metal (and sometimes other materials) by rotating a workpiece against a cutting tool. Imagine taking a block of metal and spinning it rapidly while a sharp tool shaves off material to create a perfectly round shape. This is the magic a metal lathe performs.
What it does: Primarily used for creating cylindrical parts, it can also be used for threading, facing (making a flat surface on the end of a part), and tapering.
Key Components:
Headstock: Houses the motor, gears, and spindle that rotates the workpiece.
Tailstock: Supports longer workpieces and can hold tools like drills.
Bed: The main frame that provides a stable base for all components.
Carriage: Moves the cutting tool along the length of the workpiece (longitudinal feed) and across it (cross feed).
Tool Post: Holds the cutting tool.
Applications: From making custom bolts and shafts to intricate model engineering parts, the metal lathe is indispensable for precision metal components.
The Milling Machine: Sculpting with Rotary Cutters
While a lathe spins the workpiece, a milling machine spins a cutting tool. It’s like a drill press, but the cutting head (the milling cutter) can move in multiple directions (X, Y, and Z axes) to precisely remove material and create complex shapes, slots, gears, and flat surfaces.
What it does: Ideal for creating flat surfaces, slots, pockets, gears, and intricate contours in various materials.
Key Components:
Spindle Head: Houses the motor and holds the milling cutter.
Table: Holds and moves the workpiece in X and Y directions.
Knee and Column: Provide structural support and allow for Z-axis movement (vertical).
Saddle: Supports the table and moves it in the X direction.
Ram: Allows for Y-axis adjustment and can house the spindle on some designs.
Applications: Essential for creating precise features on components, making jigs and fixtures, and for operations like slotting and profiling. For those looking to get into more advanced machining, understanding how to use a milling machine effectively is a significant step.
The Wood Lathe: Turning Wood into Art
A wood lathe is similar in principle to a metal lathe – it spins a workpiece – but it’s designed specifically for wood and uses different types of tools and speeds. It excels at creating rounded shapes like bowls, spindles, table legs, and decorative elements.
What it does: Primarily used for turning wood to create symmetrical, rounded forms.
Key Components:
Headstock: Holds the motor and the spindle that attaches to the wood.
Tailstock: Supports longer pieces and can be used for drilling.
Bed: The main structure.
Tool Rest: A sturdy bar that the woodturning tools rest on as they cut the wood.
Carriage: Guides the tool rest.
Applications: Perfect for woodworkers and hobbyists looking to create decorative items, functional pieces like bowls and platters, or furniture components.
These three machines represent foundational capabilities in shaping materials. While they share some basic mechanical principles, their design, tooling, and the materials they work with create distinct domains of expertise.
Getting Started Safely: Your Workshop’s Lifeline
Safety is not just a suggestion; it’s the most important rule in any workshop. Working with powerful machinery like lathes and mills demands respect and adherence to best practices. A momentary lapse in attention can lead to serious injury.
Essential Safety Gear (PPE) for Machining
Before you even think about turning on a machine, ensure you have the proper Personal Protective Equipment (PPE).
Eye Protection: Always wear safety glasses or a face shield. Debris can fly unexpectedly from any of these machines.
Hearing Protection: Prolonged exposure to the noise of machinery can damage your hearing. Earplugs or earmuffs are essential.
Footwear: Wear sturdy, closed-toe shoes. Steel-toed boots are recommended.
Clothing: Avoid loose clothing, dangling jewelry, or anything that could get caught in moving parts. Tie back long hair.
Machine Operation Safety Rules
Each machine has its own set of safety protocols, but some are universal.
Know Your Machine: Read the operator’s manual thoroughly. Understand its controls, limitations, and maintenance requirements.
Secure Your Workpiece: Ensure the workpiece is firmly held in the chuck, vise, or between centers. A loose workpiece is extremely dangerous.
Use the Right Tools: Always use sharp, appropriate cutting tools for the material and operation. Dull tools can lead to poor finishes and increased safety hazards.
Clear the Area: Keep your workbench and the area around the machine clean and free of clutter, tools, and debris.
Never Leave a Running Machine Unattended: Always be present and attentive when your machine is in operation.
Understand Emergency Stops: Know where the emergency stop button is and how to use it for all your machines.
Goggles First, Always: This cannot be stressed enough. Every single time.
Safety is a habit, not an afterthought. Make these practices second nature, and you’ll enjoy your time in the workshop much more.
Metal Lathe Basics: From Setup to Your First Cut
The metal lathe is where many precision machining journeys begin. It’s a machine that, with practice, will allow you to create parts with impressive accuracy.
Choosing Your First Metal Lathe
For hobbyists and beginners, there are several types of metal lathes to consider:
Benchtop Lathes: These are smaller, more affordable, and suitable for lighter-duty work and smaller projects.
Floor-Standing Lathes: Larger, heavier, and more powerful, capable of handling bigger workpieces and tougher materials.
When selecting a lathe, consider the size of the workpieces you intend to machine (swing and bed length), the power of the motor, and the availability of spare parts and accessories. Reputable brands often offer better support. For example, companies like Grizzly Industrial and Sherline offer popular options for hobbyists.
Essential Metal Lathe Accessories
To get the most out of your metal lathe, you’ll need a few key accessories:
Three-Jaw Chuck: The most common chuck, used to grip cylindrical workpieces.
Four-Jaw Chuck: Independent jaws allow for gripping irregularly shaped objects or providing very accurate concentric gripping.
Tool Post Grinder: For grinding hardened steel parts or creating fine finishes.
Live Center: Supports the end of long workpieces being turned in the headstock, reducing deflection.
Threading Dial: Aids in accurately picking up the thread lead.
Cutting Tools: A set of high-speed steel (HSS) or carbide-tipped bits for turning, facing, and threading.
Your First Metal Lathe Project: A Simple Bushing
Let’s walk through making a simple bushing, a common and foundational project.
Tools and Materials Needed:
Metal Lathe (properly set up and safety checked)
Drill Chuck and appropriate drill bits
HSS or carbide turning tools
HSS threading tool (if making an internal thread)
Parting tool
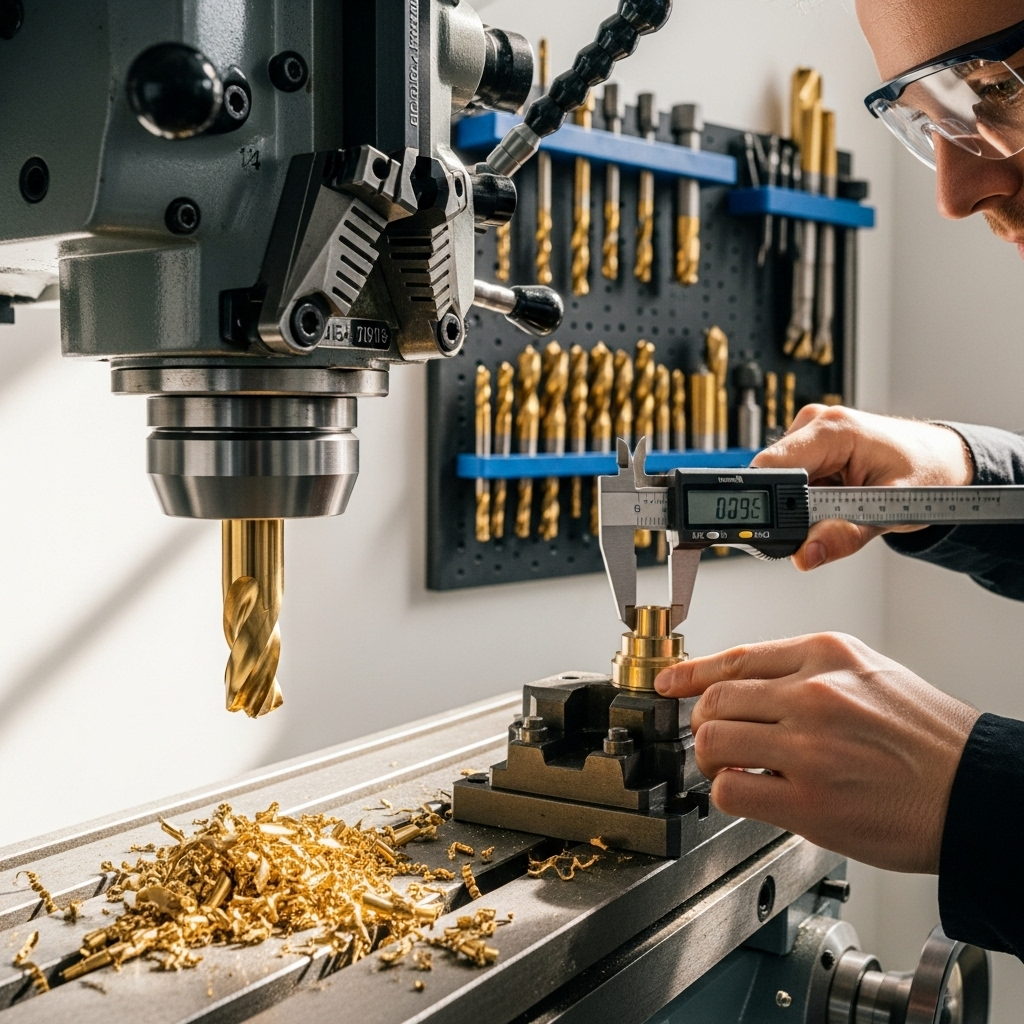
Calipers (digital or dial)
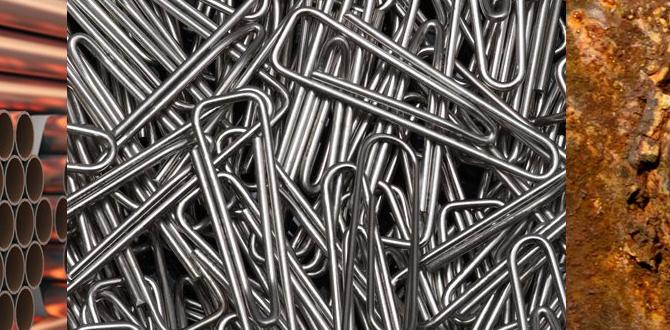
Piece of mild steel rod (e.g., 1-inch diameter, 3-4 inches long)
Safety glasses, hearing protection.
Steps:
1.
Mount the Material: Securely mount the steel rod in the three-jaw chuck. Ensure it’s centered as accurately as possible. Leave enough material extending from the chuck jaws to complete the operation.
2.
Face the End: Install a facing tool in the tool post. Position it so it can create a flat surface on the end of the rod. Turn on the lathe at a slow speed (e.g., 300-500 RPM for steel). Engage the cross-feed to move the tool across the end of the workpiece, removing material until a smooth, flat face is achieved. Use a cutting fluid for better results.
3.
Drill a Hole: Remove the facing tool. Mount a drill chuck in the tailstock, insert a drill bit slightly smaller than your desired bore diameter, and drill into the center of the faced end. Use a steady feed rate and clear the chips periodically.
4.
Bore to Size: Install a boring bar into the tool post. Set the boring bar to your desired inside diameter and carefully bore out the drilled hole. Take light cuts and measure frequently with calipers to achieve the correct size. For instance, if you need a 0.500-inch hole, aim for that diameter.
5.
Turn to Diameter: Install a turning tool. Set your desired outside diameter. Engage the longitudinal feed to shape the outside of the bushing. For a bushing, this might involve reducing the diameter to a specific size, creating shoulders, or tapering.
6.
Part Off: Once the bushing is shaped to its final dimensions, use the parting tool to cut it off from the stock. Engage the parting tool slowly to avoid chatter and ensure a clean separation.
Always remember to use appropriate cutting speeds and feed rates for the material you are working with. For a primer on metal cutting speeds and feeds, consider resources from institutions like NIST (National Institute of Standards and Technology), which offers industry standards for machining parameters.
Milling Machine Mastery: Essential Techniques for Beginners

Milling machines are the workhorses for creating flat surfaces, slots, and intricate profiles that lathes can’t easily achieve.
Types of Milling Machines
Vertical Milling Machines: The spindle is oriented vertically. These are common for general-purpose machining, drilling, and end milling.
Horizontal Milling Machines: The spindle is horizontal, often used for creating long slots or cutting with large diameter cutters.
CNC (Computer Numerical Control) Mills: Automated machines that follow pre-programmed instructions for high precision and repeatability. While these are advanced, understanding manual milling is a great foundation.
Basic Milling Operations
Facing: Creating a flat surface on the top of a workpiece.
End Milling: Using a multi-fluted cutter (end mill) to machine slots, pockets, or contours.
Slotting: Machining narrow grooves into a workpiece.
Drilling/Boring: While drills are common on a lathe, milling machines can also drill and bore holes with high precision.
Your First Milling Project: A Simple Bracket
Let’s create a basic L-shaped bracket.
Tools and Materials Needed:
Milling Machine (configured for safety and operation)
Vise or clamping system
End mills (e.g., 1/4 inch, 1/2 inch dia.)
Drill bits, center drill
Measuring tools (calipers, height gauge)
Piece of aluminum or mild steel plate (e.g., 4×4 inches, 1/4 inch thick)
Safety glasses, hearing protection, gloves (optional, with caution)
Steps:
1.
Secure the Material: Mount the metal plate firmly in a milling vise. Ensure it is parallel to the vise jaws and securely clamped. For a clean, flat surface, you can use an experienced machinist to indicate and tram the workpiece if you are starting with a raw piece of stock.
2.
Face the Top Surface: Install a face mill or a large end mill in the spindle. Set the spindle speed appropriately for your cutter and material. Engage the feed to mill a flat surface on the top of the plate. For small mills, a fly cutter can also be effective for facing operations.
3.
Mill to Width/Length: Using an end mill, carefully mill the sides of the plate to your desired dimensions. Work systematically, taking light cuts to achieve accuracy. You might machine one side, re-square the workpiece, and then machine the opposite side.
4.
Machine the “L” Shape (or Slot): If you’re making an L-bracket, you’ll need to remove material from a corner. This can be done by milling a slot or by carefully shaping the corner. An end mill is perfect for this. For precise slotting, a slotting cutter or an end mill can be used.
5.
Drill Mounting Holes: Use a center drill to create a dimple at the center of where you want your mounting holes to be. Then, switch to a drill bit of the appropriate size and drill through the material. On a milling machine, you can accurately position each hole using the table’s handwheels.
For effective slotting and pocketing, understanding the material properties and choosing the right end mill is crucial. For instance, you might look at technical guides from cutter manufacturers like Garant for recommended speeds and feeds.
Wood Lathe Wonders: Crafting with Wood
The wood lathe offers a different kind of satisfaction – turning raw lumber into smooth, flowing shapes.
Choosing Your Wood Lathe
Benchtop Lathes: Compact, affordable, and great for smaller turnings like pens, bowls, and spindles.
Larger Floor-Standing Lathes: Offer more power, longer bed lengths for bigger projects, and better stability for heavier work.
Key features to consider include motor power (in HP), swing (maximum diameter that can be turned), and distance between centers (maximum length). Brands like JET, Laguna Tools, and Delta offer excellent options for various skill levels.
Essential Woodturning Tools
Unlike metalworking, woodturning uses specialized chisels and gouges.
Spindle Gouge: For shaping spindle turnings (like table legs) and general-purpose work.
Bowl Gouge: Designed for excavating and shaping bowls.
Scraper: Used for smoothing surfaces, especially on bowls and between cuts.
Parting Tool: To cut off finished pieces or create narrow grooves.
Skew Chisel: For scraping, shearing, and creating fine details.
Your First Wood Lathe Project: A Simple Bowl or Spindle
Let’s focus on turning a simple spindle.
Tools and Materials Needed:
Wood Lathe
Lathe chisel set (spindle gouge, skew chisel, parting tool)
Wood blank (e.g., a piece of soft maple or pine, 2×2 inches square, 8 inches long)
Face shield or safety glasses, dust mask
* Optional: Lathe center, spur drive center, live center.
Steps:
1.
Prepare the Wood Blank: Cut the wood to length. If turning between centers, you might need to cut a slight taper on each end to fit into the spur drive center (headstock) and the live center (tailstock).
2.
Mount the Blank: Place the spur drive center into the headstock spindle and the live center into the tailstock. Insert the wood blank between them, ensuring sufficient pressure from the tailstock to hold it firmly.
3.
Safety Check: Put on your face shield and dust mask. Ensure the tool rest is positioned correctly, close to the workpiece, and slightly off-center. Make sure there are no wrenches or tools left on the lathe.
4.
Rough Rounding: Turn the lathe on at a slow speed (e.g., 500-700 RPM for a 2-inch blank). Use your spindle gouge to begin shaping the square blank into a cylinder. Start by catching the corners and gradually working towards the center. Be rhythmic and let the tool do the work.
5.
Shape the