A 1/4-inch carbide end mill is your key to easily machining HRC60 hardened steel. Its precision and toughness allow for clean cuts on very hard materials, making it an essential tool for demanding projects where lesser bits would fail.
Welcome to Lathe Hub! Today, we’re diving into a tool that might seem small but packs a serious punch when you need to work with tough materials: the 1/4-inch carbide end mill, especially when tackling HRC60 hardened steel. If you’ve ever struggled to cut into hard metal, ending up with frustrating chatter or a dulled tool, you’re in the right place. We’ll break down why this specific tool is a game-changer and how to use it effectively. You’ll gain the confidence to approach those challenging steels with the right gear and know-how.
Why Carbide for HRC60 Steel?
Hardened steel, especially at the HRC60 mark, is significantly tougher and more brittle than softer steels. Think of it like trying to carve a rock compared to carving soft wood. Traditional high-speed steel (HSS) tools simply can’t withstand the heat and abrasion generated when cutting such hard materials. They’ll wear out incredibly fast, or worse, shatter. This is where carbide shines.
Carbide, specifically tungsten carbide, is a composite material formed by bonding tungsten carbide particles with a binder, usually cobalt. This creates an incredibly hard and wear-resistant material. It can maintain its hardness even at very high temperatures that would make HSS as soft as butter. For machining HRC60 steel, a 1/4-inch carbide end mill is the ideal size for precision work, providing enough rigidity without excessive mass, and its carbide construction is precisely what’s needed to overcome the material’s resistance.
The Advantages of Carbide
When comparing carbide to other cutting tool materialsfor hard metals, the benefits are clear:
- Superior Hardness: Carbide is significantly harder than HSS, allowing it to cut through materials that would quickly dull or break other tools.
- High Heat Resistance: It can withstand much higher cutting temperatures, which is crucial when machining hardened steel. This means faster cutting speeds and longer tool life.
- Better Wear Resistance: The extreme hardness translates to excellent resistance to wear, ensuring the cutting edge stays sharp for more cuts.
- Rigidity: Carbide is a strong material, meaning a 1/4-inch end mill will be very rigid, leading to more accurate cuts and less chatter.
What is HRC60?
HRC stands for Rockwell Hardness, and the ‘C’ scale is used for harder materials. So, HRC60 means the steel has achieved a hardness level of 60 on the Rockwell C scale. This is very hard! For reference, a typical railroad track is around HRC50, and some high-end knife blades might be in the HRC58-60 range. Tools like bearing races, drill bits, and some precision components are often made from steel hardened to these levels. Machining HRC60 steel requires tools specifically designed for the job, and a quality 1/4-inch carbide end mill is one of them.
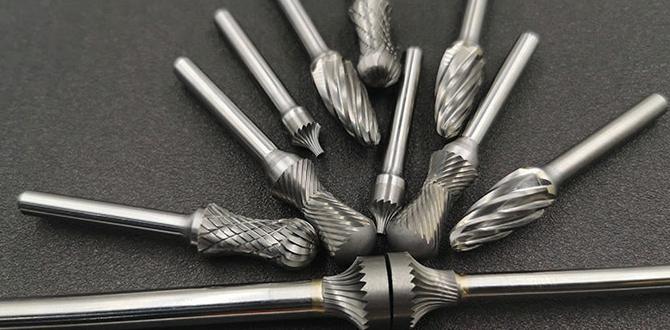
Choosing the Right 1/4-Inch Carbide End Mill

Not all 1/4-inch carbide end mills are created equal, especially when targeting material as demanding as HRC60 steel. Here’s what to look for:
Material and Coating
For HRC60, you need a solid carbide end mill. For coatings, consider these:
- Uncoated: Often used for softer materials or when you need to run at very high speeds. For HRC60, it might not be the best choice due to the extreme heat.
- TiN (Titanium Nitride): A gold-colored coating that offers some hardness and lubricity, extending tool life in moderately hard materials. It’s a good budget option.
- TiCN (Titanium Carbon Nitride): A dark gray coating that is harder and more wear-resistant than TiN. Excellent for machining harder steels.
- AlTiN (Aluminum Titanium Nitride) or Inconel: This is the king for high-temperature applications and extremely hard materials like HRC60. It forms a protective aluminum oxide layer at high temperatures, providing superior thermal protection and wear resistance. This is your go-to for HRC60.
Flute Count
Flutes are the helical grooves on the end mill that cut the material. For machining hardened steel, the flute count is important:
- 2 Flutes: Offer more chip clearance and are often preferred for harder materials and slotting. The increased space for chips helps prevent clogging and overheating.
- 3 Flutes: A good all-around choice, offering a balance of cutting ability and chip evacuation. Can be good for general milling of harder materials.
- 4 Flutes: Provide better surface finish and are generally better suited for less abrasive materials or when rigidity is paramount. However, they can have poorer chip evacuation in gummy or very hard materials, increasing the risk of overheating.
For HRC60 steel, a 2-flute or 3-flute carbide end mill with an AlTiN coating is generally the most recommended combination. The extra flute clearance from fewer flutes is beneficial for managing chips in hard, abrasive material.
Geometry and Design Features
- Corner Radii: Some end mills have a small radius on the cutting edge. This strengthens the edge and helps prevent chipping, which is crucial for brittle HRC60 steel. It also helps in creating smoother surface finishes.
- End Type:
- Square End: Creates sharp internal corners. Good for general milling, facing, and profiling.
- Ball Nose: Creates a rounded end. Ideal for 3D contouring and creating fillets.
- Corner Radius: A hybrid of square and ball nose, offering a slight radius for edge strength.
For general machining of HRC60, a square end or corner radius end mill is usually the most versatile.
- Helix Angle: A higher helix angle (e.g., 45 degrees) can provide a smoother cut and better chip evacuation.
- Stub Length vs. Standard: A stub length end mill has a shorter flute length and overall length. This increases rigidity, reducing deflection and vibration, which is critical when working with hard steels. For HRC60, a stub length end mill is often preferred for its robustness.
Shank Type
Most 1/4-inch end mills have a standard 1/4-inch round shank that is often ground with a “weldon flat.” This flat provides a secure grip for the set screw in your milling machine’s tool holder (collet chuck or end mill holder), preventing the tool from spinning out under heavy cutting loads.
Key Specifications to Look For:
- Diameter: 1/4 inch
- Shank Diameter: 1/4 inch
- Material: Solid Carbide
- Coating: AlTiN or similar high-performance coating (TiCN can be a secondary option)
- Flutes: 2 or 3
- Length: Stub length is preferable for rigidity
- Corner: Square or with a small corner radius (e.g., 0.010″ or 0.020″)
Setting Up Your Milling Machine for HRC60 Steel
Working with HRC60 steel requires careful setup. It’s not something you want to rush or guess at. Precision here pays off big time in tool life and finish.
Your Tool Holder
A high-quality tool holder is paramount. Collars, collets, or tool holders that can securely grip the 1/4-inch shank are essential. Ensure your collet is clean and properly sized for the shank. A good gripping system minimizes runout (the wobble of the tool) and vibration, both of which are detrimental to cutting hard materials.
Spindle Speed and Feed Rate: The Sweet Spot
This is arguably the most critical part. HRC60 steel is unforgiving. You cannot simply apply speeds and feeds meant for aluminum or mild steel. The general rule for carbide machining hardened steel is to use:
- Lower Spindle Speeds (RPM): Compared to softer materials, you’ll run at significantly lower RPMs. This is because the cutting forces and heat generation are much higher.
- Slower Feed Rates: You need to let the tool do its work without forcing it.
- Shallower Depth of Cut: Don’t try to remove too much material at once.
Finding the exact RPM and feed rate can be tricky and depends on your specific machine, the end mill, and the exact hardness and composition of the steel. However, here are some starting points for a 1/4-inch carbide end mill in HRC60 steel:
For reference, let’s consider a standard 1/4″ carbide end mill with an AlTiN coating. Always consult the end mill manufacturer’s recommendations if available. If not, proceed with caution and start conservatively.
| Operation Type | Spindle Speed (RPM) – Start Range | Feed Rate (IPM) – Start Range | Depth of Cut (inches) – Max | Width of Cut (inches) – Radial |
|---|---|---|---|---|
| Slotting | 300 – 600 RPM | 1 – 3 IPM | 0.020 – 0.050″ | 0.125″ (1/8″) |
| Profiling (Outside) | 400 – 800 RPM | 2 – 5 IPM | 0.030 – 0.060″ | 0.125″ (1/8″) |
| Shoulder/Pocket Milling | 400 – 700 RPM | 2 – 4 IPM | 0.015 – 0.030″ | 0.060 – 0.100″ |
| Finishing Pass | 500 – 1000 RPM | 3 – 7 IPM | 0.005 – 0.010″ | 0.125″ (1/8″) |
Important Notes on Speeds and Feeds:
- These are starting points. Always listen to your machine and the tool. If you hear screeching or chirping, adjust. If you see smoke, stop immediately.
- Coolant/Lubrication: Use a good quality cutting fluid or through-spindle coolant if available. This is crucial to dissipate heat and lubricate the cut. Flood coolant is highly recommended.
- Work Holding: Ensure your part is held extremely securely. Any movement will lead to tool breakage or poor finish.
- Chip Evacuation: If you are slotting, ensure your flutes can clear the chips. If chips start building up, reduce the feed rate or increase coolant flow.
Coolant and Lubrication
Machining HRC60 steel generates a lot of heat. Without proper cooling, your carbide end mill will rapidly lose its edge, and the workpiece can undergo undesirable metallurgical changes (like softening the heat-treated areas). A flood coolant system is ideal. If you don’t have flood coolant, a mist coolant system or even a good cutting fluid applied manually (though less effective for continuous machining) is much better than dry machining.
For many high-performance machining applications, specific synthetic or semi-synthetic coolants are recommended. They offer excellent cooling properties and lubricity, helping to extend tool life and improve surface finish.
Rigidity and Vibration
Vibration (chatter) is the enemy of hard machining. It quickly breaks down cutting edges and leads to poor surface finish. To combat this:
- Use the shortest possible tool stick-out. This means having the end mill as close to the spindle nose as possible.
- Ensure your machine’s bearings and ways are in good condition. Any play will translate into vibration.
- Use a quality tool holder with minimal runout.
- Avoid taking excessively heavy cuts.
- Consider a tool with a corner radius to strengthen the cutting edge and reduce the impact of vibrations.
How to Machine HRC60 Steel with a 1/4-Inch Carbide End Mill

Now, let’s get to the practical steps. This guide assumes you have a milling machine (like a Bridgeport, Haas, or smaller CNC mill) and the necessary safety equipment.
Step 1: Safety First
Always wear safety glasses, and consider a full face shield when machining metal. Wear protective clothing and gloves when handling sharp tools or hot parts. Ensure your workspace is clean and free of trip hazards. Understand your machine’s emergency stop procedures.
Step 2: Prepare Your Workpiece and Machine
- Secure the Workpiece: Clamp your HRC60 steel firmly. Use a sturdy vise or appropriate workholding. Ensure there’s enough clearance for the end mill to pass without hitting clamps.
- Clean Tool Holder: Make sure your collet or tool holder is perfectly clean.
- Insert End Mill: Insert your 1/4-inch carbide end mill into the holder. If using a tool holder with a set screw, tighten it securely against the shank or weldon flat. Ensure the tool is seated properly.
- Set Spindle Speed: Set your milling machine’s spindle speed to the calculated RPM. If your machine has variable speed, start at the lower end of your calculated range.
Step 3: Establish Zero and Offsets
Accurately find the zero point of your workpiece (X, Y, and Z axes). For Z-axis zero, use a height gauge or a high-quality edge finder. Be very precise; you don’t want to plunge the tool too deep accidentally.
Step 4: Perform a Test Cut (If Possible)
Before diving into the main operation, if you can, make a small test cut in a less critical area or a scrap piece of the same material. This allows you to verify your speeds, feeds, and cooling. Listen for any unusual noises. Check the chips – they should be small and brittle, not stringy or gummy.
Step 5: Make Your First Cut
Engage the spindle and begin feeding the tool into the material. Remember to start conservatively with depth and radial cuts. If you are profiling the outside of a part, enter the material on a small arc or use a ramp feature if your CNC allows. For pocketing or slotting, plunge (feed downwards) at a slow rate or use a ramp.
Plunging Techniques:
Direct plunging straight down into hardened steel can stress the end mill. If possible, use a ramping motion. Here’s how:
- Engage the spindle.
- Move the tool to the edge of where you want to plunge.
- Start feeding in X or Y at your programmed feed rate.
- Simultaneously feed down in Z at a slightly slower rate than your typical plunge feed.
- This creates a gentle ramp into the material.
If direct plunging is unavoidable, feed very slowly and ensure ample coolant flow.
<h3 id="step-6-monitor-the-