A 1/8-inch carbide end mill with a 1/4-inch shank, especially an extra-long one, is a fantastic choice for machining PMMA (acrylic). Its design helps tremendously in minimizing deflection, leading to cleaner cuts and better accuracy with this often challenging material.
Working with PMMA, or acrylic, can sometimes feel like walking a tightrope. One moment you’re achieving a beautiful, smooth finish, and the next, your tool is chattering, melting, or worse, snapping. A common culprit? Tool deflection. When a tiny tool like a 1/8-inch end mill encounters resistance, it can bend slightly. This tiny bend throws off your cut, leaving rough edges and inaccurate dimensions. It’s a frustrating issue that many makers, from hobbyists to seasoned pros, face. But what if there was a “genius” way to fight back and get those super-clean, precise PMMA parts? You’re in luck! We’re going to dive into how a specific type of 1/8-inch carbide end mill, especially when designed for this task, can be your secret weapon. Get ready to say goodbye to deflection headaches and hello to perfect PMMA cuts!
Why PMMA is Tricky and How Deflection Makes it Worse
PMMA, commonly known as acrylic or Plexiglas, is a popular material for many DIY projects and professional applications. It’s clear, relatively easy to work with in some ways, and looks great. However, it has a low melting point and tends to melt or gum up when machined. When your cutting tool, especially a small one like a 1/8-inch end mill, encounters resistance in PMMA, it can bend or deflect. This deflection means the tool isn’t cutting where you intended it to. The result? Surface finish issues, inaccurate dimensions, and increased heat buildup, which leads to more melting. For a 1/8-inch end mill, this is even more critical because it’s a smaller diameter, meaning less rigidity to begin with. If you’re aiming for precise, clean cuts in PMMA, understanding and controlling deflection is absolutely key.
The “Genius” Solution: The Right 1/8-Inch Carbide End Mill for PMMA
So, what makes a 1/8-inch carbide end mill “genius” for PMMA? It’s all about its design and how that design combats deflection. We’re specifically looking for end mills that are engineered to handle materials like plastics and acrylics with minimal fuss.
Understanding the Key Features
When you’re shopping for an end mill to tackle PMMA, keep an eye out for these specific features:
- Carbide Material: Carbide is much harder and more rigid than High-Speed Steel (HSS). This means it retains its sharpness longer and is less prone to bending. For precise cuts in any material, but especially PMMA, carbide is the way to go.
- Coating: Some end mills come with special coatings (like TiN, TiCN, or AlTiN). While not always necessary for PMMA, certain coatings can help reduce friction and heat, leading to a cleaner cut and longer tool life. For plastics, coatings that promote a slicker surface can be beneficial.
- Flute Design (Number of Flutes): For plastics like PMMA, fewer flutes are generally better. Why? More flutes mean more cutting edges packed into the same diameter. This can lead to chip packing and increased friction, which translates to heat and deflection. Two-flute or even single-flute end mills are often recommended for plastics. The larger chip evacuation space helps get the material away from the cutting edge.
- Helix Angle: A steeper helix angle (e.g., 45 degrees) can sometimes provide a more aggressive cut and better chip evacuation. However, for materials prone to melting, a moderately steep helix is often a good balance.
- Specialized Plastic End Mills: Many manufacturers offer end mills specifically designed for plastics. These often feature polished flutes, specific flute geometries, and optimized cutting geometries to prevent melting and sticking. These are often the best bet for beginners.
The Importance of the 1/4-Inch Shank
Now, let’s talk about the shank. You’ll often see 1/8-inch end mills specified for their cutting diameter but paired with different shank diameters. For a 1/8-inch cutting diameter, pairing it with a 1/4-inch shank is a smart move, especially in PMMA.
Why is this combination so effective at minimizing deflection? It’s simple physics. A larger shank diameter provides a much more rigid connection to your tool holder and spindle. Think of trying to bend a thin twig versus a thicker stick – the thicker one is much harder to bend. The 1/4-inch shank is significantly more rigid than a 1/8-inch shank. This extra rigidity means less chance of the end mill bending away from the material as it cuts, resulting in:
- Reduced Deflection: The bigger shank resists bending far better.
- Improved Accuracy: Your cuts will be closer to their intended dimensions.
- Better Surface Finish: Less wobble means smoother engagement with the material.
- Less Heat Buildup: A stable tool generates less friction-induced heat, reducing melting.
Extra-Long for What?
The term “extra-long” refers to the overall length of the end mill, not just the cutting flutes. While it might seem counterintuitive to use a longer tool for better rigidity, “extra-long” in this context usually refers to the length of the flutes themselves, or the reach of the tool. For 1/8-inch end mills, an “extra-long” flute length can be beneficial for reaching into deeper features or for pocketing operations. However, for minimizing deflection, the shank diameter is the primary factor. If an extra-long end mill also has a substantial shank (like the 1/4-inch we’re discussing), then it’s a well-rounded choice. Always check the specifications to understand if “extra-long” refers to flute length or overall tool length, and consider how it fits your specific application and CNC machine’s rigidity.
Choosing the Right End Mill: Specifications to Look For
Navigating the world of end mills can be a bit daunting. Here’s a breakdown of what to look for when selecting a 1/8-inch carbide end mill for PMMA, with an emphasis on deflection control. We’ll focus on a common, effective configuration: a 1/8″ cutting diameter, 1/4″ shank, likely with 2 flutes and designed for plastics.
Essential Specifications
When you’re browsing online stores or looking at tool catalogs, here’s what you should prioritize:
- Material: Solid Carbide
- Coating: Uncoated (often best for plastics as coatings can sometimes add friction if not designed for it) or a specialized plastic-friendly coating (e.g., mirror polish).
- Number of Flutes: 2 (ideal for plastics like PMMA)
- Cutting Diameter: 1/8 inch (0.125″)
- Shank Diameter: 1/4 inch (0.250″) – This is key for rigidity.
- Overall Length: Standard or slightly longer flute length if needed for depth, but prioritize rigidity from the shank.
- Helix Angle: Around 20-30 degrees is often a good starting point for plastics, but specialized designs exist.
- Flute Type: Straight flute or moderate helix. Polished flutes are a big plus.
Example Product Specifications
Here’s how a suitable end mill might be listed:
| Specification | Description |
|---|---|
| Material | Solid Carbide |
| Flutes | 2 |
| Cutting Diameter | 1/8″ (0.125″) |
| Shank Diameter | 1/4″ (0.250″) |
| Flute Length | e.g., 1/2″ (0.500″) |
| Overall Length | e.g., 1.5″ (1.500″) |
| Type | Plastic O-Flute, Single Flute, or Mirror Polish End Mill |
| Coating | Uncoated or Polished |
You might see terms like “Plastic Router Bit,” “O-Flute,” or “Single Flute.” An “O-Flute” end mill has a single, very sharp cutting edge and a large flute space, designed explicitly for plastics to prevent melting and chip packing. A 2-flute end mill designed for plastics with polished flutes and a strong shank is also excellent.
Setting Up Your CNC for Success with Your 1/8″ End Mill
Having the right tool is only half the battle. Proper setup on your CNC machine is crucial for a perfect PMMA cut. This includes your speeds, feeds, and holding methods.
Speeds and Feeds: The Balancing Act
This is where machining PMMA can be tricky. Too slow, and it melts. Too fast, and it can chatter or break. Too light of a feed, and it melts. Too aggressive, and it can flex the tool or break it.
For a 1/8-inch carbide end mill in PMMA, you’re aiming for a balance that efficiently removes material without generating excessive heat.
- Spindle Speed (RPM): Start conservatively. For a 1/8-inch carbide end mill, a good starting point can be between 10,000 and 18,000 RPM. The exact speed will depend on your machine’s capabilities and the specific material.
- Feed Rate (IPM – Inches Per Minute): This is critical. You want to remove material fast enough to avoid melting but not so fast that you overload the cutter or make it deflect. A general rule for plastics is chip load.
- Chip Load: This is the thickness of the material removed by each cutting edge per revolution. For PMMA with a 1/8″ end mill, a chip load of 0.002″ to 0.005″ is a good range to start with.
Let’s put that into practice. If you have a 2-flute end mill and want a chip load of 0.003″, and your spindle speed is 12,000 RPM, your feed rate should be:
Feed Rate = Number of Flutes × Chip Load × Spindle Speed
Feed Rate = 2 × 0.003 inches/tooth × 12,000 RPM = 72 inches per minute (IPM)
Important Note: These are starting points! Always perform test cuts, preferably on scrap material, to dial in the perfect speeds and feeds for your specific setup. Listen to the machine, watch the chips, and feel the surface finish.
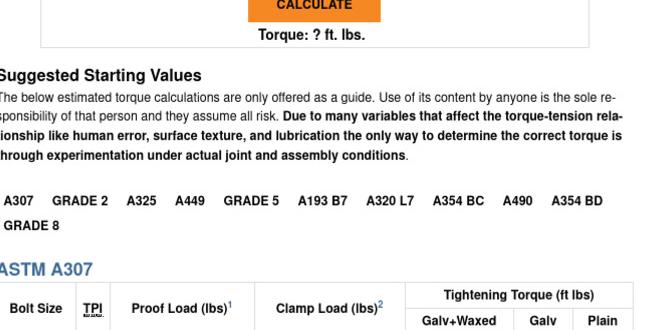
For more detailed information on calculating speeds and feeds, resources like the MachineryValues Speeds and Feeds Calculator can be very helpful.
Holding Your PMMA Securely
Deflection can also be exacerbated if your workpiece isn’t held down properly.
- Clamping: Use clamps that are positioned so they don’t interfere with the tool path. Ensure they are tight enough to prevent any movement.
- Vacuum Fixturing: For larger or thinner sheets, vacuum tables are excellent at holding the material flat and secure.
- Double-Sided Tape: For very small parts or rapid prototypes, high-strength double-sided tape (used in woodworking and metalworking) can work, but ensure it’s strong enough for the cutting forces.
- Support: If you’re cutting thin PMMA, consider adding a sacrificial backing board of MDF or plywood underneath. This provides support directly opposite the cutting area, helping to prevent the material from flexing and chipping out on the exit side.
Step-by-Step: Machining PMMA with Your 1/8″ End Mill
Let’s walk through a typical scenario of cutting a shape out of a PMMA sheet using your specialized 1/8-inch carbide end mill.
- Prepare Your Design: Create your 2D or 3D design in your CAD software. Ensure all your dimensions are correct.
- CAM Programming: Import your design into your CAM software.
- Select your 1/8″ carbide end mill with a 1/4″ shank.
- Define the cutting strategy: For a cutout, use a profile (contour) toolpath.
- Set your cutting depth. For PMMA, it’s often best to cut in multiple shallow passes rather than one deep pass. For a 1/8″ tool, aim for a depth of cut (DOC) of around 0.0625″ (1/16″) per pass.
- Apply tabs if necessary to keep the piece from falling out.
- Ensure your speeds and feeds are set according to your calculations and test cuts (e.g., 12,000 RPM, 72 IPM feed rate, 0.0625″ DOC).
- Set coolant or air blast if you have it. A mist coolant or a strong air blast is great for PMMA to keep chips clear and reduce heat.
- Job Setup on CNC:
- Securely mount your PMMA sheet to your machine bed. Use clamps, double-sided tape, or a vacuum table. Make sure it’s rigid and won’t move.
- Install the 1/8″ carbide end mill with the 1/4″ shank into your collet. Ensure it’s seated properly for maximum rigidity.
- Set your work zero (origin) accurately on the PMMA workpiece.
- Perform an Air Cut: If unsure, run the entire program with the spindle off, a few inches above the material, to visually verify tool paths and ensure no collisions.
- Perform Test Cuts: Before committing to the full job, cut a small test piece or a feature on scrap material. This is your chance to fine-tune your speeds, feeds, and DOC. Look for smooth cutting action, clean chips, and a good surface finish. Listen for any rattling or chattering.
- Start the Cut: Once you’re confident with your test cuts, start the actual machining process.
- Monitor the Process: Keep an eye on the cut, especially during the first few passes. Look for signs of melting, chip buildup, or excessive chatter. Be ready to pause or stop the machine if anything seems wrong.
- Post-Machining: After the cut is complete, carefully remove the finished part. Tabs (if used) will need to be cut, and any minor rough edges can be cleaned up with a deburring tool or fine sandpaper.
Tips for an Even Better Finish and Longevity
Beyond the basics, a few extra tips can elevate your PMMA machining experience:
- Air Blast or Misting: A constant stream of compressed air directed at the cutting zone is highly effective at clearing chips and reducing heat. A light mist coolant can also work wonders, but be cautious as excessive coolant can sometimes cause issues with certain plastics.
- Tool Lubricants: There are specialized cutting fluids designed for plastics. A small amount applied to the cutting zone can help prevent melting and sticking.
- Shallow Depth of Cut (DOC): As mentioned, taking lighter cuts is almost always better for PMMA. It reduces the load on the tool and the material, leading to less deflection and a cleaner cut.
- Feed in the Correct Direction (Climb vs. Conventional Milling): For plastics, conventional milling (where the cutter rotates against the feed direction) is often preferred as it generates less heat than climb milling. However, a very sharp plastic-specific end mill and correct speeds/feeds can make climb milling suitable and yield a smoother finish. Experiment to see what works best.
- Keep Flutes Clean: Regularly clear chips from the flutes of your end mill. Clogged flutes lead to poor chip evacuation, increased heat, and potential melting.
- Tool Holder Rigidity: Ensure your collet and tool holder are clean and provide a rigid grip on the end mill. A Wobbly tool holder will only amplify deflection issues.
For those interested in the science behind cutting tools and materials, the Sandvik Coromant Master Apprentice program offers deep insights into tooling technologies that can be applied even with smaller hobbyist machines.</