A 1/8 inch carbide end mill paired with proper technique is crucial for achieving a flawless mirror finish on nylon, preventing melting and ensuring precise cuts. This guide will show you how to select and use the right end mill for this specific application.
Achieving a Nylon Mirror Finish: Your Guide to the 1/8 Inch Carbide End Mill
Ever tried to get that super smooth, shiny finish on nylon parts, only to end up with a melted mess? It’s a common frustration for many makers and machinists. Getting a true mirror finish on plastics like nylon can be tricky. The wrong tools or settings can easily lead to heat buildup, which turns your precise cuts into gummy, unusable blobs. But don’t worry, there are ways to achieve that professional, glass-like surface. One of the keys to success lies in choosing and using the right cutting tool. In this guide, we’ll dive into why a specific type of end mill, the 1/8 inch carbide end mill, is your secret weapon for tackling nylon and achieving that perfect mirror finish you’re after. We’ll break down exactly what makes it work, how to pick the best one, and the simple steps to use it safely and effectively.
Why Nylon is Tricky for Machining
Nylon, while a fantastic material for many applications due to its strength and durability, presents unique challenges when it comes to machining. Its relatively low melting point and tendency to absorb moisture make it prone to melting and deforming under the heat generated by cutting tools. This heat buildup is often the culprit behind those frustrating gummy surfaces and imprecise dimensions. When a cutter drags or melts the material instead of cleanly slicing it, you lose the opportunity for a clean finish and accurate part.
The inherent properties of nylon mean we need cutting tools that can remove material quickly and efficiently, while also minimizing friction and heat. Standard tools, especially those designed for harder materials like metal, can generate too much heat. This is where specialized tooling comes into play, and this is where our small but mighty 1/8 inch carbide end mill shines.
Enter the 1/8 Inch Carbide End Mill: Your Nylon Finishing Specialist
So, why is a 1/8 inch carbide end mill so effective for nylon? Let’s break it down:
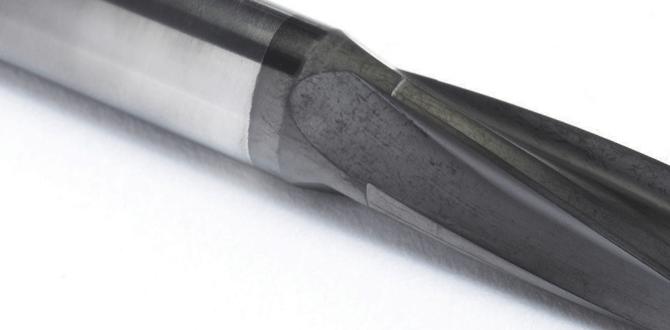
- Carbide Material: Carbide is an incredibly hard and wear-resistant material. This means it stays sharp longer and can handle higher cutting speeds than High-Speed Steel (HSS) tools. For nylon, this sharpness translates to cleaner cuts and less friction, reducing heat buildup.
- Small Diameter (1/8 Inch): A smaller diameter end mill allows for finer details and a lighter cut. This is crucial for plastics like nylon. Smaller flutes mean less material is being removed at once, further reducing heat generation and the risk of melting. It’s also excellent for achieving tight radiuses and intricate features.
- Flute Design: The number and geometry of the flutes (the spiral grooves on the end mill) are vital. For plastics, end mills with fewer, highly polished flutes (often 1 or 2 flutes) are preferred. These designs allow chips to clear easily and reduce the tendency for the nylon to cling to the tool.
When you combine these features, you get a tool that’s optimized for slicing through nylon cleanly, minimizing heat, and producing a surface finish that can, with the right technique, become a mirror polish. You’ll often find these specific tools advertised as “carbide end mill 1/8 inch 1/4 shank extra long for nylon mirror finish” because that’s precisely their intended purpose.
Key Features to Look For in a 1/8 Inch Carbide End Mill for Nylon
Not all 1/8 inch carbide end mills are created equal, especially when you’re aiming for that elusive mirror finish on nylon. Here’s what to prioritize:
1. Flute Count
This is perhaps the most critical factor for plastics. For nylon, you generally want:
- 1 or 2 Flutes: These are ideal. They provide the most open space for chips to evacuate, which is essential for preventing melting and clogging. A 1-flute end mill is often the go-to for softer plastics, while a 2-flute can handle slightly more aggressive cuts if needed.
- Avoid 3 or 4 Flutes: While great for metals, these designs have less chip clearance and can pack up with nylon, leading to heat and poor finishes.
2. Flute Finish (Polished Flutes)
Look for end mills specifically marketed with “polished flutes” or a “bright finish.”
- Why it Matters: A highly polished flute surface reduces friction between the nylon and the cutting edge. This means less heat is generated, and the nylon is less likely to stick to or melt onto the tool.
- What to Avoid: Standard, uncoated, or dull-finished flutes will offer more resistance and increase the chances of a gummy finish.
3. Coating
While some coatings can be beneficial, for nylon, often a simple, polished carbide with no coating is best. However, if you see a coating designed to reduce friction and prevent material buildup, it might be worth considering.
- Common Coatings to Consider (with caution): Some specialized diamond-like carbon (DLC) coatings can offer excellent low-friction properties for plastics. However, ensure they are specifically recommended for plastic machining.
- Coatings to Generally Avoid for Nylon: TiN (Titanium Nitride), TiCN (Titanium Carbonitride), and AITiN (Aluminum Titanium Nitride) are primarily designed for high-temperature metal cutting and can sometimes increase friction heat with plastics.
4. Shank Diameter
You’ll commonly see 1/8 inch end mills with either a 1/8 inch shank or a 1/4 inch shank. For a beginner, a 1/4 inch shank offers a bit more rigidity and is less prone to vibration, which can help with surface finish. The “extra long” often refers to the overall length, allowing you to reach deeper into parts if necessary, but rigidity is more key for finish quality.
5. End Type
For achieving a mirror finish, particularly on flat surfaces or profiles, a flat-end mill is essential. Ball-end mills are for creating contours and round profiles, while radius-end mills have a small corner radius. For a general mirror finish on flat surfaces, stick with a flat-end design.
Tools and Setup for Success
Beyond the end mill itself, having the right setup and supporting tools is crucial for achieving that perfect nylon mirror finish.
Essential Equipment:
- CNC Mill or Router: While it’s theoretically possible to hand-mill, a CNC machine offers the precision and consistent speed control necessary for a mirror finish.
- Collet or Chuck: Ensure your collet or chuck is clean, runs true, and holds the end mill securely. A runout (wobble) will ruin your finish.
- Appropriate Workholding: Secure your nylon part firmly without deforming it. Vises, clamps, or double-sided tape (for lighter cuts) can be used.
- Coolant/Lubricant (Optional but Recommended): For nylon, a light mist of air or a specialized plastic machining fluid can help keep temperatures down. Avoid water-based coolants that nylon can absorb.
- Safety Glasses and Face Shield: Always protect your eyes and face.
Setup Checklist:
- Secure the Workpiece: Make sure the nylon is clamped down rock-solid. Any movement will lead to a poor finish.
- Install the End Mill: Insert the 1/8 inch carbide end mill into a clean collet or chuck, ensuring it’s seated properly. Tighten securely.
- Check for Runout: If possible, use an indicator to check that the end mill is running true. A small amount of runout can significantly degrade your finish quality.
- Set Z-Height: Accurately set your Z-zero point.
Step-by-Step Guide to Machining Nylon with a 1/8 Inch End Mill
Here’s how to approach machining nylon to achieve that sought-after mirror finish using your 1/8 inch carbide end mill.
Step 1: Material Preparation
Before you even think about cutting, ensure your nylon stock is properly prepared. If it’s stock that may have absorbed moisture (like Nylon 6 or 6/6), consider drying it in an oven at a low temperature (around 60-80°C or 140-175°F) for a few hours to remove excess moisture. This can help prevent dimensional changes and improve surface finish.
Step 2: Setting Cutting Parameters (Feeds and Speeds)
This is where many beginners stumble. Nylon requires different parameters than metal. The goal is to cut fast enough to avoid melting but slow enough to ensure clean shearing. These are starting points; you’ll likely need to fine-tune them.
Recommended Starting Speeds and Feeds for 1/8″ Carbide End Mill on Nylon:
| Parameter | Typical Value for Nylon | Notes |
|---|---|---|
| Spindle Speed (RPM) | 8,000 – 15,000 RPM | Higher speeds generally work better for plastics. |
| Feed Rate (IPM – Inches Per Minute) | 10 – 30 IPM | Start on the lower end and increase. Chip load is key. |
| Chip Load per Flute | 0.001″ – 0.003″ | Crucial for clean cutting; too small = rubbing, too large = chipping/melting. |
| Depth of Cut (Axial – DOC) | 0.010″ – 0.030″ | Shallow cuts are key for fine finishing. |
| Width of Cut (Radial – WOC) | 0.020″ – 0.060″ (or 20-50% of diameter for profiling) | Keep it small for finishing passes to reduce side load and heat. |
To calculate your feed rate if you know the chip load: Feed Rate = Spindle Speed (RPM) Number of Flutes Chip Load per Flute. For a 1-flute end mill at 10,000 RPM with a 0.002″ chip load, your feed rate would be 10,000 1 0.002 = 20 IPM.
Important Note: Always perform a test cut on a scrap piece of the same nylon material to dial in your speeds and feeds. Listen to the sound of the cut – it should be a clean shearing sound, not a squealing or melting noise.
Step 3: Toolpath Strategy for Mirror Finish
The path your end mill takes significantly impacts the final finish.
- Climb Milling: For plastics, climb milling is generally preferred. In climb milling, the cutter rotates in the same direction as its feed. This results in a shallower chip at the start of the cut and a thicker chip at the end, which helps to pull heat away from the workpiece and prevent melting. This is opposite to conventional milling where the cutter rotates against the feed direction.
- Restricted Radial Engagement: For profiling or pocketing operations where you’re removing wall material, use a strategy that limits the width of cut (WOC). A small WOC, sometimes as little as 10-20% of the end mill diameter, will generate less heat and allow the tool to shear the material cleanly.
- Finishing Passes: Often, a finishing pass is required. This would be a separate operation with a very shallow depth of cut (e.g., 0.005″ – 0.010″) and a slightly higher feed rate (to ensure it’s cutting, not rubbing) after the bulk of material is removed.
Step 4: Running the Job
- Dry Run: Always perform a dry run (without the spindle on) to ensure your toolpaths are correct and there are no crashes.
- Start Slow: Begin with your conservative speeds and feeds.
- Monitor for Heat and Chip Evacuation: Watch the chips. They should be small and clear away from the cutter. If they look like melted plastic or are packing into the flutes, your feed rate is too slow, or your depth of cut is too high.
- Use Air Blast or Lubrication: A stream of compressed air directed at the cutting zone can significantly help to cool the nylon and blow chips away. Specialized plastic machining lubricants are also available; however, avoid cutting fluids with high water content that nylon might absorb.
- Listen to the Cut: The sound of the end mill cutting nylon should be a consistent, light “shhhk” or “zzzzzt.” Any high-pitched squealing or grinding indicates heat and potential melting.
Step 5: Post-Machining Inspection and Finishing
Once the machining is complete:
- Clean the Part: Remove any residual plastic dust or slivers.
- Inspect the Finish: Examine the surface under good light. You should see a smooth, consistent finish. For a true mirror finish, the machining itself must be exceptionally clean.
- Optional Refinement: If the machined surface is already smooth but not quite a mirror, you might achieve the final polish using very fine grit sandpaper (e.g., 800-2000 grit) or polishing compounds designed for plastics. Always make these polishing steps with light pressure and in a consistent direction.
Common Problems and Solutions
Even with the right tools, nylon machining can sometimes present challenges. Here’s how to tackle them:
- Problem: Melting/Gummy Finish
- Cause: Too much heat. This can be due to slow feed rates, too high a spindle speed for the feed rate, too deep a cut, or poor chip evacuation.
- Solution: Increase feed rate, decrease depth of cut, ensure you’re using climb milling, improve chip evacuation with air blast, verify end mill sharpness and polished flutes, use a shallower finishing pass.
- Problem: Chipped Edges on Nylon
- Cause: Brittle nylon (too dry), feed rate too fast, depth of cut too aggressive, or dull cutting tool.
- Solution: Ensure nylon is properly conditioned/dried, reduce feed rate, reduce depth of cut, use a sharp, high-quality end mill, ensure workholding is secure to prevent vibration.
- Problem: Tool Breakage
- Cause: Excessive side load, plunging too fast, feed rate too slow (rubbing), lack of lubrication, or tool quality issues.
- Solution: Reduce depth and width of cut, ensure correct feed rates, use appropriate plunge feed rates, use air blast, ensure workholding rigidity, use quality tooling.
- Problem: Poor Surface Finish After Machining
- Cause: Tool runout, dull tool, incorrect speeds/feeds, improper toolpath strategy.
- Solution: Check collet and tool for runout, use a sharp and polished end mill, adjust speeds/feeds for clean shearing, employ climb milling and shallow finishing passes.
Beyond Basics: Advanced Tips for Nylon Mirror Finishes
Once you’ve mastered the fundamentals, here are a few ways to elevate your nylon machining:
Toolpath Optimization
For the most demanding finishes, consider advanced toolpath strategies like trochoidal milling or high-speed machining (HSM) principles. These methods use smaller stepovers and high feed rates with shallow depths to maintain a consistent chip load and minimize heat, thus promoting a superior surface finish. Many CAM (Computer-Aided Manufacturing) software packages offer dedicated HSM toolpath cycles.
Tool Selection Details
When looking for your 1/8 inch carbide end mill, don’t hesitate to search for terms like “plastic finishing end mill” or “nylon cutting end mill.” Manufacturers often produce specific tool geometries and coatings optimized for these materials. These specialized tools might cost a bit more but can save you a lot of frustration and time in achieving that desired mirror finish. For instance, you might see end mills with a very high helix angle, which aids in chip evacuation and provides a smoother shearing action.
Material Conditioning
As mentioned briefly, the moisture content of nylon is critical. For applications where dimensional stability and finish are paramount, investing in a drying oven and understanding the specific drying requirements for your type of nylon (e.g., Nylon 6, Nylon 6/6, Nylon 12) can make a significant difference. Always refer to the material manufacturer’s recommendations.
Post-Machining Polishing
<