The 1/8 inch carbide end mill, especially the 1/4 shank extra-long variant, is your key to minimizing deflection when machining bronze. Proper selection and usage ensure cleaner cuts and more accurate results for your projects.
When you’re working with bronze on your milling machine, getting a clean, precise cut can sometimes feel like a puzzle. One common frustration for beginners is something called “deflection.” This happens when the cutting tool, like a tiny 1/8 inch carbide end mill, bends or flexes slightly as it bites into the metal. This bending leads to inaccurate dimensions and less-than-perfect surface finishes, especially with softer materials like bronze. But don’t worry! With the right end mill and a few smart techniques, you can easily overcome this. This guide will walk you through choosing and using the best 1/8 inch carbide end mill for bronze and how to keep deflection in check.
Why is Deflection a Problem with Bronze?
Bronze, while a workable metal, has its own set of characteristics that can make tool deflection a noticeable issue. Unlike harder steels, bronze can be a bit “gummy.” This means it doesn’t chip away as cleanly and can exert a continuous, rather than intermittent, force against the cutting edge of your end mill. When a 1/8 inch end mill is under this persistent pressure, especially if it’s a standard length, that tiny cutting tool can bend. This bending, or deflection, means the tool isn’t cutting exactly where you want it to. Imagine a tiny spring bending; it’s not following a perfectly straight path.
For a beginner, seeing an inaccurate part can be disheartening. It might make you think you’re doing something wrong, or that the machine isn’t capable. The truth is, it’s a common machining challenge, and understanding both the tool and the material is the first step to mastering it. The 1/8 inch size is popular for intricate work, but its small diameter makes it more susceptible to deflection than larger tools. Choosing the right type of end mill and understanding how to apply it will make a world of difference.
Choosing Your 1/8 Inch Carbide End Mill for Bronze
Not all carbide end mills are created equal, especially when you’re specifically targeting bronze and aiming to minimize deflection. For this task, a few key features can make your life much easier.
Material Matters: Carbide vs. HSS
While High-Speed Steel (HSS) end mills are great for many general-purpose tasks, carbide is generally the superior choice for machining metals like bronze, especially when precision is paramount.
Carbide: Known for its hardness, heat resistance, and rigidity. It maintains its cutting edge longer at higher speeds and feeds, which can actually help reduce forces and thus deflection.
HSS: More forgiving if you make a mistake with speeds or feeds, but it will dull faster and generate more heat, which can lead to increased deflection and a poorer finish on bronze.
For our goal of minimizing deflection in bronze with a 1/8 inch end mill, carbide is the way to go.
End Mill Geometry: The Key to Control
The design of the end mill itself plays a massive role in how it interacts with bronze.
Number of Flutes: For softer metals like aluminum and bronze, fewer flutes are often better. This is because more chip clearance is provided.
2-Flute End Mills: Excellent for softer materials. They offer maximum chip room, which is crucial for preventing chip recutting and reducing cutting forces that cause deflection.
3-Flute End Mills: A good all-around choice, offering a balance between chip clearance and tool rigidity. For bronze, they can work well, but 2-flutes are often preferred for the best chip evacuation.
4-Flute End Mills: Generally better suited for harder materials or finishing operations where chip load per tooth is lower. They tend to pack up with chips in softer materials like bronze, increasing cutting forces and deflection.
Helix Angle: A steeper helix angle (e.g., 30-45 degrees) can result in a shearing action that cuts more smoothly and reduces the force needed to remove material. This smoother cut helps combat deflection. Standard helix angles are often around 30 degrees, while high helix angles can be 45 degrees or more.
Center Cutting: For plunge milling or drilling operations, you’ll need a center-cutting end mill. Most end mills are center-cutting, but it’s always good to check the specifications. This isn’t directly related to deflection for typical milling, but it’s a fundamental feature.
Coating: While not always necessary for bronze, specialized coatings can improve performance. For general bronze work, uncoated or TiN (Titanium Nitride) coated carbide end mills are usually sufficient and cost-effective.
The “Extra-Long” Advantage: Shank Length and Reach
This is where the keyword “carbide end mill 1/4 shank extra long for bronze minimize deflection” really comes into play. When we talk about “extra-long,” we’re often referring to the length of the tool’s cutting portion or the overall length relative to its diameter. For minimizing deflection, a tool with a shorter flute length relative to its diameter, and a more robust shank, is generally better.
However, the term “extra-long” in this context might refer to tools designed for deeper cuts or reaching into cavities. For
minimizing deflection, you generally want the shortest possible flute length that still allows you to make your desired cut without hitting the machine’s spindle or workholding. A robust 1/4 inch shank provides more rigidity than a smaller shank, even if the flute length is standard or slightly extended.When searching for an end mill to combat deflection, look for:
A sturdy 1/4 inch shank: This provides a solid base against bending forces.
Shorter flute length: The less tool sticking out from the holder, the less leverage there is for it to bend. Aim for a tool where the flute length is only slightly longer than your desired cut depth.
A dedicated “low-helix” or “square end” design: These are often engineered for rigidity.
The specific phrase “extra long for bronze minimize deflection” suggests a specialized tool. While it might seem counterintuitive, manufacturers sometimes design longer tools with specific geometries to maintain rigidity even at extended reach. However, for general use targeting deflection on a 1/8 inch tool, prioritizing a short flute length relative to diameter on a robust shank (like 1/4 inch) is crucial.
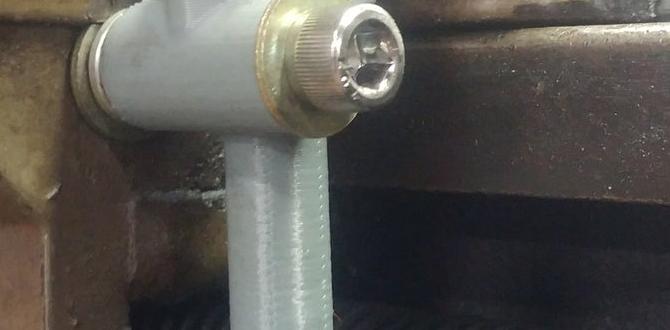
Toolholding is Crucial for Preventing Deflection
Even with the perfect end mill, how you hold it in your machine dramatically impacts deflection. This is a critical area for beginners.
The Collet Chuck: Your Best Friend
The most critical piece of tooling for holding an end mill is the collet chuck (or ER collet system).
What it is: A collet chuck consists of a holder that screws into your machine’s spindle and a set of collets that grip the tool shank.
Why it’s important: When you tighten the nut on a collet chuck, the collet itself closes down evenly around the tool shank. This provides a concentric grip, meaning the tool runs perfectly true (straight) in the spindle.
Benefits for deflection:
Runout: A well-maintained collet chuck minimizes “runout.” Runout is wobble. Even a tiny bit of wobble can be exaggerated by machining forces, leading to a much larger effective deflection.
Secure Grip: Collets provide a very strong, even grip along the entire shank of the end mill, preventing slippage and reducing the chances of excessive vibration that can contribute to deflection.
Beginner Tip: Always ensure your collets are clean, free of coolant or chips, and the correct size for your tool shank. A 1/8 inch end mill needs a 1/8 inch (or very close to it, sometimes 3mm or 3.175mm) collet. Using a collet that’s too large or too small will not hold the tool properly and will introduce runout.
Avoid Stubby Holders for Delicate Work
While holders like Weldon shanks (which have a flat machined into the side for a set screw) are common, they can sometimes lead to less concentric holding than a good collet. If you have the option, a high-quality collet chuck is always preferred for precision work with small end mills.
Machining Techniques to Minimize Deflection in Bronze
Once you have the right end mill and toolholder, the way you use them will have the biggest impact.
Feeds and Speeds: The Delicate Dance
Getting feeds and speeds right for bronze with a 1/8 inch end mill is an art, but here’s a simplified approach for beginners. The goal is to remove material efficiently without overloading the tool.
Chipload: This is the thickness of the chip that each cutting edge of the end mill removes. For bronze, you generally want a moderate chipload. Too small a chipload can cause the tool to rub and generate heat, leading to deflection. Too large a chipload can overload the tool and cause breakage or excessive deflection.
Spindle Speed (RPM) and Feed Rate (IPM): These are interconnected.
Spindle Speed: Determines how fast the tool rotates.
Feed Rate: Determines how fast the tool moves through the material.
The Formula: `Chipload = Feed Rate / (Spindle Speed Number of Flutes)`
Starting Point for 1/8 inch Carbide End Mill in Bronze:
Spindle Speed: Start around 5,000 – 10,000 RPM. This range is often safe and effective for carbide in bronze.
Number of Flutes: Use a 2-flute end mill.
Target Chipload: Aim for around 0.0005 to 0.001 inches per tooth.
Calculate Feed Rate:
If RPM = 7500, Flutes = 2, Chipload = 0.0008 inches: `Feed Rate = Chipload RPM Flutes` `Feed Rate = 0.0008 in/tooth 7500 RPM 2 flutes = 12 inches per minute (IPM)`
Listen to Your Machine: This is critical for beginners. If you hear screaming, chattering, or a high-pitched whine, your speeds or feeds are likely too aggressive. If you hear a dull scraping or rubbing sound, you might be rubbing instead of cutting, possibly with too little feed rate or too slow a spindle speed.
External Resource: For more precise calculations, explore resources like the one by the National Institute of Standards and Technology (NIST). They provide detailed information on machining parameters that can be a great reference. You can often find guides by searching for “machining handbook” or specific alloy machining parameters. For example, a quick search might lead you to a detailed guide on machining BRONZE, which is a common alloy designation.
Stepdown and Stepover: The Cut Path Matters
How deep you cut (stepdown) and how far you move sideways for the next pass (stepover) also influence deflection.
Stepdown: This is the depth of cut in the Z-axis. For a 1/8 inch end mill, taking very deep cuts (high stepdown) will dramatically increase the forces on the tool and lead to significant deflection.
Beginner Recommendation: For a 1/8 inch end mill in bronze, start with a stepdown of no more than 0.060 inches (about half the tool diameter). You might be able to go slightly deeper depending on your machine’s rigidity and the specific end mill, but it’s better to err on the side of caution.
Stepover: This is the amount of overlap between adjacent cutting passes in the X or Y axis, especially when profiling or pocketing.
For Finishing: A small stepover (e.g., 10-20% of the tool diameter) gives a smoother surface finish but can increase machining time.
For Roughing: A larger stepover (e.g., 30-50% of the tool diameter) removes material faster but may leave a rougher surface that requires a finishing pass.
Reducing Deflection with Stepover: When profiling a part, using a smaller stepover on the final finishing pass can help compensate for minor deflection. If the tool deflects slightly outward, a small stepover means the finishing pass will cut closer to the target diameter.
Climb Milling vs. Conventional Milling
The direction of your cut directly impacts the cutting forces and thus deflection.
Conventional Milling: The tool rotates against the direction of feed. This tends to lift the workpiece and can cause chatter. It’s generally less efficient and can lead to more deflection.
Climb Milling: The tool rotates in the same direction as the feed. The cutting edge engages the top of the workpiece and moves downward into the material. This pulls the workpiece into the table, resulting in a smoother cut, better surface finish, and significantly reduced deflection.
Beginner Recommendation: Always try to use climb milling whenever possible, especially with a small end mill like a 1/8 inch carbide tool in bronze. Most modern CNC machines can be set up for climb milling. For manual machines, you might need to set up your machine’s gears or traverse direction appropriately.
Understanding Bronze Alloys and Their Machinability
Not all bronze is the same. Different alloys have varying hardness and machinability, which can influence how much deflection you experience.
High-Leaded Bronzes (e.g., UNS C31400, C31600): These are often called “free-machining” bronzes because the lead acts as a lubricant and helps produce small, easily cleared chips. They are generally very good to machine and exhibit less tendency for deflection than lead-free alloys.
Tin Bronzes (e.g., UNS C4000 series): These are common and have good mechanical properties. They can be a bit tougher than leaded bronzes but are still quite machinable.
Aluminum Bronzes (e.g., UNS C61400): These are significantly harder and stronger. They require more robust tooling and slower speeds/feeds, and deflection can become a much bigger issue.
What this means for you: If you’re working with a “free-machining” bronze, you’ll likely have an easier time controlling deflection. If you’re working with a harder aluminum bronze, you’ll need to be even more diligent about your end mill selection, toolholding, and machining parameters. Always try to identify the specific bronze alloy you are using if possible.
Troubleshooting Common Deflection Issues
Even with careful setup, you might encounter problems. Here’s how to diagnose and fix them.
Issue: Chatter or Vibration
Causes:
Too fast a feed rate or spindle speed, leading to unstable cutting.
End mill is dull or chipped.
Toolholder runout (tool isn’t running true).
Workpiece or tool is not held rigidly.
Loose gibs on a manual milling machine.
Incorrect helix angle for the material.
Solutions:
Reduce feed rate gradually.
Check for a dull end mill and replace if necessary.
Ensure you are using the correct collet and that the tool is seated properly. If using a manual machine, check your spindle bearings.
Make sure your workpiece is securely clamped.
Tighten gibs on manual machines.
Consider a lower helix angle end mill if using a high-helix one.
Issue: Poor Surface Finish (Tool Marks)
Causes:
Tool deflection is inconsistent.
Dull cutting edges.
Chip recutting (chips are not clearing properly).
Excessive spindle runout.
Incorrect feeds and speeds.
Solutions:
Try climb milling.
Use a 2-flute end mill with good chip clearance.
Ensure your spindle is running true.
Adjust feed rate or spindle speed to achieve a chipload appropriate for a good finish (often a slightly smaller chipload within the acceptable range).
Consider a finishing pass with a very small stepover and a clean, sharp end mill.
Issue: Part Dimensions are Out of Tolerance
Causes:
Significant, consistent tool deflection.
Machine is not rigid enough for the operation.
Workpiece is not held securely and is moving during cuts.
Solutions:
Use a more rigid end mill (shorter flute length, robust shank).
Reduce stepdown and stepover.
Ensure workpiece is clamped down tightly.
Consider using a smaller chipload to reduce cutting forces.
For critical dimensions, you might need to perform a “spring pass” – a final light finishing pass where the tool deflects less because the cutting forces are minimal.
Using Your 1/8 Inch Carbide End Mill: A Step-by-Step Example
Let’s walk through a common scenario: milling a 1/8 inch wide slot in a piece of bronze.
| Operation | Description |
|---|---|
| 1. Setup & Tool Selection |
Related Posts |