Carbide end mills make dry cutting aluminum incredibly easy and precise, especially for hobbyists. Get ready to mill aluminum without coolant!
Aluminum is a fantastic material for makers, but cutting it can sometimes feel tricky. You might worry about messes from coolant, or have trouble getting clean, precise cuts. What if I told you there’s a straightforward way to machine aluminum with fewer headaches? Using a carbide end mill specifically designed for dry cutting aluminum is a game-changer. It’s simpler than you might think and can deliver amazing results right in your home workshop. Forget the coolant spray; we’re going to explore how this simple tool can make your aluminum milling projects a joy.
What is a Carbide End Mill, and Why Use It for Aluminum?
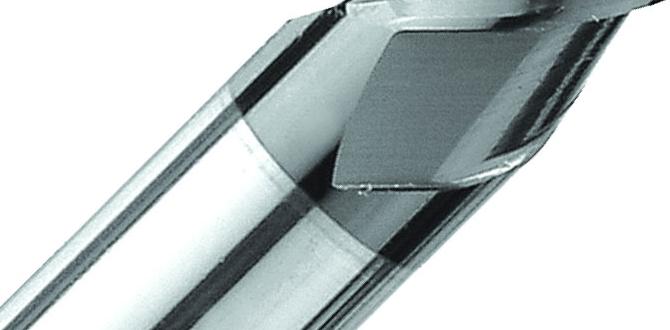
An end mill is a type of milling cutter, sort of like a drill bit but with cutting edges on the sides as well as the tip. This means it can cut sideways, plunge straight down, or make intricate shapes. When we talk about “carbide,” we’re referring to the material the end mill is made from – tungsten carbide. This stuff is incredibly hard and durable, much harder than traditional high-speed steel (HSS). This hardness is key to its performance.
For aluminum, especially softer alloys like 6061 (a very popular choice for hobbyists and makers), carbide end mills offer several big advantages. They can cut faster, handle higher temperatures generated during machining, and maintain their sharpness for much longer than HSS. This translates to cleaner cuts, less chance of the aluminum sticking to the cutter (which is a common problem!), and more consistent results, especially for beginners. The “dry cut” aspect means you often don’t need cutting fluid, which simplifies your setup and cleanup significantly.
The Magic of Dry Cutting Aluminum
Why is dry cutting aluminum with a carbide end mill so effective? It boils down to a few critical factors:
- Material Properties: Aluminum, being a “gummy” or “chip-welding” material, tends to stick to cutting tools. Carbide’s hardness and specific flute geometry (the spiral grooves) help efficiently evacuate chips, preventing this buildup.
- Heat Dissipation: While cutting generates heat, carbide handles it well. The flutes are designed to carry heat away with the chips.
- Chip Evacuation: This is HUGE for aluminum. If chips lodge in the flutes, they can cause a rough finish, tool breakage, or even damage to your workpiece. Specialized carbide end mills for aluminum have geometries optimized for clearing these chips effectively, leading to a superior surface finish.
- No Coolant Mess: For many home shop users or those working in shared spaces, dealing with cutting fluid is a hassle. It can be messy, require special disposal, and add to the cost. Dry cutting eliminates this entirely.
Choosing the Right Carbide End Mill for Aluminum
Not all carbide end mills are created equal, especially when it comes to aluminum. Here’s what to look for:
Flute Count and Design
The number of flutes (the spiral cutting edges) is important:
- 2-Flute End Mills: These are often the best choice for aluminum. They have more open space between the flutes, which is crucial for excellent chip evacuation. This minimizes the risk of chip welding and allows for faster feed rates in softer materials like aluminum.
- 3-Flute End Mills: Can be used for aluminum but are generally better for materials where chip welding is less of an issue or for specific finishing passes.
- 4-Flute End Mills: Typically reserved for ferrous materials (like steel and cast iron) or for finishing passes where smooth surface finish is paramount. They have less chip clearance.
Look for end mills with a polished or high-lustre finish. This non-stick surface helps chips slide away more easily. Some end mills designed for aluminum also have a special coating (like ZrN or TiB2) that further prevents material buildup and increases tool life.
Geometry Specialized for Aluminum
Beyond flute count, the shape of the cutting edges matters:
- High Helix Angle: A steeper spiral (high helix angle) helps “sweep” chips out of the cut more aggressively. This is a signature feature of many aluminum-specific end mills.
- Sharp Cutting Edges: Aluminum benefits from very sharp tools. Look for end mills with keen edges, often achieved through precise grinding.
- Coating: While not always necessary, coatings like an Aluminum-specific ZrN (Zirconium Nitride) or TiB2 (Titanium Diboride) can dramatically improve performance by reducing friction and preventing aluminum from sticking.
Size Matters: 1/8 Inch to 1/2 Inch Shank
For hobbyists and smaller CNC machines, common shank diameters range from 1/8 inch up to 1/2 inch. The shank is the part that holds into your tool holder or collet.
- 1/8 Inch Shank: Ideal for very fine detail work, engraving, or when working with smaller CNC machines that have limited clearance. Be aware that smaller diameter tools are more prone to deflection and breakage if pushed too hard, especially in longer lengths.
- 1/4 Inch Shank: A very common and versatile size. Good balance between rigidity and the ability to reach into pockets or create moderately sized features.
- 1/2 Inch Shank: Offers the most rigidity, which is excellent for aggressive cuts, larger depths of cut, and minimizing tool deflection. This is often found on more robust machines.
When selecting an end mill for aluminum, consider the smallest detail you need to create and the rigidity of your machine. For general-purpose work for beginners, a 1/4-inch or 3/8-inch shank with 2 flutes and a high helix angle is often a sweet spot.
Standard Length Considerations
“Standard length” usually refers to a milling cutter where the flute length is roughly 2-4 times the diameter. “Extended reach” or “long flute” end mills have flutes much longer than this. For dry cutting aluminum without coolant, standard length is usually perfectly adequate and offers more rigidity than longer tools, reducing the chance of vibration or deflection.
Key Specifications to Look For
When you’re shopping, keep an eye out for these descriptions:
- “2-Flute”
- “Carbide”
- “Aluminum Specific” or “Alu-Mill”
- “High Helix”
- “Polished Finish” or “ZrN Coating”
- The diameter you need (e.g., 1/8″, 1/4″, 1/2″)
- The shank diameter (e.g., 1/8″, 1/4″, 1/2″)
Setting Up Your Machine for Dry Cutting
The beauty of dry cutting aluminum with carbide is its simplicity. However, a few key settings and considerations will ensure success and longevity for your tools.
Spindle Speed and Feed Rate: The Sweet Spot
This is probably the most critical part for successful aluminum machining. Unlike steel, aluminum can be machined at much higher speeds. Getting the balance right between spindle speed (RPM) and feed rate (how fast the tool moves through the material) is essential.
Surface Speed (SFM) and Chip Load: Machinists often talk about Surface Speed (SFM), which is the speed of the cutting edge as it moves through the material. For aluminum with carbide end mills, SFM can range from 300 to over 1000 SFM, depending on the specific carbide grade, coatings, and whether you’re roughing or finishing. Chip load is the thickness of the material removed by each cutting edge per revolution. Too small a chip load can lead to rubbing and heat buildup, while too large can overload the tool.
A good rule of thumb for beginner 2-flute carbide end mills in 6061 aluminum, dry cutting, might look something like this:
- For a 1/4″ end mill:
- Spindle Speed (RPM): 8,000 – 12,000 RPM
- Feed Rate (IPM – Inches Per Minute): 20 – 40 IPM
- Depth of Cut (DOC – Axial): 0.050″ – 0.100″ (about half the diameter)
- Width of Cut (WOC – Radial): 0.040″ – 0.100″ (for slotting, typically 50% of diameter or less for profiling)
- For a 1/2″ end mill:
- Spindle Speed (RPM): 4,000 – 8,000 RPM
- Feed Rate (IPM): 40 – 80 IPM
- Depth of Cut (DOC – Axial): 0.100″ – 0.250″
- Width of Cut (WOC – Radial): 0.100″ – 0.250″
Important Note: These are starting points! Your specific machine’s rigidity, the exact alloy of aluminum, the specific end mill geometry, and the desired finish will all influence these numbers. Always start conservatively and increase parameters as you gain confidence and monitor your cut.
Resources for Speeds and Feeds: Many reputable tool manufacturers provide speed and feed charts for their end mills. For example, G-Wizard Calculator is a popular piece of software that can help you dial in these settings for various materials and tools. You can also find helpful charts from companies like HPC Industrial.
Tool Holder and Collet Choice
A good, clean tool holder and collet are paramount. Any runout (wobble) in your spindle will cause uneven cutting, chip buildup, and premature tool wear. Ensure your collets are clean and properly sized for your end mill shank. For precise work, consider a high-quality collet system like ER-style collets.
Workpiece Clamping
Your aluminum workpiece needs to be held securely. Use parallels or aluminum-safe fixturing to avoid marring the surface if needed. Ensure the workpiece won’t move during the cut, as this can lead to tool breakage or inaccurate dimensions.
Dealing with Chips
Even with excellent chip evacuation, chips will fly. While you don’t need coolant, you will need a way to manage chips.
- Air Blast: A directed stream of compressed air can help blow chips clear of the cutting area and the workpiece. This is often integrated into CNC machines.
- Brushing/Blowing: For manual mills or hobby machines, you might need to pause the cut occasionally to blow chips away with compressed air or a brush (ensure the spindle is stopped when using a brush!).
- Chip Traps: Some setups might incorporate simple chip traps or vacuum systems, though this is more advanced.
Never let chips accumulate around the cutting area, as this is a primary cause of poor surface finish and rapid tool wear.
Basic Machining Operations with Carbide End Mills for Aluminum
Carbide end mills excel at several common machining tasks for aluminum:
Profiling: Cutting Out Shapes
This involves cutting around the perimeter of your part to create its final outline.
- Climb Milling vs. Conventional Milling: For aluminum and a two-flute end mill, climb milling is often preferred. In climb milling, the cutter rotates in the same direction as the feed. This results in a thinner chip at the start and a thicker chip at the end, which helps prevent chip welding. Conventional milling (where the cutter rotates against the feed direction) can lead to larger chips that might weld.
- Stepovers: When profiling a complex shape, you’ll make multiple passes. The stepover is how much you move over radially for each pass. Keep stepovers conservative, especially on the final finishing pass, to achieve a smooth edge.
Pocketing: Creating Recesses
Pocketing is machining out an area to create a recessed feature.
- Roughing Passes: Use a larger depth of cut to quickly remove material.
- Finishing Pass: A final pass with a shallower depth of cut and potentially a smaller stepover to achieve a smooth surface finish and precise dimensions.
- Adaptive Clearing: For CAM users, adaptive clearing strategies (constant tool engagement) are highly effective for aluminum. They maintain a consistent chip load and optimize toolpath to minimize heat and tool wear.
Face Milling: Flattening Surfaces
While a dedicated face mill is best, an end mill can be used to flatten a surface.
- Large Stepovers: Use the largest stepover your end mill and machine can handle to remove material efficiently.
- Consistent Overlap: Ensure each pass overlaps the previous one sufficiently to avoid “ridges” of material.
- Multiple Passes: A final finishing pass with a shallow depth of cut is crucial for a good surface finish.
Drilling (Plunging)
End mills can plunge straight down into material, though it’s often slower than using a drill.
- Peck Drilling: If plunging deep, use short plunges followed by retracting the tool to clear chips. This is called “peck drilling.”
- Slow and Steady: Plunging generates a lot of heat at the bottom of the hole. Use conservative feed rates.
Example Scenario: Milling a Simple Bracket
Let’s imagine you want to mill a simple L-shaped bracket from a 1/4-inch thick sheet of 6061 aluminum. You’ll need:
- A piece of 6061 aluminum plate (e.g., 3″ x 3″ x 1/4″).
- A CNC mill or a manual milling machine.
- A collet chuck with a 1/4-inch collet.
- A 1/4-inch, 2-flute, high-helix, carbide end mill designed for aluminum.
- A vise or clamps to hold the aluminum.
- Safety glasses and hearing protection.
Steps:
- Secure the Workpiece: Clamp the aluminum plate firmly in your vise. Ensure it’s indicating flat and square.
- Mount the End Mill: Insert the 1/4-inch end mill into the collet, tighten it securely, and insert the collet assembly into your machine’s spindle.
- Set Zero: Find the X, Y, and Z zero points for your part. For Z, it’s usually the top surface of the aluminum.
- Program Your Toolpaths (or Manually Control):
- Profile Cut: If you just need an outline, program a profile cut. Let’s say your bracket is 2″ x 2″ with a 0.5″ tab.
- Pass 1 (Roughing): Use a 0.080″ depth of cut. Feed at around 30 IPM, with a spindle speed around 10,000 RPM. Program cuts to create the outer profile, leaving about 0.010″ for a finish pass. Use climb milling.
- Pass 2 (Finishing): Use a 0.010″ depth of cut. Keep the same RPM and feed rate, or slightly reduce feed for an even better finish. This pass will establish final dimensions and surface quality.