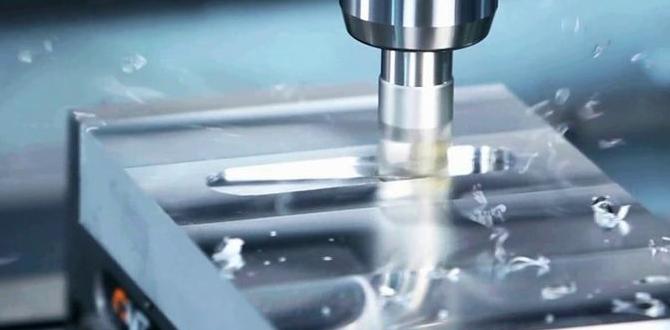
Carbide end mills, especially the 1/8 inch size, are excellent for machining Delrin, offering precision and efficiency for beginners. This guide provides proven methods for successful Delrin milling, covering tool selection, speeds, feeds, and common challenges.
Carbide End Mill 1/8 Inch: Your Key to Machining Delrin Like a Pro
Working with Delrin (acetal resin) can be a delight for makers, but sometimes getting those clean cuts and precise shapes feels a little… sticky. You might end up with melted plastic clinging to your cutter or rough edges that just aren’t smooth. It’s a common hurdle for beginners diving into milling plastics.
Don’t let a few snags discourage you! The secret to smooth, successful Delrin machining often comes down to two things: the right tool and the right settings. And when it comes to small, detailed work on plastic, a 1/8 inch carbide end mill is a game-changer. We’re going to break down exactly how to use this versatile tool to achieve fantastic results, turning those frustrating moments into satisfying achievements.
In this guide, we’ll cover everything you need to know, from choosing the perfect 1/8 inch carbide end mill to setting up your machine for optimal performance. Get ready to cut Delrin with confidence and precision!
Why a 1/8 Inch Carbide End Mill is Perfect for Delrin
Delrin, also known as acetal or POM (polyoxymethylene), is a fantastic engineering thermoplastic. It’s strong, stiff, has low friction, and is easy to machine. However, its relatively low melting point can make it prone to melting and gumming up conventional tools if you’re not careful. This is where a specialized tool like a 1/8 inch carbide end mill shines.
The Magic of Carbide
Carbide, specifically tungsten carbide, is an incredibly hard and wear-resistant material. For machining plastics like Delrin, this hardness offers several advantages:
- Heat Resistance: Carbide tools can withstand higher temperatures before deforming or losing their cutting edge. This is crucial for Delrin, which can get gummy under heat.
- Sharpness Retention: Carbide stays sharp for much longer than high-speed steel (HSS) tools, meaning fewer tool changes and more consistent cuts.
- Rigidity: The hardness of carbide means it’s less likely to flex or chatter, leading to cleaner, more accurate finishes.
The 1/8 Inch Advantage
The 1/8 inch diameter of the end mill is ideal for detailed work on Delrin. Why?
- Fine Detail: This small diameter allows you to create intricate shapes, small pockets, and sharp corners that larger tools simply can’t achieve.
- Reduced Cutting Forces: Smaller diameter tools require less force to cut, which is beneficial for both your machine and the workpiece, especially with softer materials like Delrin.
- Material Removal Rate (MRR): While a 1/8 inch tool isn’t for hogging out large amounts of material quickly, it’s perfect for precise material removal in smaller increments, which is ideal for Delrin to prevent melting.
Understanding End Mill Geometry for Plastics
When you’re picking out your 1/8 inch carbide end mill for Delrin, pay attention to its design. For plastics, certain features are more beneficial:
- Number of Flutes: For Delrin, 2-flute or 3-flute end mills are generally preferred.
- 2-Flute: These offer excellent chip evacuation, which is vital for preventing melting and buildup. The larger flute gullet (space between flutes) can handle plastic chips effectively.
- 3-Flute: While offering a smoother finish and slightly higher MRR than a 2-flute, they can sometimes pack chips more if not run at ideal speeds and feeds. Stick with 2-flute if you’re new to plastic machining.
- Helix Angle: A higher helix angle (e.g., 45 degrees or more) is beneficial for plastics. It provides a shearing action that cuts the material cleanly rather than rubbing, reducing heat buildup.
- Rake Angle: Positive rake angles help to shear the material effectively. For plastics, a sharp, highly positive rake is generally best.
- Coatings: While not always necessary for Delrin, coatings like TiN (Titanium Nitride) can further improve performance by reducing friction and increasing surface hardness, though they add to the cost. For Delrin, a simple uncoated or bright polished carbide end mill is often sufficient.
Selecting Your 1/8 Inch Carbide End Mill for Delrin
Not all 1/8 inch end mills are created equal, especially when it comes to plastics. Here’s what to look for:
Key Specifications to Consider:
- Material: Ensure it’s solid carbide.
- Diameter: 1/8 inch (0.125 inches or 3.175 mm).
- Shank Diameter: Typically 1/8 inch for a 1/8 inch diameter tool, ensuring maximum tool rigidity. However, if you need more reach, you might find 1/8 diameter cutters with a 1/4 inch shank. Make sure your collet or holder can accommodate it.
- Length of Cut (LOC): How far down the flutes go. For most general Delrin work, a standard LOC is fine. If you need to machine deep features, you’ll need a “long reach” end mill.
- Overall Length (OAL): How long the entire tool is.
- Flutes: As discussed, 2-flute is usually the best starting point for Delrin.
- Coating: Bright (uncoated) polished carbide is often ideal for plastics.
For machining Delrin, especially with intricate parts, a carbide end mill 1/8 inch 1/2 shank long reach for Delrin high MRR (though “high MRR” is relative for a 1/8 inch tool and Delrin) is a great combination to aim for if your project requires significant depth or reach.
Where to Buy High-Quality End Mills
When investing in cutting tools, quality matters. Look for reputable manufacturers and suppliers. Some well-regarded brands for end mills include:
- Hass.com (if you have a Haas machine, their tooling is good)
- Osborn (known for industrial brushes, but also offers tooling)
- Maritool
- Magnate Tool
- Specific plastic-focused brands or general machining suppliers like MSC Industrial Supply, McMaster-Carr, or even Amazon for hobbyist-grade but decent options.
Always check reviews and specifications carefully. For Delrin, a simple, sharp, 2-flute, uncoated carbide end mill is often all you need.
Setting Up Your Machine for Delrin Machining
The right tool is only half the battle. Proper machine setup and understanding speeds and feeds are critical for success with plastics like Delrin.
Choosing Your Machine and Workholding
A CNC mill is ideal for precision with Delrin. However, a manual milling machine or even a well-equipped drill press with a milling vise can also work for simpler tasks.
- CNC Mills: Offer automated precision and repeatability.
- Manual Mills: Require more operator skill but are excellent for learning.
- Drill Press with Milling Vise: Suitable for basic operations like drilling and light pocketing, but offers less rigidity and control.
Regardless of the machine, secure your Delrin workpiece firmly. Use a milling vise, clamps, or double-sided tape designed for machining. Ensure the material won’t move during the cut. Never rely on just hand pressure!
Speeds and Feeds for 1/8 Inch Carbide End Mills in Delrin
This is where many beginners struggle. Incorrect speeds and feeds lead to melting, poor finish, and broken tools. The goal is to cut the plastic, not rub it.
A good starting point for a 1/8 inch (0.125″) 2-flute uncoated carbide end mill in Delrin is:
- Spindle Speed (RPM): 5,000 – 15,000 RPM. A higher RPM generally works better for plastics because it allows for faster chip formation and evacuation before heat can build up in the workpiece.
- Feed Rate (IPM – Inches Per Minute): 15-30 IPM. This is conservative. You want to hear a light “shaving” sound, not squealing or rubbing.
- Chip Load: This is the thickness of the chip each cutting edge removes. A good target for Delrin with a 1/8″ 2-flute carbide end mill is around 0.001″ – 0.002″ per flute.
Calculating Feed Rate:
Feed Rate (IPM) = Spindle Speed (RPM) × Number of Flutes × Chip Load (inches/flute)
Example:
Spindle Speed = 10,000 RPM
Number of Flutes = 2
Chip Load = 0.0015 inches/flute
Feed Rate = 10,000 × 2 × 0.0015 = 30 IPM
Important Considerations:
- Coolant: For Delrin, compressed air is often the best coolant. It blows chips away and helps keep the material cool. Avoid liquid coolants as they can sometimes make the plastic gummy or affect its properties.
- Plunge Rate: When plunging straight down into the material, use a much slower feed rate, typically 20-30% of your cutting feed rate.
- Stepover: For roughing operations, a stepover of 30-50% of the tool diameter is common. For finishing, aim for 10-20% for a smooth surface.
- Depth of Cut (DOC): Start conservatively. For Delrin, a DOC of 0.050″ to 0.100″ is usually safe with a 1/8″ end mill. You can push this a bit deeper if your setup is rigid and you’re getting good chip evacuation, but always prioritize listening to the cut and observing chip formation.
Table: Recommended Starting Speeds and Feeds for 1/8″ Carbide End Mill in Delrin
| Parameter | 2-Flute Carbide End Mill (Uncoated) | Notes |
|---|---|---|
| Spindle Speed (RPM) | 8,000 – 15,000 | Higher RPMs generally better for plastics. |
| Feed Rate (IPM) | 20 – 40 | Listen for a light “shaving” sound. |
| Chip Load (inches/flute) | 0.001 – 0.002 | Adjust feed rate based on sound and chip appearance. |
| Depth of Cut (DOC, inches) | 0.050 – 0.100 | Start shallow and increase if conditions allow. |
| Plunge Rate (IPM) | 5 – 15 | Significantly slower than cutting feed rate. |
| Tool Engagement (Lateral, % of Dia) | 30% – 50% (Roughing) / 10% – 20% (Finishing) | Stepover affects surface finish and cutting forces. |
| Coolant | Compressed Air | Blows chips away, prevents melting. |
Tuning your settings: The numbers in the table are starting points. Always listen to your cut.
- Too much squealing or rubbing: Usually means the feed rate is too low, or the spindle speed is too high. Increase feed rate slowly.
- Melting or gummy chips: Feed rate is likely too low, or spindle speed too high. Increase feed slowly. It could also mean not enough chip load.
- Chatter or vibration: Could be a loose workpiece, a dull tool, a flexy tool, or too aggressive of a cut (DOC or stepover).
Mastering the Milling Process with a 1/8 Inch End Mill
Now that you have your tool and your settings, let’s walk through the actual machining process.
Step-by-Step Machining Guide:
- Secure the Workpiece: Mount your Delrin block firmly in your milling vise or other workholding. Ensure it’s square and won’t shift.
- Install the End Mill: Load the 1/8 inch carbide end mill into your collet or tool holder. Make sure it’s seated properly and tightened securely.
- Set Your Zero Point (X, Y, Z): Using your machine’s probing system or manual methods, establish your work coordinate system. The Z-zero is typically set at the top surface of your Delrin.
- Program or Manually Control the Tool Path:
- For CNC: Load your G-code program.
- For Manual Mill: Carefully hand-feed the machine using your DRO (Digital Readout) or dials.
- Initiate Cooling: Turn on your compressed air supply, directing it at the cutting area.
- Engage the Spindle: Start your spindle at the set RPM.
- Begin the Cut:
- For Pocketing/Contouring: Use a ramp or helical entry if possible to enter the material at an angle, rather than plunging straight down. A 1/8 inch 2-flute end mill can often do a small helical ramp entry effectively.
- For Plunging: If you must plunge, do so slowly at your set plunge feed rate.
- Observe the Chip Formation: Watch and listen. You should see small, wispy shavings (chips) being ejected. If you see melting plastic or hear loud rubbing sounds, stop the machine and adjust your feed rate or speed.
- Follow the Tool Path: Maintain consistent feed rates throughout the cut.
- Break the Chip (Optional but Recommended): For longer passes, light peck drilling (shortening the Z-depth of plunge moves) can help break chips into smaller, easier-to-evacuate pieces.
- Finish the Cut: Once the machining is complete, engage the spindle brake or let it coast to a stop.
- Retract the Tool: Move the tool clear of the workpiece upwards (Z-axis) before moving it out of the part in X/Y.
- Clean Up: Remove chips from the machine and workpiece.
Tips for Success with Delrin:
- Use Sharp Tools: A dull end mill is the quickest way to trouble with plastics.
- Keep it Cool: Compressed air is your best friend.
- Prioritize Chip Evacuation: Ensure chips aren’t packing up in the flutes or recirculating under the tool.
- Small Depth of Cut & Stepover: It’s better to make multiple lighter passes than one heavy pass.
- Listen to Your Machine: The sound of the cut is a critical indicator of whether your settings are correct.
- Consider Fly Cutting for Large Surfaces: For very large, flat surfaces on Delrin, a fly cutter (a single-point cutting tool mounted on an arm that rotates) can sometimes provide a better surface finish than an end mill, though it requires a different setup.
Troubleshooting Common Delrin Machining Issues
Even with the best practices, you might encounter a few snags. Here’s how to address them:
1. Melting or Gummy Chips
- Cause: Too little feed rate, too high spindle speed for the feed rate, not enough chip load, or insufficient cooling.
- Solution:
- Increase your feed rate gradually. Aim for a crisp shaving sound.
- If increasing feed rate isn’t an option or doesn’t help, slightly decrease spindle speed.
- Ensure your compressed air is properly directed and has sufficient pressure.
- Check if your chip load is too small (use the formula and recalculate if necessary).
2. Poor Surface Finish
- Cause: Tool vibration (