Dry cutting with a 1/8-inch carbide end mill is perfectly achievable and efficient for many materials. This guide will show you the proven techniques, safe practices, and essential tips to get clean, precise cuts without coolant, making it ideal for DIY and home workshops.
Are you looking to make precise cuts in plastic or soft metals without the mess of coolant? Using a 1/8-inch carbide end mill for dry cutting can seem a bit daunting at first, especially if you’re new to milling. Many beginners worry about overheating the tool, damaging their workpiece, or not getting a clean finish. But don’t worry, with the right approach, dry cutting with this small but mighty tool can be incredibly effective and surprisingly simple! We’ll walk you through exactly how to do it, step-by-step, making sure you get great results safely. Let’s dive in and master the art of dry milling!
Mastering the 1/8-Inch Carbide End Mill for Dry Cutting
The 1/8-inch carbide end mill is a versatile tool, especially popular for its ability to handle detailed work. When venturing into dry cutting – meaning machining without a liquid coolant – with such a small diameter, several key factors come into play. Carbide is a fantastic choice for dry milling because it can withstand higher temperatures than high-speed steel (HSS). However, managing heat is still crucial to prevent tool failure and achieve a good finish on your workpiece. This guide will equip you with the knowledge to confidently use your 1/8-inch carbide end mill for dry cutting, focusing on materials like PVC, acrylics, and softer aluminum alloys.
Why Choose Dry Cutting (and When It Works Best)
Dry cutting offers several advantages, particularly for hobbyists and those working in smaller home workshops. It means no messy coolant pumps, no coolant filtration systems, and no post-machining cleanup of fluid residue. For certain materials, dry cutting is not only possible but often preferred:
- Plastics: Materials like PVC, ABS, and acrylic are commonly and effectively dry cut. They tend to melt rather than chip, so proper chip evacuation and moderate feed rates are key.
- Softer Aluminum Alloys: Some aluminum alloys, especially those with lower melting points, can be dry cut successfully. The goal is to keep the cutting edge from overheating.
- Wood Composites: While often machined with specialized bits, certain dense wood composites can be milled dry.
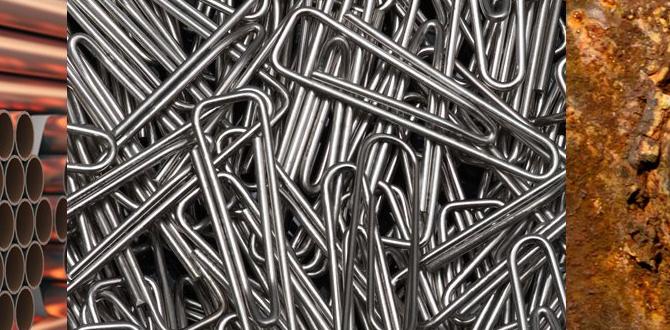
However, it’s important to know when dry cutting might not be the best option. Hardened steels, titanium, and materials requiring significant material removal (deep cuts, heavy roughing) generally benefit from or absolutely require coolant for heat dissipation and chip flushing.
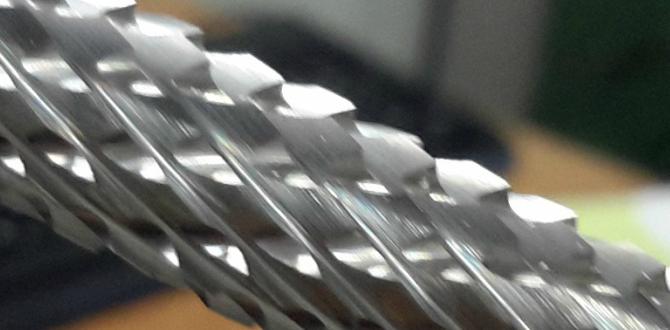
Understanding Your 1/8-Inch Carbide End Mill
A 1/8-inch carbide end mill is designed for detail and precision. When looking for one suited for dry cutting, consider these specifics:
- Carbide Grade: Look for a micro-grain or sub-micro-grain carbide. These offer better toughness and heat resistance.
- Number of Flutes: For dry cutting plastics and softer metals, fewer flutes (2 or 3) are often better. They provide more space for chips to escape, reducing the risk of chip recutting and overheating. More flutes (4+) are typically used with a coolant flood for better chip control in harder materials.
- Coatings: While not always necessary for simple dry cutting, coatings like TiN (Titanium Nitride) or TiCN (Titanium Carbonitride) can add a thin, hard layer that further improves heat resistance and reduces friction.
- Geometry: Some end mills are specifically designed for plastics with polished flutes to prevent material buildup.
- Shank: For extended reach jobs, look for an “extra long shank” option. This allows you to machine deeper into workpieces or reach around obstacles, but always be mindful of increased vibration with longer extensions.
When purchasing, you might see descriptions like “carbide end mill 1/8 inch 1/2 shank extra long for pvc dry cutting.” This is a good indicator you’re on the right track for your intended application.
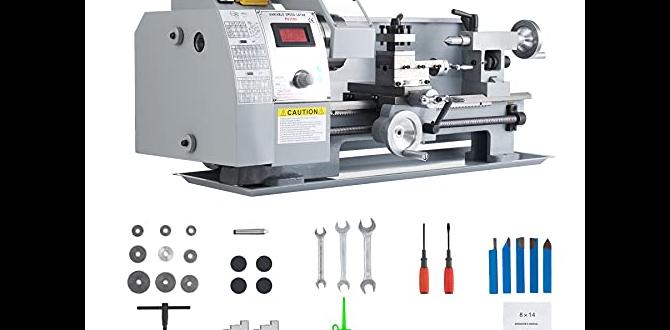
Essential Tools and Setup for Dry Milling
Before you start cutting, ensure you have the right tools and your machine is properly set up. Safety and precision go hand-in-hand.
Your Milling Machine Checklist
For dry cutting with a 1/8-inch end mill, your milling machine should be:
- Rigid: Any looseness will translate into poor surface finish and can chatter the tool.
- Clean: Dust and debris can interfere with precise movements.
- Well-lubricated: Smooth operation is key for consistent cuts.
- Equipped with a Secure Workholding Solution: Clamps, vices, or jigs that hold your workpiece firmly are non-negotiable.
Workholding: The Foundation of Good Cuts
Your workpiece needs to be absolutely still. For a 1/8-inch end mill project, you’ll likely be working with smaller pieces or intricate details. Common workholding methods include:
- Milling Vice: The most common method. Ensure the vice jaws are clean and parallel to the mill table.
- Clamps: For securing stock directly to the machine table. Use T-nuts and bolts appropriately.
- Fixtures: Custom-made jigs for specific parts or repetitive operations.
Always ensure your clamps are not obstructing the tool path!
Measuring and Setting Your Zero Point
Precision starts with knowing where you are. You’ll need:
- Edge Finder or Probe: To accurately locate the edge of your workpiece relative to the spindle.
- Dial Indicator: To check for runout in your collet or tool holder. Minimal runout (ideally less than 0.0005 inches) is crucial for small diameter tools.
- Calipers or Micrometer: For measuring your workpiece and verifying dimensions.
Setting Up the End Mill
A quality collet system is highly recommended for small end mills. A solid ER collet chuck will provide the best grip and minimize runout.
- Clean the Collet and Tool Holder: Ensure no dust or grease is present.
- Insert the End Mill: Chuck the 1/8-inch carbide end mill securely into the collet. Ensure it’s seated properly for the required cutting depth. Do not extend the tool unnecessarily; a longer extension increases vibration and the risk of breakage.
- Tighten the Collet: Use the appropriate wrench to tighten the collet nut onto your tool holder.
- Install the Tool Holder: Securely mount the tool holder with the end mill into the milling machine’s spindle.
The Proven Dry Cutting Technique: Step-by-Step
Now, let’s get to the actual cutting. This process emphasizes controlling heat and clearing chips effectively.
Step 1: Material Preparation and Fixturing
- Ensure your workpiece is clean and free of any debris.
- Securely clamp your workpiece using the method described above (vice, clamps, etc.). Double-check that it cannot move during machining.
- Set your machine’s zero point (X, Y, and Z axes) accurately relative to your workpiece.
Step 2: Setting Cutting Parameters (Speeds and Feeds)
This is arguably the most critical part of dry cutting. For a 1/8-inch carbide end mill:
- Spindle Speed (RPM): For plastics and soft aluminums, start with a moderate to high RPM. A good starting point for 1/8-inch carbide in PVC might be 10,000-15,000 RPM. For softer aluminum, you might start lower, around 6,000-10,000 RPM. Always consult the end mill manufacturer’s recommendations if available.
- Feed Rate (IPM – Inches Per Minute): This is how fast the tool moves through the material. For dry cutting, especially in plastics, a faster feed rate with a lighter depth of cut is often better. This helps “sheer” the material rather than rub and melt it.
- For PVC/Acrylic: Start around 10-20 IPM. You want to hear a “shaving” sound, not a rubbing or squealing sound.
- For Soft Aluminum: Start around 8-15 IPM.
- Depth of Cut (DOC): For a 1/8-inch end mill, especially when dry cutting, keep the depth of cut shallow.
- Radial Depth of Cut (width of the cut): For pocketing or profiling, use a small stepover, perhaps 20-40% of the tool diameter (0.025 to 0.050 inches).
- Axial Depth of Cut (how deep into the material): Start with very light cuts, like 0.010 to 0.030 inches, especially when plunging. You can increase this gradually as you gain confidence and observe the chip formation.
A handy rule of thumb for calculating feeds and speeds can be found on resources like Machinery Lubricants, though remember that carbide and dry cutting often require adjustments for heat.
Step 3: Performing the Cut
Plunging In:
When beginning a cut that goes straight down into the material (plunging), do so slowly and with a very shallow depth of cut. Avoid plunging straight down at your rapid feed rate. Instead, feed down gently. For plastics, a helical interpolation (ramping into the material in a spiral motion) is often much better than plunging straight down, as it reduces heat buildup.
Milling Operations:
Move the end mill through the material at your set feed rate. Listen to the sound. A crisp, shaving sound indicates you’re cutting effectively. A high-pitched squeal or a dull rumbling suggests you’re rubbing, overheating, or the feed rate is too slow. In these cases, stop the machine and adjust.
Chip Evacuation:
This is CRITICAL for dry cutting. Small chips can easily recut and melt, gumming up the tool and workpiece.
- Use Compressed Air: Aim a stream of compressed air at the cutting zone as you machine. This helps blow chips away from the tool. Sometimes, directing the air from the side or even the top can be more effective.
- Peck Drilling (for pockets): If you are cutting a deep pocket, program “peck drilling” into your CAM software or manually retract the tool slightly every few passes. This allows chips to clear out of the pocket.
- Clearance:** Ensure your machine’s coolant nozzle is out of the way or repositioned to blow chips out of the cut.
Check out these tips from the US Trade on chip evacuation, which is paramount in milling.
Step 4: Monitoring and Adjusting
Keep a close eye on:
- The Cutting Sound: Listen for changes.
- Chip Formation: Are they powdery (too much friction), stringy (plastically deforming, melting), or clean shavings? For PVC, you want small, brittle chips.
- Workpiece Temperature: You can gently touch a part of the workpiece away from the cut after stopping the machine. If it’s too hot to touch, you’re generating too much heat.
- Cut Quality: Look for melting, glazing, or a poor surface finish.
If you see signs of melting or excessive heat, immediately stop the machine. Reduce your feed rate slightly, or decrease your depth of cut. You might also need to increase your spindle speed if you’re cutting too slowly and rubbing.
Step 5: Finishing the Job
Once you’ve completed your cuts, turn off the spindle. Carefully remove the workpiece. Use a brush and compressed air to clean away any residual chips. Inspect your work for accuracy and surface quality.
Advanced Tips for 1/8-Inch Dry Cutting
Once you’ve got the basics down, you can refine your technique further.
Understanding Material Behavior
Different materials react differently to dry milling. For example:
- PVC: Tends to melt easily. Fast feed rates, shallow depths, and good chip evacuation are critical.
- Acrylic: Similar to PVC, but can crack if stressed or overheated. Polished flute end mills can help prevent sticking.
- ABS: Melts readily. Similar precautions as PVC.
- Delrin (Acetal): Machines well dry, as it’s somewhat self-lubricating.
- Soft Aluminum (e.g., 6061-T6): Can be prone to “chip welding” – where chips stick to the cutting edge. A slightly slower RPM and a more aggressive feed rate can help shear the material cleanly before it has a chance to weld.
Using Air Blast Correctly
Don’t underestimate the power of compressed air. Experiment with the angle and force. Sometimes, a strong blast from one side is better than a gentle stream from the top. For very small parts, a vacuum system can also help draw chips away.
Consider Different End Mill Geometries
While we’ve focused on standard end mills, variations exist:
- O-Flute (Single Flute): Often used for plastics. The single flute with a large chip gullet is excellent for clearing material and preventing melting.
- Compression Bits (for wood/composites): While not for dry metal cutting, these can be relevant for some hobbyist DIY projects.
- Ball End Mills: For creating curved surfaces or fillets.
Coolant Alternatives (When Needed)
If you find you’re pushing a material too hard for effective dry cutting, but don’t want a full coolant system, some alternatives exist:
- Mist Coolant Systems: These spray a fine mist of coolant and air directly onto the cutting zone. They use much less fluid than flood systems and are easier to manage for home shops. However, a 1/8-inch end mill still produces very small chips, so chip evacuation remains paramount.
- Lubricants: For certain aluminum alloys, a drop of cutting fluid applied manually sparingly to the cutting edge can help prevent chip welding. However, this is less effective for heat dissipation and requires constant attention.
Feed Rate Optimization: The “Shhh” Sound
A common trick for achieving optimal feed rates in plastics is to listen for the sound. You want a consistent “shhh” or “swish” sound, like air moving through a small passage. This indicates the tool is cutting material cleanly and efficiently without excessive rubbing or melting.
Common Issues and Troubleshooting
Even with the best intentions, you might encounter problems. Here’s how to fix them:
Problem: Melting and Gunking Up the End Mill
- Cause: Feed rate too slow, spindle speed too high for the feed rate, insufficient chip evacuation, or too much depth of cut.
- Solution:
- Increase the feed rate.
- Decrease the spindle speed.
- Increase the compressed air blast.
- Reduce the depth of cut.
- Ensure you are using an end mill with sufficient chip clearance (e.g., 2 or 3 flutes).
Problem: Poor Surface Finish (Rough or Scalloped)
- Cause: Excessive runout in the spindle or tool holder, worn cutting edges, inconsistent feed rate, or workpiece vibration.
- Solution:
- Check and minimize spindle and collet runout (ideally under 0.0005″).
- Inspect the end mill for wear and replace if necessary.
- Ensure a steady, consistent feed rate.
- Improve workholding to prevent vibration.
Problem: End Mill Breakage
- Cause: Feed rate too high, depth of cut too aggressive, plunging too fast, material binding, or tool extension too long leading to vibration.
- Solution:
- Reduce feed rate.
- Reduce depth of cut.
- Plunge more slowly or use ramping.
- Ensure workholding is secure and material isn’t shifting.
- Minimize the stick-out (extension) of the end mill from the collet.
Problem: Chatter or Vibration
- Cause: Machine rigidity issues, worn spindle bearings, loose workholding, tool extension too long, or incorrect cutting parameters (e.g., feed