Carbide end mills are crucial for achieving incredibly precise cuts, especially when working with demanding materials or aiming for tight tolerances in your projects. They offer superior hardness and wear resistance, ensuring accuracy and a clean finish every time.
So, you’re looking to get those super-accurate cuts on your milling machine, huh? It’s a common challenge for beginners (and even some experienced folks!) to achieve that level of precision. You might be trying to make a part that fits snuggly into another, or perhaps you just need a really clean edge. The good news is, with the right tools and a little know-how, you can nail these tight tolerances. Today, we’re diving into one of the unsung heroes of precision machining: the humble carbide end mill. We’ll explore why it’s so good at what it does and how you can use it to elevate your projects. Get ready to make your parts fit like a dream!
Why Carbide End Mills Rule for Tight Tolerance Machining
When we talk about “tight tolerances,” we mean keeping the difference between the specified size and the actual size of your part incredibly small. Think fractions of a millimeter or even thousandths of an inch! Achieving this level of accuracy isn’t just about a steady hand; it’s heavily dependent on the quality and properties of your cutting tools. This is where carbide end mills really shine.
The Magic Behind Carbide
Carbide, specifically tungsten carbide, is a ceramic material that’s famously hard and incredibly durable. Here’s why that’s a big deal for milling:
- Extreme Hardness: Carbide is significantly harder than traditional high-speed steel (HSS). This means it can cut through tough materials without deforming or losing its sharp cutting edge easily.
- Heat Resistance: Machining generates heat. Carbide can withstand much higher temperatures than HSS before it starts to soften. This is vital because a tool that softens won’t cut accurately and can even ruin your workpiece.
- Wear Resistance: Because it’s so hard, carbide wears down much slower than other tool materials. This consistent wear pattern means it maintains its cutting dimensions for longer, which is absolutely essential for repeatable, high-tolerance machining.
- Rigidity: Carbide tools are generally more rigid than HSS. Less deflection means a more predictable and accurate cut, directly contributing to tighter tolerances.
What is an End Mill, Anyway?
Before we go deeper, let’s clarify what an end mill is. Think of it as a cutting tool that spins on a milling machine to remove material from a workpiece. Unlike a drill bit which mainly cuts downwards, an end mill typically cuts sideways, or can be used for plunging (moving downwards). They come in various shapes, sizes, and with different numbers of “flutes” (the spiraling cutting edges).
When aiming for tight tolerances, the choice of end mill becomes paramount. A standard HSS end mill might work for general shaping, but for those precise dimensions, a carbide end mill is often the only tool for the job, especially when dealing with materials that are tough or require fine detail.
Decoding Carbide End Mill Specifications: What You Need to Know
Buying the right end mill can feel like deciphering a secret code. But once you understand the key specs, it’s straightforward. For hitting tight tolerances, paying attention to these details is crucial.
Diameter and Shank Size
This is probably the most obvious. End mills are measured by their diameter (how wide the cutting head is) and their shank diameter (how thick the part that goes into the tool holder is).
- Diameter: This determines the width of the slot or the size of the feature you’re cutting. For fine details and tight tolerances, smaller diameters are often needed.
- Shank Diameter: This needs to match your machine’s tool holder. Common sizes include 1/4 inch, 1/2 inch, and 8mm, 12mm for metric machines. A larger shank generally provides more rigidity.
Length: The ‘Extra Long’ Factor
The length of an end mill, especially the “effective cutting length” (how far down the flutes go), is important for reaching into certain areas or for clearance. An “extra-long” end mill allows you to machine deeper features or reach across larger workpieces without obstruction. For tight tolerance work, sometimes a longer reach is needed to avoid multiple setups which can introduce errors.
Number of Flutes
The flutes are the helical grooves on the cutting surface. They carry away chips and are the cutting edges.
- 2 Flutes: These are great for slotting and deep plunging because they offer maximum chip clearance. This is good for materials like plastics and aluminum, and can help prevent chip packing which can ruin a tight tolerance job.
- 3-4 Flutes: These are more general-purpose and offer a good balance between cutting efficiency and surface finish. They can be effective for many materials when chip evacuation isn’t the primary concern or can be managed.
- More Flutes (6+): These are typically used for finishing passes where chip evacuation is less critical, and a very fine surface finish with high precision is desired.
For hitting tight tolerances, especially in materials that might be prone to melting or gumming up, like certain plastics, a 2-flute end mill is often a great choice because of its superior chip evacuation capabilities. This prevents re-cutting chips and overheating.
Coating
While many carbide end mills are left uncoated, some come with special coatings that can improve performance, hardness, and chip control. For very demanding applications or materials, a TiN (Titanium Nitride) or TiAlN (Titanium Aluminum Nitride) coating can extend tool life and improve surface finish, contributing to accuracy. However, for many common plastics and softer metals, uncoated carbide is perfectly sufficient.
Choosing the Right Carbide End Mill for Specific Materials
The material you’re cutting significantly impacts which end mill is best. For tight tolerances, you need a tool that works harmoniously with your workpiece.
Carbide End Mill for Polycarbonate
Polycarbonate is a popular plastic known for its toughness and clarity. However, it can be prone to melting and chipping.
- Best Choice: A 2-flute, uncoated or TiN-coated carbide end mill with a polished flute is often ideal.
- Why: The 2 flutes provide excellent chip evacuation, preventing the plastic from melting and gumming up the tool. A polished flute further reduces friction and sticking. The sharp cutting edges of carbide easily slice through the plastic, minimizing burrs. For very precise cuts, an 1/8 inch carbide end mill with a 1/2 inch shank can offer excellent control and detail.
- Considerations: Use lower spindle speeds and higher feed rates to prevent heat buildup. A coolant mist can also be beneficial. Don’t try to remove too much material in a single pass.
Carbide End Mill for Aluminum
Aluminum is a softer metal, but it can also be “gummy” and tend to stick to cutting tools.
- Best Choice: Again, a 2-flute or 3-flute carbide end mill is often preferred, especially those designed for aluminum (often with a high rake angle).
- Why: The flutes need to handle the aluminum chips effectively. A sharp, hard carbide tool slices cleanly. For tight tolerances, a specialized aluminum end mill with polished flutes is excellent.
- Considerations: Using a cutting fluid or lubricant is highly recommended to prevent material buildup and improve surface finish.
Carbide End Mill for Steels and Other Hard Metals
When working with steels, stainless steels, or other harder alloys, carbide is almost always the go-to material for end mills, especially for precision work.
- Best Choice: 4-flute or higher flute count carbide end mills are common. Coatings like TiAlN are very beneficial here.
- Why: These materials require robust tools that can withstand heat and pressure. Carbide’s inherent properties are essential. More flutes can provide a better surface finish.
- Considerations: You’ll likely need flood coolant for these operations to manage heat and lubricate the cut. Machining parameters (speed and feed) need to be carefully chosen based on the specific alloy.
Getting the Most Out of Your Carbide End Mill: Best Practices for Tight Tolerance
Having the right tool is only half the battle. How you use it makes all the difference for accuracy.
1. Secure Your Workpiece Rock-Solid
This is non-negotiable for tight tolerances. Any movement of your workpiece during machining will ruin your precision.
- Clamping: Use sturdy clamps, vises, or fixtures. Ensure they are positioned to avoid the cutting path and provide strong, even pressure.
- Machining Aids: For delicate parts, consider using parallels, toe clamps, or specialized fixturing.
2. Use a Stiff Tool Holder and Machine Setup
A wobbly tool holder or a loose spindle will undo all your efforts.
- Tool Holder: Ensure your tool holder (e.g., ER collet chuck) is clean, in good condition, and provides a rigid grip on the end mill shank.
- Machine Condition: Make sure your milling machine’s ways are properly lubricated and the gibs are adjusted correctly. There should be no play in the axes.
3. Master Your Feeds and Speeds
This is where you truly control the cutting action.
- Chip Load: This is the thickness of the chip you’re removing with each tooth of the end mill. For tight tolerances, a smaller chip load is usually better. It leads to a finer surface finish and less stress on the tool and workpiece.
- Spindle Speed: This should be set in conjunction with your feed rate and the material you’re cutting. Too fast a speed can cause overheating and tool wear; too slow can lead to poor chip formation.
- Online Calculators: Utilize resources like the Machinery Historical Society resources or manufacturer charts to find starting points for feeds and speeds. Always refine based on observation.
4. Take Light, Incremental Passes
Don’t try to hog out material in one go. For precision, multiple shallow passes are key.
- Depth of Cut (DOC): For tight tolerance finishing passes, a very shallow DOC is often used, sometimes as little as 0.001″ to 0.005″.
- Stepover: This is the amount the end mill moves sideways for each pass when milling a surface. A smaller stepover (e.g., 20-40% of the tool diameter) results in a smoother surface finish and better accuracy, but takes longer.
5. Chip Evacuation is Critical, Especially with Plastics
As mentioned, preventing chip buildup is vital.
- Air Blast/Coolant: Use compressed air, a mist coolant, or a flood coolant system to blow chips away from the cutting zone.
- Peck Drilling/Plunging: If plunging, use the machine’s peck drilling function to periodically retract the tool and clear chips.
- Orientation: Sometimes, orienting your part or the cutting path to help chips naturally fall away can make a big difference.
6. Understand Your Machine’s Capabilities
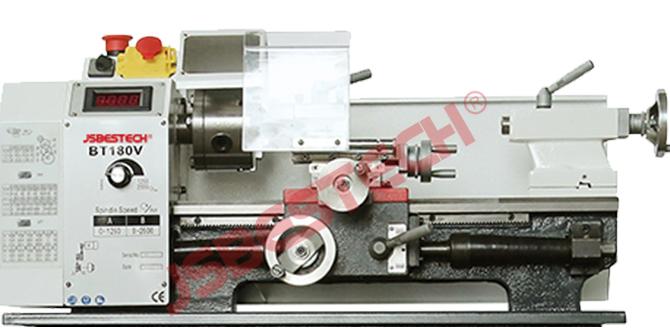
Not all machines are created equal. A small hobby CNC or a manual mill might have limitations in rigidity and accuracy that affect what tolerances you can achieve. Learn your machine’s quirks and limitations.
Example Scenario: Milling a Precise Slot for a Polycarbonate Project
Let’s imagine you need to mill a slot that is exactly 0.250 inches wide and 0.100 inches deep in a sheet of polycarbonate, and this slot needs to be very clean with no burrs.
Tools Needed:
- A precise milling machine (manual or CNC)
- A solid vise or clamping system
- A clean, sharp 1/8 inch diameter, 2-flute, solid carbide end mill
- A 1/2 inch shank is fine if your tool holder accommodates it; a smaller shank matched to your holder is also acceptable. Consider a ball-nose or square end mill depending on the slot’s internal corners. For a square slot, a square end mill is best.
- Safety glasses and appropriate PPE
- Compressed air or a mist coolant system
- A caliper or micrometer for measurement
Steps:
- Programming/Setup: If using a CNC, program the toolpath ensuring a shallow depth of cut and a moderate stepover. If manual, set up your DROs (Digital Readouts) and plan your cuts.
- Secure Polycarbonate: Clamp the polycarbonate sheet firmly but without deforming it. Use soft jaws if necessary.
- Set Tool Length: Accurately set the Z-axis height of your end mill.
- First Pass (Roughing): Use a relatively conservative feed rate and spindle speed appropriate for polycarbonate (e.g., 10,000-15,000 RPM, 20-30 inches per minute feed rate). Take a depth of cut of around 0.050 inches. Use air blast to clear chips.
- Second Pass (Finishing): This is crucial for tolerance. Reduce the depth of cut to the final 0.100 inches. You might also slightly increase the feed rate or adjust the spindle speed. The goal here is a clean, precise cut. Ensure good chip evacuation.
- Measuring: After the cut, carefully clear away any plastic dust. Use your calipers to measure the width of the slot at multiple points. For a 0.250 inch target, you might aim for 0.2505″ to allow for slight variations and ensure parts fit.
- Adjustments: If the slot is too narrow, you might need a slightly larger end mill or a more aggressive final pass (carefully!). If too wide, it may indicate tool deflection or excessive feed.
This methodical approach, focusing on controlled passes and effective chip management, is what allows carbide end mills to achieve those difficult tight tolerances, even in materials like polycarbonate.
Table: Carbide End Mill Properties vs. HSS
To really see why carbide is preferred for precision, let’s compare their key properties:
| Property | Carbide (Tungsten Carbide) | High-Speed Steel (HSS) |
|---|---|---|
| Hardness (HRC) | 85-93+ | 62-66 |
| Heat Resistance (at approx. 600°C) | Retains High Hardness | Loses Significant Hardness |
| Wear Resistance | Excellent | Good |
| Stiffness/Rigidity | High | Moderate |
| Brittleness | More Brittle (requires careful handling) | Tougher, Less Brittle |
| Cost | Higher | Lower |
| Best For | Hard materials, high-volume production, tight tolerances, high speeds | Softer materials, lower volume, general purpose, less demanding tolerances |
This table clearly illustrates the superior performance characteristics of carbide for demanding machining tasks where precision and durability are paramount.
Maintaining Your Carbide End Mills for Longevity and Accuracy
Even the best carbide end mills will lose their edge and accuracy over time. Proper care ensures they keep performing.
Inspection is Key
Before and after each use, visually inspect your end mill.
- Chips and Nicks: Look for any chipping on the cutting edges, nicks, or signs of excessive wear. These can negatively impact your finish and accuracy.
- Build-up: Check for any material that has adhered to the flutes. This is especially common with softer metals and plastics.
Cleaning
Keeping your end mills clean is vital.
- Solvent Cleaning: Use a suitable solvent (like isopropyl alcohol or a specialized metal cleaner) to remove residue.
- Bristle Brushes: A stiff nylon or brass brush can help dislodge stubborn debris from the flutes. Avoid steel brushes, which can scratch the carbide.
Storage
Proper storage prevents damage.
- Tool Holders/Organizers: Store end mills in dedicated tool holders or organizers. This prevents them from knocking against each other, which can cause chipping.
- Dry Environment: Keep them in a dry environment to prevent corrosion, although carbide itself is highly resistant.
When to Replace
Don’t push a dull end mill too far.
- Degrading Finish: If you start noticing a rougher surface finish or increased burring, it’s a sign the tool is getting dull.
- Increased Cutting Force: If you have to push harder or the machine sounds strained, the tool is likely dull.
- Dimension Issues: If parts are no longer coming out to size, the end mill is probably worn beyond its useful dimension.
Replacing a worn end mill before it causes scrap parts or damages your workpiece