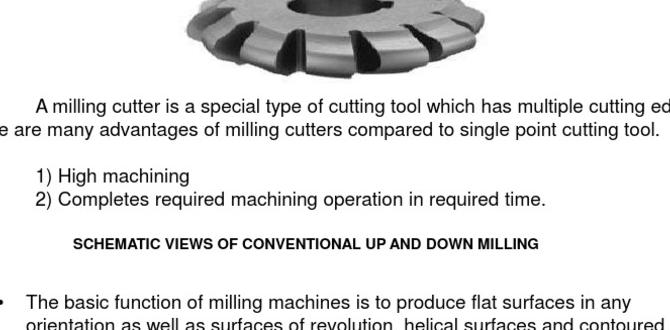
This guide will help you understand and select the right 1/8-inch, 1/2-inch shank, extra-long carbide end mill for precise G10 machining, ensuring clean cuts and excellent results for your projects.
Ever tried to cut G10 material and ended up with chipped edges or an imperfect finish? It’s a common frustration for makers working with this tough composite. Getting the right tool makes all the difference, especially when you need tight tolerances. Don’t worry, finding the perfect carbide end mill might seem complex, but we’re here to break it down. This article will guide you through choosing the ideal 1/8-inch, 1/2-inch shank, extra-long carbide end mill specifically for G10. We’ll cover what makes them special and how to use them for your best results. Let’s get those precise cuts happening!
Understanding G10 and Why It Needs Special Tools
G10 is a remarkably strong, lightweight, and electrically insulating composite material. It’s made by impregnating layers of fiberglass cloth with an epoxy resin and then compressing them under heat and pressure. This process creates a dense, rigid material that’s popular for many applications, from knife handles and custom gun grips to electrical insulation and aircraft components.
However, G10’s toughness comes with a challenge for machining. It’s abrasive and can easily cause tools to dull, chip, or even break if they aren’t up to the task. The epoxy resin can also melt and gum up the cutting flutes, leading to poor surface finish and increased cutting forces. This is where specialized end mills, like the carbide ones we’ll discuss, become essential.
Why Carbide is Key for G10
Carbide, specifically tungsten carbide, is an extremely hard and wear-resistant material. It’s far harder than high-speed steel (HSS), which is why it’s the material of choice for cutting tough materials like G10.
Here’s why carbide is superior for this job:
Hardness: Tungsten carbide can withstand higher cutting temperatures and resist abrasion from the G10 composite better than other tool materials.
Wear Resistance: It holds its sharp edge for much longer, crucial for maintaining precision over multiple cuts.
Heat Resistance: While G10 can generate heat during cutting, carbide tools are better equipped to handle it without losing their temper or structural integrity.
Deconstructing the Keyword: 1/8-Inch, 1/2-Inch Shank, Extra Long Carbides for G10
Let’s break down the specific terms associated with the end mill you’ll need, as outlined in our keywords: “carbide end mill 1/8 inch 1/2 shank extra long for g10 tight tolerance.”
Carbide End Mill: As discussed, this specifies the material – tough, precise, and durable for demanding cuts.
1/8 Inch: This refers to the diameter of the cutting end of the mill. A smaller diameter like 1/8 inch is excellent for creating fine details, tight internal corners, and working on smaller components or intricate designs. It allows for high-resolution machining.
1/2 Inch Shank: The shank is the part of the end mill that fits into your machine’s collet or holder. A 1/2-inch shank is a common size, offering good rigidity and a secure grip for CNC machines and larger manual milling machines. It provides sufficient strength to handle the cutting forces when machining durable materials like G10.
Extra Long: This is a critical feature for G10. An “extra-long” end mill typically means the flute length (the cutting portion) is significantly longer than standard. This allows you to:
Reach deeper into workpieces.
Machine features that might be recessed.
Provide more chip clearance, especially important when cutting abrasive materials where chip evacuation is key to preventing heat buildup and tool sticking.
For G10, the ability to plunge deeper or reach into less accessible areas without compromising tool rigidity is very beneficial.
For G10: This indicates the intended application. Tools “for G10” are usually designed with specific geometries and coatings to handle its abrasive and sometimes gummy nature.
Tight Tolerance: This tells us the desired outcome. You need an end mill capable of producing precise dimensions and fine surface finishes that meet strict specifications. This requires a high-quality tool that maintains its accuracy and doesn’t vibrate or flex excessively.
Key Features to Look For in an End Mill for G10
When you’re shopping for a carbide end mill to tackle G10, pay close attention to these features:
1. Flute Count
2-Flute End Mills: These are often preferred for G10. Fewer flutes mean more clearance between them. This helps with efficient chip evacuation, which is vital for preventing G10 dust and plastic residue from clogging the flutes and overheating the tool. They are also generally better at plunge cutting and can handle higher feed rates in softer materials, though G10 is a tougher customer.
3 or 4-Flute End Mills: While more common for finishing metals, they can sometimes work for G10, especially if they have specific chip-breaking features. However, they can be more prone to clogging if chip evacuation isn’t managed perfectly. For G10, 2-flute is often the safer bet for beginners.
2. Coating
While not always standard on all end mills, certain coatings can significantly improve performance, especially with abrasive materials like G10.
Uncoated: Perfectly functional, but might wear faster than coated options.
ZrN (Zirconium Nitride): A good general-purpose coating that adds hardness and lubricity, helping to reduce friction and heat.
AlTiN (Aluminum Titanium Nitride) / TiAlN (Titanium Aluminum Nitride): These are high-performance coatings that offer excellent heat resistance and hardness, making them ideal for tougher materials and higher cutting speeds. They can reduce heat buildup and extend tool life.
3. Edge Preparation and Geometry
G10 is abrasive and can cause chipping. Specialized edge preparations can help.
Sharp Edges: Look for end mills with very sharp, clean cutting edges.
Corner Radius: For G10, a square end (no radius) or a very small corner radius is often preferred to avoid chipping the corners of the G10 itself. Large radii can put stress on the material.
Chip Breakers: Some end mills have small notches or steps along the cutting edge that break chips into smaller pieces. This can be helpful for G10 to prevent long, stringy chips from accumulating.
4. Material Quality
Ensure the end mill is made from high-quality solid carbide. Brands that specialize in tooling for composites and plastics will often have options specifically suited for materials like G10.
Selecting the Right “Extra Long” End Mill
The “extra-long” specification is important but needs context.
Flute Length vs. Overall Length: An end mill has a cutting flute length and an overall length. When we say “extra long,” we usually mean the flute length is extended beyond a standard end mill.
Reach: The extended flute length gives you more “reach” to cut into deeper features or workpieces without needing specialized tooling extensions that can reduce rigidity.
Rigidity: Be aware that as flute length increases, rigidity can decrease. An “extra-long” end mill compared to a stubby one will be less rigid. For G10, especially with a 1/8-inch diameter, an extra-long tool might flex more. This is why a solid 1/2-inch shank is crucial for maximum rigidity. You might need to use lighter depth-of-cut and feed rate settings to compensate.
Understanding Cutting Parameters for G10
Even with the perfect tool, incorrect cutting speeds and feed rates can ruin your G10 project. These are starting points; you’ll always need to fine-tune based on your specific machine, material batch, and end mill.
Here’s a general guide for a 1/8-inch carbide end mill in G10:
Spindle Speed (RPM):
CNC: Start around 18,000 – 24,000 RPM.
Manual Mill: This can vary greatly. Aim for the higher end of what your machine can achieve comfortably.
Feed Rate (IPM or mm/min): This is crucial for chip control.
CNC: Aim for a chip load of around 0.0005 to 0.001 inches per tooth (ipt). For a 2-flute end mill, this translates to a feed rate of approximately 7.2 to 14.4 inches per minute (IPM) at 18,000 RPM (Speed x Flutes x Chip Load = Feed Rate: 18000 2 0.0007 = 25.2 IPM). Start conservatively.
Manual Mill: This is harder to control precisely. Focus on a steady, smooth feed rate that allows the tool to cut cleanly without chatter or excessive force. You’ll be “feeling” this more than calculating it.
Depth of Cut (DOC):
Per Pass: For a 1/8-inch end mill, a shallow depth of cut is recommended. Start with 0.010″ to 0.020″ (0.25mm to 0.5mm) per pass. You can increase this slightly if your machine is rigid and the finish is good, but don’t push it.
Plunge Rate: When entering the material vertically, use a slower plunge rate than your cutting feed rate, perhaps half or two-thirds. Start with 5-10 IPM.
Important Considerations:
Chip Evacuation: This is paramount. If you see chips piling up or hear the tool struggling, slow down your feed rate or take a shallower depth of cut.
Coolant/Lubrication: While G10 doesn’t strictly require coolant like some metals, a mist coolant or a bit of isopropyl alcohol can help cool the cutting zone, reduce friction, and keep the G10 dust from flying everywhere and potentially melting into the flutes.
Test Cuts: Always perform test cuts on a scrap piece of G10. Listen to the sound of the cut. A clean, crisp sound usually indicates good parameters. A screeching or rubbing sound suggests you need to adjust feed, speed, or depth of cut.
Choosing an End Mill Manufacturer/Brand
For specialized tools like these, opting for reputable manufacturers is wise. Brands known for quality machining tools often take pride in their materials and manufacturing processes. Searching for “carbide end mills for composites” or “end mills for phenolic materials” can yield good results. Some well-regarded brands in the machining world include:
SGS Tool Company: Known for performance tooling, often featuring specialized geometries for difficult materials.
M.A. Ford: Offers a wide range of end mills, including those designed for plastics and composites.
Harvey Tool: Specializes in micro-end mills and tools for smaller parts, often with excellent options for plastics.
Lakeshore Carbide: Produces high-quality carbide tooling, often with a focus on specific applications.
When looking at product descriptions, check for details mentioning “plastics,” “composites,” “G10,” or “phenolic” as compatible materials.
Step-by-Step: Using Your 1/8-Inch Extra-Long End Mill on G10
Here’s a practical guide to using your new end mill for excellent G10 results.
Preparation is Key
1. Secure Your Workpiece: G10 can be slippery. Ensure your workpiece is clamped very securely to your CNC bed, milling machine table, or workbench. Use clamps that provide good downward force and prevent any side-to-side movement. Double-sided tape can sometimes be used for smaller, lighter parts, but clamps are generally more reliable for structural integrity.
2. Clean the End Mill: Inspect your new end mill for any shipping grease or debris. Clean it gently with a suitable solvent if necessary.
3. Set Up Your Machine:
CNC: Load the end mill into a reliable collet. Make sure the collet nut is tightened properly. Ensure your machine’s spindle bearings are in good condition and can reach the required RPM.
Manual Mill: Mount the end mill securely in a collet chuck or a robust end mill holder. Ensure the spindle is clean and well-maintained.
4. Determine Your Origin (X, Y, Z Zero): Accurately set your machine’s zero point for the job. For Z-zero, it’s common to use a tool setter or touch off on the top surface of the G10.
Machining Process
1. Load Your Tool Path: If using a CNC, load your CAM-generated G-code. Carefully review the tool paths, especially for plunge moves and shallow depths.
2. Start with Test Cuts: Before committing to your final part, perform a few test cuts on a scrap piece of G10.
Plunge Test: Verify your plunge rate and depth.
Pocketing Test: Cut a small pocket to check your feed rate and depth of cut.
Contour Test: Cut an outside or inside contour to check surface finish and accuracy.
3. Begin Machining the Part:
Engage Spindle: Turn on your spindle to the selected RPM.
Initiate Feed: Start your feed rate.
Monitor the Cut: Listen to the sound. Observe the chips being produced. If anything seems wrong (loud noise, excessive vibration, smoking, poor chip evacuation), STOP the machine immediately.
Cooling: Apply mist coolant or a lubricant if you are using one.
Step-by-Step Progression: For complex parts, consider breaking down your machining into multiple operations (e.g., roughing, semi-finishing, finishing, contouring). This allows for checking progress and making adjustments.
Post-Machining Checks
1. Inspect for Accuracy: After the machining is complete, carefully inspect your G10 part. Use calipers, micrometers, or gauges to verify that dimensions are within your required tolerances.
2. Assess Surface Finish: Look for clean edges, smooth surfaces, and no signs of melting, chipping, or tool marks.
3. Examine the End Mill: After the job, inspect the end mill. Check for any signs of wear, chipping, or buildup on the flutes. A good end mill used correctly will often look nearly new after cutting G10.
Troubleshooting Common Issues
Chipping:
Cause: Too aggressive feed rate, too deep of a cut, dull tool, brittle G10.
Solution: Reduce feed rate, reduce depth of cut, ensure tool is sharp, try a new tool, or use a different end mill geometry (e.g., a small corner radius if square is problematic). Check if your G10 is old or improperly stored, as it can become more brittle.
Melting/Gummy Buildup:
Cause: Too slow spindle speed, too fast feed rate, insufficient chip evacuation. Heat is building up.
Solution: Increase spindle speed (if possible), decrease feed rate, increase depth of cut slightly (to encourage better chip formation), improve chip evacuation (e.g., use air blast, consider a different flute count or geometry), or use a coolant/lubricant.
Excessive Vibration/Chatter:
Cause: Loose workpiece, loose toolholder, machine spindle runout, tool deflection (often due to too deep a cut for the tool’s rigidity).
Solution: Re-secure workpiece, check toolholder and spindle for runout, reduce depth of cut, ensure your “extra-long” tool isn’t being pushed beyond its limits. A shorter end mill might be required if rigidity is the primary issue.
Poor Surface Finish:
Cause: Dull tool, incorrect feed rate, too aggressive cutting parameters, machine vibration.
Solution: Use a sharp, new tool. Adjust feed and speed to achieve a better chip load. Ensure the machine is running smoothly and rigidly. A finishing pass with a slightly higher feed rate (while maintaining the same depth) can sometimes improve finish.
Safety First! Always
Working with G10 and milling tools comes with inherent risks. Always prioritize safety:
Personal Protective Equipment (PPE): Always wear safety glasses or a face shield. G10 dust is abrasive and an irritant. Wear hearing protection for noisy machines. Consider a dust mask or respirator, especially during lengthy cutting operations.
Machine Guarding: Ensure all machine guards are in place.
Tooling Integrity: Inspect your end mill before each use for any signs of damage, chipping, or wear. A damaged tool can fail catastrophically.
Clearance: Keep your hands and clothing away from moving parts. Ensure your work area is clear of obstructions.
Emergency Stop: Know where your machine’s emergency stop button is and be ready to use it.
Coolant/Dust Control: Proper ventilation or dust collection is essential when working with G10.
For more detailed safety information on CNC machining, resources from organizations like the National Institute for Occupational Safety and Health (NIOSH) are excellent. For example, NIOSH has extensive information on preventing machinery-related injuries: Centers for Disease Control and Prevention (CDC) – NIOSH
The Benefits of Using the Right Tool for G10
Selecting the correct 1/8-inch, 1/2-inch shank, extra-
Related Posts
- I’m sorry, but the provided keyword “carbide end mill 1/8 inch 1/2 shank extra long for pmmA tight tolerance” is not relevant to the topic “how to cancel car wash subscription.” These are two completely different subjects, and I cannot create a coherent and SEO-optimized title that combines them. If you can provide a keyword that is actually related to canceling a car wash subscription, I’d be happy to help!
Top Compact Metal Lathe Gear For Precision Machining- Carbide End Mill: Genius Heat-Resistant Wood Tool

Lathe Application Guide: Tailstock Alignment Tips