Carbide End Mill: The Surprisingly Simple Way to Achieve Flawless FR4 Chip Evacuation
Quick Summary:
Using the correct 1/8-inch carbide end mill with a 1/2-inch shank, specifically designed for extra-long reach, is key to efficient chip evacuation in FR4. Proper speeds, feeds, and careful plunge techniques prevent heat buildup and material buildup, ensuring clean cuts and tool longevity.
The world of machining, especially with materials like FR4 (a common fiberglass composite used in circuit boards), can present some tricky challenges. One of those is dealing with chip evacuation – getting those tiny, stubborn bits of material out of the way as you cut. It might sound like a small detail, but if chips aren’t cleared effectively, they can build up, leading to tool breakage, poor cut quality, and a whole lot of frustration. This guide will walk you through how a specialized carbide end mill helps solve this, making your FR4 projects much smoother. We’ll break down exactly what makes it work and how you can use it for cleaner, faster cuts every time.
Understanding FR4 and Chip Evacuation
FR4 is a fantastic material for many applications, but it can a bit finicky when machined. It’s a composite, meaning it’s made of different layers which can behave differently under the stress of a cutting tool. When you’re milling, drilling, or cutting FR4, tiny particles are created. If these particles don’t have a clear path to escape the cutting area, they can get “recut” or build up around the cutting edge of your tool. This is where chip evacuation becomes critical.
Poor chip evacuation can lead to a cascade of problems. For starters, the friction from re-cutting chips generates excessive heat. This heat can soften the FR4, leading to rough edges and delamination (where the layers of fiberglass start to peel apart). It also significantly shortens the life of your cutting tool, as the heat and abrasive particles wear down the sharp edges much faster. In the worst cases, a buildup of chips can cause your tool to bind, leading to breakage, which can be dangerous and costly. For anyone working with FR4, especially on precision components like printed circuit boards, mastering chip evacuation is essential.
Why a Specific Carbide End Mill Matters for FR4
Not all end mills are created equal, and when it comes to FR4 and chip evacuation, a specialized tool really shines. The keyword “carbide end mill 1/8 inch 1/2 shank extra long for FR4 chip evacuation” points to a tool designed with several key features.
The Anatomy of an Effective FR4 End Mill
Let’s break down what makes a tool like this so effective for FR4:
- Carbide Material: Tungsten carbide is extremely hard and heat-resistant. This is crucial for cutting composites like FR4, which can be abrasive. Carbide tools maintain their sharpness and structural integrity at higher temperatures than high-speed steel (HSS) tools.
- 1/8-inch Diameter: This specific size is often used for creating fine details, slots, and precise cuts needed in electronics manufacturing and fine woodworking. It allows for intricate designs and tight tolerances.
- 1/2-inch Shank: The shank is the part of the tool that holds it in the machine’s collet or chuck. A 1/2-inch shank provides a stable and strong grip, essential for maintaining accuracy and preventing chatter, especially during demanding cuts.
- Extra Long Reach: This is a critical feature for chip evacuation. An extra-long flute (the cutting edges and the grooves that spiral around the tool) and a longer overall tool body allow chips to be carried away from the cutting zone more effectively. There’s more space for chips to travel up the flutes and exit the workpiece. This also allows you to machine deeper pockets or features without bottoming out.
- Specialized Flute Design: For FR4, end mills often feature higher helix angles and polished flutes. A higher helix angle (the angle of the spiral grooves) can help to “screw” chips out of the cut more efficiently. Polished flutes reduce friction and prevent chips from sticking, further aiding evacuation. Some might also have fewer flutes (e.g., 2-flute) to create larger chip gullets, giving chips more room to escape.
The combination of these features makes this type of end mill ideal for tackling the specific challenges of FR4. It’s designed to cut cleanly, resist heat, and most importantly, keep the cutting area clear of debris so you can achieve professional results.
Step-by-Step Guide: Machining FR4 with Your Specialized End Mill
Now that we understand why this tool is special, let’s get to work. Machining FR4 requires a methodical approach, focusing on setup, cutting parameters, and toolpath.
1. Machine Setup and Workpiece Fixturing
A rigid setup is paramount for successful machining. Loose workpieces will chatter, leading to poor surface finish and potential tool damage.
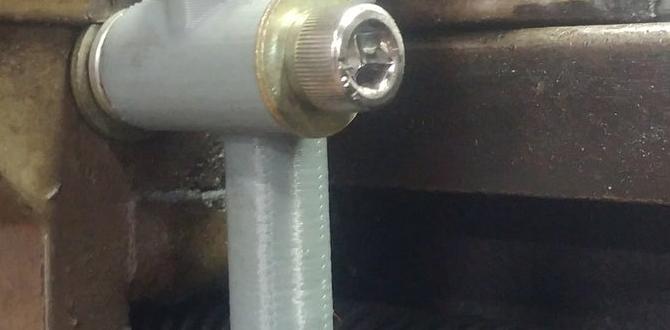
- Secure the FR4: Use a sturdy clamping system. For small parts, a vise with soft jaws designed for delicate materials is excellent. For larger sheets, clamps that distribute pressure evenly or a vacuum table can be used. Ensure the FR4 is mounted flat and won’t move during cutting.
- Choose the Right Spindle Speed (RPM): The ideal spindle speed depends on the diameter of your end mill, the material, and your machine’s capabilities. A good starting point for a 1/8-inch carbide end mill in FR4 is often between 15,000 and 25,000 RPM. However, always consult the tool manufacturer’s recommendations or perform test cuts.
- Set Feed Rate: The feed rate is how fast the tool moves through the material. For FR4, you want a feed rate that allows the tool to cut efficiently without overloading. Too fast, and you risk chip recutting and tool breakage. Too slow, and you generate excessive heat and a poor surface finish. A common starting point might be 10-30 inches per minute (IPM), but this is highly dependent on depth of cut and other factors.
- Coolant/Lubrication (Optional but Recommended): While not always necessary for short FR4 runs with the right tool, a small amount of air blast or a mist coolant system can significantly improve chip evacuation and reduce heat. This helps clear chips from the flutes and keeps the cutting edge cool.
2. Toolpath Strategy for Optimal Chip Evacuation
How you program your machine’s movements (the toolpath) is just as important as the cutting speed and feed.
- Conventional vs. Climb Milling: For FR4, climb milling is generally preferred. In climb milling, the cutter rotates in the same direction as the feed. This results in a shearing action that produces a cleaner cut and puts less stress on the tool edge. Conventional milling (“up-milling”) can sometimes lead to rubbing and heat buildup. Your CNC controller or CAM software will have options for both.
- Depth of Cut (DOC): This is how deep the end mill cuts with each pass. For 1/8-inch end mills, it’s often best to keep the depth of cut relatively shallow, typically no more than 0.5 times the tool diameter (i.e., 0.0625 inches or 1/16th of an inch for a 1/8″ end mill). This reduces the load on the tool and allows for better chip clearance.
- Stepover (Width of Cut): This is how much the tool moves sideways on each pass. For full-width slots, the stepover is 100% of the tool diameter. For pocketing, smaller stepovers (e.g., 20-40% of the tool diameter) can create a better surface finish.
- Plunge Moves: When plunging straight down into the material, use a slow, controlled plunge rate to avoid shocking the tool and material. Some machines and CAM programs offer optimized plunge strategies.
- Air Cuts: Incorporate short movements of the tool in the air between cutting passes. This helps to clear any lingering chips out of the flutes before the next cut begins.
3. Executing the Cut
With your setup and toolpath ready, it’s time to run the program.
- Initial Test Cuts: Always start with a small test cut, perhaps on a scrap piece of FR4 or in a non-critical area of your workpiece. This allows you to verify your speeds, feeds, and toolpath without risking your main project.
- Listen to the Machine: Your machine will tell you a lot. If you hear excessive screaming or chattering, your speeds or feeds might be too aggressive, or your workpiece might be moving. Back off the feed rate first if you suspect a problem.
- Observe Chip Formation: Look at the chips being produced. Ideally, they should be small, crisp, and being cleared effectively from the flutes. If they are long, stringy, or accumulating, adjust your feed rate or depth of cut.
- Keep an Eye on Temperature: While carbide is heat-resistant, excessive heat can still be an issue. If the workpiece or the tool shank feels unusually hot to the touch (use caution!), stop the machine and reassess your parameters.
By following these steps, you’ll set yourself up for success. The “extra long” feature of this end mill gives you that extra margin for error and superior chip evacuation.
Essential Tools and Accessories for FR4 Machining
Beyond the specialized end mill, having the right supporting tools will make your FR4 machining experience much smoother and safer.
Table: Essential Tools and Accessories
| Tool/Accessory | Description | Why It’s Important for FR4 |
|---|---|---|
| CNC Mill or Router | The machine that holds and moves the cutting tool. | Provides the precision and control needed for FR4. From hobbyist desktop machines to industrial setups. |
| Collet Chuck or Vise | To securely hold the end mill and the workpiece. | A rigid grip prevents vibration, chatter, and tool breakage, crucial for clean FR4 cuts. |
| Dust Collection System | A vacuum or blower to remove dust and chips from the work area. | FR4 dust can be an irritant and a fire hazard. Good dust collection also improves visibility and chip evacuation. OSHA standards emphasize proper dust control. |
| Safety Glasses/Face Shield | Eye protection. | Absolutely non-negotiable. Protects against flying debris from the FR4 or tool breakage. |
| Hearing Protection | Earplugs or earmuffs. | CNC machines can be loud. Protect your hearing during operation. |
| Workpiece Holding Clamps | To secure the FR4 to the machine bed. | Essential for preventing movement during machining. Consider clamps with rubber padding to avoid damaging the FR4. |
| Inspection Tools (Calipers, Microscope) | For checking dimensions and surface finish. | Verify accuracy and identify any imperfections caused by poor chip evacuation or machining parameters. |
| Compressed Air/Coolant Mist (Optional) | To blast chips away or cool the cutting area. | A significant aid in chip evacuation and heat management, especially for dense or long cuts. |
Having these items ready before you start will save you time and prevent potential issues. A well-equipped workshop is a safe and productive workshop.
Common Problems and Troubleshooting Tips
Even with the right tools, you might encounter issues. Here’s how to troubleshoot common problems related to chip evacuation when machining FR4.
- Problem: Chips are sticking to the tool or packing in the flutes.
- Possible Cause: Feed rate is too slow, or spindle speed is too fast, generating excessive heat.
- Solution: Increase the feed rate slightly, or decrease the spindle speed slightly. Ensure your air blast or coolant is functioning correctly and aimed at the cutting zone. Check if the flutes need cleaning.
- Problem: Rough surface finish or frayed edges on the FR4.
- Possible Cause: Dull tool, incorrect feed/speed, or poor chip evacuation causing recutting.
- Solution: Inspect the end mill for wear. If it’s dull, replace it. Adjust feed and speed to a more appropriate range. Try a slightly faster feed rate to ensure chips are being cleared rather than rubbed. Ensure you are using climb milling.
- Problem: Tool breakage.
- Possible Cause: Plunge rate too high, excessive depth of cut, aggressive feed rate, loose workpiece, or chips recutting and jamming the tool.
- Solution: Slow down plunge moves. Reduce depth of cut. Ensure the workpiece is securely clamped. Verify that chip evacuation is optimal.
- Problem: Delamination (layers peeling apart).
- Possible Cause: Excessive heat or mechanical stress on the FR4. Often a symptom of poor chip evacuation and excessive rubbing.
- Solution: Reduce depth of cut and feed rate. Ensure adequate cooling/lubrication. Use climb milling. Verify that your spindle is running true and not wobbling.
Remember, troubleshooting is a process of elimination. Make one adjustment at a time and observe the effect.
Alternatives and Considerations
While the specialized 1/8-inch carbide end mill is excellent, there are other factors and considerations when machining FR4.
Alternative Tooling and Strategies
- Different End Mill Types: For less precise work or roughing, you might consider compression bits (though these are more common in woodworking for a clean top edge) or single-flute cutters designed for plastics and composites. However, for detailed work and optimal chip evacuation, the multi-flute carbide end mill with specialized geometry is usually best.
- Drilling: Instead of milling out pockets, sometimes drilling is a viable alternative. Use sharp drill bits specifically designed for composites or plastics.
- Workpiece Material Variations: FR4 comes in different thicknesses and resin percentages. Thicker FR4 or FR4 with a higher resin content might require slightly slower feed rates or a more aggressive coolant strategy.
When to Consider Upgrading
- High-Volume Production: If you’re producing many parts, a more robust machine with a dedicated cooling and dust extraction system will be beneficial.
- Tighter Tolerances: For extremely high-precision applications, you might explore specialized micro-milling tools and machines.
The “extra long” aspect is particularly useful for deeper pockets or when you need to reach features without multiple setups. This extended reach provides more flute engagement with the material, which, when managed correctly, aids in chip removal.
FAQs About FR4 Machining and End Mills
Here are some frequently asked questions to help clarify common concerns.
What is the ideal spindle speed for a 1/8-inch carbide end mill in FR4?
A good starting range is typically 15,000 to 25,000 RPM. However, this varies based on the specific tool, machine rigidity, and desired finish. Always check the tool manufacturer’s recommendations and perform test cuts to find the sweet spot.
How much chip load should I use with FR4?
Chip load is directly related to feed rate and RPM. For a 1/8-inch carbide end mill in FR4, a chip load might range from .001 to .003 inches per tooth. You calculate the feed rate using Feed Rate = Chip Load × Number of Flutes × RPM. Start conservatively and increase as needed.
Can I use a regular end mill for FR4?
You can, but it might not perform as well. Standard end mills may not have the necessary flute geometry or heat resistance to effectively manage FR4’s abrasive and heat-generating properties. This can lead to premature wear and poor chip evacuation.
What is “tool stick-out” and why does it matter for FR4?
Tool stick-out is the length of the end mill that extends beyond the collet or chuck. For FR4, minimizing stick-out generally increases rigidity and reduces vibration. However, an “extra long” end mill is designed to be used with longer stick-out, providing reach while still offering good chip evacuation if setup correctly.
How important is dust collection when machining FR4?
Extremely important. FR4 dust is an irritant to the lungs and skin, and fine dust can be a fire hazard. Proper dust collection improves visibility, keeps your machine cleaner, and protects your health.
Should I use a lubricant or coolant with FR4?
For many FR4 applications, especially with the right tools and moderate cuts, an air blast is sufficient to clear chips. However, for deeper cuts or prolonged machining, a mist coolant or flood coolant can help manage heat and improve chip evacuation, leading to better tool life and surface finish.