Carbide end mills make cutting fiberglass dry easy and clean. Use the right type and speed to get smooth results and keep dust down, letting you tackle projects efficiently without the mess.
Hey there, workshop friends! Daniel Bates here from Lathe Hub. Ever tried cutting fiberglass and ended up with a dusty, fuzzy mess that’s tough on your tools and your lungs? It’s a common frustration, especially when you just want to get a clean cut. But what if I told you there’s a way to slice through fiberglass like butter, with minimal fuss and excellent precision? Today, we’re diving into the world of carbide end mills, specifically how to use them for effortless fiberglass dry cutting. It’s simpler than you think, and by the end of this guide, you’ll be ready to take on your next fiberglass project with confidence.
Why Carbide End Mills Are Your Fiberglass Best Friend
When it comes to cutting tough materials like fiberglass, the right tool makes all the difference. Traditional tools can quickly become dull, create a lot of heat, and leave rough edges. This is where carbide end mills shine.
The Toughness of Carbide
Carbide, short for tungsten carbide, is an incredibly hard and dense material. It’s significantly harder than high-speed steel (HSS) tools. This superior hardness means carbide end mills can:
- Maintain a sharp cutting edge for much longer.
- Cut through abrasive materials like fiberglass without rapid wear.
- Generate less heat during the cutting process compared to softer metals.
- Achieve cleaner cuts with less fraying or splintering.
For fiberglass, which is notorious for its abrasive nature, carbide is practically tailor-made. It resists the wear and tear that would quickly dull other types of cutting tools.
Designed for Precision
End mills, by their design, are rotary cutting tools. They have cutting edges along the flutes (the spiral grooves) and at the tip. This allows them to perform a variety of operations, including plunging (entering the material from the top), profiling (cutting around a shape), and facting (creating a flat surface). For fiberglass, their ability to create precise shapes and cut clean paths is invaluable.
When selecting an end mill for fiberglass, size and flute count matter. For most common DIY and hobbyist applications, you’ll often be looking at:
- Diameter: Common sizes include 1/8 inch and 1/4 inch. These are versatile for various detail work and slotting.
- Shank Size: Usually matches the diameter (e.g., a 1/4 inch end mill will have a 1/4 inch shank).
- Length: Stub length end mills are often preferred for fiberglass. They are shorter and more rigid, which helps reduce vibration and chatter, leading to cleaner cuts.
- Flute Count: For plastics and composites like fiberglass, 2-flute or 3-flute end mills are generally recommended. Fewer flutes mean more space for chips to escape, which is crucial for preventing heat buildup and clogging in abrasive materials.
Understanding Fiberglass Dry Cutting
Cutting fiberglass isn’t just about having a sharp tool; it’s also about how you approach the material. Dry cutting, meaning cutting without a coolant or lubricant, is often preferred with composites. Here’s why and what it entails:
The Pitfalls of Wet Cutting Composites
While coolant is standard for metal cutting, it’s often avoided for fiberglass. When fiberglass is cut wet, the glass fibers and resin can mix with the water to create a slurry. This sticky paste:
- Can clog up milling machines and their components.
- Makes for a very messy cleanup.
- Can be difficult to manage in a home workshop setting.
- May not offer significant benefits in terms of tool cooling for this specific application.
Therefore, dry cutting, when done with the right precautions and tools, is typically the go-to method for fiberglass machining.
The Dust Factor: Safety First!
The biggest drawback of dry cutting fiberglass is the fine dust it produces. This dust is not just messy; it can be hazardous to your health and your equipment. It’s crucial to have robust dust extraction and personal protective equipment (PPE) in place. Always wear:
- A high-quality respirator: A P95 or P100 respirator is recommended for fine particulate matter.
- Safety glasses or a face shield: To protect your eyes from flying debris.
- Gloves: To protect your skin from fiberglass irritation.
For your machine, a good dust collection system connected to your mill is essential. This not only improves air quality but also helps keep your machine running smoothly by preventing dust buildup.
Choosing the Right Carbide End Mill for Fiberglass
Not all carbide end mills are created equal, especially when it comes to cutting fiberglass. Here’s what to look for:
Material and Coating
As we’ve established, tungsten carbide is the primary material. For fiberglass, coatings aren’t usually necessary or beneficial. Plain, uncoated carbide performs excellently and avoids introducing potential bonding issues with the resin.
Flute Design and Count
The number of flutes is a key consideration. For cutting composites like fiberglass, you generally want:
- 2 Flutes: This is a very common and effective choice. The wider chip gullets (spaces between flutes) allow for good chip evacuation, which is critical for preventing heat buildup.
- 3 Flutes: Can also work well, offering a slightly smoother finish than 2-flute cutters in some applications. However, they have narrower chip gullets, so feed rates may need to be adjusted to avoid clogging.
- Avoid: 4-flute end mills are typically not recommended for fiberglass dry cutting as they have even tighter chip spaces, increasing the risk of heat and binding.
Look for end mills specifically designed for plastics or composites if you can find them. These often have optimized flute geometry for these materials.
Geometry and Edge Prep
The cutting edges should be sharp and clean. Some end mills are designed with a sharper cutting angle for plastics. For fiberglass, a slightly positive rake angle is generally ideal. A stub length (shorter flute length relative to the diameter) increases rigidity and reduces the chance of chatter, leading to a better surface finish.
Specific Example: The 1/8 Inch Shank Stub-Length End Mill
For intricate work or smaller parts, a carbide end mill 1/8 inch 1/4 shank stub length for fiberglass dry cutting is an excellent choice. The smaller diameter allows for detailed profiling, while the 1/4 inch shank is common for many small milling machines or CNC routers. The stub length ensures maximum rigidity for this smaller diameter.
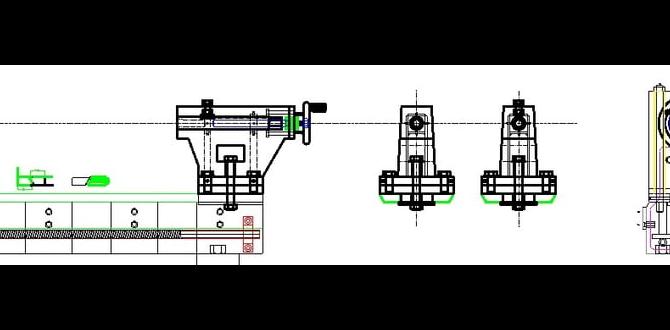
Setting Up Your Milling Machine for Fiberglass
A well-prepared machine is key to successful and safe fiberglass cutting. This involves setting up your workpiece, your tool, and your dust collection.
Workpiece Clamping and Support
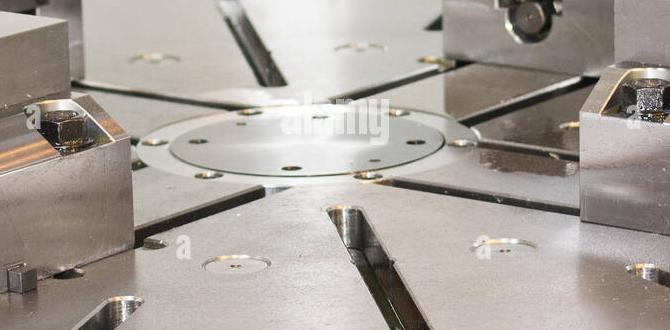
Fiberglass parts need to be held securely. Because it’s an abrasive material, you don’t want it shifting during the cut. Use appropriate clamping methods:
- Vises: A good quality milling vise is ideal. Ensure the jaws are clean and provide adequate grip.
- Clamps: Use clamps that won’t interfere with the cutting path. Fixturing plates can be very useful for consistent setups.
- Double-Sided Tape: For thin sheets, strong double-sided tape can sometimes work, but be cautious about its holding power during aggressive cuts.
Ensure the material is also well-supported from underneath, especially if you are cutting through it entirely. This prevents the part from breaking free prematurely.
Tool Holder and Collet
Use a high-quality collet and tool holder for your end mill. A clean collet that grips the shank of the end mill securely is vital. Any runout (wobble) in the tool holder will lead to a poor finish and can stress the end mill. For 1/8 inch shank end mills, ensure your collet set has a corresponding size or a reliable reducing sleeve.
Dust Collection System
This cannot be stressed enough. A robust dust collection system is non-negotiable when dry-cutting fiberglass. Attach a dust shoe or a vacuum nozzle as close to the cutting point as possible.
Look for systems designed to handle fine dust particles. A good shop vacuum with a fine dust filter, or a dedicated dust collector, is essential. Remember to empty the dust bin frequently to maintain airflow.
Step-by-Step: Dry Cutting Fiberglass with a Carbide End Mill
Now for the practical part. Let’s walk through the process of cutting fiberglass using your carbide end mill.
Step 1: Plan Your Cut and CAM (If Applicable)
Before you start, understand your desired cut. Are you cutting out a profile? Creating a pocket? Drilling holes? If you’re using a CNC mill, this is where your CAM software comes in. You’ll define toolpaths, select your end mill, and set cutting parameters. For manual milling, you’ll be controlling the feeds and speeds yourself.
Step 2: Secure the Workpiece
As discussed, firmly clamp your fiberglass material to your machine’s table or vise. Double-check that it won’t move during operation.
Step 3: Install and Indicate the End Mill
Install your chosen carbide end mill (e.g., a 1/8 inch shank stub-length end mill) into the collet and then into the spindle. Ensure the collet is clean and provides a tight grip. Use an indicator to check for runout. Minimal runout is crucial for a good finish and tool life.
Step 4: Set Your Zero and Depth of Cut
For manual milling, use your DRO (Digital Readout) or indicators to set your X, Y, and Z zero points. For CNC, this is done via your program. Carefully determine your depth of cut. For fiberglass, it’s often best to take shallower, multiple passes rather than one deep pass.
Step 5: Determine Cutting Speeds and Feeds
This is critical for achieving good results and preventing tool breakage. These are often found in manufacturer datasheets or can be calculated. As a general starting point for carbide end mills in fiberglass:
- Spindle Speed (RPM): Generally in the range of 10,000 to 25,000 RPM, depending on the diameter of the end mill and the rigidity of your setup. Smaller diameters usually run faster.
- Feed Rate (IPM/mm/min): This determines how fast the tool moves through the material. Start conservatively. For a 1/4 inch carbide end mill, you might start around 20-40 IPM (inches per minute). For a 1/8 inch end mill, you might start lower, perhaps 10-20 IPM.
- Depth of Cut (DOC): For 1/4 inch end mills, a radial depth of cut (how much of the tool diameter engages the material side) of 0.100 inches and an axial depth of cut (how deep you cut into the material) of 0.050 inches per pass is a reasonable starting point. For 1/8 inch, reduce these values.
It’s always better to start with conservative settings and increase them if the machine and cut can handle it. Listening to the cut and observing chip formation are good indicators.
Step 6: Engage Dust Collection
Turn on your dust collection system before you start cutting.
Step 7: Make the Cut
- For plunge cuts (where the end mill enters from the top), use a controlled plunge rate. Many CNC controllers have specific plunge ramping or helical interpolation options that are gentler than a straight plummet.
- Feed the end mill into the material at your set feed rate. Maintain a consistent speed.
- If making multiple passes, clear the depth of cut for each pass before moving to the next.
- Listen to the sound of the cut. A smooth whirring is good. A high-pitched squeal or grinding could indicate you’re feeding too slowly, or the material is melting. A loud chattering or groaning suggests you’re feeding too fast or the tool is rubbing.
Step 8: Inspect and Clean
Once the cut is complete, retract the tool and turn off the spindle. Inspect the cut for quality. Check for any fuzzies or rough edges. Clean up any dust accumulation on the machine and workpiece.
Key Parameters: A Quick Reference Table
To help you get started, here’s a table summarizing recommended parameters. Remember, these are starting points. Always consult tool manufacturer recommendations and adjust based on your specific machine and material.
| Parameter | Typical Range for Carbide End Mill in Fiberglass | Notes |
|---|---|---|
| End Mill Type | 2 or 3 Flute, Uncoated Carbide | Stub length for rigidity |
| Diameter | 1/8″ to 1/4″ | Smaller for detail, larger for material removal rate |
| Spindle Speed (RPM) | 10,000 – 25,000 | Higher RPM for smaller diameters, lower for larger |
| Feed Rate (IPM) | 10 – 40 | Start conservatively, adjust based on sound and chip formation. Lower for 1/8″, higher for 1/4″. |
| Axial Depth of Cut (per pass) | .020″ – .060″ | Take multiple shallow passes |
| Radial Depth of Cut (per pass) | .050″ – .150″ | For profiling, not slotting |
| Coolant/Lubricant | None (Dry Cut) | To avoid slurry and mess. Rely on air blast/dust collection for cooling and chip removal. |
For more in-depth information on machining speeds and feeds, resources like the Michigan Tech University’s Machining Speeds and Feeds guide offer valuable insights into the principles involved.
Troubleshooting Common Issues
Even with careful setup, you might run into a few snags. Here’s how to handle them:
Fuzzy Edges or Delamination
Cause: Too much heat, dull tool, feeding too slowly, or weak clamping.
Solution:
- Increase feed rate slightly.
- Take shallower passes.
- Ensure your dust collection is efficient to help with cooling.
- Sharpen or replace your end mill.
- Improve workpiece clamping.
Tool Breakage
Cause: Feeding too fast, taking too deep a cut, excessive runout, shallow depth of cut causing rubbing, or hitting an unexpected obstruction.
Solution:
- Significantly reduce feed rate and depth of cut.
- Verify tool holder and collet are clean and tight; check for runout.
- Take multiple shallow passes.
- Ensure proper chip evacuation to prevent binding.
Excessive Dust (Beyond what collection can handle)
Cause: Inefficient dust collection, wrong end mill type, or cutting too aggressively.
Solution:
- Improve dust collection setup (closer nozzle, better filter, stronger vacuum).
- Consider a down-draft table if possible, in addition to your dust shoe.
- Go back to more conservative cutting parameters (slower feed, shallower depth).
- Ensure you’re using a 2 or 3-flute end mill designed for composites.
Chatter or Vibration
Cause: Loose workpiece, worn spindle bearings, flex in the machine, incorrect speeds/feeds, negative rake angle on the cutter, or too long of an end mill.
Solution:
- Improve workpiece rigidity and clamping.
- Ensure the end mill is gripped securely and is as short as possible.
- Experiment with slightly different feed rates and spindle speeds.
- Check your machine for any play or wear.
Advanced Tips for Fiberglass Machining
Once you’ve mastered the basics, here are a few tips to further refine your fiberglass cutting: