Quick Summary: A 1/8 inch carbide end mill is a small but mighty tool, especially for aluminum. It’s the secret weapon for achieving precise cuts, smooth finishes, and intricate details on softer metals like 6061 aluminum, making it a must-have for any maker.
Hey folks, Daniel Bates here from Lathe Hub! Ever stared at a piece of aluminum, itching to make something amazing, but felt a bit intimidated by how to get those clean, accurate shapes? You’re not alone. Many beginners find working with metal, especially for detailed projects, a bit daunting. The good news is, the right tool can make all the difference. Today, we’re diving into one of my absolute favorite small tools: the 1/8 inch carbide end mill. If you’re looking to cut aluminum with precision and get a brilliant finish, this little gem is a game-changer. We’ll walk through exactly why it’s so good and how you can wield it for your own projects, making complex tasks feel simple and achievable.
Why a 1/8 Inch Carbide End Mill is Perfect for Aluminum
Aluminum, especially popular alloys like 6061, is a fantastic material for hobbyists and makers. It’s relatively soft, easy to machine, and incredibly versatile. However, achieving a super smooth “mirror finish” or cutting very fine details can be tricky if you don’t have the right tools. This is where the 1/8 inch carbide end mill shines.
Here’s why this specific combination is so effective:
- Carbide: Tungsten carbide is renowned for its hardness and heat resistance. This means carbide end mills stay sharper for longer, can handle higher cutting speeds, and produce cleaner cuts, especially in metals like aluminum that can get “gummy.”
- 1/8 Inch Size: This small diameter is perfect for intricate work. It allows you to create fine details, engrave text, and machine small features that larger end mills simply can’t handle. Think delicate patterns, tiny lettering, or the sharp corners of small parts.
- Aluminum’s Properties: Aluminum is a “gummy” or “sticky” metal. This means it can tend to cling to cutting tools, leading to poor surface finishes and tool breakage. Carbide’s hardness and the geometry of a well-designed end mill help to efficiently clear chips and prevent this buildup.
When you combine these factors, you get a tool that’s ideal for taking your aluminum projects from good to absolutely spectacular. You can achieve those crisp lines and smooth surfaces you see in professional work, right in your own shop.
Understanding Carbide End Mills: The Basics
Before we get cutting, let’s quickly cover what makes up a carbide end mill and why those features matter.
What is an End Mill?
An end mill is a type of rotating cutting tool used in milling machines. Unlike a drill bit that cuts only axially (downwards), an end mill can cut both axially and radially (sideways). This ability is what allows us to machine shapes, slots, profiles, and complex contours.
Carbide vs. High-Speed Steel (HSS)
Most end mills are made from either High-Speed Steel (HSS) or Carbide. While HSS is more common for general-purpose machining and is tougher (less prone to chipping), carbide offers superior hardness, rigidity, and heat resistance. For working with aluminum, especially when striving for excellent finishes and detail, carbide is often the preferred choice:
- Carbide:
- Much harder.
- Better at holding a sharp edge at high speeds.
- More brittle, can chip if used improperly or on interrupted cuts.
- Excellent for materials like aluminum, steel, and composites.
- HSS:
- Tougher, more flexible.
- Can be ground to a very sharp edge.
- Softer than carbide, dulls faster.
- Good for general-purpose machining, softer metals, and wood.
Key Features of a 1/8 Inch Carbide End Mill for Aluminum
When you’re looking for a 1/8 inch carbide end mill specifically for aluminum, keep an eye out for these characteristics:
- Number of Flutes: This refers to the number of helical cutting edges on the tool.
- 2 Flutes: Generally the best choice for aluminum. The extra space between flutes (called the gullet) allows for excellent chip evacuation. This is crucial because aluminum tends to produce long, stringy chips that can clog up the flutes if there isn’t enough room.
- 4 Flutes: Can be used, but often require higher speeds and better flood coolant to prevent chip packing in aluminum. They can provide a smoother finish than 2-flute tools in some applications.
- Coating: While not always necessary for aluminum, certain coatings can enhance performance. For aluminum, a polished flute or a coating designed for non-ferrous materials can help reduce friction and prevent material buildup. Uncoated, highly polished carbide is often superb for aluminum.
- Helix Angle: The angle of the cutting flutes. A higher helix angle (e.g., 45 degrees) generally leads to a smoother cut, better chip evacuation, and can reduce the cutting forces, which is beneficial for smaller tools.
- Shank: Most 1/8 inch end mills will have a 1/8 inch shank, but sometimes, for added rigidity and better holding in a collet or tool holder, you might find them with a 3mm or 4mm shank for a bit more meat. However, for most CNC routers and smaller milling machines, a 1/8 inch shank is standard.
- Length: For general work, standard length is fine. If you need to reach into deeper pockets or machine features on a thicker part, an “extra long” version can be a lifesaver.
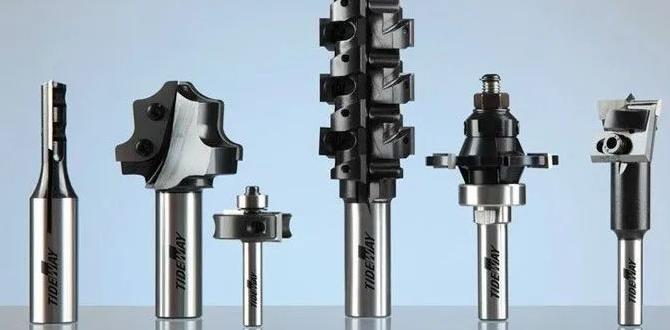
For that sought-after “mirror finish” on 6061 aluminum, a 2-flute, highly polished carbide end mill with a good chip clearance is your best bet. Take a look at this example; you’ll see the design is specifically meant to let the aluminum chips escape easily.
Choosing the Right 1/8 Inch Carbide End Mill: Factors to Consider
Not all 1/8 inch carbide end mills are created equal. When selecting one for aluminum, especially for detailed work or that coveted mirror finish, here are some key points to guide your choice:
Material & Grade
For general machining of aluminum, standard tungsten carbide grades are usually sufficient. The key is the finish of the carbide itself. A highly polished flute surface is extremely beneficial for aluminum. Why? Because it reduces friction, making it harder for the soft aluminum to stick or “weld” itself onto the cutting edge. This is a major cause of poor finishes and premature tool wear.
Flute Design
As mentioned, for aluminum, a 2-flute end mill is typically the champion. The ample space between the flutes (the gullets) is critical for efficiently clearing the chips produced when cutting aluminum. Aluminum tends to create long, stringy chips rather than brittle dust. If these chips can’t escape the cutting zone, they can pack together, leading to:
- Poor surface finish.
- Increased heat.
- Tool breakage.
- Workpiece damage.
A 2-flute design maximizes this chip-clearing capacity. The helix angle also plays a role; a steeper helix angle (often around 30-45 degrees) can help pull chips out of the cut more effectively.
Coatings
Most high-quality end mills for non-ferrous materials like aluminum are left uncoated but highly polished. Coatings, like TiN (Titanium Nitride), often have a yellowish hue and are generally harder than the base carbide. While good for steels, they can sometimes increase friction or chip adhesion with aluminum. However, some specialized coatings exist that are designed to reduce friction with soft metals. For a beginner, focusing on a polished, uncoated end mill is a safe and effective choice for aluminum. You can learn more about coatings on tools from resources like the Machinery Lubricants website, which offers detailed insights into their functions.
Geometry: Square End vs. Ball End
The end of the end mill determines the types of cuts you can make:
- Square End: This is the most common type. The end is flat, allowing for sharp, square internal corners and general profiling. Ideal for making slots, pockets, and cutting out shapes.
- Ball End: The end is perfectly curved, like a ball. These are used for creating rounded internal corners, machining complex 3D surfaces, and 2.5D contouring. A 1/8 inch ball end mill can create very fine, rounded details
For general aluminum cutting and achieving a clean profile, a square end mill is excellent. If your project involves intricate 3D surfacing or specific radiused internal corners, a ball end mill might be necessary.
Shank Options
The shank is the part of the end mill that fits into your machine’s tool holder or collet. For a 1/8 inch cutting diameter, you’ll most commonly find end mills with either:
- 1/8 inch Shank: Matches the cutting diameter.
- 3mm or 4mm Shank: Slightly larger, offering a bit more rigidity and a more secure grip in common collets, especially on smaller machines or CNC routers.
For dedicated milling machines with robust tool holding, a 1/8 inch shank is standard. On CNC routers or smaller benchtop mills, a 3mm or 4mm shank on a 1/8 inch end mill might offer enhanced stability.
“Extra Long” vs. Standard Length
Standard end mills have a certain flute length and overall length. An “extra long” version will have proportionally longer flutes and/or a longer reach beyond the shank. This is incredibly useful if you need to machine features deep within a cavity or on a part with a significant thickness. However, longer tools are generally less rigid and more prone to vibration. For precise work, always aim for the shortest tool that can do the job. If you need that extra reach, be prepared to slow down your feed rates and cutting speeds.
Essential Setup: What You’ll Need in Your Workshop
Before you can even think about cutting that beautiful piece of aluminum, you need to make sure your workshop is ready. Having the right setup ensures safety, precision, and helps you achieve that perfect finish the 1/8 inch carbide end mill promises.
The Machine
This tool will work on a variety of machines, but the key is a stable setup capable of precise movement:
- CNC Mill/Router: This is where a 1/8 inch end mill truly excels. CNC machines offer the repeatability and accuracy needed for intricate cuts and fine details.
- Manual Milling Machine: A benchtop or larger manual mill can also use this tool effectively. You’ll have more control over feeds and speeds, but it requires more hands-on skill.
- Drill Press (with limitations): While not ideal for true milling, some hobbyists use a drill press setup (often with a vise and DROs) for very light “engraving” or pocketing. This is very limited and not recommended for anything beyond the most basic tasks due to lack of rigidity.
Tool Holding
This is critical for any machining operation!
- Collet Chuck/Collets: The absolute best way to hold an end mill is in a collet chuck system. Collets provide a uniform, concentric grip on the shank of the end mill, ensuring it runs true. For a 1/8 inch end mill, you’ll need a ER11, ER16, or similar collet system that can accept a 1/8 inch (or 3mm/4mm if your shank is that size) shank. A well-fitting collet is crucial for preventing runout and chatter.
- End Mill Holder: Some machines use dedicated end mill holders, which are essentially a larger collet that fits into a larger taper. Ensure the holder is designed for the shank size of your end mill.
- Drill Chuck (Avoid if possible): While a drill chuck can hold an end mill, it’s generally not recommended for milling. Drill chucks are designed for round drill shanks and don’t offer the same rigidity or concentricity as collets. They can lead to runout, vibration, and poor finish.
Workholding
Your aluminum workpiece needs to be held securely and without flexing.
- Machine Vise: A good quality vise is essential. Ensure the vise jaws are parallel to the machine’s travel axes. For soft aluminum, using soft jaws (made of aluminum or plastic) can prevent marring the workpiece and provide a better grip.
- Clamps: For irregular shapes or when a vise isn’t suitable, use clamps. Ensure they are placed strategically to not interfere with the end mill’s path and that they hold the part rigidly.
- Fixturing: For repeatable production or complex parts, custom fixtures are ideal. This could be anything from a simple plate with strategically placed dowel pins and clamps to a more complex jig.
Always consult your machine’s manual for recommended workholding practices. Resources like Troyke Manufacturing offer great advice on selecting the right workholding devices.
Workpiece Material
We’re focusing on 6061 aluminum today. It’s a heat-treatable alloy, meaning its properties can be changed with heat treatment. It’s also incredibly popular due to its good strength, weldability, and corrosion resistance. For machinists, it’s a dream to work with because it cuts cleanly and doesn’t require extremely exotic tooling, though specific considerations help!
Lubrication/Coolant
While not always strictly necessary for aluminum with the right tool and speeds, a cutting fluid or lubricant can greatly improve performance, finish, and tool life.
- Cutting Fluid/Mist Coolant: A fine mist of specialized cutting fluid sprayed directly at the cutting zone is excellent for aluminum. It keeps the tool cool, lubricates the cut, and helps flush chips away.
- Lubricating Sticks/Wax: For very light operations, a stick lubricant can be applied manually.
- Soluble Oil Coolant: If your machine has a flood coolant system, a properly mixed soluble oil works well.
For a 1/8 inch end mill on aluminum, a mist coolant system is often the sweet spot for achieving that mirror finish and preventing chip buildup.
Step-by-Step Guide: Machining Aluminum with a 1/8 Inch Carbide End Mill
Now for the exciting part! Let’s walk through how to use that 1/8 inch carbide end mill to machine aluminum. We’ll aim for a clean, precise cut. This assumes you’re using a CNC machine, as it offers the most control for precise results, but the principles apply to manual machining as well.
Step 1: Secure Your Workpiece
This is paramount for safety and accuracy. Mount your 6061 aluminum block securely in your machine vise or using other appropriate workholding. Ensure it’s indicated in so it’s square with your machine’s axes. Always double-check that it won’t move during the machining process. A loose part is a recipe for disaster!
Step 2: Install the End Mill
Insert the 1/8 inch carbide end mill into the appropriate collet. Clean both thoroughly before insertion. Tighten the collet securely in the collet chuck or tool holder, and then install the holder into your machine’s spindle. Make sure the end mill is held firmly and runs true.
Step 3: Set Your Zero Point (Work Offset)
This is where you tell your machine where your part is located in 3D space. For simplicity, the most common method is to set your X, Y, and Z zeros on the workpiece.
- X and Y: Find the center or a corner of your aluminum block.
- Z: Touch off the top surface of your aluminum block with a tool probe or a “Z-probe” accessory. This sets your Z zero relative to the top of the material.
Accurate zero setting is crucial for getting your part dimensions correct. For more on this, check out G-code basics and work offsets, as explained by resources like LinuxCNC’s G-code guide.
Step 4: Create Your Toolpath (or Set Manual Speeds/Feeds)
This is where your CAM software or your knowledge of machining parameters comes in.
For CNC Users:
<