A 1/8 inch carbide end mill is a fantastic choice for machining carbon steel. Its hardness and precision allow for clean cuts and excellent detail, making it ideal for intricate work and ensuring a long tool life when used correctly.
Hey there, fellow makers! Daniel Bates here from Lathe Hub. Ever stare at a piece of tough carbon steel and wonder what tool can tackle it without a fuss? That’s where a little hero, the 1/8 inch carbide end mill, steps in. For many beginners, especially when you’re just getting comfortable with milling or even advanced drilling, figuring out the right cutter can feel like a puzzle. It’s common to run into frustration with softer bits that dull quickly or leave rough edges, especially on harder materials like carbon steel. But don’t worry, this small but mighty tool is your secret weapon. Today, we’re going to break down exactly why this specific end mill is so brilliant for carbon steel and how you can use it to achieve amazing results. Get ready to make your projects shine!
Why a 1/8 Inch Carbide End Mill is a Game-Changer for Carbon Steel
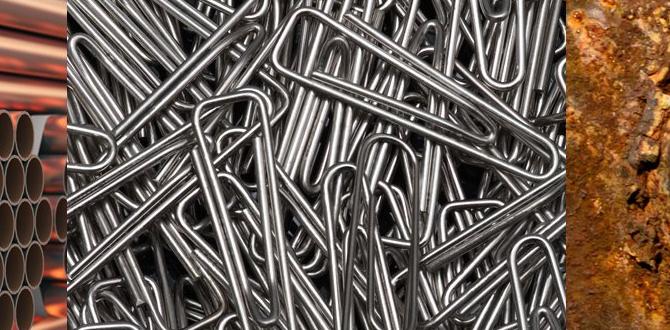
When you’re working with materials like carbon steel, you need a tool that’s tough. Carbon steel, as the name suggests, has a higher carbon content, which makes it stronger and harder than mild steel. Machining it can be challenging if your tool isn’t up to the task. This is precisely why a carbide end mill comes into its own.
The Power of Carbide
Carbide, or more specifically, tungsten carbide, is an incredibly hard ceramic material. It’s significantly harder than high-speed steel (HSS), which is often used for other types of cutting tools. This superior hardness means that carbide cutters can:
- Withstand higher cutting temperatures without softening.
- Maintain a sharp cutting edge for much longer periods, even when working with abrasive or hard materials.
- Cut faster than HSS cutters, leading to quicker project completion times.
- Produce a cleaner, smoother finish on the workpiece.
For carbon steel, these properties are crucial. The greater hardness of the carbide resists the wear and tear that would quickly dull an HSS bit, while its ability to handle heat means you can push it a little harder for more efficient material removal.
The Magic of the 1/8 Inch Size
So, why specifically a 1/8 inch end mill? This size is often chosen for precision work and intricate details. For carbon steel, a smaller diameter like 1/8 inch is excellent for:
- Fine details and text: If you’re engraving, creating small channels, or milling out tiny features, this size allows for incredible accuracy.
- Slotting and grooving: It’s perfect for milling narrow slots or grooves without removing excessive material.
- Trimming and deburring: It can precisely trim edges or remove small burrs with ease.
- Reduced cutting forces: Smaller diameter tools generally experience lower cutting forces, which can be beneficial for delicate workpieces or when using smaller milling machines.
When you combine the brute strength of carbide with the precision of a 1/8 inch diameter, you get a tool that’s ideally suited for tackling the demands of carbon steel with finesse.
Choosing the Right 1/8 Inch Carbide End Mill for Carbon Steel
Not all carbide end mills are created equal, even within the 1/8 inch size. To get the best performance and longevity when milling carbon steel, consider these factors:
Material and Coating
Solid Carbide: For most general-purpose machining of carbon steel, solid carbide end mills are the go-to. They offer excellent rigidity and wear resistance.
Coatings: While solid carbide is hard, certain coatings can further enhance performance on specific materials. For carbon steel, coatings like:
- TiAlN (Titanium Aluminum Nitride): This is a popular choice for high-temperature applications and steel machining. It excels at resisting heat buildup, which is common when cutting harder materials.
- AlTiN (Aluminum Titanium Nitride): Similar to TiAlN, AlTiN offers excellent thermal stability and wear resistance, making it a strong contender for carbon steel.
- ZrN (Zirconium Nitride): This coating is known for its lubricity and can help prevent material from adhering to the cutter, leading to a cleaner cut and longer tool life.
For a beginner, a good quality, uncoated solid carbide end mill is often sufficient and more cost-effective. If you plan on heavy or high-speed machining of carbon steel, investing in a coated end mill like TiAlN or AlTiN will likely yield better results and longer tool life.
Number of Flutes
The flutes are the helical grooves that run along the cutting edges of the end mill. For milling steel, the number of flutes is important:
- 2-Flute: These end mills have more “chip clearance,” meaning there’s more space for the chips of metal being cut to exit. This is generally preferred for slotting and for machining gummy materials like aluminum, but they can also work well in steel, especially for roughing operations, to help prevent chip recutting and clogging.
- 4-Flute: These offer better rigidity and surface finish compared to 2-flute mills and are excellent for finishing passes and general-purpose machining of steel. They can handle higher feed rates but have less chip clearance, so careful consideration of chip evacuation is needed.
For general-purpose milling and finishing of carbon steel with a 1/8 inch carbide end mill, a 4-flute is often the best balance. If you’re doing a lot of deep slotting or encounter significant chip buildup, a 2-flute might be a better choice.
Corner Radius
Some end mills have sharp corners, while others have a slight radius on the corners. A corner radius adds strength to the cutting edge, making it less prone to chipping.
- Square End Mill: Has a sharp 90-degree corner. Great for milling square pockets and sharp internal corners.
- Corner Radius End Mill: Has a rounded corner. This radius adds strength to the cutting edge, reducing the chance of chipping, especially in harder materials like carbon steel. It leaves a slight radius at the bottom of a pocket.
For milling carbon steel, especially if you’re a beginner and want to avoid chipping the end mill, a corner radius end mill can offer added durability. The radius is usually specified (e.g., 1/8 inch end mill with a 0.010 inch corner radius).
Shank Type
The shank is the part of the end mill that fits into the collet or tool holder on your milling machine.
- Straight Shank: The most common type. Ensure the diameter matches your collet size (e.g., a 1/8 inch shank end mill fits a 1/8 inch collet).
- Weldon Shank: Features a flat or “weldon flat” ground into the side. This flat provides a seating point for the set screw in tool holders (like R8 or CAT holders), preventing the end mill from slipping under heavy cutting loads. Less common for very small end mills typically used in hobbyist machines, but worth noting.
For most common setups with collets, a straight shank is what you’ll use. Make sure the shank diameter matches your available collets.
Essential Setup and Safety for Using a 1/8 Inch Carbide End Mill
Before you even think about starting the mill, getting your setup right and prioritizing safety is paramount, especially when working with hard materials and sharp tools.
Workholding is Key
Your workpiece must be held securely. For small parts or when precise positioning is critical, consider:
- Machine Vise: A sturdy vise clamped to your mill table is the most common and secure method for holding parts. Ensure the vise jaws are clean and the workpiece is seated firmly against the vise stop if applicable.
- Clamps: Toe clamps or strap clamps can be used to hold larger or irregularly shaped pieces directly to the T-slots of the milling machine table.
- Fixture: For repetitive tasks or highly precise work, a custom fixture might be necessary.
Never attempt to mill a free-standing or inadequately secured workpiece. It’s an invitation to accidents and ruined parts.
Tool Holder and Collet
Use the correct collet for your end mill’s shank diameter. A 1/8 inch end mill needs a 1/8 inch collet. Ensure the collet and the mating surfaces of the collet chuck are clean and free of debris. Overtightening a collet can damage it, so use the appropriate wrench and a firm, but not excessive, amount of force.
Personal Protective Equipment (PPE) – Non-Negotiable!
Your safety is the most important thing. Always wear:
- Safety Glasses: Not just any glasses, but impact-resistant safety glasses that meet ANSI Z87.1 standards or equivalent. Even better is a full face shield over your safety glasses.
- Hearing Protection: Milling can be loud. Earplugs or earmuffs will protect your hearing.
- Appropriate Clothing: Avoid loose clothing, dangling jewelry, or anything that could get caught in the machine. Tie back long hair.
- Gloves?: Be cautious with gloves around rotating machinery. While they protect from minor cuts, they can also get caught and pull your hand into the machine. Many experienced machinists prefer to work without gloves on their hands near the cutting zone.
Always ensure your work area is clean and free of trip hazards or unnecessary clutter.
Coolant and Lubrication
Milling steel generates heat. Using a cutting fluid or coolant is highly recommended for carbon steel. It:
- Cools the cutting edge, extending tool life.
- Lubricates the cut, reducing friction and making it easier for the tool to cut.
- Helps to flush chips away from the cutting area, preventing them from recutting and causing damage or a poor finish.
There are many types of cutting fluids available. For general steel machining, a semi-synthetic or synthetic coolant is often a good choice. You can apply it with a spray mist system, a flood coolant system, or even manually with a brush or squirt bottle, especially for smaller hobbyist machines. For very light cuts or short operations, a cutting paste or wax can sometimes suffice.
Always check the manufacturer’s recommendations for the specific end mill and material you are using. More information on machining speeds and feeds can be found from resources like the Machining Doctor Speed and Feed Calculator, which can help you determine optimal settings.
Step-by-Step Guide: Milling Carbon Steel with a 1/8 Inch Carbide End Mill
Now for the exciting part! Let’s get this done. Remember, patience and precision are your best friends here.
Step 1: Prepare Your Machine and Workpiece
Ensure your milling machine is clean, in good working order, and securely grounded. Clamp your carbon steel workpiece firmly in your chosen workholding device (vise, clamps, etc.). Double-check that it won’t move during the operation.
Step 2: Install the End Mill
Insert the 1/8 inch carbide end mill into the correct collet. Clean the end mill shank and the inside of the collet before insertion. Place the collet into the collet chuck and tighten it securely in your milling machine spindle. Ensure the spindle’s runout is minimal – a worn spindle or collet can lead to poor results and tool breakage.
Step 3: Set Your Zero Point (Work Zero)
This is crucial for accuracy. You need to tell the machine where your workpiece is relative to the tool. There are several ways to do this:
- Edge Finder: A common method. You touch the tip of the edge finder to the side of your workpiece and align it with the center of your spindle. Repeat for the other axes (X and Y) to find the corner or center of your stock.
- Tool Touch-Off Probe: If your machine has one, these automated probes make setting work offsets very quick and accurate by probing the workpiece surface.
- Manual Touch-Off: With the spindle stopped, carefully bring the end mill down to touch the surface of your workpiece (or a gauge block on the surface). Zero your DRO (Digital Readout) or set your work offset in your CNC controller.
Make sure to also set your Z-axis zero (depth) accurately. This is often done by touching the end mill to the top surface of the material and zeroing.
Step 4: Determine Cutting Speeds and Feeds
This is one of the most critical parts. Too fast, and you’ll burn up the tool or steel. Too slow, and you’ll chatter or rub. For a 1/8 inch carbide end mill in carbon steel, you’ll generally want:
- Spindle Speed (RPM): Carbide generally likes to run faster than HSS. For a 1/8 inch carbide end mill in carbon steel, a good starting point for RPM might be between 4,000 to 10,000 RPM, depending on the specific steel alloy, coolant, and machine rigidity. Always start conservatively.
- Feed Rate (IPM – Inches Per Minute): This is how fast you’re moving the cutter through the material. For a 1/8 inch 4-flute carbide end mill in carbon steel, a starting feed rate might be anywhere from 5 to 20 IPM.
- Depth of Cut (DOC): How deep the end mill cuts into the material per pass. For smaller end mills in harder materials, conservative DOCs are important. Start with axial DOCs (plunging down) of around 0.020″ to 0.050″ and radial DOCs (sideways) of around 0.010″ to 0.030″.
These are starting points. You’ll adjust based on sound, chip formation, and finish. Always consult your tool manufacturer’s recommendations if available. The Haas Automation website offers useful general guidance on machining best practices.
Step 5: Perform the Cut
- Engage Coolant: Turn on your coolant system before the tool contacts the material.
- Engage Spindle: Start your spindle to the chosen RPM.
- Plunge (if necessary): If you need to create a pocket or hole, carefully plunge the end mill into the material. Use a conservative chip load.
- Ramp or Circle Interpolate Entry: For a cleaner entry, consider ramping the tool into the material (moving at an angle) or using circular interpolation if your CAM software allows. This reduces shock on the cutter.
- Move to Feed: Once at the desired depth (or if starting from a drilled hole), move the end mill sideways at your set feed rate to begin the milling operation (e.g., facing, slotting, pocketing).
- Monitor the Cut: Listen to the sound of the cut. A smooth, consistent sound is good. Grinding, screaming, or chattering indicates something is wrong – adjust speeds, feeds, or depth of cut. Watch the chips being produced. You want small, uniform chips, not long, stringy ones that clog.
- Make Multiple Passes: It’s almost always better to take lighter, multiple passes rather than one aggressive cut. This reduces stress on the tool and machine, improves surface finish, and makes chip evacuation easier.
- Retract and Repeat: Once your operation is complete, retract the end mill from the material, then turn off the spindle.
Step 6: Inspect and Clean
Carefully remove the workpiece from the machine. Inspect the milled surfaces for the desired finish and accuracy. Clean your machine, tool, and workpiece of chips and coolant. Ensure the end mill is clean and free of any built-up material before putting it away.
Common Issues and How to Solve Them
Even with the best tools, you might run into a few hiccups. Here’s how to address them:
Issue: Chattering or Vibration
Cause
- Tool overhang is too long.
- Machine is not rigid enough.
- Workpiece is not held securely.
- Feeds or speeds are incorrect (often too slow feed for the speed).
- The end mill is dull or chipped.
Solution
- Reduce tool overhang by using a shorter tool holder or a different collet.
- Ensure the machine is properly set up and not worn.
- Improve workholding rigidity.
- Adjust speeds and feeds – often increasing the feed rate or decreasing the RPM slightly can help.
- Inspect the end mill for damage and replace if necessary.