For precise work on tough stainless steel, a carbide end mill specifically designed for the material is absolutely essential. It offers superior hardness, heat resistance, and edge retention, allowing for clean cuts and accurate dimensions, especially when working with demanding alloys like 304.
Carbide End Mill: Your Secret Weapon for Stainless Steel Precision
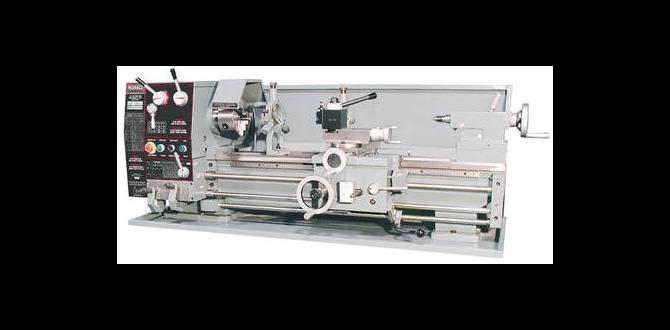
Working with stainless steel can feel like trying to cut hardened butter – it’s tough, it can gum up your tools, and getting a clean, precise finish is a real challenge. Many beginners find themselves frustrated, with tools that dull quickly or leave rough, inaccurate cuts. The good news is, you don’t need brute force; you need the right tool. A carbide end mill isn’t just an option for stainless steel; it’s practically a necessity if you want to achieve those tight tolerances and smooth finishes we all strive for. In this guide, I’ll walk you through why carbide is king for stainless steel and how to choose and use it effectively. Let’s get your projects cutting cleanly and precisely!
Why Stainless Steel Demands More (And What Carbide Delivers)
Stainless steel is fantastic, right? It’s strong, it resists rust and corrosion, and it looks great. But all those good qualities make it a real bear to machine. Unlike softer metals, stainless steel has a higher yield strength, meaning it deforms rather than cuts easily. It also has poor thermal conductivity, which causes heat to build up rapidly at the cutting edge. This heat can quickly wreck conventional cutting tools, leading to dullness, chipping, and that dreaded “gummy” material buildup.
This is where carbide truly shines. Carbide, or tungsten carbide, is a super-hard composite material. It’s incredibly wear-resistant and can handle much higher temperatures than high-speed steel (HSS). When you’re milling stainless steel, especially when you’re aiming for precise dimensions and a good surface finish, a carbide end mill is your best friend. It maintains its sharp edge longer, cuts cooler (relative to HSS), and produces cleaner chips.
Key Advantages of Carbide End Mills for Stainless Steel:
Superior Hardness: Carbide is significantly harder than HSS, allowing it to slice through tough stainless steel without dulling as quickly.
Heat Resistance: Stainless steel generates a lot of heat during machining. Carbide’s high melting point means the cutting edge stays sharp and effective at elevated temperatures.
Edge Retention: Because it’s so hard and heat-resistant, carbide retains its sharp cutting edge for much longer periods, leading to more consistent part quality.
Increased Productivity: Sharper tools that last longer mean you can cut faster and more aggressively, reducing your machining time.
Better Surface Finish: A sharp carbide end mill leaves a smoother, more accurate surface finish on stainless steel compared to a duller HSS tool.
Choosing the Right Carbide End Mill: Beyond Just “Carbide”
It’s not enough to know you need carbide; there are specific features that make an end mill ideal for stainless steel, especially for precise work. When you’re looking for that perfect tool, particularly for demanding tasks like achieving “tight tolerance” with “304” stainless steel, consider these factors:
Material Grade and Coating
Sub-Grade of Carbide: Not all carbide is created equal. Look for carbide grades specifically engineered for machining tough, gummy materials like stainless steel. These often have optimized grain structures.
Coatings: While a bare carbide end mill is good, coatings can provide even more benefits.
TiAlN (Titanium Aluminum Nitride): This is a popular choice for stainless steel. It’s hard and provides excellent thermal resistance, creating a barrier that further protects the carbide substrate from heat.
ZrN (Zirconium Nitride): Offers good lubricity and wear resistance, helping to prevent material buildup.
Uncoated: For some applications, especially where chip evacuation is critical and speeds are slower, uncoated carbide can perform well, but coatings generally offer an advantage for stainless steel.
Number of Flutes
The flutes are the helical cutting edges on the end mill. The number of flutes affects chip clearance and the tool’s ability to handle material.
2 Flutes: Generally offers better chip clearance, which is crucial for gummy materials like stainless steel. This helps prevent chip recutting and tool breakage. It’s often a good choice for slotting andrägen operations in stainless.
3 Flutes: A good balance between cutting ability and chip clearance. It can take a slightly heavier cut than a 2-flute in some scenarios but can be more prone to packing up with chips in very sticky materials.
4 Flutes: Offers better stability and a smoother finish on some materials but can struggle with chip evacuation in gummy stainless steel, increasing the risk of tool breakage. They are often better suited for peripheral milling where chip load is more consistent.
For stainless steel, especially when machining with a focus on preventing material buildup and ensuring good chip evacuation for precision, 2-flute or 3-flute end mills are typically preferred.
Helix Angle
The helix angle is the steepness of the spiral flutes.
Standard Helix (30°): A good all-around choice.
High Helix (45°+): Provides a shearing action that can help cut tougher materials more cleanly and evacuate chips more aggressively. This can be very beneficial for stainless steel.
Variable Helix: Some end mills feature different helix angles on different flutes to break up harmonic vibrations, which can lead to a smoother cut and longer tool life, especially on less rigid setups.
For stainless steel, a higher helix angle (like 45°) or a variable helix design can significantly improve cutting performance and reduce chip packing.
End Mill Geometry
Square End: The most common type, used for general milling, pocketing, and face milling.
Ball Nose: Features a rounded tip, ideal for creating 3D contours and fillets.
Corner Radius: A square end with a small radius at the corner. This adds strength to the cutting edge and helps prevent chipping, which is invaluable when working with hard materials like stainless steel and aiming for tight tolerances.
When precision is key with stainless steel, a square end mill with a corner radius is often a wise investment as it strengthens the most vulnerable part of the cutting edge.
Shank and Length Considerations
Shank Diameter: For a “1/8 inch 10mm shank,” you’re likely referring to a common shank size, but ensure it matches your collet or tool holder. The “10mm shank” is standard for many smaller end mills.
Reach/Length: For stainless steel, it’s often beneficial to use the shortest tool possible to maintain rigidity. However, if you need to reach deeper into a part or machine a deeper pocket, you’ll need a longer tool. For “extra long” tools, ensure you have a rigid setup and appropriate speeds/feeds to avoid chatter and deflection, which can ruin precision. For tight tolerance work, minimize tool overhang.
Putting It All Together: The Ideal End Mill for Stainless Steel Precision
Considering the keywords “carbide end mill 1/8 inch 10mm shank extra long for stainless steel 304 tight tolerance,” we’re looking for a very specific tool:
Material: Carbide.
Type: End Mill.
Diameter/Shank: Likely a smaller diameter end mill with a 1/8″ (approx. 3mm) cutting diameter and a 10mm shank for rigidity. Or, it might mean a small diameter cutting head but a substantial 10mm shank for a better grip.
Length: “Extra long” – this is a trade-off. While longer reach is needed, it sacrifices rigidity. You’ll need to be extra careful with cutting parameters.
Application: Stainless Steel (specifically 304), demanding “tight tolerance” work.
An ideal tool might be a 2-flute or 3-flute, solid carbide end mill with a high helix angle (around 45°) and a small corner radius. A TiAlN coating would be a significant advantage. The “extra long” aspect means you’ll need to focus heavily on rigidity and machining parameters.
Safe Setup and Machining Practices for Stainless Steel
Machining stainless steel with carbide requires a slightly more deliberate approach than with softer aluminum or mild steel. Safety and precision go hand-in-hand here.
Machine Rigidity is Paramount
Stainless steel is unforgiving. Any flex in your machine, tool holder, or the workpiece itself will lead to chatter, poor surface finish, and tool breakage. Ensure everything is as rigid as possible.
Secure the Workpiece: Use strong clamping methods. Avoid relying on just one or two small clamps if possible.
Minimize Tool Overhang: Especially with an “extra long” end mill, keep its projection from the collet or tool holder to an absolute minimum. This is critical for preventing deflection and vibration.
Use Collets, Not Just Tool Holders: A good quality collet chuck system will offer better runout accuracy and rigidity than many basic end mill holders.
Speeds and Feeds: The Delicate Balance
Getting the speeds and feeds right is crucial. Stainless steel requires slower spindle speeds and a healthy feed rate to allow the carbide tool to cut effectively. Too fast a speed and too slow a feed will generate excessive heat, leading to tool wear and chip welding. Too fast a feed can overload the tool.
Here’s a general guideline for starting parameters, but always consult manufacturer data for your specific carbide end mill and stainless steel grade:
Spindle Speed (RPM): Stainless steel, due to its hardness and tendency to work harden, typically requires lower RPMs than softer metals. For a 1/8″ (3mm) carbide end mill in 304 stainless, you might start in the range of 3,000 – 6,000 RPM, depending on the depth of cut and the specific tool’s recommendations.
Feed Rate (IPM or mm/min): A good rule of thumb for carbide in stainless is to maintain a chip load that creates a small, well-formed chip. For a 1/8″ end mill, this might be in the range of 0.001″ – 0.003″ per flute (0.025mm – 0.075mm per flute). Multiply by the number of flutes to get the overall feed rate. So, for a 2-flute end mill, this would be 0.002″ – 0.006″ per revolution.
Depth of Cut (AP): For lighter roughing or precise finishing passes, shallower depths of cut are better. A common starting point for full-width cuts (slotting) might be 0.050″ – 0.100″ (1.2mm – 2.5mm), and for side milling (step-over), perhaps 0.020″ – 0.050″ (0.5mm – 1.2mm). For very precise finishing, an even lighter “clean-up” pass is often done with a very shallow depth.
Width of Cut (AE): When milling pockets or slots, the width of cut impacts chip load and heat. For stainless, it’s often best to avoid taking the full diameter of the tool in one pass if possible, or use a high step-over percentage. A common recommendation is to keep the step-over (part of the tool’s diameter engaged on the side) at around 20-50% of the tool diameter for peripheral milling.
Always perform test cuts and listen to the machine. A smooth, consistent cutting sound is what you’re aiming for. A high-pitched whine often indicates feeds that are too high or speeds that are too low, leading to rubbing. Chattering or knocking sounds mean rigidity issues or incorrect parameters.
Lubrication and Chip Evacuation
Proper lubrication is vital for stainless steel. It helps cool the cutting zone, lubricates the chip as it forms, and aids in chip evacuation.
Flood Coolant: The most effective method. A good quality coolant-lubricant should be used generously.
MQL (Minimum Quantity Lubrication): Using an air-oil mist system can also be effective for smaller machines or when flood coolant isn’t practical.
Cutting Fluid/Paste: For lighter operations or manual milling, a good quality cutting fluid or paste applied directly to the cutting zone can make a significant difference.
Good chip evacuation is paramount. Stainless steel chips can be stringy and sticky, re-welding themselves to the tool if they aren’t cleared properly. Ensure your machine’s coolant nozzle is aimed effectively, or use air blasts to help clear chips. For deeper pockets, peck-drilling cycles (where the end mill retracts periodically to clear chips) are essential.
Example Machining Strategy for Tight Tolerance Stainless Steel
Let’s say you need to mill a precise slot in a piece of 304 stainless steel. You have that “carbide end mill 1/8 inch 10mm shank extra long for stainless steel 304 tight tolerance.”
1. Secure Fixturing: Mount your 304 stainless steel securely in a vise or fixture. Ensure the vise jaws are clean.
2. Tool Setup: Insert the end mill into a high-quality collet chuck. Ensure the shank is as far into the collet as possible, minimizing overhang.
3. Zero the Tool: Carefully touch off your Z-axis zero point on the work surface.
4. Program the Cut:
Roughing Pass: Use a conservative depth of cut (e.g., 0.050″). Set your RPM (e.g., 4,000 RPM for a 1/8″ carbide) and feed rate (e.g., 0.002″ chipload x 2 flutes = 0.004″ feed per revolution, or ~16 IPM). Use a climb milling strategy if your machine supports it well, as it generally produces a better finish.
Finishing Pass: Raise your stock material by the desired final dimension. Set a very light depth of cut (e.g., 0.005″ – 0.010″). Use a slightly slower feed rate (e.g., 0.001″ chipload x 2 flutes = 0.002″ feed per revolution, or ~8 IPM). This pass is critical for achieving tight tolerances and a smooth surface.
5. Coolant: Flood the area generously with coolant.
6. Execute: Run the program, listening intently to the sound of the cut. Be ready to stop if any drastic changes occur.
Benefits of Using a Carbide End Mill for Thread Milling
While this article focuses on general end milling, it’s worth noting that carbide end mills are also essential for thread milling, especially in tough materials. Creating precise internal threads can be just as challenging as general milling.
Accuracy: Carbide thread mills, used with appropriate programming, can produce highly accurate threads, crucial for any assembly where components need to fit perfectly.
Durability: Unlike taps that are prone to breaking in stainless steel if not perfectly aligned or lubricated, thread milling with a durable carbide tool offers a more forgiving and often more consistent method.
Flexibility: A single thread mill can often create multiple thread sizes by adjusting the programmed diameter, offering versatility for your workshop.
For any application requiring precise thread forms in stainless steel, such as fitting custom hydraulic fittings or precision machine components, a carbide thread milling cutter is the go-to tool.
Common Issues and Troubleshooting When Milling Stainless Steel
Even with the right tool, you might encounter problems. Here’s how to troubleshoot:
Problem: Tool Wear / Dullness
Causes: Too high a speed, too low a feed, insufficient lubrication, or material abrasion.
Solutions: Reduce RPM, increase feed rate, ensure floods of coolant, use a higher quality carbide grade or a more advanced coating.
Problem: Chip Welding / Material Buildup (Galling)
Causes: Insufficient chip evacuation, too low a feed rate causing rubbing instead of cutting, insufficient lubrication, or incorrect tool geometry (e.g., too many flutes without good clearance).
Solutions: Increase feed rate, use a 2-flute or 3-flute end mill with good chip breaker features or a high helix angle, ensure excellent coolant flow, use a good quality cutting fluid, consider a coating like TiAlN.
Problem: Chatter / Vibration
Causes: Machine rigidity issues, worn spindle bearings, excessive tool overhang, incorrect speeds/feeds, dull tool.
Solutions: Ensure workholding and tool holding are rigid, minimize tool overhang, experiment with feeds and speeds (sometimes varying RPMs slightly can find a sweet spot), ensure the tool is sharp.
Problem: Poor Surface Finish
Causes: Dull tool, incorrect speeds/feeds, vibration, chip recutting.
* Solutions: Use a sharp, high-quality carbide end mill, ensure correct RPM/feed for a clean chip, use a finishing pass with a very light depth of cut, improve rigidity, ensure good chip evacuation.
Understanding Material Standards for Stainless Steel
When you’re working with precision, understanding the material you’re cutting is as important as the tool. For “304 stainless steel,” this is a common austenitic stainless steel grade. It’s known for its excellent corrosion resistance and formability, but it does work harden significantly when machined. This means the more it’s deformed or cut, the harder the material becomes.
This work hardening is why slow speeds, appropriate feeds, and sharp tools are so critical. You don’t want to rub the material; you want to cut it cleanly to prevent the surface from becoming excessively hard, which then makes subsequent cuts even more difficult.
You can find more detailed information on metallurgy and machining practices for various stainless steel grades from resources like the <a href="https://www.ssina.com/" target="_blank" rel