Carbide end mills, especially 1/8″ with a 10mm shank, are a fantastic, precise tool for effortlessly cutting High-Density Polyethylene (HDPE). Get ready to achieve clean, accurate HDPE cuts for your projects with this simple guide!
Cutting High-Density Polyethylene (HDPE) can sometimes leave you with messy edges or feel like a chore. Many makers run into trouble finding the right tool that balances precision with ease of use, especially in a home workshop. The good news is, there’s a specific type of cutting tool that can make all the difference: a carbide end mill, particularly a 1/8″ one with a 10mm shank designed for dry cutting. These aren’t just ordinary bits; they’re engineered for clean, efficient material removal. In this guide, we’ll walk through exactly why this tool is so brilliant for HDPE and how you can use it to get amazing results for all your projects, from simple jigs to intricate designs.
Why a 1/8″ Carbide End Mill is Your HDPE Best Friend
When you’re working with High-Density Polyethylene (HDPE), you need a cutting tool that can handle its unique properties. HDPE is known for being tough, slippery, and prone to melting if too much heat is generated. This is where a specialized carbide end mill truly shines.
The Power of Carbide
Carbide, also known as tungsten carbide, is an incredibly hard and wear-resistant material. Compared to High-Speed Steel (HSS), carbide tools can withstand higher temperatures and cutting speeds. For HDPE, this means:
- Less Melting: The hardness of carbide allows it to cut through the plastic cleanly without generating excessive heat that can melt the HDPE and gum up the cutting edges.
- Sharper Edges: Carbide holds a very sharp edge for longer, ensuring consistent cutting performance over many projects.
- Durability: These tools are built to last, meaning fewer tool changes and a more reliable cutting experience.
The 1/8″ Sweet Spot
The 1/8-inch diameter is particularly useful for CNC routing and milling of HDPE for several reasons:
- Fine Detail: It allows for intricate cuts and sharp internal corners, which is essential for detailed designs, small parts, or precise lettering.
- Material Removal: While small, a 1/8″ end mill is perfectly suited for the relatively soft nature of HDPE, allowing for efficient material removal without being too aggressive.
- Versatility: It’s a common size that works well for a wide range of applications, from creating small components to cutting through sheets for enclosures or jigs.
The 10mm Shank Advantage
The 10mm shank is a practical feature for several reasons, especially when paired with a 1/8″ cutting head:
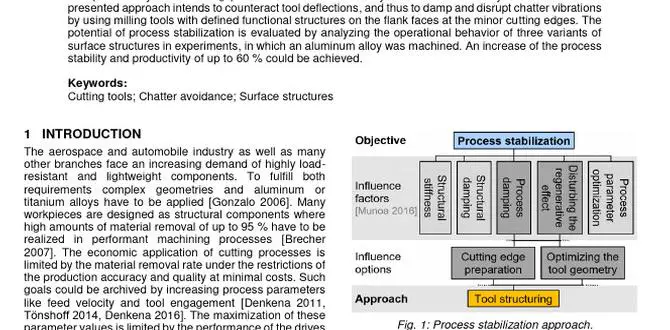
- Rigidity: A larger shank diameter, like 10mm (which is close to 3/8 inch), provides more rigidity than a smaller shank. This reduces tool deflection, especially during more demanding cuts or when the end mill is extended further from the collet. Less deflection means straighter, more accurate cuts.
- Wider Workholding Options: Many common CNC collets and tool holders accommodate 10mm shanks, giving you more flexibility in how you mount the tool.
- Better Heat Dissipation (Indirectly): While the material itself is key, a more robust shank can potentially help dissipate some of the heat generated away from the cutting zone, further minimizing melt-back issues.
Designed for Dry Cutting
Many 1/8″ carbide end mills intended for plastics, including HDPE, are specifically designed for dry cutting. This means they are optimized to perform efficiently without the need for coolant. This is a massive advantage for hobbyists and home workshop users because:
- Cleanliness: No coolant means no messy cleanup. Your workpiece and machine stay clean.
- Simplicity: You don’t need to worry about setting up coolant systems or managing coolant disposal.
- Cost-Effective: It saves on the cost of cutting fluids and associated equipment.
These specialized end mills often have specific flute geometries and coatings designed to evacuate chips effectively and keep the cutting edge cool enough to prevent melting. Look for terms like “plastic cutting,” “non-ferrous,” or “drag bits” (though a true end mill is generally preferred for milling operations) on product descriptions.
Choosing the Right Carbide End Mill for HDPE
Not all carbide end mills are created equal, especially when it comes to cutting plastic. Here’s what to look for:
Key Features to Consider:
- Material: Solid carbide is the standard.
- Number of Flutes: For plastics like HDPE, 1 or 2 flutes are often ideal. Fewer flutes provide better chip evacuation, which is crucial to prevent melting and clogging. More flutes can lead to excessive heat buildup.
- Helix Angle: A high helix angle (e.g., 30-45 degrees) helps lift chips away from the cut quickly, further aiding in preventing melting.
- Coating: While not always necessary for HDPE, some coatings can improve performance and tool life. However, many uncoated carbide tools designed for plastics work exceptionally well.
- End Type: For general milling, square end mills are common. For pocketing operations where you need to cut a flat bottom, a square end mill is fine, but be mindful of the center cutting capability. Ball-nose end mills are for creating curved surfaces, and radius end mills have a rounded corner. For most beginner HDPE projects, a square end mill is a great starting point.
- Specifics for HDPE: Look for end mills marketed for cutting plastics, aluminum, or non-ferrous metals. These are typically designed with more aggressive geometries for efficient chip extraction.
Example Specifications for HDPE:
When searching online or in a tool catalog, here’s a good example of what you might look for:
- Type: Single Flute or Two Flute Upcut Spiral End Mill
- Material: Solid Carbide
- Diameter: 1/8 inch (3.175mm)
- Shank Diameter: 10mm
- Length of Cut: Varies, but consider how deep you need to cut.
- Overall Length: Varies, ensure it fits your machine’s Z-axis travel and spindle.
- Manufacturer Recommendation: Tools specifically recommended for plastics or non-ferrous materials.
Where to Buy Such Tools:
You can find these specialized tools from various online retailers and specialized machining supply stores. Some popular options include:
- Amazon: Offers a wide variety from many brands, often at competitive prices.
- Drill Bit Warehouse: Specializes in cutting tools and often has high-quality carbide options.
- Tooling Manufacturers: Companies like Onsrud, Harvey Tool, or Precise Bits offer high-performance end mills for specific materials.
- CNC-Specific Retailers: Many online stores cater specifically to CNC hobbyists and professionals.
Setting Up Your CNC for HDPE Cutting
Proper setup is crucial for getting the best results when milling HDPE with a 1/8″ carbide end mill. Small adjustments can make a big difference.
Material Clamping: The Golden Rule
HDPE is a relatively soft plastic and can move or “grab” during cutting if not secured properly. This can lead to poor cut quality, tool breakage, or even damage to your workpiece. ALWAYS ensure your HDPE sheet is securely clamped down around the entire perimeter of your cutting area. Avoid clamping only in the center, as the edges can lift.
Clamping Methods:
- Mechanical Clamps: Use sturdy C-clamps or F-clamps to secure the HDPE to your CNC bed or workbench.
- Vacuum Table: If your CNC has a vacuum table, this is an excellent method for holding down thin sheets of HDPE firmly and evenly.
- Double-Sided Tape: For smaller pieces or less aggressive cuts, strong double-sided carpet tape can sometimes work, but mechanical clamping is generally safer for milling.
- Sacrificial Board: It’s highly recommended to place your HDPE on top of a spoilboard (e.g., MDF or plywood). This protects your CNC bed from the end mill if you accidentally cut too deep and provides a stable base for clamping.
Spindle Speed (RPM) and Feed Rate
These two settings are critically linked and the most important for successful plastic cutting. The goal is to remove material efficiently without overheating.
- Spindle Speed (RPM): For a 1/8″ carbide end mill in HDPE, a good starting point is between 12,000 and 18,000 RPM. Lower RPMs can cause melting, while excessively high RPMs might not be necessary and can increase wear.
- Feed Rate: This is how fast the tool moves through the material. For a 1/8″ end mill, a typical feed rate might be between 20 to 50 inches per minute (IPM) or 500 to 1270 mm/minute. The key is to make “chips,” not dust. If you see melted plastic or fine powder, your feed rate is likely too slow, or your RPM is too high (or a combination). If you hear screaming or chattering, your feed rate might be too fast for the RPM.
- Chip Load: This is the thickness of the material removed by each cutting edge of the tool. A good chip load help ensure you’re cutting rather than rubbing. For a 1/8″ end mill, a chip load might be in the range of 0.002″ to 0.004″ per flute. You can often calculate your feed rate using the formula: Feed Rate = RPM × Number of Flutes × Chip Load.
Pro Tip: Always do a test cut on a scrap piece of HDPE. Listen to the sound of the cut. A clean, crisp sound is good. A high-pitched whine or a “sugary” sound suggests melting or rubbing. Visually inspect the chips – they should be small, distinct pieces, not a fine dust or stringy melted plastic.
Depth of Cut (DOC)
It’s generally better to take multiple shallow passes rather than one deep pass, especially when starting out or with a smaller diameter end mill.
- Ideal DOC: For a 1/8″ end mill in HDPE, a depth of cut between 0.1″ to 0.25″ (2.5mm to 6.35mm) is often a good starting point for a full-width cut. If you are doing a full-slotting operation (cutting with the full diameter of the bit), stay on the shallower end.
- Adaptive Cutting: If your CAM software supports it, adaptive clearing strategies can be very effective. These strategies use a smaller step-over (sideways motion) and allow the tool to engage with the material more gradually, reducing heat buildup and stress on the tool.
Step-Over Distance
This refers to how much the tool moves sideways on each pass when cutting pockets or profiles. For HDPE, a step-over of 30-50% of the tool diameter is usually a good balance between cutting efficiency and surface finish.
For a 1/8″ end mill, this means a step-over of roughly 0.04″ to 0.06″ (1mm to 1.5mm).
Workholding Surface
As mentioned, using a spoilboard (like MDF) beneath your HDPE is highly recommended. This protects your machine’s bed and provides a flat, stable surface. Ensure the spoilboard itself is also material-ready.
For excellent resources on starting with CNC on plastics, check out general guides on machining polymers. Many principles apply across different plastics, and reputable sources like Machinery’s Handbook or university engineering departments often share valuable data, though you’ll need to look for specific plastic machining sections.
Step-by-Step Cutting Process for HDPE
1. Design Your Part
Use your preferred CAD (Computer-Aided Design) software to create your part. Ensure your design accounts for the 1/8″ tool diameter, especially in tight internal corners. If you need perfectly sharp internal corners, a ball-nose end mill of the appropriate diameter will be required. For most projects, designing with the understanding that internal corners will have a radius equal to half the tool diameter is sufficient.
2. Generate Toolpaths (CAM)
Import your CAD file into your CAM (Computer-Aided Manufacturing) software. Define your material (HDPE), tool (user-defined 1/8″ carbide end mill with appropriate flute count, diameter, etc.), and cutting parameters (spindle speed, feed rate, depth of cut, step-over).
Key CAM Settings to Focus On:
- Tool Selection: Accurately define your 1/8″ carbide end mill.
- Stock Material: Set to HDPE.
- Operation Type: Choose based on your needs (e.g., Pocketing for clearing areas, Profile for cutting out the shape).
- Cut Direction: Climb milling is often preferred for plastics as it can result in a better surface finish and less chance of “chatter.”
- Tabs: If you’re cutting a part out, enable tabs in your CAM software. These are small sections of material that are intentionally left uncut at the end of the path, holding your part in place until you manually break or cut them free. This prevents the part from shifting or flying out of the machine.
3. Prepare Your CNC Machine
- Install the Spoilboard: Ensure you have a flat, secure spoilboard.
- Mount the HDPE: Clamp your HDPE sheet firmly to the spoilboard. Double-check all clamps are tight.
- Install the End Mill: Securely install the 1/8″ carbide end mill into your CNC’s collet or tool holder. Ensure it’s inserted to the recommended depth for rigidity.
- Zero the Axes: Carefully set your X, Y, and Z zero points. For Z zero, it’s common practice to use a touch probe or manually touch off on the surface of the HDPE or spoilboard.
4. Perform Dry Run (Crucial!)
Before cutting into the material, run the entire program with the spindle OFF but the machine moving along the programmed path. This allows you to:
- Verify your X, Y, Z zero points are correct.
- Check for any unexpected movements or collisions.
- Ensure the machine is following the toolpaths accurately.
- Confirm the clearance height is sufficient for tool changes or gantry movements.
5. Execute the Cut
- Turn on Spindle: Ensure your spindle is at the correct RPM.
- Start the Cut: Jog the machine to the starting point of your program and begin the cutting job.
- Monitor Continuously: Stay with your machine while it’s cutting. Listen for any unusual sounds, watch for excessive smoke or melting. Be ready to hit the Emergency Stop if anything goes wrong.
6. Finish the Part
- Remove Tabs: Once the cut is complete and the machine has moved to a safe position, carefully remove the part from the spoilboard. If you used tabs, you’ll need to cut them free using a hobby knife, flush-cut saw, or even a rotary tool.
- Deburr: Small burrs might be present along the cut edges. These can often be removed with a deburring tool, a sharp knife, or a light sanding.
- Clean Up: Remove any residual dust or debris from your workpiece and machine.
Troubleshooting Common Issues
Even with the best tools, you might encounter a few hiccups. Here’s how to tackle them:
Issue: Melting or Gumming of HDPE
- Cause: Too much heat generated. This can be due to feed rate being too slow, spindle speed being too high, insufficient chip evacuation (e.g., wrong flute count or helix angle), or taking too deep of a cut.
- Solution:
- Increase feed rate.
- Decrease spindle speed.
- Use an end mill with fewer flutes (1 or 2) and a higher helix angle.
- Reduce the depth of cut per pass.
- Ensure your CAM software is set up to clear chips effectively.
Issue: Chattering or Vibration
- Cause: Tool deflection, loose workholding, spindle runout, or feed rate/spindle speed combination is causing resonance.
- Solution:
- Ensure HDPE is clamped firmly.
- Use a stabilizer post or longer tool holders if necessary to reduce tool overhang.
- Use an end mill with a higher quality shank and ensure it’s clean.
- Try adjusting feed rate and spindle speed – sometimes a slightly faster feed rate can “push through” chatter.
- Ensure your CNC machine’s physical components (like belts or lead screws) are properly tensioned and maintained.
Issue: Rough Surface Finish
- Cause:


