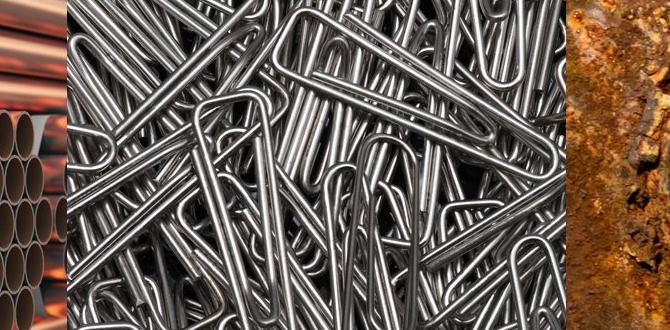
Carbide end mills with a 1/8 inch diameter and 10mm shank are crucial for efficient HDPE chip evacuation, especially when working with longer cuts. Their design helps clear material quickly, preventing melting and ensuring clean results in your CNC projects.
Hey there, workshop wizards! Daniel Bates here from Lathe Hub. Ever found yourself battling melted plastic and a clogged-up CNC machine when trying to cut High-Density Polyethylene (HDPE)? It’s a common headache, especially when you’re diving into projects that require deeper or longer passes. The good news is, the right tool can make all the difference. Today, we’re focusing on a small but mighty hero: the 1/8 inch carbide end mill with a 10mm shank. This specific bit is like a secret weapon for keeping those pesky plastic chips flying out of the cut, ensuring smooth, clean work. Ready to banish melted plastic and level up your HDPE game? Let’s get started!
Why the 1/8 Inch Carbide End Mill with 10mm Shank is Your HDPE Best Friend
HDPE, or High-Density Polyethylene, is a fantastic material for many DIY and professional projects. It’s tough, water-resistant, and relatively easy to machine. However, it has a low melting point. When you’re cutting into it, especially with longer or deeper passes, the friction from the cutting tool can generate heat. If that heat isn’t managed, two things can happen: the HDPE can start to melt, and the chips (the bits of material you’re cutting away) can get stuck. This is where our hero tool comes in.
A 1/8 inch end mill is small enough to get into detailed areas, but the key here is its design for chip evacuation. The “extra long” aspect often refers to a higher flute count and specific flute geometry designed explicitly for plastics. The 10mm shank offers a robust connection to your collet or tool holder, providing stability needed for precise cuts. When you select a 1/8 inch carbide end mill specifically designed for plastic evacuation, you’re choosing a tool that:
- Cuts cleanly: Carbide is harder and stays sharper for longer than many other materials, leading to a cleaner cut.
- Evacuates chips effectively: Special flute designs help lift and carry chips away from the cutting area.
- Reduces heat buildup: By clearing chips quickly, less heat is trapped in the cut.
- Prevents melting: This is the big one! Good chip evacuation is paramount for avoiding a melted mess.
- Wears better: Proper use drastically extends the life of your cutting tool.
Understanding Chip Evacuation and HDPE
Imagine trying to drill a hole in a soft material that instantly gums up the drill bit. That’s essentially what can happen with HDPE if the chips aren’t cleared. The tool’s flutes are like tiny conveyors. Their job is to grab the material being cut and lift it out of the slot. For materials like HDPE, which can become gummy when warm, efficient evacuation is critical. If chips pile up, they act as an insulator and quickly bring the cutting edge up to melting point. The melted plastic then sticks to the bit, clogging it further and leading to a poor finish or, worse, tool breakage.
The 1/8 inch diameter combined with a 10mm shank (which is a standard size for many CNC machines) offers a balance. The small diameter allows for intricate work and detail, while the 10mm shank provides the rigidity needed to handle the forces involved in cutting. An “extra long” version might have longer flutes, allowing it to reach deeper into the material in a single pass or cut longer slots without getting completely buried in chips.
Carbide vs. HSS: Why Carbide Wins for HDPE Evacuation
High-Speed Steel (HSS) tools are common and can be great for many applications. However, when it comes to materials like HDPE that are prone to melting, carbide tools generally have an advantage. Carbide (Tungsten Carbide) is significantly harder than HSS. This means:
- Higher heat resistance: Carbide can withstand higher temperatures before its cutting edge degrades.
- Better edge retention: It stays sharp for much longer, especially in abrasive or heat-generating materials like plastics.
- More efficient cutting: A sharper, harder edge cuts more cleanly, producing smaller, more manageable chips that are easier to evacuate.
To maximize chip evacuation, look for end mills specifically designed for plastics. These often feature:
- High helix angles: This steep spiral helps lift chips effectively.
- Polished flutes: A smooth flute surface reduces friction and prevents plastic from sticking.
- Fewer flutes (often 2 or 3): More flute area for chip clearance compared to tools with 4 or more flutes, which are better suited for finishing in metals.
For a 1/8 inch end mill with a 10mm shank intended for HDPE, a 2-flute, high-helix, polished flute design is often ideal. The 10mm shank, as mentioned, provides excellent rigidity, which is crucial for preventing chatter and ensuring a clean cut, especially when the tool is extended to reach deeper.
Choosing Your 1/8 Inch Carbide End Mill for HDPE
When you’re browsing for this specific tool, here’s what to look for:
Key Features to Prioritize
Not all 1/8 inch carbide end mills are created equal, especially when it comes to cutting plastic. Here are the must-have features for effective HDPE evacuation:
- Material: Solid Carbide (Tungsten Carbide). This is non-negotiable for good edge life and heat resistance.
- Diameter: 1/8 inch (approximately 3.175mm).
- Shank Diameter: 10mm. This ensures a secure fit in most standard CNC collets and tool holders.
- Flute Count: 2 or 3 flutes. These provide the best balance of cutting action and chip clearance for plastics. More flutes (like 4) can pack chips too tightly.
- Flute Type: High helix angle (often 30-45 degrees). This steep spiral is engineered to “screw” chips out of the cut.
- Flute Finish: Polished or mirror-finish flutes. This reduces friction and prevents melted plastic from adhering to the tool.
- Coating: While not always strictly necessary for HDPE if your feed and speed are dialed in, coatings like TiCN (Titanium Carbonitride) can extend tool life and improve performance by further reducing friction and increasing hardness. However, for plastics, the focus is more on geometry and finish.
- “O-Flute” or “Plastic Cutting” Designation: Many manufacturers will specifically label bits as such. These are designed with aggressive chip-clearing geometry.
Understanding the “Extra Long” Aspect
The term “extra long” can be a bit vague. For an end mill, this usually refers to the length of the cutting flutes, known as the “effective cutting length.” A typical 1/8 inch end mill might have a cutting length of 1/4 inch or 3/8 inch. An “extra long” version might have a cutting length of 1/2 inch, 3/4 inch, or even longer. This is important if your project requires deeper cuts in a single pass or if you need to machine through a thicker piece of HDPE.
Important Consideration: When using an extra-long end mill, especially one with a small diameter like 1/8 inch, you introduce more potential for deflection or vibration. A tool with a larger shank diameter (like our 10mm) helps mitigate this by providing a more rigid connection. Always ensure your machine’s rigidity and setup can support longer reach tools.
Where to Buy and What to Expect
You can find these specialized end mills at reputable tool suppliers online and in well-stocked industrial supply stores. Brands like Precise Bits, Bits & Bits, Lakeshore Carbide, and others often carry tools designed for plastics. When looking at pricing, remember that quality solid carbide tools, especially those with specialized geometries, will cost more upfront than basic HSS bits, but their performance and longevity in HDPE will justify the investment.
Setting Up for Success: CNC Parameters and Safety
Having the right tool is only half the battle. Proper speed, feed rate, and safe handling are critical for great results when cutting HDPE with your 1/8 inch carbide end mill.
| Parameter | Typical Range for HDPE (1/8″ Carbide) | Notes for Optimal Evacuation and Crisp Cuts |
|---|---|---|
| Spindle Speed (RPM) | 18,000 – 30,000 RPM | Higher RPMs can help with chip evacuation, but ensure your machine can achieve it reliably. Start conservatively. |
| Feed Rate (IPM / mm/min) | 15 – 40 IPM (approx. 380 – 1000 mm/min) | This is crucial. Too slow, and you melt. Too fast, and you risk tool breakage. Aim for smaller chip load. |
| Chip Load per Flute | 0.001″ – 0.002″ (0.025mm – 0.05mm) | This is arguably the MOST important setting. Small chip load creates small chips that are easy to evacuate. |
| Depth of Cut (Doc) | 0.020″ – 0.100″ (0.5mm – 2.5mm) | Shallow depths of cut are key for effective chip evacuation, especially in softer plastics. Avoid “plunging” too deep at once. |
| Stepover (For Pocketing/Profiling) | 25% – 50% of tool diameter | For profiling (cutting edges), use a small stepover or a single pass. For pocketing, 25-50% is usually fine for roughing. Finish passes with even smaller stepovers can improve surface finish. |
| Cooling/Chip Removal | Compressed Air / Air Blast | A directed stream of compressed air is essential. It blows chips out of the flute and away from the cut. Flood coolant is usually not recommended for HDPE as it can make the material more prone to melting and clog channels. |
Dialing in Your Feed and Speed
Finding the perfect “sweet spot” for feed and speed is an iterative process. These values are general guidelines. Always consult the end mill manufacturer’s recommendations if available.
- Start Conservatively: If you’re unsure, always start at the lower end of the recommended RPM and feed rate.
- Listen to Your Machine: Is it chattering? Is the motor struggling? Adjust as needed.
- Watch for Melting: If you see plastic building up on the bit or melting into the cut, your feed rate is too slow, your depth of cut is too high, or your chip load is too large. Increase feed rate slightly or reduce DOC.
- Observe Chip Formation: Ideally, you want small, thin, curly chips that are easily blown away. Large, stringy, or melted chips mean you need to adjust your settings.
- Per-Pass Depth of Cut: For deep cuts, it’s often better to make multiple shallow passes rather than one deep one. This ensures each pass has ample room for chip evacuation.
A great resource for understanding chip load is this calculator from CNC Cookbook, which can help you understand the math behind it, though you’ll still need to experiment for your specific material and setup.
Safety First, Always!
Working with CNC machines and cutting tools involves inherent risks. Always prioritize safety.
- Eye Protection: Always wear safety glasses or a face shield. Plastic chips can fly at high speeds.
- Dust Mask: While cutting HDPE doesn’t produce the fine dust of wood, airborne particles can still be an issue. Use a dust mask, especially during longer operations.
- Secure Workpiece: Ensure your HDPE is firmly clamped to your machine bed. Any movement can lead to ruined parts or dangerous tool crashes.
- Machine Guarding: Keep all machine guards in place.
- Tool Inspection: Before each use, inspect your end mill for wear, chipping, or damage. A damaged tool is less effective and more dangerous.
- Emergency Stop: Know where your machine’s emergency stop button is and how to use it.
- Work Area: Keep your work area clean and free of clutter.
For more detailed safety guidelines, consult resources like OSHA’s Machine Guarding Safety information.
Step-by-Step: Cutting HDPE with Your Carbide End Mill
Let’s walk through a common scenario: cutting out a shape from a sheet of HDPE using your 1/8 inch, 10mm shank carbide end mill.
Preparation is Key
- Design Your Part: Create your design in CAD software. Ensure it’s what you want!
- CAM Software: Import your design into your CAM (Computer-Aided Manufacturing) software.
- Tool Selection: Select your 1/8 inch 2-flute, high-helix, polished carbide end mill from your tool library. If you don’t have one programmed, you’ll need to input its basic dimensions (diameter, shank diameter, flute length, overall length).
- Define Toolpaths: Set up your cutting strategies. For cutting out a shape (profile cut), you’ll likely use a “Contour” or “Profile” toolpath. For clearing out an area (pocketing), use a “Pocket” toolpath.
- Input Feeds & Speeds: Enter your starting parameters for RPM, feed rate, depth of cut, and stepover. Remember to start with conservative values and adjust.
- Air Blast Setup: Ensure your compressed air blast is positioned to effectively blow chips away from the cutting area as the tool moves. This is vital!
- Secure Your Material: Clamp your HDPE sheet firmly to the CNC bed. Use plenty of clamps, especially around the areas to be cut. Double-sided tape or CNC spoilboard inserts can also be used for thin sheets, but robust clamping is best.
- Set Z-Zero: Accurately set your Z-axis zero point on the surface of the HDPE.
The Cutting Process
- Load the Tool: Insert the 1/8 inch end mill into a 10mm collet and secure it firmly in your spindle. Ensure there are no chips or debris on the shank or collet.
- Initial Dry Run (Optional but Recommended): Perform a “dry run” of the toolpath with the spindle off. This allows you to visually check that the toolpath is correct and won’t crash into clamps or your workpiece in the wrong places.
- Start Spindle and Air Blast: Once you’re ready, turn on your spindle to the programmed RPM and activate your compressed air blast.
- Initiate Cut: Start the G-code program. The machine will move the tool to the starting position and then plunge into the material to begin cutting.
- Monitor the Cut: Watch and listen!
- Are chips flying out cleanly?
- Is the material melting or gumming up?
- Is the cut surface looking smooth?
- Is the machine making unusual noises?
- Adjust as Needed: If you notice melting or excessive chip buildup, pause the job. Try slightly increasing the feed rate or decreasing the depth of cut for subsequent passes. If the bit seems to be struggling or you hear chattering, you might need to reduce feed rate or DOC.
- Complete the Toolpath: Let the machine run through the entire programmed path. For profiling, ensure you’re cutting “on the outside” or “on the inside” of your line as intended in your CAM software. For a full cutout, you want the tool to move around the perimeter until the part is free.
- Tool Retract: The tool will automatically retract from the material. Turn off the spindle and air blast once the tool is clear.
Post-Cut Inspection and Finishing
- Remove Workpiece: Carefully remove the cut part from the remaining material. Be aware that small pieces can sometimes be sharp or difficult to dislodge cleanly.
- Inspect the Part: Check the edges for smoothness. Look for any signs of melting or slag.
- Deburr if Necessary: Depending on your material and the cut quality, you might need to lightly deburr the edges