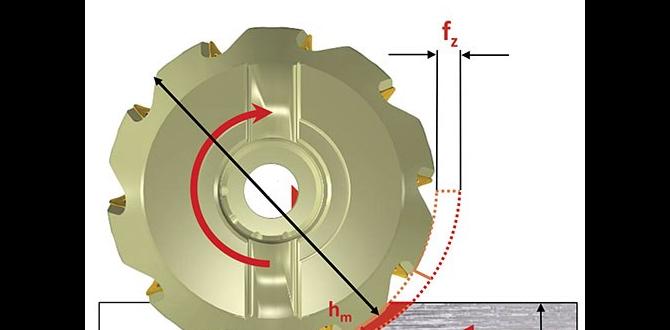
A 1/8 inch carbide end mill is absolutely essential for cleanly cutting FR4 materials, providing precision and preventing damage, making it a must-have for any hobbyist or professional working with circuit boards or similar composites.
Working with FR4 can be tricky. If you’ve ever tried to cut this common circuit board material with the wrong tools, you know the frustration. Edges can chip, the material can splinter, and your precision projects can end up looking… well, less than perfect. For anyone building electronics, making custom enclosures, or even dabbling in detailed CNC projects involving FR4, the question often arises: what’s the best tool for the job? We’re here to tell you that a specific type of cutting tool stands out above the rest, and mastering its use will elevate your projects significantly. Get ready to discover why a tiny, yet mighty, 1/8 inch carbide end mill is your new best friend when it comes to FR4.
Why FR4 Demands the Right Tool
FR4 is a ubiquitous material in the electronics world, forming the backbone of most printed circuit boards (PCBs). But it’s not just fiberglass and epoxy resin; it’s a composite that can be tough to machine cleanly. What makes it challenging? FR4 is abrasive and brittle. When you try to cut it with standard tools, you risk:
- Chipping and Delamination: The fiberglass layers can easily separate or chip away, leading to rough, unprofessional edges.
- Excessive Heat: The friction generated can melt the epoxy binder, gumming up your tool and creating a mess.
- Tool Wear: Standard bits can dull quickly when faced with the abrasive nature of fiberglass.
- Poor Surface Finish: This results in inaccurate cuts, impacting the functionality and aesthetics of your projects.
For precise work, like cutting custom PCBs, creating intricate panel mounts, or prototyping enclosures, you need a tool that can handle these challenges without compromising accuracy or finish. This is where specialty end mills shine.
Enter the 1/8 Inch Carbide End Mill
When we talk about the “carbide end mill 1/8 inch” for FR4, we’re referring to a specific type of cutting tool designed for high-performance material removal. Let’s break down what makes it so special:
- Carbide: This is the key material. Tungsten carbide is incredibly hard and wear-resistant, far more so than high-speed steel (HSS). This allows it to slice through abrasive materials like FR4 with ease and maintain a sharp edge for much longer.
- 1/8 Inch Diameter: This is a common and highly versatile size. For PCB work, 1/8 inch is perfect for routing out internal shapes, cutting precise outlines for enclosures, and even for engraving details. It offers a good balance between accuracy and material removal rate.
- End Mill: As opposed to a drill bit, an end mill has cutting edges on its sides as well as its tip. This allows it to cut horizontally into material (plunging) and move sideways to create slots, pockets, and complex shapes.
Key Features to Look For
Not all 1/8 inch carbide end mills are created equal, especially when dealing with FR4. Here are some features that make them ideal:
- Number of Flutes: For FR4, 2-flute or 3-flute end mills are generally preferred. More flutes can lead to better surface finish but can also cause chip packing in harder materials. For FR4, 2-flutes offer excellent chip evacuation, crucial for preventing heat buildup and clogging. 3-flutes can offer a slightly better finish.
- Coating: While not always necessary for short runs, specialized coatings (like TiAlN or TiCN) can further enhance performance by reducing friction, increasing hardness, and improving tool life, especially in demanding applications.
- Helix Angle: A standard helix angle (typically 30-45 degrees) works well for general FR4 milling.
- Shank Diameter: While we’re focusing on a 1/8 inch cutting diameter, the shank (the part that goes into your tool holder) can vary. For stability and to prevent runout (wobble), a 1/4 inch or 6mm shank is common for end mills of this cutting size, offering more rigidity than a 1/8 inch shank. We often see “carbide end mill 1/8 inch 10mm shank” for a slightly larger, more robust tool.
- Straight vs. Spiral: For FR4, spiral flute end mills are standard as they allow for cutting in multiple directions.
For the best results and ease of use for beginners, a general-purpose 2-flute or 3-flute carbide end mill with a standard helix angle is a fantastic starting point. If you see descriptions like “carbide end mill 1/8 inch 10mm shank extra long for fr4,” it means the flute length is extended, which can be useful for deeper cuts but requires careful consideration of machine rigidity.
Choosing the Right End Mill for FR4: Beyond the Basics
When selecting your 1/8 inch carbide end mill specifically for FR4, consider these additional factors:
- Material Type: While FR4 is common, other PCB substrates exist. Ensure your chosen end mill is designed for composites and fiberglass.
- Application: Are you profiling (cutting out the exact shape)? Pocketing (creating recessed areas)? Engraving small features? A general-purpose end mill will handle most tasks, but specialized ones exist for extreme precision or high-volume production.
- Machine Capability: Your CNC machine’s rigidity and spindle power will influence how aggressive you can be with the end mill. A smaller, lighter machine might perform better with slower feed rates and shallower depth of cuts, even with a carbide end mill.
- MQL (Minimum Quantity Lubrication): For FR4, using a coolant mist system (MQL) is highly recommended. It dramatically reduces heat, lubricates the cut, and helps clear chips. Look for end mills described as “MQL friendly” or designed to work with mist cooling.
Recommended Specifications for FR4 Milling
To guide your selection, here’s a table of typical specifications for a good 1/8 inch FR4 end mill:
| Specification | Recommended Value for FR4 | Notes |
|---|---|---|
| Cutting Diameter | 1/8″ (3.175 mm) | Standard size for routing and detail work. |
| Shank Diameter | 1/8″ (3.175 mm), 1/4″ (6.35 mm), or 6 mm | 1/4″ or 6mm offers better rigidity; 10mm shank is often seen for longer tools asking for more stability. |
| Number of Flutes | 2 or 3 | 2 flutes typically offer better chip evacuation, 3 flutes can provide a slightly smoother finish. |
| Material | Solid Carbide | Essential for hardness and wear resistance. |
| Helix Angle | 30° – 45° | Standard angles are suitable for FR4. |
| Coating | Uncoated or basic (e.g., ZrN) | For MQL use, often coatings aren’t strictly necessary unless pursuing extreme tool life. |
| Chip Breakers / Special Geometry | Optional | Some end mills have specialized geometries for improved chip control, but standard ones work well. |
Step-by-Step: Milling FR4 with a 1/8 Inch Carbide End Mill
Now, let’s get hands-on. Following these steps will help you achieve excellent results when milling FR4.
Step 1: Secure Your Workpiece
This is paramount for safety and accuracy. Place your FR4 material on a stable work surface or a CNC machine bed. Use clamps, double-sided tape specifically designed for CNC work, or a vacuum table to ensure the FR4 cannot move during the milling process. For PCBs, often a spoilboard is used, and the FR4 board is taped or vacuumed down onto that.
Step 2: Set Up Your CNC Machine (if applicable)
Install the 1/8 inch carbide end mill into your router or CNC spindle collet. Ensure it’s seated firmly and the collet is tightened securely. If your machine has a tool height sensor, use it to accurately set the Z-axis zero position; otherwise, manually jog the spindle down to touch off on the surface of your workpiece or the spoilboard.
Step 3: Define Your Cutting Paths
Using your CAM software (or by manually setting coordinates for simpler tasks), define the toolpaths. For FR4, it’s generally best to:
- Profile Cuts (Outlines): Use “tab” features in your CAM software. Tabs are small sections of material left uncut at intervals around the perimeter, holding the cut-out piece in place until the very end. This prevents the piece from shifting or being thrown during the final cut. Use a climb-milling strategy where possible, which often yields a cleaner edge.
- Pocketing: For pockets, define the shape and depth. You can often use an “on-path” or “inside” strategy depending on whether the pocket is defined by its internal or external boundary.
- Engraving: For fine details, use appropriate V-bits or specialized engraving end mills, but a 1/8 inch can also work for larger engraved lines.
Step 4: Calibrate Feed Rate and Spindle Speed
This is where experience and manufacturer recommendations come in. For FR4 and a 1/8 inch carbide end mill, a good starting point might be:
- Spindle Speed: 18,000 – 24,000 RPM
- Feed Rate: 20 – 60 inches per minute (IPM) or 500 – 1500 mm per minute (MM/min).
These are approximate. Always consult the end mill manufacturer’s recommendations for their specific tooling. You may need to adjust these based on your machine and desired finish. A common recommendation for CNC routers is to ensure the chip load (the thickness of material removed by each flute per revolution) is between 0.001″ and 0.004″ (0.025mm to 0.1mm) for a 1/8″ end mill. Chip load = Feed Rate / (Spindle Speed * Number of Flutes).
Step 5: Implement Cooling / Lubrication
If using MQL, turn it on before the cut begins. If you don’t have MQL, a blast of compressed air directed at the cutting zone can help clear chips and reduce heat buildup. Avoid using liquid coolant that can saturate the fiberglass.
Step 6: Perform the Cut
Start the milling operation. Listen to the machine. A smooth, consistent sound is good. If you hear chattering or excessive grinding, stop the machine and re-evaluate your settings (feed rate, depth of cut, or spindle speed). For depth of cut per pass:
- Pocketing: Start with a shallow depth of cut, perhaps 1/8″ (3mm) or less, and increase if your machine handles it well.
- Profiling: A full depth cut might be possible, depending on the rigidity of your machine and workpiece fixturing.
For FR4, taking lighter passes is often better than one deep pass, as it reduces stress on the material and the tool, leading to a cleaner cut and less risk of delamination.
Step 7: Clear Tabs and Finish
Once the main cutting operation is complete, if you used tabs, you’ll need to carefully break them. A hobby knife, flush-cut nippers, or another pass with the end mill (carefully controlled) can remove the tabs. Clean up any rough edges with light sanding or a deburring tool.
Benefits of Using the Right Carbide End Mill for FR4
Investing in the correct tooling pays dividends. Here’s why a 1/8 inch carbide end mill is so beneficial for FR4:
- Superior Finish: Get clean, crisp edges that don’t look splintered or frayed. This is especially critical for PCBs where precise dimensions matter.
- Increased Accuracy: Carbide tools maintain their sharpness longer, ensuring consistent cut dimensions throughout your project.
- Reduced Material Waste: Fewer mistakes due to tool failure mean less wasted FR4.
- Extended Tool Life: Carbide’s hardness means your end mill will last significantly longer than HSS tools in abrasive materials.
- Faster Machining: While you might take lighter passes, the overall efficiency is higher due to less downtime for tool changes or rework.
- Versatility: A 1/8 inch carbide end mill isn’t just for FR4; it’s a workhorse for many plastics, soft metals, and wood composites.
You can find great resources on machining best practices from organizations like the National Institute of Standards and Technology (NIST), which often publishes research and standards that inform machining operations.
Alternative Tools and Why They Fall Short for FR4
It’s helpful to know why other tools aren’t ideal for FR4 so you can appreciate the carbide end mill’s value.
- Standard Steel End Mills (HSS): While cheaper, HSS quickly dulls when cutting fiberglass. They generate more heat, leading to melted epoxy and poor cut quality. They are simply not hard enough for long-term, precise FR4 cutting.
- Drill Bits: Drill bits are designed for making holes, not for moving sideways through material to create shapes. Using a drill bit for profiling will result in a rough, oversized cut and likely damage to the bit and material.
- Router Bits (Woodworking): Many woodworking router bits have aggressive profiles and aggressive feed rates designed for softer woods. While some specialty router bits might work for a short time, they often aren’t designed for the abrasive, brittle nature of FR4 and will wear out rapidly, failing to provide the crisp edges needed.
The specialized geometry and material of carbide end mills are specifically engineered to overcome the challenges presented by composite materials like FR4.
Maintenance and Care of Your Carbide End Mill
Even though carbide is hard, proper care will extend your tool’s life and ensure optimal performance.
- Cleaning: After each use, clean your end mill thoroughly. Remove any FR4 dust, resin buildup, or coolant residue. A brass brush or a solvent designed for resins can work.
- Inspection: Before and after use, inspect the flutes for any signs of chipping, dulling, or excessive wear. A dull or damaged end mill will produce poor results and can even damage your machine.
- Storage: Store your end mills in a dry place, ideally in a protective case or holder. This prevents them from knocking against each other and damaging the cutting edges.
- Sharpening: Carbide end mills can be resharpened, but this is a specialized process often best left to professional grinding services. For most hobbyists, replacing a significantly worn end mill is more cost-effective than professional sharpening.
Common Pitfalls When Milling FR4
Be aware of these common mistakes to avoid frustration:
- Using Dull or Damaged Tools: This is the quickest way to ruin a project and your material.
- Taking Too Deep of a Cut: Forcing the end mill too deep in a single pass creates excessive heat and stress, leading to chipping and delamination.
- Inadequate Chip Evacuation: Chips building up in the flutes act like sandpaper, dulling the tool and increasing heat.
- Insufficient Workpiece Fixturing: Any movement of the FR4 during cutting will result in inaccuracies and potentially dangerous situations.
- Improper Speeds and Feeds: Too fast a feed rate can cause the tool to break or chatter; too slow can lead to rubbing and overheating.
Always start with conservative settings and increase them cautiously as you gain confidence and understand how your machine and tooling behave.
Frequently Asked Questions About 1/8 Inch Carbide End Mills for FR4
Q1: Can I use a 1/8 inch carbide end mill for cutting acrylic or plastics?
A1: Yes, absolutely! Carbide end mills, especially those with fewer flutes (like 2), are excellent for cutting most plastics and acrylics. They provide a clean cut and reduce the


