Carbide end mills, especially 1/8″ ones, are incredibly effective for dry cutting copper, offering precision and ease for hobbyists and professionals alike.
Ever looked at a piece of copper and thought, “I wish I could cut that cleanly and easily with my mill?” You’re not alone! Working with metals, especially softer ones like copper, can present unique challenges. Getting that perfect cut without melting, gumming up your tools, or creating a mess is key. Many beginners struggle with finding the right tool that’s both precise and manageable for smaller projects or detailed work. That’s where a specially designed carbide end mill comes in. We’re going to dive into why a specific type – the 1/8″ carbide end mill – is a real game-changer for dry cutting copper, making your machining tasks smoother and your results sharper. Get ready, because we’re about to unlock a simpler way to mill copper.
Why a 1/8″ Carbide End Mill is Perfect for Copper
Copper is a fantastic material for many projects, from intricate jewelry to functional electrical components. However, it can also be a bit of a sticky challenge when it comes to machining. It has a tendency to “gum up” softer cutting tools, leading to poor surface finish, tool breakage, and frustrating delays. This is where the right tooling makes all the difference.
The Magic of Carbide
Carbide, or tungsten carbide, is a super-hard composite material. It’s significantly harder and more rigid than high-speed steel (HSS), which is what many standard end mills are made from. This hardness means carbide tools can withstand higher cutting temperatures and forces, but more importantly for copper, they’re much less likely to deform or lose their sharp edge when encountering sticky materials.
Why 1/8″ Size Matters
The 1/8-inch diameter is incredibly versatile. For the hobbyist or someone working on detailed parts, this size offers:
Precision: It allows for intricate cuts, fine details, and small pockets that larger end mills just can’t achieve.
Maneuverability: Its small size means it can get into tight corners and work on smaller workpieces without overwhelming them.
Reduced Material Stress: For delicate copper pieces, a smaller tool exerts less force, reducing the risk of bending or damaging the workpiece.
“Dry Cutting” Convenience
“Dry cutting” means machining without the use of a cutting fluid or coolant. While coolant is often recommended for metal cutting to cool the tool and lubricate the cut, copper can sometimes be machined dry effectively. Using a specialized end mill designed for this purpose, like a dedicated copper-cutting carbide bit, means you avoid the mess and disposal issues associated with coolants. This is a huge win for home workshops where fume extraction and cleanup can be a concern. Your workspace stays cleaner, and setup is often quicker.
Choosing the Right 1/8″ Carbide End Mill for Copper
Not all 1/8″ carbide end mills are created equal, especially when it comes to cutting copper dry. You need to look for specific features that make it a “genius” choice for this material.
Key Features to Look For:
Material: Definitely carbide. Ensure it’s a solid carbide end mill.
Flute Count: For copper, a low flute count (typically 2 or 3 flutes) is often preferred. More flutes can load up with softer materials like copper. Two-flute end mills are excellent for chip evacuation and are generally less prone to clogging.
Helix Angle: A lower helix angle (often around 30 degrees or even less) is good for softer materials. This provides a sharper cutting edge and helps lift chips away more effectively than a steeper helix.
Coating: While not always strictly necessary for copper if the geometry is right, some coatings can further improve performance and tool life. However, for simplicity and cost-effectiveness, a good uncoated carbide end mill with the right geometry is often sufficient for copper.
Shank Size: The prompt mentions “carbide end mill 1/8 inch 10mm shank.” This is a bit of a mix-up, as usually the cutter diameter and shank diameter are specified separately. A common configuration might be a 1/8″ (approx. 3.175mm) cutter diameter with a 1/8″ (3.175mm) or a 1/4″ (6.35mm) shank for better rigidity. If you are indeed seeing end mills marketed with a 1/8″ cutter and a 10mm (0.393″) shank, this would be an “extra long” shank relative to the cutter size, which can be advantageous for reaching into deeper features or over obstacles, but it also increases the potential for vibration. For standard operations with a 1/8″ cutter, a matching 1/8″ shank or a larger, more rigid shank like 1/4″ is more typical. We’ll proceed assuming a standard 1/8″ cutter diameter.
Where to Find Them
You can find these specialized end mills at reputable industrial supply stores, online machining tool retailers, and even some well-stocked hobbyist shops. Look for terms like “copper cutting,” “soft metal,” or “low helix” when searching. Brands specializing in CNC tooling are a good bet.
Understanding “Dry Cutting” Parameters for Copper
Dry cutting copper with a 1/8″ carbide end mill isn’t just about picking the right tool; it’s also about using it correctly. This means understanding the delicate balance of speed and feed.
Spindle Speed (RPM):
For a 1/8″ carbide end mill cutting copper, a good starting point is often in the range of 5,000 to 15,000 RPM. Carbide tools can handle high speeds, and copper benefits from relatively faster surface speeds to prevent chip welding. However, starting conservatively is wise.
Too Fast: Can lead to excessive heat, material buildup on the cutter, and a poor finish.
Too Slow: Can cause the cutter to rub rather than cut, leading to chatter, poor chip formation, and increased wear.
Feed Rate (IPM or mm/min):
The feed rate is how fast the tool moves through the material. This is crucial for efficient chip removal and preventing the copper from packing into the flutes. For a 1/8″ end mill, a good starting point might be around
5 to 20 inches per minute (IPM) or 120 to 500 mm/min.
Too Fast: The tool will struggle to cut, potentially overloading the spindle or breaking bits. Chip thickness will be too large.
Too Slow: Results in a rubbing action, generating heat and poor surface finish. Chip thickness will be too small.
Depth of Cut (DOC):
For dry cutting copper with a small end mill, it’s best to take shallow passes.
Radial Depth of Cut (Stepover): For finishing passes, aim for a very small stepover (e.g., 10-20% of the cutter diameter). For roughing, you might go up to 50%.
Axial Depth of Cut: For 1/8″ end mills, especially in copper, aim for axial depths of cut that are no more than half the cutter diameter, or even less (e.g., 0.030″ to 0.050″ or 0.8mm to 1.2mm). Taking deeper cuts increases the load and the chance of chip recutting and material buildup.
Chip Load (Chip Thickness):
This is a fundamental concept in machining. It’s the thickness of the chip that each cutting edge removes. A good chip load is essential for preventing tool wear and achieving a good finish.
Formula: Chip Load = Feed Rate / (RPM Number of Flutes)
For Copper: You want a chip load that’s thick enough to be easily cleared by the flutes but not so thick that it overloads the cutter. For a 1/8″ 2-flute end mill, a chip load of 0.002″ to 0.004″ (0.05mm to 0.10mm) is often a good range to aim for.
Example Calculation:
Let’s say you have a 1/8″ 2-flute end mill and you want a chip load of 0.003″.
If you run at 10,000 RPM:
Feed Rate = Chip Load RPM Number of Flutes
Feed Rate = 0.003″ 10,000 2 = 60 IPM
This is a bit on the high side for a starting point. So, you might adjust your RPM or desired chip load.
If you want to run at 30 IPM with 10,000 RPM and 2 flutes:
Chip Load = 30 IPM / (10,000 RPM
2) = 0.0015″
This is a bit on the thin side, which might mean you need to increase your feed rate or RPM cautiously.
Important Note on “Extra Long” Shanks
As mentioned in the prompt, if you have a 1/8″ end mill with a 10mm shank, this is a significant difference in diameter. The 10mm shank offers a lot more rigidity and mass, which helps dampen vibrations. However, it’s the
cutting portion’s reach that matters for chatter. If the “extra long” refers to the length of the cutting flutes or the overall length from shank to tip, it could increase the tendency for chatter too. Always try to use the shortest possible tool extension (how far the tool sticks out of the collet or holder) for maximum rigidity.
Step-by-Step Guide: Dry Cutting Copper with a 1/8″ Carbide End Mill
Ready to get started? Follow these steps for a smooth and successful copper milling experience.
Materials and Tools You’ll Need:
1/8″ Carbide End Mill specifically suited for copper (low flute count, appropriate helix). Ensure it has a standard shank diameter that fits your collet or tool holder.
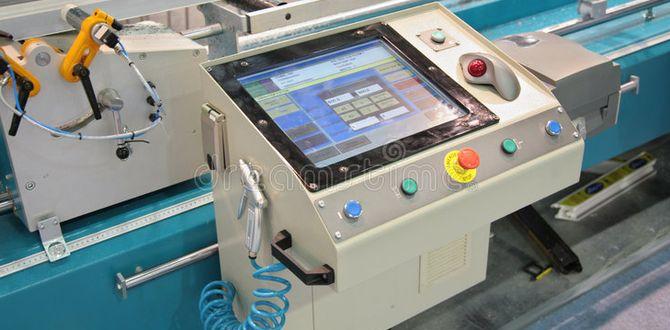
Your Milling Machine: Whether it’s a benchtop CNC, a manual mill, or a Sherline-style mill.
Workpiece Clamping System: Vise, clamps, magnetic chuck, or specialized fixture.
Copper Workpiece: Cleaned and prepped.
Safety Glasses: Essential eye protection.
Hearing Protection: Recommended as milling can be noisy.
Dust Mask/Respirator: Copper dust can be harmful if inhaled.
Calipers or Measuring Tools: For setting depths and checking dimensions.
Deburring Tool or File: For cleaning up edges after cutting.
Step 1: Secure Your Workpiece
This is paramount for safety and accuracy.
Ensure your copper workpiece is firmly clamped to the milling machine’s table. Make sure there are no gaps under the workpiece, and that your clamping method won’t deform the part. A machinists’ vise with soft jaws can be helpful for delicate copper parts to avoid marring the surface.
Step 2: Set Up the End Mill
Mount your 1/8″ carbide end mill securely in your milling machine’s collet or tool holder.
Make sure the shank is properly seated in the collet to prevent runout. Avoid extending the tool further than necessary from the spindle nose; a shorter tool stick-out provides more rigidity and reduces the risk of vibration and breakage.
Step 3: Zero Your Axes
Establish your workpiece zero point (X, Y, and Z origins).
For the Z-axis zero, a common method is to use a “Z-probe” or touch plate. Carefully lower the spinning end mill until it just makes contact with the top surface of your copper workpiece (or a known reference surface). This sets your Z=0 to the top of your material.
Step 4: Program or Manually Set Your Cuts
Chip Load = 30 IPM / (10,000 RPM
This is where you tell the mill what to do.
If you’re using a CNC mill, this involves loading your G-code program created in CAM software. For manual mills, you’ll be making the cuts using the handwheels. It’s highly recommended to use a CAM software for consistent results, especially for precise paths. Resources like Autodesk Fusion 360 offer free hobbyist licenses and have excellent milling simulation tools.
Step 5: Start Cutting (Slowly and Carefully)
Begin your first operation.
Start your spindle at your target RPM. Slowly engage the feed rate. Listen to the sound of the cut. A good cut sounds like a continuous, smooth slicing noise. If it sounds squeaky, chattery, or like the tool is rubbing, adjust your feed rate or RPM slightly. For the first pass, it’s wise to take a shallower depth of cut than planned to verify your settings and tool engagement.
Step 6: Monitor Chip Evacuation
This is critical for dry cutting copper.
Watch the flutes of your end mill as it cuts. You should see chips being cleared away effectively. If chips start to build up and pack into the flutes, your feed rate might be too slow, your RPM too low, or your depth of cut too high. Stop the machine immediately if you see significant buildup, as this can lead to tool breakage or a bad surface finish.
Step 7: Complete Your Cuts
Work through your programmed paths or manual operations.
Take your time and let the tool do the work. For complex shapes, consider breaking them down into simpler operations. For example, rough out a pocket with a slightly larger stepover, then use a finishing pass with a very small stepover and potentially a slightly different set of parameters to get a smooth surface finish.
Step 8: Clean Up and Inspect
After the machining is complete.
Carefully remove the finished part from the machine. Use a deburring tool or a fine file to gently remove any sharp edges or burrs left by the cutting process. Inspect your work for dimensional accuracy and surface finish. Small copper dust particles may cling to the workpiece; use compressed air (wear eye protection!) or a brush to clean them away.
Advantages of Dry Cutting Copper with This End Mill
Using the right 1/8″ carbide end mill for dry copper cutting offers several compelling benefits, especially for makers and small workshops.
Pros:
Cleanliness: No coolant means no mess, no coolant waste disposal issues, and a simpler machine setup. This is ideal for home or hobbyist workshops.
Precision and Detail: The 1/8″ size allows for intricate designs and fine features that are often sought after in copper projects like jewelry, model making, or custom electronics.
Speed of Operation: Once dialed in, dry cutting can be surprisingly fast. Proper parameters allow the tool to efficiently slice through the material.
Material Versatility (within its scope): While optimized for copper, this type of end mill can also perform well on other soft metals like brass or even some plastics if the parameters are adjusted.
Cost-Effectiveness: Avoiding coolant pumps, reservoirs, filters, and disposal costs saves money and reduces maintenance.
Reduced Risk of Tool Welding: The specialized geometry and material hardness of carbide, combined with appropriate cutting parameters, minimize the tendency for copper to “stick” to the cutting edge.
Considerations (Not quite cons, but things to be aware of):
Dust Generation: Dry cutting produces fine metal dust. Proper dust collection and personal protective equipment (PPE), such as a respirator, are crucial.
Heat Management: Without coolant, heat is primarily dissipated through chip evacuation. If chip evacuation is poor, the tool and workpiece can get hot. This highlights the importance of correct parameters.
Material Limitations: This approach is best suited for pure copper or alloys with similar machinability. Very hard copper alloys or other tougher metals will require different tooling and likely the use of coolant.
For a comprehensive guide on machinability of various metals, resources from organizations like the Sandvik Coromant Machining Handbook can provide valuable insights into material properties and cutting challenges.
When to Use Coolant (and When Not To)
While we’re focusing on dry cutting, it’s worth understanding why coolant is often used and when you might still consider it, even with the right end mill.
Reasons to Use Coolant:
Heat Dissipation: For high-volume production or very deep cuts, coolant is essential for keeping the tool and workpiece temperature down, extending tool life, and preventing thermal deformation.
Chip Evacuation: A flood of coolant can help flush chips away from the cutting zone, especially in deep pockets or when using higher flute counts.
Lubrication: Coolant provides a lubricating film between the chip and the cutting edge, reducing friction and wear.
Corrosion Prevention: Some coolants contain inhibitors to protect the workpiece and machine components from rust.
When Dry Cutting is Preferred:
Hobbyist/Home Workshops: As we’ve discussed, the simplicity, cleanliness, and reduced setup/cleanup time make dry cutting very appealing.
Small Parts & Delicate Materials: When the risk of coolant contamination or mess outweighs the benefits, dry cutting is a good choice.
Specific Materials: Certain materials, like some plastics or very soft metals like pure copper, can be machined effectively dry if the correct tooling and parameters are used.
Machine Limitations: If your machine isn’t equipped for coolant and you want to avoid retrofitting, learning to dry cut is a valuable skill.
For detailed information