A 1/8-inch carbide end mill with low runout is crucial for precise milling, especially in small-scale projects. It ensures your cuts are accurate and repeatable, reducing frustration and producing cleaner results on your milling machine.
Welcome to Lathe Hub! Ever started a milling project, only to find your cuts aren’t quite lining up, or the finish is a bit rough? It’s a common hiccup for beginners, and often, the culprit isn’t your skill, but the tiny details of your tools. Today, we’re diving into the world of a very specific, yet incredibly important, tool: the 1/8-inch carbide end mill, focusing on why “low runout” is your new best friend. This little powerhouse can make a world of difference in achieving those clean, precise cuts you’re aiming for. Stick around as we break down what it is, why it matters, and how to pick the right one to elevate your milling game.
Why a 1/8-Inch Carbide End Mill with Low Runout Matters
When you’re working with a milling machine, especially on intricate parts or tight tolerances, precision is key. The end mill is the cutting tool that does the actual work of removing material. Imagine a perfectly round spinning top; that’s what you want your end mill to be like in its collet. Now, imagine that spinning top wobbling slightly. That wobble is similar to runout.
Runout refers to the deviation from a perfect rotation. In the context of an end mill, it’s how much the cutting edges deviate from the true axis of rotation when the tool is held in the spindle. High runout means the tool isn’t spinning perfectly true, causing the cutting edges to wander. This can lead to:
- Inaccurate Dimensions: Your cuts won’t be as deep or as wide as intended, leading to parts that don’t fit together.
- Poor Surface Finish: The tool will be effectively taking uneven cuts, leaving behind chatter marks or a rougher surface than desired.
- Increased Tool Wear: Uneven cutting puts extra stress on certain parts of the cutting edge, causing it to dull faster.
- Vibration and Noise: A wobbly tool can cause your machine to vibrate more, leading to a less pleasant and potentially less safe working environment.
For a small 1/8-inch end mill, precision is even more critical. These tools are often used for fine details, slotting, or engraving where even a slight deviation can be noticeable. A low-runout tool minimizes this wobble, ensuring that each pass of the cutting edge is consistent. This results in:
- Accurate and Repeatable Cuts: Your programmed depth and width will be achieved consistently.
- Clean Surface Finishes: The workpiece will look much better, requiring less post-machining cleanup.
- Longer Tool Life: Even wear on the cutting edges means your end mill will last longer.
- Smoother Machine Operation: Less vibration means a more stable cutting process.
What is “Low Runout”?
In machining, “low runout” typically refers to a runout measurement of 0.0005 inches (0.013 mm) or less. For truly high-precision applications, this can be even tighter, but for most hobbyist and small-shop needs, staying within this range is excellent. It means the tool spins with minimal wobble, allowing for maximum accuracy.
Understanding Carbide End Mills
Before we dive deeper into the low-runout aspect, let’s quickly touch upon why carbide is the material of choice for many milling applications, especially for smaller tools like our 1/8-inch example.
Why Carbide?
Carbide, specifically tungsten carbide, is a super-hard material created by combining tungsten and carbon. It’s significantly harder and more rigid than High-Speed Steel (HSS). This translates to several advantages:
- Higher Cutting Speeds: You can often run carbide tools faster, reducing your machining time.
- Better Heat Resistance: Carbide can withstand higher temperatures generated during cutting, which is crucial for maintaining tool sharpness and preventing workpiece damage.
- Increased Rigidity: Its stiffness means less deflection under cutting forces, leading to more accurate cuts, especially with smaller diameter tools.
- Longer Tool Life: When used correctly, carbide end mills can last much longer than their HSS counterparts.
However, carbide is also more brittle than HSS. This means it can chip or break if subjected to sudden shocks or improper use, like plunging too aggressively or experiencing excessive runout. This is another reason why a low-runout holder and spindle are so important when using carbide.
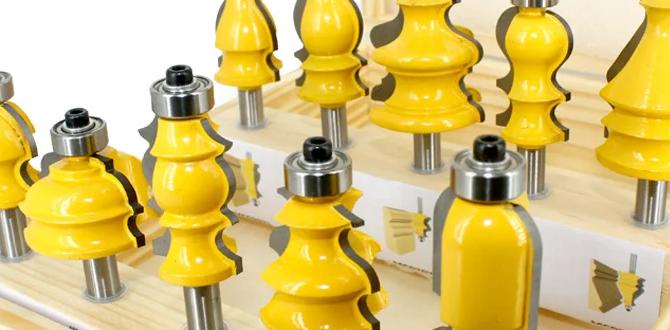
Types of Carbide End Mills
Carbide end mills come in various forms, designed for specific materials and operations. For our focus, we’re generally looking at general-purpose end mills, but understanding the types can be helpful:
- Square End Mills: These have flat ends and are used for slotting, pocketing, contouring, and general milling.
- Ball Nose End Mills: These have a rounded tip, ideal for 3D contouring and creating fillets.
- Corner Radius End Mills: These have a small radius at the corners, which strengthens the cutting edge and helps prevent chipping, while also creating a fillet in the workpiece.
- Drilling/Plunge End Mills: Designed to plunge into material straight down, like a drill.
For a beginner focusing on general milling tasks, a 1/8-inch square end mill is likely the most versatile starting point. When searching for specific tools, you might see terms like “2 flute,” “4 flute,” etc. More flutes mean it can remove more material per revolution (higher chip load), but they also require faster spindle speeds and are more prone to clogging with chips, especially in softer materials. For general-purpose work and good chip evacuation, 2-flute and 4-flute are common.
The 1/8-Inch Carbide End Mill You Need: Key Features to Look For
When you’re searching for that perfect 1/8-inch carbide end mill, especially one that promises low runout, a few key specifications will jump out. Let’s break them down so you know what you’re looking for.
Shank Diameter
The most common shank diameter for a 1/8-inch end mill in hobbyist and light industrial settings is 1/8-inch. However, you might also find them with a 3mm or 1/4-inch shank. Why the difference? A larger shank (like 1/4-inch) is more rigid and can better handle cutting forces, reducing deflection and the potential for breakage. If your collet system can hold a 1/4-inch shank, it’s often a more robust choice, even if the cutting diameter is 1/8-inch. For this article, we’ll focus on the 1/8-inch cutting diameter, often paired with a 1/8-inch or 1/4-inch shank.
Length
End mills come in various lengths, from short stubby versions to long, slender ones often referred to as “extra long” or “extended reach.”
- Standard Length: Good for general-purpose milling where reach isn’t a major concern.
- Longer Length: Provides more reach to get over workholding or into deeper pockets. A 1/8-inch tool with a longer shank (e.g., 4 inches or more overall length) can be very useful for certain projects.
- Extra Long: Like an “extra long for cast iron” variant, these might be optimized for reach while still balancing rigidity. When choosing an extra-long variant, always consider the increased potential for deflection due to the leverage.
The “extra long” designation often implies a shank length that allows for deeper reach. For cast iron, specific coatings and flute geometries are often beneficial, but the core principle of low runout remains.
Flute Count
As mentioned earlier, the number of flutes affects performance:
- 2 Flutes: Excellent for softer materials like aluminum and plastics, and generally better for slotting and clearing chips. They also tend to be more forgiving in terms of spindle speed requirements and are often preferred for their ability to cut on both the periphery and the end center.
- 4 Flutes: Better suited for harder materials like steel and harder alloys. They offer a smoother finish and can handle higher metal removal rates in rigid setups.
For a 1/8-inch end mill used on a variety of materials in a beginner’s workshop, a 2-flute design is often a versatile and forgiving choice.
Coatings
While not always present on the simplest end mills, coatings can extend tool life and improve performance. Common ones include:
- Uncoated: The baseline. Good for general use.
- TiN (Titanium Nitride): A common, general-purpose coating that adds hardness and lubricity, extending tool life and allowing for slightly higher speeds.
- TiCN (Titanium Carbonitride): Harder than TiN, good for abrasive materials.
- AlTiN (Aluminum Titanium Nitride): Excellent for high-temperature applications and machining steels and stainless steels.
For a beginner working with common metals like aluminum, mild steel, or even some plastics, an uncoated or TiN-coated end mill is usually sufficient and cost-effective. If you plan to machine harder materials regularly, consider coatings like TiCN or AlTiN.
Helix Angle
This refers to the angle of the flutes. A steeper helix angle (e.g., 30-45 degrees) is better for softer materials and provides a “shearing” action, resulting in a smoother finish. A shallower helix angle (e.g., 15-30 degrees) is more rigid and better for harder materials.
The All-Important “Low Runout”
Now, let’s circle back to the star of our discussion: low runout. As a beginner, you might be asking, “How do I ensure my end mill has low runout?” It’s a combination of factors, primarily related to the tool itself and how it’s held in your machine.
What Causes High Runout?
- Poor Quality End Mill: The manufacturing process of the end mill itself can introduce imbalances.
- Damaged End Mill: Even a small chip on a cutting edge can cause it to run out.
- Worn or Dirty Collet: Collets can wear out over time, or dirt and debris can prevent them from gripping the tool properly and concentrically.
- Improperly Seated Tool: Not pushing the end mill fully into the collet or socket.
- Worn Spindle Bearings: The bearings in your milling machine’s spindle can wear out, preventing it from spinning perfectly true.
- Collet Chuck Issues: For machines using collet chucks (like R8 or ISO spindles), the chuck itself can be the source of runout if it’s damaged or worn.
Ensuring Low Runout in Your Setup
Since the end mill itself is a primary component, purchasing end mills from reputable manufacturers that specify low runout tolerances is a great start. However, even the best end mill will exhibit runout if its holder or spindle is compromised.
Here’s how to achieve and maintain low runout:
- Invest in Quality Collets: For CNC machines, ER collets (ER11, ER20, etc.) are common and offer excellent precision when properly used. For manual machines, R8 collets or similar are standard. Look for reputable brands. Always use the correct size collet for your end mill shank. Never force a tool into a collet that is too small.
- Cleanliness is Crucial: Ensure your collets, collet nut, and spindle taper are clean and free of chips, coolant, or any debris before inserting the tool. A single small chip can cause significant runout.
- Proper Tool Insertion: When inserting the end mill into the collet, push it in firmly and ensure it’s seated all the way. Then, tighten the collet nut (or tool holder) securely. For CNC machines, you’ll often insert the tool, tighten the nut slightly, and then let the spindle run at a moderate speed to help seat it before fully tightening.
- Use a Quality Tool Holder/Collet Chuck: If your machine uses a tool holder system (like Morse taper with a collet adapter, or a dedicated collet chuck), ensure that system is in good condition.
- Regular Maintenance: Periodically check your spindle for signs of wear. Listen for unusual noises. If you suspect spindle issues, it might require professional servicing.
- Dial Indicator for Verification: For critical applications, you can use a dial indicator to measure the runout of your end mill directly at it’s cutting edge or near the shank. This helps diagnose issues and verify your setup. Most reputable tool holders claim accuracies like "runout under 0.0002" or "0.0004"".
Choosing a 1/8-inch carbide end mill that is marketed as “low runout” is a good indicator, but it’s only half the battle. The other half lies in your machine’s ability to hold that tool true.
Using Your 1/8-Inch Carbide End Mill Safely and Effectively
Now that you’ve got your low-runout 1/8-inch carbide end mill, how do you use it? Safety and understanding basic machining principles will make your experience much smoother.
Safety First!
Machining involves sharp, fast-moving tools and heavy machinery. Always prioritize safety:
- Wear Safety Glasses: Always wear ANSI-approved safety glasses. A face shield offers even better protection.
- No Loose Clothing or Jewelry: These can get caught in rotating machinery. Tie back long hair.
- Secure Your Workpiece: Ensure your workpiece is firmly clamped. A loose part can be ejected violently.
- Keep Hands Clear: Never reach near a running spindle. Use appropriate tools for chip removal (like a brush or vacuum).
- Know Your Machine: Understand its controls, emergency stops, and proper operating procedures. Refer to your machine’s manual.
- Feed Rate and Speed: Start conservatively. Too fast a feed rate can break the tool or pull the workpiece. Too slow can cause rubbing and generate excessive heat.
- Coolant/Lubrication: For many materials, especially metals, using a cutting fluid or coolant is essential to keep the tool cool, lubricate the cut, and help evacuate chips.
Basic Machining Parameters (Starting Points)
These are general guidelines and can vary significantly based on your specific machine rigidity, material hardness, coolant use, and the exact end mill geometry. It’s always best to start conservatively!
Let’s consider machining in Aluminum using a 1/8-inch, 2-flute carbide end mill. These are often used for general-purpose milling and pocketing.
A good starting point for spindle speed (RPM) might be around 3,000-6,000 RPM. The surface speed for aluminum is typically in the range of 300-600 SFM (Surface Feet per Minute). With a 1/8″ (0.125″) diameter, RPM = (SFM 12) / Pi Diameter. Using 400 SFM: RPM = (400 12) / (3.14159 0.125) ≈ 12,200 RPM. So, 3,000-6,000 RPM is often too slow for ideal aluminum cutting at very high speeds, but it’s a safer, more achievable starting point for many hobby machines and less rigid setups. For a more rigid machine, you might push speeds higher! The key is to find the sweet spot where the tool cuts cleanly and doesn’t rub or chatter.
For feed rate (IPM – Inches Per Minute), consider chip load. For a 2-flute end mill in aluminum, a chip load of 0.001″ to 0.003″ per flute is often recommended. Multiply this by the number of flutes to get the IPM:
Chip Load x Flutes = IPM
If Chip Load = 0.002″ per flute: 0.002″ * 2 flutes = 0.004″ IPM. This is extremely slow for many machines.
It’s more common to see Feed Rate programmed directly. For a 1/8″ end mill in aluminum, a starting feed rate could be in the range of 5-15 IPM. Again, this is highly dependent on your machine’s stability.
Table: Example Machining Parameters (1/8″ 2-Flute Carbide End Mill)
| Material | Spindle Speed (RPM) | Feed Rate (IPM) | Depth of Cut (Per Pass) | Notes |
|---|