A 1/8 inch carbide end mill is crucial for achieving precise cuts and tight tolerances when machining acrylic, ensuring smooth finishes and accurate part dimensions.
Working with acrylic can sometimes feel like a puzzle, especially when you need those super-accurate, tight-fitting parts. It’s easy to get frustrated with melted plastic or rough edges, right? Well, I’ve got good news! The right tool makes all the difference. Today, we’re diving into the world of the 1/8 inch carbide end mill, a real hero for getting those clean, precise cuts in acrylic that you’re aiming for. We’ll show you exactly why it’s your go-to tool and how to use it for stunning results. Get ready, because we’re about to make acrylic machining much simpler!
<h2>Why a 1/8 Inch Carbide End Mill is Your Acrylic Best Friend</h2>
<p>When we talk about machining acrylic, especially for projects demanding precision, the 1/8 inch carbide end mill is a standout choice. It might seem small, but this tool packs a punch when it comes to performance, particularly when you need to achieve that “tight tolerance” – meaning your parts fit together almost perfectly, with very little wiggle room. Let’s break down why it’s so good.</p>
<h3>The Magic of Carbide</h3>
<p>First off, what’s “carbide”? It’s a super-hard material, much harder than typical high-speed steel (HSS). This hardness means it can handle higher cutting speeds and temperatures without getting dull as quickly. For acrylic, which can melt easily if your tool isn’t up to the job, this is a huge advantage. Carbide stays sharp longer and cuts cleaner, reducing the chances of that dreaded melting and gumming up.</p>
<h3>The Perfect Size: 1/8 Inch</h3>
<p>Now, about the 1/8 inch size. This specific diameter is incredibly versatile for acrylic work. It’s small enough to create intricate details, sharp corners, and very fine features. Think about engraving text, cutting out small logo shapes, or creating precise slots for components to slide into. For tight tolerances, a smaller diameter tool allows for more delicate adjustments and finer control over the material removal process. You can remove tiny amounts of material very accurately.</p>
<h3>Benefits for Acrylic Machining</h3>
<ul>
<li><strong>Reduced Melting:</strong> Carbide’s heat resistance helps prevent acrylic from melting and sticking to the cutter, which is a common problem.</li>
<li><strong>Cleaner Cuts:</strong> Sharp, hard carbide leaves a smoother surface finish, reducing the need for post-machining cleanup.</li>
<li><strong>Precision & Detail:</strong> The 1/8 inch size is ideal for intricate designs and achieving those critical tight tolerances.</li>
<li><strong>Durability:</strong> Carbide tools last longer, meaning fewer tool changes and a more efficient workflow.</li>
</ul>
<h2>Key Features to Look For in Your 1/8 Inch Carbide End Mill</h2>
<p>Not all 1/8 inch carbide end mills are created equal, especially when you’re working with a material like acrylic. There are a few specific features that make a big difference in how well the tool performs. Paying attention to these details will save you headaches and lead to much better results.</p>
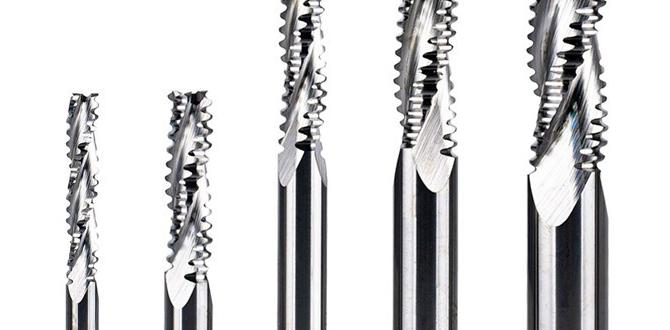
<h3>Number of Flutes (The Cutting Edges)</h3>
<p>Flutes are the spiral grooves on the end mill. For acrylic, you generally want an end mill with fewer flutes. Why? More flutes mean more cutting edges packed closer together. This can lead to chip buildup, especially in a material that can melt. For acrylic, two or three flutes are often ideal.</p>
<ul>
<li><strong>2 Flutes:</strong> Excellent for plastics like acrylic. They provide good chip clearance, which is crucial for preventing melting and clogging. This allows chips to escape easily.</li>
<li><strong>3 Flutes:</strong> Can also work well, offering a slightly smoother finish than 2-flute cutters but still with decent chip clearance. They’re a good middle ground.</li>
<li><strong>4+ Flutes:</strong> Generally not recommended for acrylic. The close spacing of the flutes can trap heat and chips, leading to melting and a poor cut.</li>
</ul>
<h3>Coating</h3>
<p>End mills can come with various coatings. For acrylic, a coating isn’t as critical as it is for some harder metals, but certain types can still offer benefits. However, the most important thing is the quality of the carbide and the sharpness of the cutting edge. Polished flutes are a plus, as they help reduce friction and improve chip flow.</p>
<h3>Helix Angle</h3>
<p>The helix angle is the steepness of the spiral flutes. For plastics like acrylic, a lower helix angle (often referred to as a “straight flute” or “low helix” design) is generally better. This geometry helps you push the material away more efficiently and reduces the tendency for the plastic to stick to the cutter. It’s designed for better chip evacuation in softer materials.</p>
<h3>Shank Size vs. Cutting Diameter</h3>
<p>You’ll often see specifications like “1/8 inch cutting diameter” and “3/8 inch shank.” This is important! The cutting diameter is how wide the part of the tool that actually cuts is. The shank is the part that fits into your machine’s collet or holder. A 3/8 inch shank on a 1/8 inch cutter means you’ll need a collet that can hold a 3/8 inch shank, but the cutter profile itself is only 1/8 inch wide. This provides a more rigid connection to the spindle, which helps with accuracy and reduces vibration, crucial for those tight tolerances.</p>
<h3>”Extra Long” – What’s the Deal?</h3>
<p>An “extra long” end mill usually refers to the overall length or the length of the cutting portion. For certain deep pockets or complex 3D profiling, this can be useful. However, for general acrylic work, especially when precision is key, a standard length with a strong shank (like the 3/8″ shank) is often preferred for rigidity. If you do need to reach deep into a part, ensure you use appropriate speeds and feeds to avoid chatter and vibration.</p>
<h2>Essential Tools and Setup for Using Your End Mill</h2>
<p>Using your new 1/8 inch carbide end mill effectively means having the right setup and knowing a few key things before you even start cutting. Let’s get you prepared for success. Safety first, always!</p>
<h3>What You’ll Need:</h3>
<ul>
<li><strong>CNC Machine or Milling Machine:</strong> A router with a CNC control, a small desktop CNC, or a manual milling machine will work.</li>
<li><strong>Collet Chuck and Appropriate Collets:</strong> You need a way to hold the end mill securely. If you have a 3/8 inch shank end mill, you’ll need a collet and chuck that can accommodate it.</li>
<li><strong>Workholding:</strong> This is how you’ll hold your acrylic piece down. Clamps suitable for acrylic or a vacuum table are good options.</li>
<li><strong>Safety Gear:</strong> Safety glasses are non-negotiable. Hearing protection and dust collection are also highly recommended.</li>
<li><strong>Coolant or Air Blast (Optional but Recommended):</strong> While some acrylic can be cut dry, a little cooling can go a long way in preventing melting. Compressed air is often sufficient, directed at the cutting zone.</li>
</ul>
<h3>Setting Up Your Machine:</h3>
<p>Proper setup is crucial for accuracy and preventing issues. Make sure your machine is clean and that your collet and chuck are free of debris before inserting the end mill.</p>
<ul>
<li>Secure the end mill firmly in the collet.</li>
<li>Ensure your acrylic workpiece is held down very securely. Any movement will ruin your tight tolerances.</li>
<li>If using a CNC, double-check that your work zero (origin point) is set accurately.</li>
<li>Set up your dust collection or chip evacuation system.</li>
</ul>
<h2>Achieving Tight Tolerances in Acrylic: Step-by-Step Guide</h2>
<p>Now for the exciting part! Here’s how to use your 1/8 inch carbide end mill to get those precise, tight-tolerance cuts in acrylic. We’ll go through it step-by-step, keeping things simple and focused on great results.</p>
<h3>Step 1: Material and Tool Selection</h3>
<p>You’ve already got your ideal tool: a 1/8 inch carbide end mill, likely with 2 or 3 flutes, and a good, solid shank (like 3/8 inch) for rigidity. Ensure the tool is clean and in excellent condition – no nicks or dull spots.</p>
<h3>Step 2: Calibrate Your Machine</h3>
<p>This is critical for tight tolerances. Make sure your machine’s axes are properly calibrated and that your runout (the wobble of the spindle) is minimal. A dial indicator can help check this. For CNCs, verify your steps per millimeter/inch are correct.</p>
<h3>Step 3: Determine Speeds and Feeds</h3>
<p>This is where experience helps, but for beginners with acrylic, here are some good starting points. These are approximate and might need fine-tuning based on your specific machine, acrylic type, and end mill. There are many online calculators, but general recommendations for acrylic with a 1/8 inch carbide end mill often look like this:</p>
<p>Generally, you want to cut acrylic relatively fast but with a slower feed rate, and shallow depth of cuts to prevent melting and vibration. The goal is a clean chip, not melted plastic.</p>
<table>
<thead>
<tr>
<th>Parameter</th>
<th>Recommended Value for Acrylic</th>
<th>Notes</th>
</tr>
</thead>
<tbody>
<tr>
<td>Spindle Speed (RPM)</td>
<td>15,000 – 30,000 RPM</td>
<td>Higher RPMs are typical for plastics. Adjust based on cooling.</td>
</tr>
<tr>
<td>Feed Rate (IPM or mm/min)</td>
<td>15 – 40 IPM (approx. 380 – 1000 mm/min)</td>
<td>Start conservatively. Listen to the cut. Too fast causes melting.</td>
</tr>
<tr>
<td>Depth of Cut (DOC)</td>
<td>0.010″ – 0.050″ (approx. 0.25 – 1.27 mm)</td>
<td>Shallow cuts are key for clean machining and less heat.</td>
</tr>
<tr>
<td>Plunge Rate</td>
<td>Half of Feed Rate</td>
<td>Plunging deeper can generate more heat.</td>
</tr>
</tbody>
</table>
<p><em>Always test cut on a scrap piece first!</em></p>
<h3>Step 4: Secure Your Workpiece</h3>
<p>This cannot be stressed enough. For tight tolerances, your acrylic piece must be absolutely still. Use clamps that don’t put too much localized pressure on the acrylic, which could cause cracking. Double-sided tape can work for lighter jobs, but clamps offer better security.</p>
<h3>Step 5: Perform a Dry Run (CNC)</h3>
<p>If you’re on a CNC machine, run the program with the spindle off but the Z-axis moving. Many machines have a “dry run” or “simulation” mode. This lets you check the toolpaths and ensure nothing is colliding, giving you peace of mind before cutting.</p>
<h3>Step 6: The Cutting Process – First Pass</h3>
<p>Start with a shallow depth of cut. Begin your cut, paying close attention to the sound and visual cues.</p>
<ul>
<li><strong>Listen:</strong> You want a consistent, light “swishing” sound. A loud screeching or chattering means something is wrong – likely too fast a feed, too deep a cut, or tool/workpiece vibration.</li>
<li><strong>Watch for Melting:</strong> If you see plastic starting to melt and gum up the flutes, stop the machine immediately. Your feed rate might be too slow, or your spindle speed too high for the depth of cut.</li>
<li><strong>Chip Evacuation:</strong> Ensure chips are being cleared away. If you’re using compressed air, make sure it’s blowing chips out of the flutes and away from the cut.</li>
</ul>
<h3>Step 7: Multiple Passes for Accuracy</h3>
<p>To achieve very tight tolerances, you will very likely need to make multiple passes. Especially for the final pass, you’ll want to take a very light “cleanup” or “finishing” pass. This means removing only a tiny amount of material, perhaps 0.002″ to 0.005″ (0.05mm to 0.12mm).</p>
<p>Here’s a common strategy for tight tolerances:</p>
<ol>
<li><strong>Roughing Passes:</strong> Make several passes removing most of the material, using your determined speeds and feeds, and a moderate depth of cut (e.g., 0.040