Carbide end mills are your go-to solution for effectively machining hardened steel. Their superior hardness and heat resistance allow for clean cuts and impressive tool life, even with tough HRC60 materials. This guide will show you how to select and use them safely and effectively in your workshop.
Working with hardened steel can feel like a bit of a puzzle, especially when you’re starting out. You’ve probably heard that it’s tough, and maybe you’ve even tried to cut it with the wrong tools, only to end up with a dull bit and a lot of frustration. The good news is, there’s a specific tool that shines when it comes to hardened steel: the carbide end mill. It’s designed to handle this tough material, making your machining tasks much smoother and more successful. This article will walk you through everything you need to know about using carbide end mills for hardened steel, from choosing the right one to making your first cut. Get ready to tackle those challenging projects with confidence!
What Makes Carbide End Mills Great for Hardened Steel?
Hardened steel is, well, hard! This means it’s incredibly strong and resistant to wear, which is great for the final product but a real challenge for machining. Traditional tools can quickly become dull or even break when trying to cut into it. This is where carbide truly makes a difference.
Carbide, also known as tungsten carbide, is an extremely hard and dense material. It’s significantly harder than high-speed steel (HSS), which is what many general-purpose cutting tools are made from. This superior hardness allows end mills made from carbide to cut through hardened steel without losing their sharp edge as quickly.
Beyond hardness, carbide also has excellent heat resistance. Machining, especially with tough materials, generates a lot of friction and heat. While HSS tools can soften and deform under high temperatures, carbide can withstand much higher temperatures before its cutting ability is compromised. This means you can often run carbide end mills at faster speeds and feed rates, leading to quicker machining times.
When you see descriptions like “carbide end mill 1/8 inch 3/8 shank extra long for hardened steel HRC60 heat resistant,” it’s telling you exactly what you need. The “hardened steel HRC60” part indicates it’s designed for steels hardened to a Rockwell hardness of 60, which is quite hard. The “heat resistant” is a key benefit of carbide. The “extra long” and specific sizes (1/8 inch, 3/8 shank) refer to the geometry that suits particular jobs, which we’ll get into next.
Understanding Carbide End Mill Features
Not all carbide end mills are created equal, especially when you’re aiming for hardened steel. Here are some key features to look for:
- Material Hardness Rating (HRC): This tells you what hardness of steel the end mill is designed to cut effectively based on the steel’s Rockwell Hardness (HRC) value. For hardened steel, you’ll often see recommendations for HRC ratings like 50-55, 55-60, or even higher. Always match the end mill’s rating to the hardness of your workpiece.
- Number of Flutes: This refers to the number of cutting edges or grooves on the end mill.
- 2 Flutes: Best for slotting and general-purpose milling in harder materials. They offer good chip clearance, which is crucial when cutting tough materials that produce smaller, harder chips.
- 3 Flutes: A good all-around choice, offering a balance of cutting performance and chip evacuation.
- 4 Flutes: Generally preferred for finishing operations and milling softer metals. They provide better stability but have less chip clearance, which can be an issue with hardened steel’s abrasive chips. For hardened steel, prioritize 2 or 3 flutes for most operations.
- Coating: Coatings add an extra layer of performance. Common coatings for hardened steel include:
- TiN (Titanium Nitride): A basic, gold-colored coating that improves hardness and lubricity, offering moderate heat resistance.
- TiCN (Titanium Carbonitride): A greyish coating that’s harder and more wear-resistant than TiN, offering better performance in abrasive applications and higher temperatures.
- AlTiN (Aluminum Titanium Nitride): A dark purple/black coating that excels in high-temperature applications. It forms a protective aluminum oxide layer at high heat, which is excellent for machining hardened steels and exotic alloys. This is often the best choice for cutting steels above HRC50.
- ZrN (Zirconium Nitride): Offers good lubricity and wear resistance, especially useful for stainless steels but can also perform well on some hardened steels.
- Geometry:
- Ball Nose: Ideal for 3D contouring and creating round profiles.
- Square End (Flat): The most common type, used for creating flat surfaces, pockets, and slots.
- Corner Radius: A slight radius at the corner of a square end mill helps to reduce stress concentration and improve tool life, especially in hardened materials.
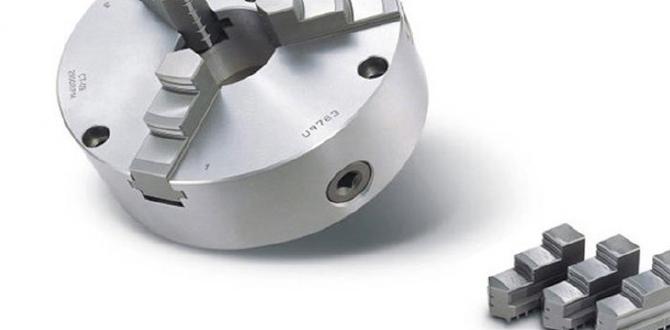
- Shank Diameter: This is the part of the end mill that fits into your milling machine’s collet or holder. Common imperial sizes include 1/8″, 1/4″, 3/8″, 1/2″, etc.
- End Mill Length: ‘Standard’ or ‘extra long’ refers to the overall reach of the tool. Extra-long end mills are useful for reaching deeper into workpieces or for specific fixturing arrangements, but can be less rigid.
Why “Extra Long” Might Matter
An “extra long” end mill, like the “carbide end mill 1/8 inch 3/8 shank extra long for hardened steel HRC60 heat resistant,” offers greater reach. This can be beneficial for reaching into deep cavities or for specific setups where you need clearance between the tool holder and the workpiece. However, it’s important to note that longer tools can be less rigid. This means they might be more prone to vibration or deflection, which can affect surface finish and accuracy. For hardened steel, rigidity is often key, so consider if the “extra long” feature is truly necessary for your specific job.
Choosing the Right Carbide End Mill for Your Project
Selecting the perfect carbide end mill involves considering several factors about your workpiece and your milling machine setup. Don’t worry; it’s more about understanding the basics than becoming an expert overnight.
Key Considerations:
- Material Hardness: This is your primary guide. If your steel is rated at HRC60, look for end mills specifically designed for that hardness. Trying to use a tool rated for HRC40 on HRC60 material will lead to frustration and tool failure.
- Operation Type: Are you roughing out material (removing large amounts quickly) or finishing a surface to a tight tolerance? Roughing often benefits from specialized geometries, while finishing requires precision and a sharp, well-maintained edge.
- Machine Rigidity: A more rigid machine and setup can better handle the forces involved in milling hardened steel. If your machine is less rigid, you might need to use slower speeds and feeds, and consider a more robust, shorter end mill if possible.
- Coolant/Lubrication: Machining hardened steel generates heat. Using a suitable coolant or lubricant is essential for tool life and preventing thermal shock.
Example Scenario: Machining a Pocket in HRC60 Steel
Let’s say you need to mill a pocket that’s 1/4 inch wide and 1/2 inch deep into a piece of steel hardened to HRC60. Here’s how you might choose an end mill:
- Material: HRC60. This immediately tells you to look for a carbide end mill rated for at least this hardness.
- Operation: Milling a pocket. This typically involves both slotting (removing full width) and contouring (following the pocket walls).
- End Mill Type: A 1/4 inch diameter, 2-flute or 3-flute carbide end mill with an AlTiN coating would be an excellent choice. The 2 or 3 flutes provide good chip clearance, essential for hard materials, and the AlTiN coating offers superior heat resistance required for HRC60 steel. A square end (uncoated or coated) or one with a small corner radius (e.g., 0.010″ or 0.015″) would be suitable. Since you’re milling a pocket, you’ll likely need an end mill with enough length to reach the required depth.
- Shank Size: If your machine’s collets are primarily set up for 3/8″ shank tools, a 1/4″ end mill with a 3/8″ shank is a common and practical choice.
For this scenario, you’d search for something like: “2 flute carbide end mill 1/4 inch, 3/8 shank, AlTiN coated, for HRC60 steel.” The “extra long” spec might be relevant if the pocket is very deep, but always prioritize rigidity if possible.
Essential Tools and Setup for Machining Hardened Steel
Milling hardened steel requires more than just the right end mill. Your setup and supporting tools are equally important for safety, accuracy, and achieving good results. Think of it as building a solid foundation for your work.
Your Milling Machine:
Ensure your milling machine is rigid and in good working order. Spindle runout, worn ways, or a loose table can all lead to poor surface finish and premature tool wear. Hobbyist machines might struggle with very hard steels, so be realistic about what your machine can handle.
Tool Holder and Collets:
A high-quality collet chuck or end mill holder is crucial. A .0005″ runout specification is generally considered the minimum for good performance. For hardened steel, minimize runout as much as possible. A tighter tolerance holder will lead to a better finish and longer tool life.
Workholding:
Your workpiece must be held securely. Use strong vises, clamps, or specialized fixtures. Any movement or vibration during machining can break the end mill or damage your workpiece. Ensure your stock is properly supported, especially if it’s thin or delicate.
Coolant and Lubrication:
This is non-negotiable when machining hardened materials. Heat is your enemy.
- Flood Coolant Systems: Ideal for continuous operations.
- Mist Coolant Systems: Deliver a fine spray of coolant and air, good for saving coolant and improving visibility.
- Cutting Fluid/Paste: For manual application, high-performance cutting fluids designed for hard metals are available. These can be dripped or brushed onto the cutting area.
- Dry Machining: Generally NOT recommended for hardened steel with carbide, as it will drastically reduce tool life and can lead to catastrophic failure.
Always use a coolant formulated for the specific material you are cutting, and ensure it’s delivered directly to the cutting zone.
Machine Feed Rate and Spindle Speed:
This is a critical parameter. You’ll need to consult manufacturer data or use general machining calculators, but always start conservatively. For hardened steel with carbide, you’ll typically use slower spindle speeds (RPM) and moderate to aggressive feed rates compared to softer materials.
Machining Doctor’s Speeds and Feeds Calculator can be a helpful starting point for determining appropriate settings, but remember these are guidelines. Always listen to your machine and adjust as needed.
Step-by-Step Guide: Machining Hardened Steel with a Carbide End Mill
Let’s walk through the process of milling hardened steel. We’ll assume you’ve already selected a suitable carbide end mill and have your machine, workholding, and coolant ready.
Preparation and Safety First:
- Safety Gear: Always wear safety glasses, hearing protection, and wear close-fitting clothing.
- Workpiece Setup: Secure your hardened steel workpiece firmly in your milling machine vise or fixture. Ensure it’s indicated to be square to the machine axes if necessary.
- End Mill Installation: Insert the carbide end mill into a clean collet and tighten it securely in the collet chuck or holder. Mount the holder in the machine spindle.
- Coolant Ready: Prepare your coolant system to deliver coolant to the cutting zone. For manual application, have your cutting fluid ready.
Setting Up the Cut:
- Establish Zero: Carefully locate your X, Y, and Z zero points on the workpiece using your preferred method (e.g., edge finder, probe, or dial indicator).
- Set Z-Axis Depth: Set your Z-axis zero on the top surface of your workpiece. This is crucial for accurate depth control.
- Program or Manual Movement: Depending on your machine (CNC or manual), program your toolpath or prepare to manually feed the tool.
Making the Cut:
- Engage Spindle and Coolant: Start the spindle at your chosen RPM and begin the coolant flow.
- Depth of Cut (DOC): For hardened steel, it’s often best to use a smaller Depth of Cut. A common starting point might be 0.010″ to 0.020″ for finishing passes, and potentially larger (0.050″ to 0.100″) for roughing depending on the machine’s rigidity and the end mill’s diameter. Always refer to manufacturer recommendations for your specific end mill.
- Feed Rate: Engage the feed rate. For hardened steel, you’ll generally use faster feed rates relative to the spindle speed, or what is often referred to as a chip load. This helps “scoop” material rather than rubbing, which generates excessive heat. Aim for a chip load that produces clean chips, not dust or glowing particles. Refer to your end mill manufacturer’s data for recommended chip loads.
- Machining Process (Example: Slotting):
- Plunge the end mill into the material to the desired Z-depth. For plunging, use a controlled plunge feed rate, which is typically slower than the side milling feed rate. Some end mills are designed for plunging, while others are not.
- Begin milling the slot at your programmed/set feed rate.
- If milling a pocket that is wider than your end mill, you will need to step over (take multiple passes) to remove the material. The step-over distance (or step-down if milling a flat surface) is another parameter to consider.
- Listen and Watch: Pay close attention to the sound of the cut. A harsh, chattering sound indicates a problem – possibly too high of a feed rate, too deep of a cut, or a dull tool. The chips should be a healthy color, not blue or burnt.
- Manage Heat: Ensure coolant is reaching the cutting zone effectively. If the tool or workpiece starts to get excessively hot, pause the operation, reapply coolant, and potentially reduce your DOC or feed rate.
Finishing Touches:
- Multiple Passes: For critical surfaces or tight tolerances, consider taking multiple finishing passes. A common strategy is to rough out most of the material with a larger depth of cut and then take one or two light finishing passes (e.g., 0.005″ to 0.010″ DOC) at a slightly slower feed rate to achieve a good surface finish.
- Tool Retraction: Once the machining is complete, retract the end mill from the workpiece and turn off the spindle and coolant.
- Clean Up: Carefully remove the workpiece and clean your machine, tools, and chips.
Troubleshooting Common Problems
Even with careful preparation, you might run into a few hiccups. Here’s how to address common issues when machining hardened steel:
Problem: Premature Tool Wear or Breakage
Possible Causes:
- Material hardness exceeds end mill rating.
- Excessive depth of cut or feed rate.
- Insufficient coolant or incorrect type.
- Machine rigidity issues or vibration.
- Tool runout / poor tool holding.
- Improper chip evacuation (chips recutting).
Solutions:
- Verify the HRC rating of your steel and ensure your end mill is suitable.
- Reduce depth of cut and/or feed rate.
- Increase coolant flow and ensure it’s reaching the cutting zone.
- Check machine rigidity, tighten belts, and ensure all components are secure.
- Use a high-quality, accurately runout tool holder and collet.
- Ensure you are using sufficient flutes for chip clearance (2 or 3 flutes are often best) and that chips are being cleared away.
Problem: Poor Surface Finish (Chatter Marks, Burning, Roughness)
Possible Causes:
- Excessive spindle