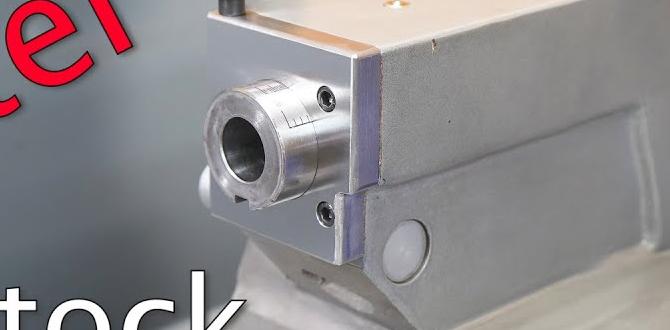
A 1/8 inch carbide end mill, especially a stub length version with a 6mm shank, is your go-to tool for achieving a flawless mirror finish on various materials like fiberglass and plastics. It offers precision and a smooth cut that larger or less specialized end mills can’t match.
Ever tried to get that super smooth, almost polished look on your projects, only to end up with tiny scratches or a dull finish? It’s a common frustration for anyone working with materials like fiberglass, acrylics, or even certain plastics. You’ve got the milling machine, you’ve got the material, but that final, gleaming surface just seems out of reach. Don’t worry, I’ve been there! The good news is, the right tool can make all the difference. Today, we’re diving deep into why a 1/8 inch carbide end mill, particularly a stub length one with a 6mm shank, is an absolute game-changer for achieving that coveted mirror finish. We’ll cover everything from why it works so well to how to use it safely and effectively. Get ready to elevate your projects!
Why a 1/8 Inch Carbide End Mill is Your Secret Weapon for a Mirror Finish
Getting a mirror finish on tricky materials like fiberglass might sound like something reserved for professional polishers, but with the right tools and techniques, you can absolutely achieve it in your own workshop. The key often lies in the precision and material of your cutting tool. This is where the humble, yet mighty, 1/8 inch carbide end mill, especially models designed for high-finish work, truly shines.
The Magic of Carbide
Carbide, also known as tungsten carbide, is a super hard material. It’s significantly harder than high-speed steel (HSS), which is what many standard end mills are made from. This hardness is crucial for a few reasons:
Edge Retention: Carbide tools stay sharper for much longer than HSS tools. This is absolutely vital when you’re aiming for a smooth finish. A dulling tool will start to drag, tear, and deform the material, leaving behind those frustrating imperfections.
Heat Resistance: Machining generates heat, and carbide handles it much better than HSS. High heat can soften a cutting edge, causing it to wear down faster. Carbide’s superior heat resistance means it can maintain its sharp edge even under demanding cutting conditions.
Precision: Because carbide is so hard and rigid, it can be manufactured to incredibly tight tolerances. This precision is essential for delicate finishing passes where even a tiny wobble or inconsistency in the cutting edge can ruin the surface.
The Advantage of 1/8 Inch Diameter
Why specifically 1/8 inch (which is roughly 3.175mm)? There are several advantages for finishing work:
Fine Detail: A smaller diameter allows for incredibly fine cuts. When you’re aiming for a mirror finish, you’re essentially removing material in very thin layers. A 1/8 inch end mill can make these tiny passes with absolute precision.
Reduced Chatter: Chatter, those annoying vibrations that lead to a rough surface finish, is often less of an issue with smaller diameter tools, especially when cutting materials that can be prone to chipping or tearing.
Access to Tight Areas: While not the primary reason for a mirror finish, a 1/8 inch end mill is also useful for getting into smaller pockets or details where larger tools simply won’t fit.
Stub Length and 6mm Shank Considerations
You’ll often see 1/8 inch carbide end mills described as “stub length” and with a “6mm shank.” Let’s break that down:
Stub Length: This refers to the cutting flute length. A stub length end mill has a shorter flute length relative to its diameter compared to a standard or extended length end mill. Why is this good for finishing?
Rigidity: Shorter flutes mean less tool deflection. The less the end mill bends or vibrates under load, the smoother and more consistent your cut will be. This is paramount for a mirror finish.
Stability: Stub length tools are inherently more stable, providing a more predictable cutting action.
6mm Shank: This is the diameter of the tool’s shank (the part that goes into the collet or tool holder). For a 1/8 inch (3.175mm) cutter, a 6mm shank offers a much larger, more robust interface than a 1/8 inch shank would.
Better Clamping: A larger shank diameter allows for a more secure grip in your collet or tool holder. This prevents runout (wobble) and slippage, both of which are detrimental to achieving a fine finish.
Reduced Vibration: The increased mass and rigidity of a larger shank can also help dampen vibrations.
In summary: A 1/8 inch carbide end mill, specifically a stub length version with a 6mm shank, combines extreme hardness, superior edge retention, fine cutting capability, and enhanced rigidity. This makes it the ideal tool for those demanding final passes that result in a flawless mirror finish on materials like fiberglass, acrylics, and certain plastics.
Materials Best Suited for a Mirror Finish with a 1/8 Inch End Mill
While the 1/8 inch carbide end mill is versatile, it excels on specific types of materials when the goal is a mirror finish. Understanding these materials will help you choose the right applications for this specialized tool.
Fiberglass Composites
Fiberglass is a popular material in everything from boat building and automotive parts to custom enclosures and decorative items. Achieving a mirror finish on fiberglass can be challenging due to its layered structure and the resin that binds the glass fibers.
Why it works: The hardness of carbide allows it to cut through the glass fibers cleanly without excessive fraying. The precision of a 1/8 inch tool helps to blend the layers smoothly.
Considerations: It’s crucial to manage dust and heat. Use appropriate dust collection, and consider climb milling for a smoother surface on the upward path of the cut. Some resins might require specific coolant if operating at higher speeds.
Acrylics and Other Clear Plastics
Acrylic (PMMA) and other transparent plastics are often used for visual applications where clarity and surface smoothness are paramount.
Why it works: Acrylic can be prone to melting and chipping. The sharp, hard edge of a carbide end mill, combined with controlled feed rates and spindle speeds, can cut acrylic cleanly. Smaller diameter tools help reduce the risk of chipping delicate edges.
Considerations: Heat is a major issue with plastics. You’ll want to use a slow feed rate and high spindle speed, or even better, specialized plastic-cutting end mills if available. Some machinists prefer single-flute or two-flute end mills for plastics to improve chip evacuation and reduce melting. A shallow depth of cut is essential.
Certain Machinable Woods and Composites
While wood is typically worked with different tools, some dense, stable wood composites or engineered woods can be milled to a very fine finish.
Why it works: For materials like Micarta, Garolite, or extremely dense hardwoods, a fine-toothed carbide end mill can provide a cleaner cut than many woodworking tools, especially when intricate details are involved.
Considerations: Chip evacuation is key. Ensure your machine has good airflow or dust collection to prevent chips from recutting and damaging the finish.
Soft Metals (with caution)
While primarily discussed for non-metals, a 1/8 inch carbide end mill can be used for very fine finishing passes on softer metals like aluminum or brass in specific scenarios, though it’s not its primary purpose.
Why it works: For extremely delicate engraving or the final smoothing of a tiny feature where a large mill must be avoided.
Considerations: This is an advanced technique for soft metals. Heat generation and chip packing are significant risks. Using lubricoolant and very shallow depths of cut is mandatory. Specialized aluminum finishing end mills are generally preferred.
Important Note: Always consult the material manufacturer’s recommendations for machining any material. The success of achieving a mirror finish also heavily relies on your machine’s rigidity, your collet quality, and your setup.
Setting Up for Success: Spindle Speed, Feed Rate, and Depth of Cut
Achieving that sought-after mirror finish isn’t just about the tool; it’s equally about how you use it. Getting your spindle speed, feed rate, and depth of cut dialed in are crucial steps. Think of it like tuning a fine instrument – each setting plays a vital role.
Spindle Speed (RPM)
Spindle speed determines how fast the cutting edge of the end mill rotates. For mirror finishes, especially on plastics and composites, precision here is key.
General Principle: Higher spindle speeds generally lead to a smoother finish if chip evacuation is good and heat doesn’t become a problem. However, for finishing passes where you’re removing minimal material, speed needs to be balanced with feed.
For 1/8 Inch Carbide: Start in the range of 12,000 to 24,000 RPM. The exact speed depends heavily on the material. For delicate plastics, you might lean towards the higher end to get a cleaner shear. For fiberglass, you might find a slightly lower, more controlled speed works better to avoid chipping.
Finding the Sweet Spot: You’ll often hear about Surface Feet per Minute (SFM). For carbide on plastics, you might be looking at SFM from 200-500, and for fiberglass, perhaps 300-600 SFM. You can convert this to RPM using the formula:
RPM = (SFM 3.25) / Diameter (in inches)
For a 1/8 inch (0.125 inch) end mill:
RPM = (SFM 3.25) / 0.125 = SFM 26
If SFM = 300, RPM = 300 26 = 7800 RPM.
If SFM = 600, RPM = 600 26 = 15600 RPM.
This calculation is a starting point. Always be prepared to adjust.
Feed Rate (IPM or mm/min)
Feed rate is how fast the workpiece moves into the rotating end mill. This is arguably the most critical parameter for surface finish.
General Principle: For a mirror finish, you typically want a relatively slow and consistent feed rate. This ensures that the cutting edge has enough time to cleanly shear the material without rubbing or causing excessive heat. Too fast, and you get chipping or melting; too slow, and you get rubbing, burning, and a dull finish.
For 1/8 Inch Carbide: Start conservatively. For plastics, a feed rate between 5-15 inches per minute (IPM) or roughly 120-375 mm/min is a good starting point. For fiberglass, you might run slightly faster, perhaps 10-20 IPM (250-500 mm/min), depending on the resin content and glass weave.
Chip Load: A more advanced concept, chip load refers to the thickness of the material being removed by each cutting tooth. For finishing, you want a very small chip load.
Chip Load = Feed Rate (IPM) / (RPM Number of Flutes)
For a 1/8 inch, 2-flute end mill at 15,000 RPM and 10 IPM feed rate:
Chip Load = 10 / (15000 2) = 10 / 30000 = 0.00033 inches per tooth.
This is a very small chip load, ideal for finishing.
Depth of Cut (DOC)
Depth of cut is how deep the end mill cuts into the material per pass. For mirror finishes, this is usually very shallow.
General Principle: Finishing passes are light. You’re not trying to hog material; you’re trying to smooth what’s already there.
For 1/8 Inch Carbide: This is where “light” really means light. For your final mirror finishing passes, aim for a Depth of Cut between 0.005 to 0.015 inches (0.127mm to 0.381mm). Some might even go as shallow as 0.003 inches (0.076mm) on very critical surfaces.
Why shallow DOC?
Reduces Cutting Forces: Less force acting on the tool and workpiece minimizes deflection and vibration.
Better Chip Evacuation: Thinner chips are easier to clear from the cutting zone, preventing recutting and heat buildup.
Superior Surface Finish: Allows the sharpest part of the cutting edge to engage the material most effectively for a smooth shear.
Essential Setup Checklist
Before you even think about hitting “go,” run through this quick checklist:
- Secure Workpiece: Ensure your material is clamped down TIGHTLY. Any movement will ruin your finish. Use appropriate clamps, jigs, or vice.
- Clean Collet/Tool Holder: A dirty or damaged collet is a primary cause of runout. Make sure it’s clean and gripping the shank squarely.
- Centered Tool: If your machine has a spindle runout indicator, check it. Minimal runout is critical for a mirror finish.
- Rigid Machine: A wobbly, low-power mill will struggle. Ensure your machine is robust and well-maintained.
- Dust/Chip Management: Have a plan for dust collection or vacuuming as you go, especially for fiberglass and plastics.
- Coolant/Lubrication: For some materials (like aluminum), a mist coolant or a drop of appropriate lubricant can be essential. For plastics, sometimes just air blast is best to prevent melting.
Remember, these settings are starting points. Every machine, material, and end mill combination is slightly different. Be prepared to make small adjustments based on what you observe during the cut.
Step-by-Step: Achieving a Mirror Finish with Your 1/8 Inch Carbide End Mill
Let’s walk through the process of using your 1/8 inch carbide end mill to achieve that sought-after mirror finish. This guide assumes you’ve already done your roughing and semi-finishing passes and are now focusing on the final, critical steps.
Step 1: Secure Your Workpiece and Tool
Workpiece: Ensure your material is absolutely stable and securely clamped. Any vibration or movement from the workpiece during cutting will ruin your fine finish. Use as many clamping points as necessary without obstructing the cutting path. For delicate materials, consider using a sacrificial backing board.
Tool: Insert the 1/8 inch carbide end mill firmly into a clean, high-quality collet. Tighten the collet in your spindle securely. Ensure the shank is fully seated in the collet for maximum rigidity and minimal runout. A 6mm shank provides a good, solid grip here.
Step 2: Set Up Machining Parameters
Referencing our previous section, set your spindle speed, feed rate, and depth of cut.
Initial Pass (Pre-finishing): Before your absolute mirror finish pass, consider one light “sculpting” pass at a slightly higher depth of cut (e.g., 0.020″ – 0.040″ / 0.5mm – 1mm) but with a fine chip load. This helps to ensure the surface is perfectly flat and ready for the final polishing cut.
Spindle Speed: As recommended (e.g., 12,000 – 20,000 RPM).
Feed Rate: Moderate (e.g., 15-25 IPM / 375-625 mm/min).
Depth of Cut: Light but not a finishing pass (e.g., 0.020″ / 0.5mm).
Mirror Finish Pass: Now, dial in the parameters for the critical mirror finish pass.
Spindle Speed: Typically higher (e.g., 15,000 – 24,000 RPM, depending on material).
Feed Rate: Slower and consistent (e.g., 5-15 IPM / 120-375 mm/min).
Depth of Cut: Extremely shallow (e.g., 0.005″ – 0.015″ / 0.127mm – 0.381mm).
Step 3: Choose Your Cutting Strategy (Climb vs. Conventional Milling)
For achieving the best surface finish, climb milling is often preferred, especially for materials like plastics and fiberglass.
Climb Milling: The cutter rotates in the same direction as it moves into the workpiece. This pulls the chip away from the workpiece, resulting in a cleaner cut and reducing the tendency for the cutter to “rub.” This is generally better for surface finish.
Diagrammatic Comparison:
| Milling Type | Direction of Rotation vs. Feed | Typical Result |
|---|---|---|
| Climb Milling | Rotation and feed move in the same direction | Smoother finish, less tool wear, reduced chatter |
| Conventional Milling | Rotation and feed move in opposite directions | Increased tool pressure, can cause chipping, more prone to chatter |
* Conventional Milling: The cutter rotates against the direction of workpiece feed. This pushes the chip up and out, which can