A 1/8 inch carbide end mill is perfect for High-Speed Machining (HSM) of HDPE, offering excellent material removal rates (MRR) and a smooth finish. This guide shows you how to use it effectively.
Learning to machine plastics like High-Density Polyethylene (HDPE) can seem a bit tricky at first. You want a clean cut, fast material removal, and a tool that won’t break the bank or chip easily. That’s where a 1/8 inch carbide end mill shines, especially for achieving a High Material Removal Rate (MRR). It’s a common setup for small parts and intricate details. This guide will walk you through everything you need to know, from choosing the right tool to getting those perfect cuts on your CNC machine. We’ll keep it simple, just like you’re right here in the workshop with me.
Why Choose a 1/8 Inch Carbide End Mill for HDPE?
HDPE is a fantastic plastic for many projects. It’s tough, chemical-resistant, and easy to work with. But to machine it efficiently, you need the right cutting tools. A 1/8 inch carbide end mill is often the go-to choice for good reasons.
- Carbide Durability: Carbide is much harder and more heat-resistant than high-speed steel (HSS). This means it stays sharper for longer, especially when cutting harder materials like plastics.
- Small Diameter Advantage: A 1/8 inch (or 3mm, which is very close and often interchanged in imperial/metric systems) diameter is perfect for detailed work, creating fine features, engraving, and cutting smaller parts.
- High MRR Potential: With the right settings, a 1/8 inch carbide end mill allows for a surprisingly high Material Removal Rate (MRR). This means you can cut away material quickly and efficiently.
- Smooth Finish: Carbide end mills, particularly those designed for plastics or non-ferrous metals, can leave an incredibly smooth surface finish on HDPE.
When we talk about “MRR,” we’re essentially talking about how much material the tool can cut away per minute. For HDPE, a higher MRR usually translates to faster machining times, less tool wear (if done correctly), and better overall efficiency. A common search term you might see is “carbide end mill 1/8 inch 6mm shank standard length for hdpe high mrr”. This tells you precisely what many makers are looking for: a reliable tool for fast cutting.
Understanding the 1/8 Inch Carbide End Mill
Let’s break down what makes a 1/8 inch carbide end mill suitable for HDPE and how to select one.
Types of 1/8 Inch Carbide End Mills
While the diameter is key, there are other features to consider:
- Flute Count: For plastics like HDPE, 2-flute or 3-flute end mills are generally preferred.
- 2-Flute: Excellent for chip evacuation, which is crucial for plastics that can melt and re-harden. This helps prevent the tool from clogging and overheating. They are great for plunging and pocketing.
- 3-Flute: Can sometimes offer a slightly better surface finish and higher MRR, but chip evacuation needs more attention. They are often better for contouring and finishing passes.
- Coating: While not always necessary for HDPE, coatings like TiN (Titanium Nitride) or ZrN (Zirconium Nitride) can add a layer of hardness and reduce friction, potentially extending tool life and improving surface finish. However, uncoated carbide generally works very well on HDPE.
- Geometry: Look for end mills designed for “Non-Ferrous” materials or “Plastics.” These often have sharper cutting edges and a more open flute design to handle the gummy nature of some plastics.
- Shank: Most 1/8 inch end mills will have a 1/8 inch or a 1/4 inch (6.35mm) shank. The larger shank (1/4 inch) is generally more rigid and better for higher cutting forces, though for small parts and lighter cuts, a 1/8 inch shank is fine. Ensure your collet or tool holder matches the shank diameter.
Key Specifications to Look For:
When shopping, you’ll see terms like “standard length,” which usually means the flute length is roughly 2-3 times the diameter. This is generally suitable for most HDPE routing tasks at this size. For HDPE, consider an end mill with a slightly positive rake angle to help shear the material cleanly rather than pushing it.
Setting Up Your CNC for HDPE
Getting the settings right is critical for success. Overheating, melting, and poor finish are common problems if your speeds and feeds are off.
Essential Tools and Setup Checklist:
Before you start cutting, make sure you have everything you need.
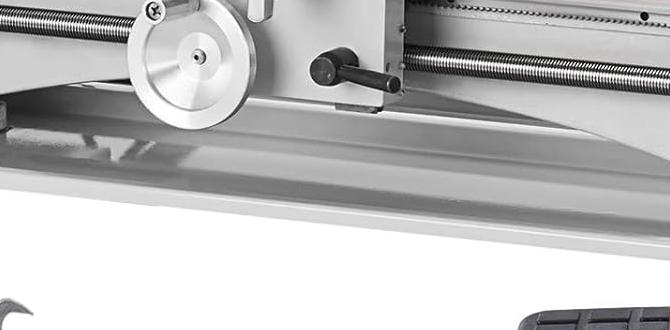
- CNC Router or Mill: A machine capable of holding a 1/8 inch collet and running at appropriate speeds.
- 1/8 Inch Carbide End Mill: As discussed above, preferably a 2-flute or 3-flute designed for plastics or non-ferrous metals.
- HDPE Sheet: Ensure it’s clean and free of debris.
- Workholding: This is crucial. You need to securely hold the HDPE down so it doesn’t move during cutting. Clamps, double-sided tape specifically designed for CNC, or a vacuum table can work.
- Dust Collection: Machining plastic creates dust. Good dust collection is vital for your health and to keep your machine clean.
- Safety Glasses: Always wear them!
Understanding Speeds and Feeds for HDPE
This is where the magic happens for achieving a good MRR and finish. There’s no single perfect setting, as it depends on your specific machine, the exact type of HDPE, and the end mill. However, we can provide excellent starting points.
Key concepts:
- Spindle Speed (RPM): How fast the tool spins.
- Feed Rate (IPM or mm/min): How fast the tool moves through the material.
- Chip Load: The thickness of the chip that each flute is designed to cut. This is a crucial factor for tool life and finish. A good target chip load for a 1/8 inch end mill in HDPE is typically between 0.002″ – 0.005″ (0.05mm – 0.13mm).
Starting Point Recommendations:
For a 1/8″ (3mm) 2-flute or High-Performance 3-flute carbide end mill in HDPE:
- Spindle Speed: 18,000 – 24,000 RPM
- Feed Rate: Calculate based on chip load and flute count.
- Example: Target chip load = 0.004″ (0.1mm), Flutes = 2, Spindle Speed = 18,000 RPM
- Feed Rate = Chip Load × Flutes × Spindle Speed
- Feed Rate = 0.004″ × 2 × 18,000 RPM = 144 inches per minute (IPM)
- This is approximately 3658 mm/min.
- Depth of Cut (DOC): For finishing passes, a shallow DOC (e.g., 0.010″ – 0.030″ or 0.25mm – 0.75mm) is best on the final pass. For roughing, you can go deeper, but be mindful of heat and tool deflection. A common starting point for roughing might be 0.125″ (3mm) or even a full diameter, but monitor for signs of melting.
- Plunge Rate: Plunge rates are usually slower than feed rates to prevent excessive heat buildup. A good starting point is 1/2 to 1/3 of your cutting feed rate (e.g., 50-70 IPM or 1200-1800 mm/min).
Important Considerations:
- Material Thickness: Adjust your Depth of Cut (DOC) based on the thickness of your HDPE. A common practice is to take multiple shallow passes rather than one deep pass. Aim to never cut deeper than the diameter of the end mill in a single pass for optimal results and tool life, especially for pocketing.
- Cooling: HDPE can melt if too much heat is generated. While some plastics benefit from coolant, for HDPE, compressed air is often the best option. Directing a strong stream of air at the cutting point helps clear chips and dissipate heat.
- Listen to Your Machine: Unusual noises, chattering, or a high-pitched squeal often indicate that your speeds, feeds, or depth of cut need adjustment.
You can often find manufacturer recommendations for specific end mills as a starting point. For example, reliable tool suppliers often provide data sheets. Searching for “carbide end mill for plastic” will yield results from reputable tool manufacturers like G-Wizard Calculator, Onsrud, or Lakeshore Carbide, offering guidance.
Step-by-Step Machining Process for HDPE
Let’s get your HDPE project cut.
Step 1: Design and CAM Programming
1. Create Your Design: Use CAD (Computer-Aided Design) software to draw your part.
2. Generate Toolpaths: In your CAM (Computer-Aided Manufacturing) software, import your design and set up your machining operations.
- Tool Selection: Choose your 1/8 inch carbide end mill from your tool library.
- Speeds & Feeds: Input the recommended RPM and Feed Rate. Calculate chip load to ensure it’s within a good range for your tool and material.
- Depth of Cut: Set your step-down for roughing and finishing passes. A common strategy for a 1/8 inch end mill cutting through 1/4 inch or 1/2 inch HDPE is to use a step-down of 0.125″ or less for pocketing, and 0.0625″ on the final passes for a clean edge.
- Lead/Lag and Stepover: For contouring, set your stepover (the distance between passes if not cutting entirely with the end mill diameter). For HDPE, a stepover of 40-60% of the tool diameter is a good starting point for roughing, and 20-30% for finishing.
- Pocketing Strategy: Use strategies like “Adaptive Clearing” or “High-Speed Machining” (HSM) paths if available, as these maintain a consistent chip load and reduce heat buildup.
- Engraving/Detailing: For text or fine lines, use a 2D contour path with a shallow DOC and a small stepover.
3. Simulate: Always simulate your toolpaths in the CAM software to visually check for collisions, gouges, or inefficiencies.
Step 2: Machine Setup and Workholding
1. Secure Your Material: Place your HDPE sheet on your CNC bed. Use clamps around the edges (making sure they won’t be hit by the tool) or apply strong double-sided tape. For larger jobs, a vacuum table offers excellent holding power.
2. Install the End Mill: Carefully insert the 1/8 inch carbide end mill into your collet. Ensure it’s clean and properly seated. Tighten the collet securely in your spindle.
3. Zero Z-Axis: Use a touch plate or a piece of paper to find the top surface of your HDPE. Set your Z-axis zero point in your machine controller software. This is critical for accurate depth.
4. Zero X/Y-Axis: Home your machine or use edge finders to set your X and Y zero points according to your CAM program origin.
5. Set Up Dust Collection: Position your dust shoe or vacuum nozzle to capture dust and chips effectively at the point of cutting.
Step 3: Running the Job
1. Safety First: Put on your safety glasses. Ensure no loose clothing or jewelry is near the machine.
2. Test Run (Optional but Recommended): If you’re unsure about your settings, you can perform a “dry run” with the spindle off to ensure the toolpaths are clear and within the bounds of your material.
3. Start the Spindle: Turn on your spindle to the programmed RPM.
4. Begin the Cut: Start your machining job.
5. Monitor Closely: Stay with your machine, especially during the first few minutes. Listen for any unusual sounds. Watch for signs of melting (plastic fusing behind the cutter), excessive vibration, or smoke.
- If Melting Occurs: Stop the machine immediately. Increase your feed rate, increase your spindle speed (if safe for the tool), or decrease your depth of cut. Ensure your air blast is strong and direct.
- If There’s Chattering: Try increasing your feed rate slightly, reducing your depth of cut, or ensuring your workholding is very secure.
6. Chip Evacuation: Make sure your dust collection and air blast are effectively removing chips from the flutes and the cut area. Clogged flutes are a primary cause of overheating and tool failure with plastics.
Step 4: Finishing and Inspection
1. Remove Part: Once the job is complete, wait for the spindle to stop before removing the finished part and any scrap.
2. Deburr (If Necessary): HDPE usually has minimal burrs, but if any are present, they can typically be removed with a deburring tool, a craft knife, or light sanding.
3. Inspect: Check your part for dimensional accuracy and surface finish.
Troubleshooting Common HDPE Machining Issues
Even with the best setup, you might run into a few snags. Here’s how to fix them.
Melting Plastic
Cause: Too much friction, not enough chip load, cutting too slow, or poor chip evacuation.
Solution:
Increase feed rate.
Ensure your chip load is appropriate (aim for the higher end of a good range if the material isn’t too gummy).
Decrease depth of cut.
Improve air blast or dust collection directed at the cut.
Consider a tool with a higher polish on the flutes or designed specifically for plastics.
Poor Surface Finish (Rough or Gummy)
Cause: Insufficient spindle speed, too high feed rate, dull tool, or incorrect flute count.
Solution:
Increase spindle speed.
Decrease feed rate (ensuring chip load remains healthy).
Use a sharper, higher-quality end mill.
For finishing passes, use a shallower depth of cut and a tighter stepover.
A 3-flute end mill might provide a smoother finish if chip evacuation is managed well.
Tool Breakage
Cause: Excessive depth of cut, feed pauses, accidental rapid movement into material, weak workholding, or hitting a hard spot.
Solution:
Reduce depth of cut.
Ensure smooth, continuous movement at the programmed feed rate.
Verify workholding is extremely secure.
Check your G-code for errors or unexpected rapid moves.
Use climb milling where appropriate (though conventional can be better for preventing melting in some cases) and avoid plunge cuts that are too aggressive.
Excessive Vibration or Chattering
Cause: Loose workholding, worn tool, incorrect speeds/feeds, or machine rigidity issues.
Solution:
Tighten workholding.
Use a sharp, high-quality end mill.
Adjust depths of cut. Experiment with feed and speed combinations.
Ensure your machine’s spindle bearings are in good condition.
Advantages of Using a 1/8 Inch Carbide End Mill for HDPE vs. Alternatives
While a 1/8 inch carbide end mill is excellent, it’s good to know what other options exist and why you might choose one over the other.
Carbide End Mill vs. HSS End Mill
| Feature | 1/8″ Carbide End Mill | 1/8″ HSS End Mill |
| :————— | :——————————————————– | :——————————————————– |
| Hardness | Very High | Moderate |
| Heat Resistance | Excellent | Poor |
| Tool Life | Long | Shorter; prone to dulling/melting in plastics |
| Speed/Feed | Can run faster speeds and higher feed rates | Must run slower speeds and lower feed rates |
| Cost | Higher initial cost | Lower initial cost |
| Brittleness | More brittle, can chip if mishandled | Less brittle, more forgiving of moderate impacts |
| Best For HDPE| High MRR, durable, good finish, handles heat better | Can work for light-duty or less frequent use, limited MRR |
Carbide End Mill vs. Different Diameter Mills
1/8 Inch: Ideal for fine details, small parts, engraving, and when the strength of a larger tool isn’t needed. Limited by depth of cut and maximum chip load per flute compared to larger tools.
* 1/4 Inch (6.35mm):