Unlock Precision Machining: Master Aluminum 7075 with a 1/8″ Carbide End Mill for Superior Chip Evacuation.
Working with metal can seem a bit daunting at first, especially when you’re just starting out. You want to create cool projects, but sometimes the tools and techniques feel like a secret language. I get it! Today, we’re diving into something essential for getting clean, precise cuts in aluminum: using a 1/8 inch carbide end mill with a 6mm shank, specifically when working with tough materials like Aluminum 7075. You’ll learn why the right end mill and proper technique make all the difference, especially when it comes to managing those pesky chips.
This guide will break down everything you need to know, ensuring you can tackle your projects with confidence and get fantastic results. We’ll cover what makes this specific tool so good for aluminum, how to set it up, and the best ways to keep your workspace clean and your cuts smooth.
Why This Specific End Mill is Your Aluminum Buddy
When you’re aiming for clean cuts and good finish on aluminum, especially harder alloys like 7075, the tool you choose is crucial. A 1/8 inch carbide end mill with a 6mm shank isn’t just any cutting tool; it’s a fine-tuned instrument perfectly suited for this job. Let’s break down why:
Carbide — The Tough Stuff: Carbides are known for their hardness and wear resistance. This means your end mill stays sharp for longer, even when cutting through tough metals like 7075. It can handle higher speeds and feeds without quickly becoming dull, leading to better surface finish and longer tool life.
1/8 Inch Diameter — For Finer Detail: This smaller diameter is fantastic for detailed work, engraving, and cutting thinner sections. It allows for a good balance between material removal and the ability to achieve intricate features without excessive stress on the workpiece or the tool.
6mm Shank — A Common Fit: The 6mm shank is a standard size in many smaller milling machines and CNCs. This means it’s likely to fit your existing collets or tool holders without needing special adapters. It provides a good grip for the forces involved in milling.
Standard Length — Versatility: Standard length end mills offer a good compromise for most general machining tasks. They have enough reach for typical operations without being so long that they become prone to excessive runout or vibration, which can impact cut quality.
The Challenge of Chip Evacuation in Aluminum
Aluminum, while a great material to work with, has a tendency to be “gummy.” This means it can stick to the cutting edge of your tool, creating heat and poor surface finish. When you’re machining aluminum, especially alloys like 7075, managing the chips (the small pieces of metal being cut away) is super important. This is where “chip evacuation” comes in.
Good chip evacuation means the tiny pieces of aluminum are cleared away from the cutting area quickly and efficiently. If chips build up, they can:
Cause Recutting: The tool might cut the same chips over and over, generating excess heat and dulling the tool faster.
Lead to Poor Surface Finish: Chips getting trapped can scratch the freshly cut surface, leaving a rough, undesirable finish.
Overload the Tool: A packed flute can put too much stress on the end mill, increasing the risk of breakage.
This is precisely why a well-designed end mill, used correctly, for aluminum is so effective. The flutes (the spiral grooves on the end mill) are designed to carry these chips away. In aluminum, you want flutes optimized for this.
Choosing the Right End Mill for Aluminum 7075
Not all end mills are created equal, and picking the right one for aluminum 7075 can make a world of difference. Here’s what to look for:
Key Features to Consider
Number of Flutes:
2-Flute End Mills: These are generally the best choice for aluminum. They have a larger chip pocket between their two flutes, which is excellent for clearing out those sticky aluminum chips. The wider gullet allows chips to exit more easily, preventing buildup.
3-Flute End Mills: While good for many materials, they can sometimes pack up with aluminum chips more easily than 2-flute. They offer a slightly better surface finish but can be more prone to chip welding if not managed properly.
4-Flute End Mills: These are generally best for harder materials like steel. They have smaller chip pockets and are not ideal for aluminum, as they will likely clog up quickly.
Helix Angle:
High Helix Angles (e.g., 45-60 degrees): These end mills are specifically designed for softer, gummy materials like aluminum. The steeper helix angle helps to “slice” through the material cleanly and, more importantly, provides a more aggressive chip evacuation due to the steeper spiral that pulls chips up and out of the cut more effectively.
Coatings:
Uncoated: For aluminum, an uncoated end mill is often preferred. Aluminum has a tendency to stick to coatings. An uncoated carbide end mill allows the aluminum to slide off the cutting edge more easily.
Specialized Aluminum Coatings (e.g., ZrN – Zirconium Nitride): Some specialized coatings are designed to reduce friction and prevent chip welding for aluminum. If you’re doing high-volume production, these might be worth considering, but for general use, uncoated is often more straightforward.
Material:
Solid Carbide: As mentioned, solid carbide is excellent for its hardness and ability to hold an edge. It’s the standard for precision machining of aluminum alloys.
The 1/8″ 6mm Shank Specifics
So, why is the combination of 1/8” diameter with a 6mm shank so common and effective for this task?
Size and Detail: A 1/8 inch end mill is perfect for engraving, adding fine details, or cutting narrow slots in parts made from Aluminum 7075. This size gives you precision without being too delicate.
Shank Diameter: The 6mm shank is a very common size for tool holders in many mini-mills and smaller CNC machines. It ensures a secure fit and good rigidity for a tool of this diameter, minimizing vibration.
Tooling Availability: Because this is a popular combination for certain types of machining, these end mills are readily available from many manufacturers.
When purchasing, look for phrases like “2-flute,” “high helix,” or “designed for aluminum” on the packaging or product description.
Preparing Your Machine and Workspace
Before you even touch the end mill to the metal, a little preparation goes a long way. This ensures safety, accuracy, and prolongs the life of your tools.
Safety First!
Machining involves sharp tools and fast-moving parts. Always prioritize safety:
Wear Safety Glasses: No exceptions. Metal chips can fly at high speeds.
Tie Back Long Hair and Loose Clothing: Keep them away from moving parts.
No Gloves: Gloves can get caught in machinery and pull your hand in.
Understand Your Machine: Know how to stop it quickly.
Machine Setup Essentials
Secure Workpiece: Use clamps or a vise to firmly hold your Aluminum 7075 workpiece. It should not budge during the milling operation. Use soft jaws if you’re clamping on a finished surface.
Clean Spindle and Collet: Ensure your machine’s spindle and the collet you’re using are clean and free of debris. A clean connection means less runout (wobble) and a more accurate cut.
Proper Collet Selection: Use a collet that matches the shank diameter exactly (6mm in this case). A tight, centered fit is critical.
Workspace Preparation for Chip Management
Good chip evacuation starts with a clean setup.
No Obstructions: Make sure the path for chips to exit the workpiece and machine bed is clear.
Coolant or Lubricant (Optional but Recommended): For aluminum, a mist coolant system or a light application of cutting fluid can significantly help with chip evacuation and reduce friction. It keeps the chips from sticking to the bit and helps dissipate heat. You can also use a simple spray bottle with diluted cutting fluid or even a light oil for smaller projects. For hobbyist use, a product like WD-40 can work in a pinch for very light cuts, but dedicated cutting fluids are better.
Chip Brush or Air Blast: Have a brush, shop vac, or air compressor ready to clear away chips as you work. Never use your hands to brush away chips from a moving machine!
The Step-by-Step Milling Process
Now that you’re set up, let’s get milling! We’ll use a hypothetical scenario: making a slot in a piece of Aluminum 7075.
Step 1: Secure Your Workpiece
Place your Aluminum 7075 stock in a machinist vise or secure it with clamps on your milling machine’s table. Double-check that it’s held down tightly and won’t move. Ensure the top surface is accessible for milling.
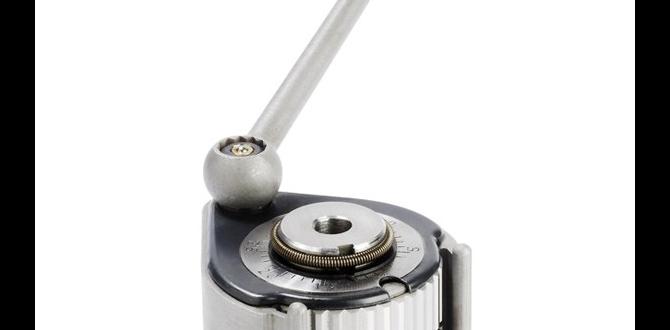
Step 2: Install the End Mill
Insert the 1/8 inch, 6mm shank carbide end mill into the collet. Tighten the collet securely in your machine’s spindle. Make sure the end mill is seated properly and that there’s no wobble.
Step 3: Set Your Zero Point (Work Coordinate System)
This is where you tell the machine where your workpiece is in 3D space.
X and Y Axis: Use an edge finder or probe to locate the edges of your workpiece. You’ll set these as your X and Y zero points.
Z Axis: Carefully bring the end mill down to the top surface of your workpiece. You can use a piece of paper or a dial indicator to find the exact Z zero point. This is the surface from which your milling depth will be measured.
Step 4: Determine Your Cutting Speeds and Feeds
This is a critical step, and it depends heavily on your machine’s capabilities, the specific alloy of aluminum, and the end mill. For beginners, it’s often best to start conservatively.
Spindle Speed (RPM): Aluminum generally benefits from higher spindle speeds than steel. For a 1/8 inch carbide end mill, typical starting points might be anywhere from 15,000 to 30,000 RPM, depending on your machine. If you don’t have a high-speed spindle, use the highest RPM your machine can achieve.
Feed Rate (IPM or mm/min): This is how fast the tool moves into the material. For a 1/8 inch end mill in Aluminum 7075, a very conservative starting point might be around 5-10 inches per minute (or roughly 120-250 mm/min). The goal is to hear a clean cutting sound, not a loud screech or a chattering noise.
Where to Find More Information: Many end mill manufacturers provide recommended speeds and feeds charts for different materials. Additionally, online resources and machining forums can offer valuable starting points. A great resource for understanding machining basics, including speeds and feeds, is the National Institute of Standards and Technology (NIST) Manufacturing Engineering Laboratory. You can often find their publications and data online by searching for “NIST metal cutting parameters.”
Step 5: Set Your Depth of Cut
Decide how deep you want your slot or feature to be. For small-diameter end mills like a 1/8 inch, it’s generally best to take lighter depths of cut.
Radial Depth of Cut (Side Milling): How far the end mill is engaged into the material from the side. For an 1/8” end mill, you might take a cut of 0.020″ to 0.040″ (0.5mm to 1mm) per pass.
Axial Depth of Cut (Plunge/Slotting): How deep the end mill cuts downwards into the material. For a 1/8″ end mill in Aluminum 7075, you might start with an axial depth of cut of 0.050″ to 0.100″ (1.25mm to 2.5mm) per pass.
Key Principle: It’s always better to take multiple light passes than one deep, aggressive pass. This reduces stress on the tool, improves chip evacuation, and results in a better surface finish.
Step 6: Start the Cut
Engage Spindle: Turn on your spindle to the desired RPM.
Begin Feeding: Slowly and smoothly feed the end mill into the material to your set depth. Listen to the sound of the cut.
Chip Evacuation During the Cut: As the end mill works, watch the chips being cleared. If you see chips building up, stop the machine carefully and clear them. This is where coolant mist can really help prevent chip welding.
Making Multiple Passes: If your desired depth is greater than your axial depth of cut per pass, finish one pass, retract the tool, move to the next pass (or reposition for the next depth), and repeat.
Step 7: Finishing the Operation
Once you reach your final desired depth, you might want to make a final “clean-up” pass at a slightly shallower depth (e.g., 0.002″ – 0.005″ or 0.05mm – 0.1mm). This pass removes any minor inaccuracies from previous passes and leaves a superior surface finish.
Step 8: Retract and Clean Up
Retract the Tool: Once the milling is complete, safely retract the end mill from the workpiece.
Turn off Spindle: Once the tool is clear of the material.
Remove Chips: Carefully clear all chips from the machine and workpiece.
Best Practices for Aluminum 7075
Aluminum 7075 is a strong, heat-treatable alloy, often compared to steel in terms of its strength but much lighter. This strength means it can be a bit trickier to machine than softer aluminums. Here are some tips:
Use Sharp Tools: This can’t be stressed enough. A dull end mill will struggle, generate more heat, and produce poor chip evacuation.
Positive Rake Angles: Tools designed for aluminum often have high rake angles. This helps them “slice” the material rather than scrape it, reducing cutting forces and heat.
Lubrication is Key: Even a light mist coolant or a dedicated cutting fluid will make a huge difference. It lubricates the cutting edge, cools the tool and workpiece, and helps flush away chips. For manual machining, a few drops of cutting fluid applied to the cut area can be very effective.
Avoid Peeling/Gouging: When finishing a pass or moving along an edge, try to make climb milling cuts where possible if your machine allows it (especially suitable for CNC). In manual milling, conventional milling is often safer. Pay attention to the direction of the cut to avoid a rough finish.
Machining Strategy: For slots, use peck drilling motions (plunging and retracting small amounts) to help clear chips if you are deep and experiencing buildup. However, for most aluminum slotting with a 2-flute high-helix mill, a continuous cut with good feed rates is often preferred if chip evacuation isn’t an issue.
Tooling and Machine Considerations
Let’s look at the different types of machines and how they impact your milling experience with this end mill.
Lathe vs. Mill
It’s important to distinguish between lathes and milling machines. A lathe spins the workpiece, and a stationary tool cuts into it (usually for cylindrical parts). A milling machine spins a rotating cutter (like our end mill) that moves into a stationary workpiece (for more complex shapes, slots, pockets, and flat surfaces). This article focuses on milling.
Types of Milling Machines
Manual Milling Machines (e.g., Bridgeport-style): These are operated by hand, where you manually move the table and quill. Precision comes from your skill in controlling the feeds and speeds. Excellent for learning and for one-off parts. You’ll need to be more attentive to the sound and feel of the cut.
Benchtop/Mini Mills: Smaller, less rigid versions of manual mills. Great for hobbyists with limited space. They often have lower RPM limits, so slightly slower speeds might be necessary.
CNC Mills (Desktop to Industrial): Computer-controlled machines that follow programmed instructions (G-code). They offer high precision and repeatability. For CNC, proper programming of speeds, feeds, and depths of cut is paramount for successful chip evacuation and avoiding tool breakage.
Understanding Your Machine’s Limitations
Rigidity: A more rigid machine can handle faster feeds and heavier depths of cut without vibration.
Spindle Speed (RPM): Higher RPMs are generally better for aluminum. If your machine has a low top speed, you might need to slow your feed rate down proportionally to maintain a good chip load per flute.
* Power: Ensure your machine has enough power to pull the material without bogging down the spindle.
When to Use Different End Mill Types (A Quick Comparison)
While we’re focusing on the 1/8″ 6mm carbide end mill for Aluminum 7075, it’s useful to know how it fits into the broader picture.
| End Mill Type | Best For | Chip Evacuation in Aluminum | Notes |
| :—————————– | :—————————————— | :————————– | :———————————————– |
| 2-Flute, High Helix Carbide | Aluminum, soft metals, slotting, pockets | Excellent | Our focus for AL 7075. Large chip gullets. |
| 4-Flute Carbide | Steel, stainless steel, harder metals | Poor for Aluminum | Smaller chip gullets, better for harder materials. |
| Ball End Mill |