Quick Summary:
Achieving precision with small carbide end mills, especially on tough materials like titanium, requires understanding tool geometry, machine settings, and proper workholding. Even with standard tools, specific techniques can unlock impressive results and extended tool life.
Welcome to Lathe Hub! As a lifelong machinist, I know how frustrating it can be when a seemingly simple task feels impossible, especially when working with specialized materials or tools. You might be looking at a small carbide end mill and wondering how to get the best performance, or maybe you’re encountering unexpected challenges. Don’t worry, it’s a common journey for anyone learning the craft. We’ll break down how to approach these situations, focusing on smart techniques and understanding your tools. Get ready to gain confidence and unlock new possibilities in your machining projects!
Mastering Your Tools: A Beginner’s Guide to Carbide End Mills
Working with precision tools can sometimes feel like trying to solve a puzzle. When you’re new to machining, the sheer variety of tools and materials can be overwhelming. Take, for example, a small carbide end mill – a tool that, when used correctly, can carve intricate details and work efficiently on even challenging metals. It’s easy to get discouraged if things aren’t going as planned, but that’s exactly what we’re here to tackle. This guide is designed to demystify the process, giving you the knowledge and confidence to get the most out of your smaller end mills. We’ll cover everything from understanding the tool itself to the crucial machine settings and techniques that lead to success. Let’s get cutting!
Understanding the ‘Why’: The Challenge of Small End Mills
Small end mills, particularly those with a 1/8 inch diameter and a 6mm shank, are incredibly useful for detailed work. However, their small size presents unique challenges. They are more susceptible to breakage due to reduced rigidity and can generate heat more rapidly. This is especially true when machining tougher materials like Titanium Grade 5, which is known for its strength and tendency to work-harden. The desire for “long tool life” in such demanding applications isn’t just a wish; it’s a necessity for cost-effectiveness and consistent results. Achieving this requires a detailed understanding of how these tiny cutting tools interact with the workpiece.
Key Factors for Success with Small Carbide End Mills
When you’re aiming for precision and longevity with small carbide end mills, several factors come into play. It’s not just about having the right tool; it’s about using it intelligently. Think of it like a chef choosing the right knife for a delicate garnish – precision matters.
- Tool Geometry: The design of the end mill itself plays a huge role. Features like the number of flutes, helix angle, and coating can significantly impact performance.
- Material Properties: Knowing your workpiece, like Titanium Grade 5, is crucial. Its high strength and heat resistance demand specific machining strategies.
- Machine Stability: The rigidity of your milling machine and how securely the workpiece is held are paramount. Vibration can quickly destroy a small end mill.
- Cutting Parameters: Spindle speed (RPM), feed rate, and depth of cut are the dial you’ll turn to control the cutting action.
- Coolant/Lubrication: Proper cooling prevents heat buildup, which is critical for both the tool and the workpiece.
The Role of Carbide
Carbide, or tungsten carbide, is a hard, brittle ceramic material widely used for cutting tools. Its hardness allows it to cut harder materials and maintain a sharp edge at higher speeds than high-speed steel (HSS). However, its brittleness means it can chip or shatter if subjected to excessive shock or vibration. For your 1/8 inch end mills, this hardness is a double-edged sword: it’s why they can cut tough materials, but it also means you need to treat them with care.
Reduced Necked End Mills: A Specific Design for Specific Tasks
You mentioned “reduced neck” end mills. This is a very specific design feature that addresses a critical issue: clearance. In deep pockets or complex 3D contours, a standard end mill might rub against the walls of the cut due to its overall diameter. A reduced neck, also known as a necked-down or relief neck, means the diameter of the shank above the cutting flutes is smaller than the cutting diameter. This provides extra clearance, allowing the tool to reach deeper or into tighter spots without friction, which in turn can help prevent tool breakage and improve surface finish.
For a 1/8 inch end mill with a 6mm shank, a reduced neck means the shank itself, which is close to 1/4 inch (6mm), is thinned down just above the cutting portion. This is particularly valuable when working with materials that might cause galling or adhesion, as it minimizes the contact area of the non-cutting parts of the tool.
Machining Titanium Grade 5: What Beginners Need to Know
Titanium Grade 5 (Ti-6Al-4V) is a popular choice for aerospace, medical implants, and high-performance automotive parts due to its excellent strength-to-weight ratio, corrosion resistance, and biocompatibility. However, it’s also known for being a challenging material to machine. Here’s why and what it means for your small end mill:
- High Strength: It requires more cutting force than steels or aluminum.
- Low Thermal Conductivity: Heat generated during cutting tends to stay concentrated at the cutting edge, rather than dissipating into the chip or workpiece. This can rapidly dull or break carbide tools.
- Tendency to Work-Harden: As titanium is cut, the surface layers can become harder, making subsequent cuts more difficult and increasing tool wear.
- Galling/Adhesion: Under pressure and heat, titanium can stick to the cutting tool, loading up the flutes and potentially leading to tool failure.
For a 1/8 inch carbide end mill, machining titanium requires a very conservative approach to parameters, focusing on preventing heat buildup and minimizing tool stress. It’s about working smarter, not harder.
Optimizing Your Setup for Small Carbide End Mills
Getting the best results from your 1/8 inch carbide end mill, especially in tough materials, hinges on how you set up your milling machine and your workpiece. Think of this as building a solid foundation for success.
Workholding: Keeping Things Rock Solid
Vibration is the enemy of small, brittle cutting tools. If your workpiece can move even a tiny amount, it can cause the end mill to chatter, chip, or break. For small parts, especially when dealing with harder metals like titanium, you need robust workholding.
- Vise Jaw Tightness: Ensure your milling vise jaws are clean and that the workpiece is held with maximum force without deforming the part. Use soft jaws if necessary to protect delicate surfaces.
- Clamping Strategy: For larger or irregularly shaped parts, consider using clamps, toe clamps, or even strategically placed chucks for extreme rigidity.
- Eliminate Play: Check your milling machine for any slop in the Z-axis (downward movement) or X/Y axes. Loose components can introduce unwanted movement.
A great resource for understanding different workholding techniques can be found through established machining organizations. For instance, the National Tooling & Machining Association (NTMA) often publishes guides and best practices relevant to solid workholding (you can often find introductory materials on their website or through machinist forums).
Tool Holder Precision
Just as important as the vise is the tool holder that grips your end mill. For small end mills, runout (wobble) in the spindle can be disastrous. A worn or poor-quality tool holder can introduce enough runout to cause uneven cutting, excessive tool pressure, and premature tool failure.
- Collets are King: For small end mills, a high-quality ER collet chuck system is highly recommended. Collets provide excellent concentricity (minimal runout) and grip the tool shank evenly along its length. A 6mm ER collet is what you’ll need for that shank size.
- Cleanliness: Always ensure the collet, the tool holder, and the end mill shank are perfectly clean. Any dirt or coolant residue can affect the grip and introduce runout.
- Tighten Properly: Use the correct collet nut and wrench to tighten the collet securely.
Coolant and Lubrication: The Unsung Heroes
Heat is a major factor in tool wear and can quickly ruin a small carbide end mill. Proper coolant or lubrication is essential, especially when machining titanium.
- Flood Coolant: For general milling, a good quality soluble oil coolant delivered via a flood system is generally effective. It cools the cutting zone, flushes chips away, and lubricates.
- MQL (Minimum Quantity Lubrication): For certain materials and operations, MQL systems deliver a fine mist of lubricant directly to the cutting edge. This can be very effective for titanium, providing targeted cooling and lubrication with minimal mess.
- Aerosol Spray Lubricants: While less effective than flood or MQL for heavy cuts, specialized spray lubricants designed for milling titanium can provide localized cooling and friction reduction.
- Air Blast: A strong blast of compressed air can help clear chips and provide some cooling, but it often isn’t sufficient on its own for tougher materials.
The goal is to keep the cutting edge as cool as possible. For titanium, many machinists recommend using specialized cutting fluids or even high-pressure coolant systems to ensure adequate heat removal. Resources like the Machinery Magazine often discuss strategies for machining difficult materials like titanium.
Setting Your Machine: The Right Parameters for Success
This is where the magic happens – or doesn’t, if your settings are off. For a 1/8 inch carbide end mill on titanium, conservative and calculated settings are key. The “perfect” numbers can vary based on the specific end mill geometry, machine rigidity, and coolant, but we can provide excellent starting points.
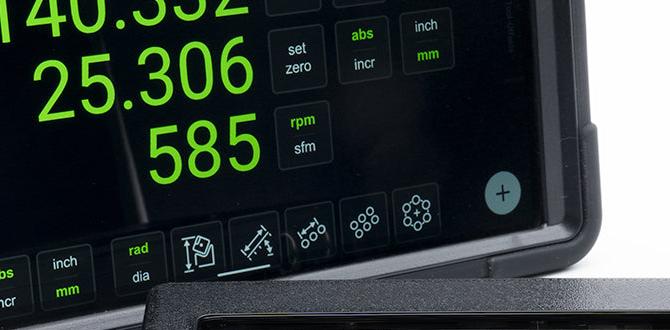
Surface Speed (SFM) and Spindle Speed (RPM)
Surface speed refers to the speed at which the cutting edge is moving relative to the workpiece, measured in surface feet per minute (SFM). Your spindle speed (RPM) is what you set your machine to, and it’s calculated based on the SFM and the diameter of the end mill.
Formula: RPM = (SFM 3.82) / Tool Diameter (inches)
For 1/8 inch carbide end mills machining Titanium Grade 5, typical surface speeds might range from 30-80 SFM. It’s often better to start at the lower end.
Calculation Example:
- Tool Diameter: 1/8 inch (0.125 inches)
- Target SFM: 40 SFM (a conservative starting point)
- RPM = (40 3.82) / 0.125 = 1528 / 0.125 = 12,224 RPM
So, a starting point might be around 10,000 – 15,000 RPM, heavily depending on the specific end mill. Always consult the end mill manufacturer’s recommendations if available.
Chip Load and Feed Rate
Chip load is the thickness of the material being removed by each tooth of the end mill. A proper chip load ensures that the cutting edge is actually cutting material, not rubbing or “milling air,” which generates heat and reduces tool life. For small end mills, chip loads are very small.
Formula: Feed Rate (IPM) = Chip Load (IPT) Number of Flutes RPM
For a 1/8 inch carbide end mill, a starting chip load for titanium might be extremely fine, perhaps in the range of 0.0005 to 0.0015 inches per tooth (IPT). This is tiny!
Calculation Example (using 0.001 IPT):
- Chip Load: 0.001 IPT
- Number of Flutes: Let’s assume 4 flutes
- RPM: 12,000 (from our SFM calculation)
- Feed Rate = 0.001 4 12,000 = 48 IPM
This 48 IPM (inches per minute) feed rate is crucial. Too slow, and you won’t create sharp, efficiently removed chips, leading to rubbing and heat. Too fast, and you risk breaking the tool or overloading the spindle.
Depth of Cut (DOC) and Width of Cut (WOC)
When machining titanium with small end mills, you must think in terms of light cuts.
- Axial Depth of Cut (ADOC): This is how deep the end mill cuts into the material along its cutting edge (downwards). For titanium, especially with small tools, you often need to keep this very small, perhaps 0.050 inches (about half the tool diameter) or even less on the first pass.
- Radial Width of Cut (AWOC): This is how much the end mill cuts horizontally into the material (side milling). For materials like titanium, it’s often best to use a smaller radial engagement, sometimes called “high-efficiency milling” or “adaptive clearing,” where the tool engages the material over a smaller arc, taking many shallow radial passes rather than one large one. A radial depth of 0.020 to 0.050 inches is common for this size tool.
These values are highly dependent on the rigidity of your setup. Always be prepared to reduce them if you hear chatter or see signs of tool strain.
Strategies for Maximizing Titanium Grade 5 Tool Life
Achieving “long tool life” when cutting titanium with a small carbide end mill isn’t accidental. It’s the result of applying specific strategies designed to mitigate titanium’s difficult properties:
1. High-Efficiency Milling (HEM) / Adaptive Clearing
Traditional milling involves plunging the tool into the material and then taking large radial steps. HEM, on the other hand, uses a constant tool engagement angle, typically entering the material with a shallow helical path and maintaining a consistent radial depth of cut. This results in:
- More predictable chip loads.
- Less heat buildup due to continuous chip formation and evacuation.
- Reduced cutting forces, minimizing stress on the tool and spindle.
- Faster material removal rates overall when programmed correctly.
Many modern CAM software packages offer “Adaptive Clearing” or “Dynamic Milling” toolpaths that are perfect for this.
2. Climb Milling vs. Conventional Milling
For most milling operations, especially with carbide tools, climb milling is preferred. In climb milling, the cutter rotates in the same direction as the feed. This results in a slicing action, producing a thinner chip at the beginning of the cut and a thicker chip at the end. This can:
- Reduce cutting forces.
- Produce a better surface finish.
- Reduce heat generation.
However, it requires a machine with zero backlash on the feed screws or a modern CNC with backlash compensation. If your machine has significant backlash, conventional milling (where the cutter rotates against the direction of the feed) might be safer to prevent the tool from “digging in” suddenly.
3. Managing Heat Buildup
As established, heat is a primary enemy. Beyond good coolant, consider:
- Pecking Cycles for Deep Pockets: If you need to take deeper axial cuts than recommended, use a peck drilling cycle. This involves retracting the tool periodically to clear chips and allow coolant to reach the cutting zone.
- Intermittent Cuts: If possible, program your toolpath to allow the tool to retract briefly to dissipate heat.
- Tool Coatings: While your tool is likely already coated (e.g., TiN, TiAlN, AlTiN), some coatings perform better at higher temperatures. Consult the tool manufacturer for coating recommendations.
4. Utilizing the Reduced Neck
The reduced neck design is there for a reason. Don’t shy away from using it to get into those tight areas. Just remember that the reduced diameter often means less rigidity in that section, so maintain conservative chip loads.
- Clearance: This design is for reaching deeper or into tighter corners where a standard end mill would rub.
- Machining Strategy: When using a reduced neck end mill, ensure your toolpath programs the tool with enough clearance for the full diameter to pass through without rubbing the non-cutting parts.
5. Tool Inspection and Replacement
Regularly inspect your end mill, even mid-operation if possible. Look for:
- Chipping: Small nicks or chips on the cutting edges.
- Flank Wear: A dull, shiny land on the cutting edge.