Quick Summary: Effectively reduce chatter when machining stainless steel 316 with a 1/8 inch carbide end mill featuring a 6mm shank and reduced neck. Proper tool selection, machine rigidity, sharp tooling, and optimized cutting parameters are crucial for smooth, vibration-free cuts and excellent surface finish.
Hey there, fellow makers and machinists! Daniel Bates here from Lathe Hub. Ever found yourself wrestling with a milling project, only to be met with that annoying, high-pitched squeal and those rough, jagged cuts? That’s chatter, and it’s one of the biggest headaches for anyone working with metal, especially tough materials like stainless steel 316. It’s frustrating, can damage your workpiece and your tools, and frankly, it’s just no fun. But don’t worry! Today, we’re going to break down exactly how to combat chatter, specifically when using a critical tool: a 1/8 inch carbide end mill with a 6mm shank and a reduced neck.
This specialized end mill is a hero for certain jobs, but like any tool, it needs the right approach. We’ll walk through everything you need to know, from picking the right tool to dialing in your machine settings, so you can achieve those clean, precise cuts you’re after. Let’s get your milling back on track and make those vibrations a thing of the past!
Understanding Chatter: The Enemy of Smooth Cuts
Chatter is essentially unwanted vibration that occurs during a cutting operation. It’s a dynamic process where the cutting tool, workpiece, and machine tool system all interact. If the system’s natural frequencies align with the cutting frequency, resonance occurs, amplifying the vibrations. Imagine a guitar string – pluck it, and it vibrates at a specific pitch. Chatter is like that, but instead of music, you get noise and poor surface finish.
Several factors contribute to chatter:
- Machine Rigidity: A flexible machine or worn components can easily vibrate.
- Tooling Issues: Dull cutters, incorrect tool geometry, or improper tool holding.
- Cutting Parameters: Excessive depth of cut, too fast or too slow a feed rate, or wrong spindle speed.
- Workpiece Holding: If the material isn’t held securely, it can vibrate.
- Tool Length/Stick-out: A long, slender tool is more prone to vibration.
For beginners, identifying the exact cause can seem daunting, but by systematically addressing these areas, you’ll gain control. Today, we’re focusing on how a specific tool, the 1/8 inch carbide end mill with a 6mm shank and reduced neck, can be your ally in this fight, particularly with stainless steel 316.
Why Stainless Steel 316? The Machining Challenge
Stainless steel 316 is a popular choice for its excellent corrosion resistance, particularly in marine and chemical environments. It’s also quite strong and durable. However, these desirable properties make it a challenging material to machine. It’s known for:
- Work Hardening: As you cut it, the surface layer becomes harder, making subsequent cuts more difficult and increasing tool wear.
- Low Thermal Conductivity: It doesn’t dissipate heat well, leading to tool overheating and material buildup on the cutting edge.
- Gummy Nature: It tends to “gum up” on the cutting tool rather than chipping cleanly, which can lead to poor chip formation and increased cutting forces.
These characteristics mean that any slight vibration can quickly turn into significant chatter, leaving you with a rough surface that’s difficult to clean up and potentially compromising the part’s integrity. This is where the right end mill becomes crucial for success.
The Hero Tool: 1/8 Inch Carbide End Mill with 6mm Shank and Reduced Neck
Let’s break down what makes this particular tool special and how it helps combat chatter, especially in stainless steel:
1. Carbide Material: The Backbone of Durability
Solid Carbide: Unlike High-Speed Steel (HSS) tools, solid carbide end mills are much harder and can withstand higher cutting temperatures. This means they stay sharp longer and can be run at faster speeds and feeds, which are often beneficial for cutting stainless steel. For beginners, this translates to fewer tool changes and more consistent results.
2. 1/8 Inch Diameter: Precision in Tight Spaces
A 1/8 inch (approximately 3mm) diameter is small enough for intricate detail work, pocketing small features, or machining in restricted areas. However, small diameter tools are inherently less rigid, making them more susceptible to deflection and vibration. This is a key reason why chatter can be a problem with these tools if not managed correctly.
3. 6mm Shank: A Secure Grip
The 6mm shank provides a solid interface with your milling machine’s collet or tool holder. A well-gripped tool is essential. A shank that’s too small for the cutting forces or is poorly gripped can lead to runout (the tool not spinning perfectly true) and contribute to vibration. The 6mm shank offers a good balance of size and compatibility with many smaller milling machines and collet systems.
4. Reduced Neck: The Chatter Buster
This is the secret sauce for this specific tool! A “reduced neck” means that the diameter of the shank is larger than the cutting diameter for a portion of the tool’s length, and then it steps down to the cutting diameter. Often, this relief section is polished. The primary benefit of a reduced neck is to:
- Increase Flute Length Clearance: It prevents the flute helix from interfering with the workpiece surface in deeper cuts or complex profiles.
- Reduce Re-cutting: In some operations, the reduced neck allows previously cut chips to exit more freely, preventing them from being recut and dulling the tool.
- Enhance Rigidity on Slender Tools: While the cutting diameter is small, a larger neck diameter behind the cutting flutes offers more torsional stiffness and reduces overall tool deflection. This is crucial for minimizing vibration and chatter. The larger diameter absorbs more of the cutting forces before they can cause the smaller cutting diameter to flex and chatter.
- Improve Chip Evacuation: The transition from the larger neck to the smaller diameter can sometimes aid in directing chips away from the cutting zone, further preventing buildup and chatter.
When machining stainless steel 316, where cutting forces can be high and chip evacuation is critical, this reduced neck design significantly improves your chances of achieving a smooth, chatter-free finish.
Choosing the Right End Mill for Stainless Steel 316
Beyond the specific 1/8 inch, 6mm shank, reduced neck configuration, here are other features to look for in an end mill for stainless steel 316:
Number of Flutes
For stainless steel, you typically want a lower flute count.
- 2 Flutes: Ideal for slotting and general-purpose milling in tougher materials. They have more space for chip evacuation, which is vital for gummy materials like stainless steel. This is often the go-to for beginners.
- 3 Flutes: Offers a balance between chip clearance and surface finish. They can handle higher feed rates than 2-flute tools.
- 4 Flutes: Generally better for finishing in softer materials. They provide a smoother finish due to more cutting edges but have less chip clearance, which can lead to clogging and poor performance in stainless steel.
For our 1/8 inch tool, a 2-flute or a 3-flute with good chip relief is usually best for stainless steel. The reduced neck design helps compensate for the limited chip gullet space in a 1/8 inch tool, making even a 3-flute option more viable.
Coating
Coatings can dramatically improve tool life and performance. For stainless steel, consider:
- TiCN (Titanium Carbonitride): A good all-around coating offering excellent hardness and wear resistance, especially at higher temperatures.
- AlTiN (Aluminum Titanium Nitride): Excellent for high-temperature applications and performs very well in stainless steels. It forms a protective oxide layer at high heat, further enhancing wear resistance. This is often a superb choice for 316.
- ZrN (Zirconium Nitride): A good choice for general machining, providing a slick surface that helps prevent material buildup.
Look for specific “stainless steel” or “high-temp alloy” end mills, as they are often designed with these coatings and geometries.
Helix Angle
The helix angle refers to the “twist” of the cutting flutes.
- Standard Helix Angle (approx. 30 degrees): A good general-purpose angle.
- High Helix Angle (45 degrees or more): Offers a more shearing action, which is beneficial for gummy materials like stainless steel as it helps break chips more effectively and reduces cutting forces. This can be a significant benefit in reducing chatter.
For stainless steel, a higher helix angle (like 45 degrees) on your end mill can often lead to smoother cuts and less chatter.
Mastering the Setup: Factors for Chatter-Free Machining
Even with the perfect tool, your machine setup is critical. Let’s look at the key elements beginners need to focus on.
Machine Rigidity and Maintenance
This is paramount. If your machine itself is vibrating, no tool will perform optimally.
- Ensure all gibs are properly adjusted: Too loose and the slides will chatter; too tight and it will be hard to move and potentially damage the ways.
- Check for play in the spindle: Worn spindle bearings can introduce runout and vibration.
- Secure the workpiece firmly: Use appropriate clamps, vises, or fixtures. Any movement of the workpiece will cause unpredictable cutting forces and lead to chatter. For small workpieces, consider using a vise with hardened jaws to prevent marring them.
- Keep your machine clean: Debris can affect movement and cause uneven forces.
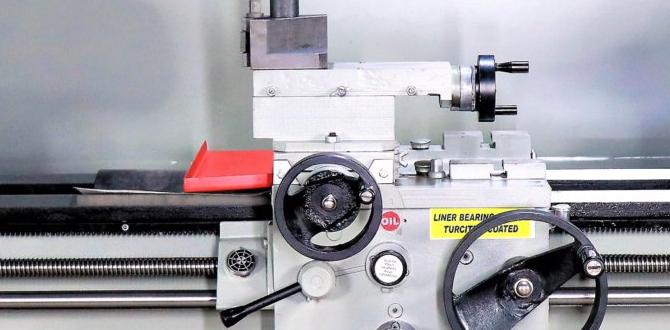
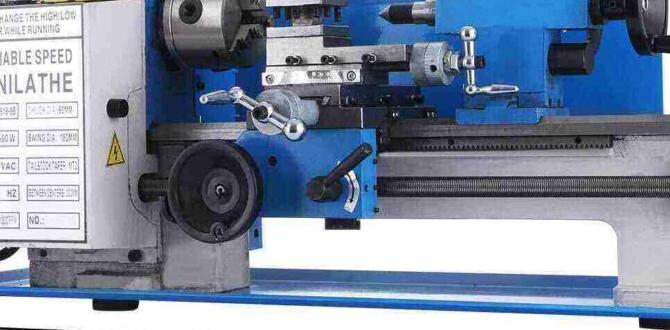
For hobbyists and small workshops, machines like the Grizzly Industrial or LittleMachineShop offer good rigidity for their size, but understanding their maintenance is key.
Tool Holder and Collet Selection
How you hold the end mill matters. For small diameter tools like a 1/8 inch end mill:
- Use a high-quality collet chuck or ER collet system: These provide excellent concentricity and grip, minimizing runout. A dedicated tool holder for small shank sizes is often better than trying to adapt with bushings.
- Ensure the collet is the correct size for the shank: A 6mm shank should go into a 6mm collet or a collet rated for 6mm. Don’t try to force it into a slightly undersized collet.
- Keep collets and tool holders clean: Any dirt or oil can prevent a secure grip and introduce runout.
Minimizing Tool Stick-out
The length of the end mill that extends beyond the tool holder (stick-out) is a major factor in rigidity. The longer the stick-out, the more it can deflect and vibrate.
- Use the shortest possible stick-out: Only extend the end mill as far as necessary to reach the bottom of your cut.
- Consider using shorter end mills if possible: Many manufacturers offer end mills in various lengths.
For a 1/8 inch tool, even a slightly excessive stick-out can lead to chatter. The reduced neck design helps here, allowing deeper pockets with less overall deflection than a straight shanked tool of the same cutting diameter.
Optimizing Cutting Parameters for Stainless Steel 316
Dialing in your spindle speed (RPM) and feed rate is an art, but for beginners, understanding the principles will get you far. The goal is to ensure the tool smoothly engages the material, taking a chip of the correct size without overloading itself or the machine.
Spindle Speed (RPM)
RPM is the rotational speed of the spindle. For carbide end mills in stainless steel 316, you’ll generally use moderate to high RPMs to achieve a good surface footage (SFM). Surface footage is the speed at which the cutting edge passes over the material. A common guideline for carbide in stainless steel is 200-400 SFM.
To calculate RPM:
RPM = (SFM 3.82) / Diameter (inches)
For a 1/8 inch (0.125 inch) end mill and targeting 300 SFM:
RPM = (300 3.82) / 0.125 = 9168 RPM
This calculation gives you a starting point. However, actual speeds depend on the machine’s rigidity, the coolant used, and the specific coating and geometry of the end mill. If you hear chattering, you might need to adjust your RPM down slightly, or more often, adjust your feed rate.
Feed Rate (IPM)
Feed rate is how fast the tool moves into the material (in Inches Per Minute, IPM). This is crucial for chip formation and chatter reduction. You want to take a chip thick enough that it breaks cleanly but not so thick that it overloads the tool or machine.
A common guideline for chip load (chip thickness per tooth) for carbide in stainless steel 316 with a 1/8 inch end mill might be around 0.0005 to 0.001 inches per tooth.
To calculate Feed Rate (IPM):
Feed Rate (IPM) = Chip Load (IPM/tooth) Number of Flutes RPM
Using our earlier RPM calculation (9168 RPM) and targeting a chip load of 0.0008 inches per tooth with a 2-flute end mill:
Feed Rate = 0.0008 2 9168 = 14669 IPM
This is extremely high for a hobbyist machine! This highlights the challenge of small diameter tools and high RPMs. In reality, your machine might max out at 10,000 or 5,000 RPM, or even lower. This dramatically changes your feed rate. Let’s try with a more realistic 4000 RPM:
Feed Rate = 0.0008 2 4000 = 6.4 IPM
This value (6.4 IPM) is much more manageable. If chatter occurs, consider slightly increasing the feed rate (e.g., to 7-8 IPM if your machine can handle it smoothly) or slightly decreasing the RPM. The key is finding the sweet spot. For stainless steel, a slightly higher feed rate can sometimes push the material away more effectively. Conversely, if you feed too fast for the depth of cut, you’ll overload the tool.
Depth of Cut (DOC) and Width of Cut (WOC)
These define how much material you’re removing at once.
- Depth of Cut (DOC): For small diameter end mills like 1/8 inch, you’ll typically use a shallow DOC. Trying to take a deep cut will cause excessive deflection and chatter. For roughing, you might aim for 0.5 times the tool diameter (0.060 inches). For finishing, you’ll want a very shallow DOC (e.g., 0.010-0.020 inches).
- Width of Cut (WOC): When milling slots or pockets, you can often mill with a wider WOC than DOC to remove material faster. However, with stainless steel and small tools, it’s often better to take lighter, more controlled cuts. For slotting, a WOC of 50% of the tool diameter is common. For pockets, you might use a trochoidal milling strategy (a series of overlapping arcs) for better tool engagement and heat dissipation.
The “Rule of Thumb” for reducing chatter: Often, reducing the depth of cut or slightly increasing the feed rate can help. For stainless steel, a moderate chip load is vital. If chatter starts, try reducing the DOC first. If that doesn’t work, and you’re feeding slowly, increase the feed rate slightly and take a shallower DOC.
A great resource for machining data is the Sandvik Coromant Tool Guide, which provides cutting data recommendations for various materials and tools. While their recommendations might seem advanced, they offer valuable starting points.
Cutting Strategies to Minimize Chatter
How you program or guide the end mill through the material also plays a big role