Quick Summary:
Canceling a car wash subscription is usually straightforward. Most services require a few clicks online or a simple phone call. Always check your contract or the provider’s website for their specific cancellation policy and required notice period to avoid unexpected charges.
Mastering Your Lathe: A Beginner’s Guide to Metal and Woodwork
Welcome to the workshop! Ever looked at a gleaming metal part or a beautifully turned wooden bowl and wondered, “How did they make that?” The answer often lies with a lathe, a truly magical machine tool. Whether you’re drawn to the precision of metalworking or the warmth of woodturning, starting with a lathe can feel a bit daunting. That’s where I come in. My name is Daniel Bates, and I’ve spent a lifetime with these machines, helping folks just like you get started. This guide is designed to demystify the lathe, breaking down everything from basic setup to your first projects. We’ll cover both metal and wood lathes, showing you how to use them safely and effectively. Get ready to build confidence and unlock your creative potential!
Understanding the Basics: Lathe Types and Components
Before we dive into any turning, it’s essential to know what we’re working with. Lathes, at their core, spin a workpiece against a cutting tool. The magic happens in how this rotation and tool movement are controlled.
Metal Lathes vs. Wood Lathes: Key Differences
While they share the fundamental principle of rotation, metal and wood lathes are distinct tools built for different tasks and materials.
Metal Lathes: These are precision machines designed for shaping metal. They are typically heavier, more robust, and built to handle the forces involved in metal cutting. Metal needs to be removed in small, controlled chips. Speed and feed rates are critical here.
Wood Lathes: Designed for shaping wood, these lathes often run at higher speeds. Wood is generally softer, so the cutting tools are different (chisels, gouges), and the forces are less intense. The focus is on smooth material removal and achieving a fine finish.
Essential Lathe Components
No matter the type, most lathes share a common anatomy. Understanding these parts will help you operate the machine safely and effectively.
- Headstock: This houses the motor and drive mechanism. It contains the spindle, which is what the workpiece mounts to and rotates.
- Tailstock: Positioned at the opposite end of the bed from the headstock, the tailstock can support one end of the workpiece (like a long shaft) or hold tools like drill bits.
- Bed: The main body of the lathe, providing a stable structure and a track (ways) for the carriage and tailstock to move along.
- Carriage: This assembly moves along the bed and supports the cutting tool. It includes the cross-slide and compound rest, which allow for precise feeding of the tool into the workpiece.
- Tool Post: Mounted on the compound rest, this holds the cutting tool.
- Chucks/Faceplates: Devices that grip the workpiece and attach it to the spindle. Common types include three-jaw chucks, four-jaw chucks, and faceplates.
Setting Up Your Lathe for Success
Proper setup is paramount for both safety and the quality of your work. A stable, well-adjusted lathe is the foundation of good machining.
Leveling and Securing the Machine
Even a small imbalance can lead to vibrations, poor finishes, and potential safety hazards. Make sure your lathe is placed on a stable surface and is perfectly level.
For benchtop models, ensure the bench itself is sturdy. For floor-standing machines, consider using anti-vibration pads or shims to achieve perfect leveling and absorb any unwanted movement.
Understanding Tool Rests (Wood Lathes) and Tool Posts (Metal Lathes)
The position and stability of your cutting tool are crucial.
Wood Lathes: The tool rest should be positioned close to the workpiece, typically just below the center line, allowing the cutting edge of your chisel to engage smoothly as the wood revolves.
Metal Lathes: The tool post secures your cutting tool. It needs to be set at the correct height (usually the center line of the workpiece) and firmly tightened to prevent any movement during the cut.
Your First Cuts: Getting Hands-On
It’s time to make some chips! We’ll start with basic operations that build foundational skills.
First Steps on a Wood Lathe: Simple Turning
Let’s start with something simple, like turning a dowel rod into a basic cylinder or slightly tapered shape.
- Mount the Wood: Secure a piece of wood between centers (headstock and tailstock) or in a chuck appropriate for the size and shape of your stock.
- Position the Tool Rest: Place the tool rest in a convenient position for your chosen tool, usually just below center.
- Take Light Cuts: Start the lathe at a moderate speed. Bring your gouge or chisel into contact with the spinning wood, taking light, shearing cuts. Let the tool do the work; don’t force it.
- Shape Gradually: Work your way down the workpiece, gradually removing material to achieve your desired shape. Regularly stop the lathe to check your progress and refine the tool rest position.
- Finishing: Once the basic shape is achieved, you can use scrapers and sandpaper (while the lathe is spinning at a slower speed) to achieve a smooth finish.
First Steps on a Metal Lathe: Facing and Parallel Turning
Metal turning requires a different approach. We’ll focus on creating a flat end (facing) and reducing the diameter of a bar (parallel turning).
Facing a Metal Bar
Facing is the process of making the end of a workpiece flat and square.
- Secure the Workpiece: Mount your metal bar securely in a chuck. Ensure it runs as true as possible.
- Install the Facing Tool: Place a suitable facing tool (like an inserted carbide tool or a solid HSS bit) in the tool post, set to the center height of the workpiece.
- Set Spindle Speed: Consult a machining handbook or online calculator for appropriate surface speeds for your metal and tool. Lower speeds are better for beginners.
- Engage the Feed: Start the lathe. Carefully engage the cross-feed to move the tool from the center outwards across the end of the bar. Take light cuts.
- Repeat and Refine: You may need several passes to achieve a perfectly flat surface. Stop the lathe periodically to measure and check for flatness.
Parallel Turning (Reducing Diameter)
This is how you make a rod smaller in diameter.
- Secure the Workpiece: Ensure the workpiece is securely held in the headstock chuck and supported by the tailstock if it’s long.
- Install the Turning Tool: Place a standard turning tool in the tool post, set to the center height.
- Set Spindle Speed and Depth of Cut: Again, consult resources for appropriate speeds. For beginners, start with a shallow depth of cut (e.g., 0.020 inches or 0.5mm).
- Engage the Longitudinal Feed: Start the lathe. Using the feed handle that moves the carriage along the bed, slowly advance the cutting tool into the workpiece.
- Make the Cut: Feed the tool the desired length of the workpiece.
- Retract and Measure: Retract the tool, stop the lathe, and measure the diameter. Remove the tool and re-engage the cross-feed to increase the depth of cut for the next pass.
- Repeat: Continue feeding and adjusting depth of cut until you reach your target diameter.
Essential Tools and Accessories
Having the right tools makes all the difference. For beginners, focus on quality over quantity.
For Wood Lathes:
- Gouges: Spindle gouges for smaller work, bowl gouges for hollow forms.
- Scrapers: For fine finishing, especially on end grain.
- Parting Tool: For cutting off sections of wood.
- Calipers: For measuring diameter accurately.
- Sandpaper: Various grits for finishing.
- Face Shield/Safety Glasses: Non-negotiable!
For Metal Lathes:
- High-Speed Steel (HSS) or Carbide Cutting Tools: A basic set is a good start (e.g., right-hand turning tool, parting tool, threading tool, knurling tool).
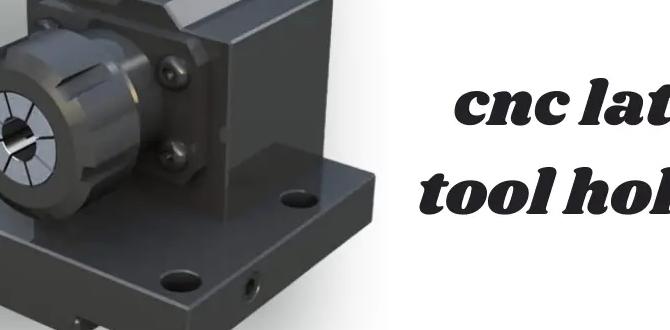
- Tool Holder: To mount the bits rigidly.
- Measuring Tools: Calipers, micrometer, dial indicator.
- Cutting Fluid/Lubricant: Essential for most metal cutting.
- Safety Glasses/Face Shield: Absolutely critical.
- Deburring Tool: For cleaning up sharp edges.
Common Accessories for Both
- Chucks: Different types for gripping various workpiece shapes and sizes.
- Centers: To support workpieces between the headstock and tailstock.
- Faceplates: For mounting awkwardly shaped pieces.
- Tool Grinder: For sharpening woodturning tools and potentially grinding HSS metal bits.
Safety First: Non-Negotiable Rules
Machining is rewarding, but it demands respect for the tools and materials. Never compromise on safety.
General Safety Practices for All Lathes
- Eye Protection: Always wear safety glasses or a face shield. Always.
- No Loose Clothing or Jewelry: Anything that can get caught in the spinning workpiece or machine must be removed. Tie back long hair.
- Secure Workpiece: Ensure your workpiece is firmly clamped and stable before starting the machine. Double-check it.
- Tool Rest/Post Position: Ensure tools are correctly positioned and secured. For wood, the rest should be close; for metal, the tool must be rigidly held.
- Start Slow: Begin at the lowest speed setting and gradually increase as needed.
- Listen to the Machine: Unusual noises often indicate a problem – stop immediately and investigate.
- Keep Area Clean: A tidy workspace reduces the risk of slips and trips, and keeps chips from flying unexpectedly.
- Know Your Emergency Stop: Be familiar with how to quickly stop the lathe in an emergency.
Specific Wood Lathe Safety Tips
- Wood Grain Direction: Be aware of grain direction, especially when turning end grain, which can be prone to tear-out.
- Tool Grinding: Keep woodturning tools sharp. Dull tools require more force, increasing the risk of kickback.
- Don’t Over-Reach: Keep your balance. Never over-extend yourself to reach a part of the workpiece.
Specific Metal Lathe Safety Tips
- Chip Removal: Use a brush or hook tool to remove chips. Never use your hands. Metal chips can be sharp!
- Cutting Speed and Feed Rate: Incorrect settings can lead to tool breakage, tool chatter, and dangerous situations.
- Coolant/Lubrication: Use appropriate cutting fluids to manage heat and improve chip flow, especially with harder metals. For more on working with specific challenges like heat-resistant stainless steels, resources like Machinery’s Handbook or guides from reputable metal suppliers are invaluable.
- Workpiece Rigidity: Ensure long workpieces are supported by the tailstock or traveling steady rest to prevent whipping.
Common Beginner Projects to Build Skills
Starting with achievable projects builds confidence and hones essential techniques.
Wood Lathe Projects
- Rolling Pin: A classic project that introduces basic cylinder turning and sanding.
- Pen/Pencil: Smaller projects often done on mini-lathes, perfect for practicing finishing techniques and understanding bushings.
- Small Bowl or Box: Introduces faceplate turning, hollowing, and external shaping.
- Candlestick Holder: Combines turned elements with a base.
Metal Lathe Projects
- Knurled Knob: Teaches knurling and basic turning to diameter.
- Threaded Rod/Bolt: Practicing threading operations requires precision and correct settings. Start with larger threads.
- Simple Bushing: Reduces a bar to a precise inner and outer diameter.
- Custom-Sized Dowel Pins: Turning pins to a very precise diameter.
Troubleshooting Common Issues
Every maker encounters hiccups. Here’s how to address a few common problems.
Wood Lathe Issues:
- Tear-out: Usually caused by a dull tool or cutting against the grain. Ensure tools are sharp and approach cuts with the grain where possible.
- Vibrations/Rough Finish: Check that the wood is properly secured, the tool rest is correctly positioned, and you are taking light, continuous cuts. Ensure the lathe is stable and level.
- Tool Chatter: The tool is bouncing against the wood. This can be due to a loose tool rest, an unstable workpiece, or taking too heavy a cut.
Metal Lathe Issues:
- Tool Chatter: Similar to wood, but often indicates tool bit issues, incorrect speed/feed, insufficient clamping, or a weak setup. Ensure tool bits have the correct rake and relief angles.
-