
Quick Summary: A 6mm shank carbide end mill is a precision cutting tool designed for machining tough materials. Its small, strong shank makes it ideal for intricate work and high-temperature plastics like PEEK, offering excellent durability and heat resistance for clean, accurate cuts.
Welcome, fellow makers! It’s Daniel Bates here from Lathe Hub. Ever stared at a complex part and wondered how to get those super clean edges, especially on challenging materials? Sometimes, it feels like the tools themselves are speaking a different language, right? Getting the right cutting tool can make all the difference between a frustrating struggle and a smooth, satisfying project. You might be looking for a tool that’s both tough and precise, something that can handle heat and intricate details without breaking a sweat. We’ve all been there, searching for that perfect bit of metal that just works. Don’t worry, we’re going to break down exactly what makes a tool like a 6mm shank carbide end mill so special and how it can help you achieve those pro-level results, even if you’re just starting out. Stick around, and let’s demystify this essential piece of workshop magic together!
Understanding Your Cutting Edge: The Carbide End Mill
So, what exactly is a carbide end mill, and why are we talking about a specific one with a 6mm shank? Let’s break it down. Think of an end mill as a fancy drill bit, but instead of just drilling down, it can also cut sideways and create shapes like slots, pockets, and contours. It’s a versatile workhorse in any machining or CNC setup.
Now, the “carbide” part is super important. Carbide, or tungsten carbide, is an incredibly hard and wear-resistant material. It’s much harder than typical high-speed steel (HSS) used in many other tools. This means carbide end mills can cut through tough materials, resist heat buildup, and stay sharp for a lot longer. This is a huge advantage when you’re working with materials that can be tricky, like certain plastics or metals.
The “end mill” bit tells us its job: it cuts with its tip (the end) and its sides. This gives you a lot of flexibility in how you use it for different machining tasks.
The Significance of the 6mm Shank
Why focus on a 6mm shank? In the world of machining, the shank is the part of the tool that grips into the machine’s chuck or collet. A 6mm shank is a relatively small diameter. This smaller size offers some unique benefits, especially for detailed work:
- Access: A smaller shank allows the tool to reach into tighter spaces and deeper pockets that a larger shank might not be able to access.
- Tool Balance: Smaller tools can sometimes be easier to balance at high speeds, leading to smoother cuts.
- Material Specifics: Certain materials, especially some plastics, might benefit from smaller diameter tools for cleaner cuts.
When you combine carbide’s toughness with a specific shank size like 6mm, you get a tool designed for precision and challenging jobs. It’s like having a surgical scalpel in your toolbox – capable of incredibly fine and detailed work.
Why a “Reduced Neck” Matters
You might also see descriptions mentioning a “reduced neck.” What does that mean, and why is it relevant, particularly with materials like PEEK?
Imagine the end mill has a main body where the cutting flutes are, and then it tapers down into the shank. A “reduced neck” means there’s a section between the cutting flutes and the shank that’s a smaller diameter and often polished smooth. This feature is crucial for a couple of reasons:
- Chip Clearance: The reduced neck provides extra space for chips (the small pieces of material produced during cutting) to evacuate. This is vital for preventing the tool from clogging up, which can lead to overheating, tool breakage, or a poor surface finish.
- Reduced Vibration: The smoother transition can help minimize vibration during cutting, leading to more accurate cuts and a better finish on your workpiece.
- Deeper Pockets: If you need to machine deep, narrow features, the reduced neck allows the cutting flutes to go deeper into the workpiece without the body of the tool rubbing where it shouldn’t.
For materials like PEEK, which we’ll discuss more, managing heat and ensuring clean chip evacuation is paramount. A reduced neck design contributes significantly to achieving this.
PEEK and High-Temperature Plastics: A Cutting Challenge
Now, let’s talk about PEEK (Polyether Ether Ketone). This is a high-performance thermoplastic known for its exceptional strength, stiffness, and resistance to high temperatures and chemicals. It’s used in demanding applications like aerospace, medical implants, and automotive components. Because of these incredible properties, PEEK can be quite challenging to machine properly.
Here’s why PEEK is tough to cut:
- Melting Point: While resistant to high temperatures in its application, PEEK can soften and melt if too much heat is generated during machining. This can lead to gummy, smeared cuts and poor surface finish.
- Toughness: Its inherent strength means it resists cutting, requiring sharp tools and appropriate cutting parameters to avoid tool wear or breakage.
- Chip Welding: If heat isn’t managed, the softened plastic can stick to the cutting edges (chip welding), dulling the tool and causing further issues.
This is where our specialized end mill truly shines. A carbide end mill, especially one designed for this purpose, is essential. The carbide’s hardness means it can cut through PEEK without easily dulling, and its ability to handle higher speeds allows for efficient material removal. Combined with proper techniques, it’s the key to successfully machining this advanced material.
Choosing the Right Carbide End Mill: Key Features to Look For
When you’re looking for an end mill for tasks involving materials like PEEK, or just for general precision work, a few key features will help you make the right choice. Beyond the 6mm shank and reduced neck, consider these:
Material of the End Mill
- Solid Carbide: This is what we’re mainly discussing. It’s the hardest and most wear-resistant option, perfect for demanding materials.
- Coated Carbide: Some carbide end mills have coatings (like TiN, TiAlN, or ZrN) that add even more hardness, lubricity, and heat resistance. For PEEK, a coating can be beneficial.
Number of Flutes
Flutes are the helical grooves that run along the cutting part of the end mill. They clear chips and form the cutting edges.
- 2 Flutes: Generally better for slotting and plunging (drilling straight down) because they offer good chip clearance.
- 3-4 Flutes: Offer a good balance between chip clearance and surface finish, suitable for general milling. For tougher materials or finishing passes, more flutes can sometimes provide a smoother result but can clog more easily with soft or gummy materials. For PEEK, 2 or 3 flutes are common starting points, depending on the operation.
Helix Angle
The helix angle affects how the tool cuts and evacuates chips.
- High Helix (30º-60º): Typically provide a shearing action, leading to smoother cuts and better chip evacuation. Often preferred for plastics and softer metals.
- Low Helix (0º-25º): Can be more robust for certain heavy-duty metal cutting.
For machining plastics like PEEK, a higher helix angle is often recommended.
Corner Radius or Chamfer
The very tip of the end mill can have different profiles.
- Square End: A flat tip, ideal for creating square shoulders and pockets.
- Corner Radius: The tip has a rounded edge. This strengthens the cutting edge, making it less prone to chipping, and can create rounded internal corners in pockets.
- Chamfer: A beveled edge, often used to deburr or chamfer holes.
For demanding plastics, a corner radius can add durability to the end mill.
Essential Tools for Using a 6mm Carbide End Mill
Using a precision tool like a 6mm carbide end mill requires the right setup to ensure accuracy, safety, and longevity of your tool. Here’s a look at the essential machinery and accessories:
The Machine Itself
You’ll need a machine capable of holding and rotating the end mill precisely. The most common options are:
- CNC Mill: For automated, repeatable, and highly precise operations. This is where smaller diameter, high-precision end mills are most often utilized.
- Manual Milling Machine: Requires more hands-on skill but offers great control for various tasks.
- Drill Press (with precautions): While not ideal for general milling due to lack of lateral stability and feed control, some very light duty side milling might be attempted with extreme caution and only with specialized fixtures. However, for true milling operations, a mill is highly recommended.
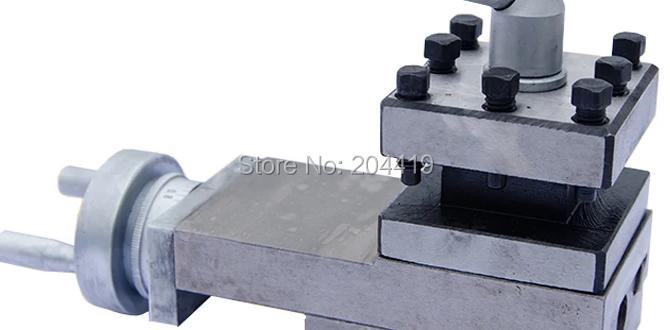
Holding the Tool
This is critical for stability and runout (wobble).
- Collet Chuck/System: This is the preferred method. A collet tightens around the shank of the end mill, holding it very precisely with minimal runout. A 6mm collet is what you’ll need for a 6mm shank. A quality ER collet system is a common and reliable choice.
- End Mill Holder: A simpler clamping device, but often less precise than a collet system. Ensure it’s sized correctly for your 6mm shank.
It’s vital that your collet or holder is clean and free of debris to ensure a secure and accurate grip. For more on tool holding and reducing runout, the National Institute of Standards and Technology (NIST) offers valuable resources on precision measurement and tooling:
NIST Manufacturing Extension Partnership (MEP) can provide insights into manufacturing best practices and tooling.
Workholding
You need to securely hold the material you are machining.
- Vise: A sturdy milling vise is common for holding stock.
- Clamps: For larger or irregularly shaped parts, various clamps might be used.
- Fixtures: Custom-made jigs or fixtures for highly repetitive or complex operations.
Ensure your workholding is robust enough to prevent the material from moving during the cutting process. Any movement can lead to inaccurate cuts or tool breakage.
Coolant/Lubrication
While some plastics can be machined dry, many operations benefit from lubrication and cooling.
- Cutting Fluid/Mist Coolant: For general machining.
- Air Blast: Can be enough for certain plastics to clear chips and provide some minimal cooling.
- Specialty Lubricants: For certain high-temperature plastics, specific lubricants might be recommended to prevent melting or gumming. For PEEK, often a mist coolant or even dry machining with good chip evacuation is preferred over flooding, as too much liquid can sometimes interfere with the delicate melting point.
Measurement Tools
Calipers, a micrometer, and a height gauge are essential for setting up your workpiece and verifying your dimensions.
Step-by-Step Guide: Using a 6mm Carbide End Mill for Precision Machining
Let’s walk through a general process for using your 6mm carbide end mill. This guide focuses on principles that apply whether you’re working on a CNC or a manual machine, and for materials like PEEK or other tough plastics.
Step 1: Preparation is Key
- Select the Correct End Mill: Ensure you have a clean 6mm shank carbide end mill suitable for your material (e.g., 2 or 3 flutes, possibly with a radius edge for PEEK).
- Secure Your Workpiece: Mount your material firmly in a vise or fixture. Ensure it’s indicating as flat and square to your machine’s axes as possible for best results.
- Install the End Mill: Clean your collet and the end mill shank. Insert the end mill into the collet, ensuring it’s seated fully. Tighten the collet securely in the machine’s spindle. Double-check that it’s the correct 6mm collet.
- Set Up Machine: If using a CNC, load your program. If manual, set your machine’s speeds and feed rates based on the material and end mill recommendations.
Step 2: Find Your Zero and Set Depth
- Locate X/Y Zero: Use your machine’s controls or touch probe to find the starting point of your cut on the workpiece in the X and Y axes.
- Find Z Zero: Carefully bring the tip of the end mill down to the surface of your workpiece. This is your Z zero point. Use a piece of paper or an edge finder for accuracy. Once zeroed, raise the tool slightly before engaging power or feeds.
Step 3: First Cut – The Plunge (If Applicable)
If your operation requires plunging straight down into the material (not just on the edge):
- Program Plunge Rate: On CNC, set a slow, controlled plunge rate. In manual machining, lower the Z-axis very slowly.
- Engage Tool: Start the spindle to the correct RPM. Lower the end mill slowly into the material to your desired depth. Listen to the cut. If it sounds like it’s struggling or making harsh noises, back off and re-evaluate your feed rate or depth of cut.
For PEEK, avoid plunging too quickly. A slower plunge rate helps prevent heat buildup and potential melting.
Step 4: Performing the Milling Operation
Now, you’ll move the end mill along the programmed path or your manual controls.
- Engage Feeds: Start your feed rate.
- Climb Milling vs. Conventional Milling: For better surface finish and chip control with plastics, climb milling is often preferred. In climb milling, the cutter rotates in the same direction as the feed. In conventional milling, they rotate in opposite directions.
- Depth of Cut: Don’t try to remove too much material at once. For tough materials like PEEK, take lighter passes (e.g., 0.1mm to 0.5mm depth of cut per pass). This reduces stress on the tool and prevents overheating. You can always make more passes.
- Chip Evacuation: Keep an eye on chip flow. If chips are building up or looking “gummy,” your feed rate might be too slow, your depth of cut too high, or you might need better cooling/lubrication. A blast of air can help clear chips.
- Listen to the Tool: The sound of the cut is a great indicator. A smooth, consistent hum is good. Chattering, screeching, or clunking sounds indicate a problem you need to address immediately (e.g., reduce feed rate, reduce depth of cut, check tool seating).
A good resource for understanding machining parameters is the Machinery’s Handbook, which provides tables of recommended speeds and feeds for various materials and tools.
Step 5: Finishing Touches
- Completion of Passes: Once you’ve reached your final depth, make a finishing pass. This is typically a lighter cut with a faster feed rate to achieve a smooth surface finish.
- Retract Tool: Once the milling is complete, carefully retract the end mill out of the workpiece along the Z-axis.
- Turn off Spindle: After the tool is clear of the workpiece, you can turn off the spindle.
Step 6: Inspection and Cleanup
- Inspect Your Work: Use your measuring tools to check the dimensions and quality of the machined feature.
- Clean Your Tools and Machine: Remove chips from the end mill, collet, vise, and machine bed. A brush and some compressed air are invaluable here. A clean workspace is a safe and efficient workspace.
Remember, patience and observation are your best friends when learning. Don’t be afraid to start conservatively with your speeds and feeds, and gradually increase them as you gain confidence and understand how the tool is behaving.
Advantages of Using a 6mm Shank Carbide End Mill
Investing in and learning to use a tool like a 6mm shank carbide end mill offers a range of benefits for your workshop projects:
Related Posts

Lathe Turning Safe Tailstock Retraction Tips Explained!- Carbide End Mill: **Essential** PVC Mirror Finish
Boost Precision With Tool Post Metal Lathe Power Feed- Tialn Ball Nose End Mill 45 Degree: Essential for Delrin

Essential Lathe Apron Oiling Procedure For Best Performance- Carbide End Mill 3/16″ | Proven Long Reach for HDPE
- This is an interesting challenge! You’ve provided a main focus keyword that is **extremely specific and technical**, related to manufacturing or machining, and asked for SEO blog titles relevant to the **education niche**. These two are very difficult to reconcile directly. A blog title about “how to cancel car wash subscription” would not use a keyword about “carbide end mills.” Similarly, a blog about “carbide end mills” wouldn’t naturally fit into the “education niche” in a way that makes sense for a general audience. Therefore, I cannot fulfill your request for a **single blog title** that meets *all* the criteria simultaneously in a meaningful way. The keyword is not relevant to the education niche, making it impossible to create a compelling, clickable, and relevant title for that audience. **To help you further, please clarify your request:** 1. **Which topic is more important?** Are you trying to rank for “how to cancel car wash subscription” or for “carbide end mill 1/8 inch 6mm shank long reach for stainless steel 304 mql friendly”? 2. **What is the intended audience for the “education niche”?** Is it students, teachers, parents, administrators, etc.? 3. **If it’s about the end mill keyword, what *kind* of education are you aiming for?** (e.g., educational guides for machinists, learning about CNC operations, etc.) Once I have this clarity, I can provide a much more effective and accurate set of SEO blog titles.
- Lathe Vibration Reduction: Enhance Metal Lathe Spindle Performance
| Advantage | Description | Impact on Your Projects |
|---|---|---|
| Precision & Detail |