A 1/8 inch carbide end mill with a 6mm shank and reduced neck for Inconel 625 with low runout is a specialized tool essential for achieving precise cuts and extending tool life on extremely tough aerospace alloys, minimizing chatter and heat buildup for superior results.
Mastering Inconel 625: Your Guide to the Perfect 1/8″ Carbide End Mill
Working with materials like Inconel 625 can feel like a daunting challenge, especially when you’re just starting. Its incredible strength and heat resistance, while fantastic for high-performance applications, make it notoriously difficult to machine. One of the biggest hurdles for beginners is selecting and using the right cutting tool. If your end mill chatters, breaks, or just can’t seem to cut cleanly, it’s frustrating. The good news is, with the right knowledge and a specialized tool, you can conquer Inconel. This guide will walk you through choosing and using a 1/8 inch carbide end mill designed specifically for tough materials like Inconel 625, focusing on those with a reduced neck and low runout. We’ll break down exactly why these features matter and how to get the best results, even if you’re new to this.
Why the Right End Mill Matters for Inconel 625
Inconel 625 is an austenitic nickel-chromium superalloy. Think of it as metal armor – incredibly strong, resistant to corrosion and high temperatures. This is why it’s used in jet engine components, offshore oil rigs, and nuclear reactors. But when it comes to machining, this strength is your enemy. Standard end mills can quickly dull, overheat, or even snap when trying to cut through it.
Heat is a major problem. As the end mill cuts, friction generates intense heat. Because Inconel 625 doesn’t conduct heat well, this heat gets trapped around the cutting edge. This causes the tool to soften, leading to faster wear and a poor cut. It also causes the Inconel itself to work-harden, making subsequent passes even tougher.
Chatter is another common issue. When the cutting forces aren’t consistent, the tool can vibrate, creating a rough, wavy surface finish. This chatter damages the tool and the workpiece, and it’s a sure sign things aren’t going well.
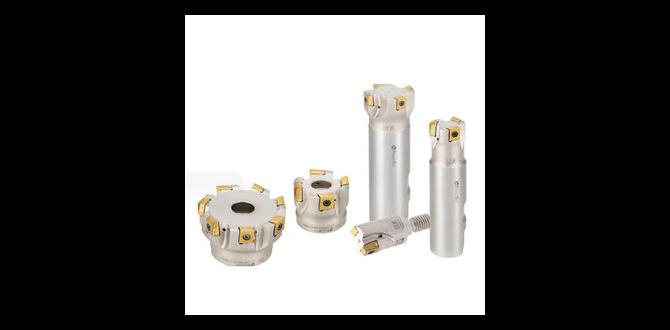
Introducing the Specialized Tool: 1/8″ Carbide End Mill for Inconel 625
The keyword we’re focusing on is: “carbide end mill 1/8 inch 6mm shank reduced neck for inconel 625 low runout.” Let’s break down what each part of this means and why it’s crucial for tackling Inconel 625.
Carbide: This is the material of the end mill. Carbide (specifically tungsten carbide) is extremely hard and can withstand higher temperatures than High-Speed Steel (HSS). This hardness is vital for cutting tough alloys like Inconel. It maintains its sharpness and structural integrity at higher speeds and temperatures, which are often necessary for efficient machining of superalloys. For Inconel, you absolutely want a solid carbide end mill, not one with carbide inserts unless you’re in a professional production environment.
1/8 Inch Diameter: This is the cutting diameter of the tool. A smaller diameter like 1/8 inch (approximately 3.175 mm) is good for detailed work, milling small features, or performing lighter cuts. For Inconel, a smaller diameter can sometimes be easier to manage in terms of cutting forces and heat dissipation compared to a larger diameter tool, especially in smaller hobbyist machines.
6mm Shank: The shank is the part of the end mill that fits into your machine’s collet or tool holder. A 6mm shank is a common size, fitting many smaller milling machines. It’s important that the shank size matches your machine’s capability and tooling.
Reduced Neck: This is a critical feature for this application. The “reduced neck” means there’s a portion behind the cutting flutes that is ground down to a smaller diameter than the cutting edge. This design provides several benefits:
Clearance: It prevents the body of the end mill from rubbing against the newly machined walls of a slot or pocket, especially when milling deep or complex shapes. This “neck relief” ensures only the cutting flutes are engaged with the material.
Reduced Load: In some designs, this can slightly reduce the amount of material the tool has to flex or bend under load, potentially improving rigidity.
Flexibility: While not its primary purpose for Inconel, a reduced neck can offer a tiny bit of flex, which might help absorb some shock. However, for Inconel, the primary benefit is clearance.
For Inconel 625: This specifies the intended application. Tools designed “for Inconel” or “for superalloys” typically have specific flute geometries, coatings, and cutting edge preparations optimized for these difficult-to-machine metals.
Low Runout: Runout is the deviation of the center of the tool’s rotation from the center of the spindle. High runout means the end mill wobbles slightly as it spins. Even a tiny amount of wobble can significantly increase cutting forces, generate excessive heat, cause chatter, and lead to premature tool failure, especially in tough materials. Low runout means the tool spins very accurately, leading to cleaner cuts, longer tool life, and less stress on your machine. Aim for tools with a runout tolerance of 0.0002″ (0.005 mm) or better if possible.
Key Features to Look For: Beyond the Keyword
When selecting your end mill, consider these additional features that contribute to successful Inconel machining:
Number of Flutes: For Inconel, you’ll typically want end mills with fewer flutes, such as 2 or 3.
2 Flutes: Offer excellent chip clearance, which is crucial for managing the heat and material removal in tough alloys. They are often preferred for slotting and pocketing.
3 Flutes: Can offer a good balance between chip clearance and a smoother finish compared to 2-flute, often used for general milling.
Avoid end mills with 4 or more flutes for Inconel unless absolutely necessary, as they provide less chip space and can lead to chip recutting and overheating.
Coating: A specialized coating can dramatically improve performance.
AlTiN (Aluminum Titanium Nitride) or TiAlN (Titanium Aluminum Nitride): These are excellent choices for machining nickel-based superalloys like Inconel. They offer high heat resistance and hardness, extending tool life.
ZrN (Zirconium Nitride): Another good option, often providing good lubricity and wear resistance.
Uncoated Carbide: While possible, it will generally have a much shorter tool life and require more careful machining parameters.
Corner Radius/Chamfer: Some end mills have a small radius or a slight chamfer on the cutting corners. This strengthens the corner, making it less prone to chipping, which is beneficial when dealing with the abrasive nature of Inconel.
Helix Angle: A moderate helix angle (e.g., 30-45 degrees) is common. Higher helix angles can provide a cleaner shearing action but might also increase the tendency for chatter. Lower helix angles can be more rigid. For Inconel, a moderate helix often strikes the best balance.
Choosing Your Tool: A Practical Checklist
Before you buy, ask yourself (or the manufacturer):
Is it made of solid carbide?
Does it have a coating suitable for superalloys (like AlTiN)?
Does it have 2 or 3 flutes?
Does it have a reduced neck for clearance?
What is its runout specification (or is it advertised as low runout)?
Are there any recommendations for speeds and feeds for Inconel?
Setting Up Your Machine for Success
Once you have the right tool, your machine setup is the next critical step.
1. Secure Workholding:
Vise: A sturdy, well-maintained milling vise is essential. Ensure the jaws are clean and properly aligned. Use soft jaws if necessary to avoid marring your workpiece, but for Inconel, you need robust clamping.
Clamps: If using clamps, ensure they are placed to provide maximum support without interfering with the cutting path.
Material Support: For larger parts, ensure they are adequately supported to prevent vibration.
2. Tool Holder:
Collet Chuck: For a 6mm shank, you’ll likely use a collet chuck or a precision ER (Einschränkungsspannfutter) collet.
Runout: Use the highest quality collet you can afford. A worn or low-quality collet will introduce runout. Make sure the collet is clean and free of debris. A new collet designed for precise runout is a good investment.
Gripping Force: Ensure the collet chuck or tool holder is providing adequate gripping force for the cutting loads of Inconel.
3. Machine Rigidity:
Check for Play: Ensure there’s no excessive play in your machine’s Z-axis (spindle), X, or Y axes. Loose ways or worn bearings will exacerbate chatter.
Secure Machine: Make sure your milling machine is placed on a stable surface or bolted down if necessary.
Machining Inconel 625: Speeds, Feeds, and Strategy
This is where we put the tool to work. Machining Inconel requires a different approach than softer metals. The general rule is: slow spindle speed, higher feed rate, and a shallow depth of cut.
General Guidelines for a 1/8″ Carbide End Mill in Inconel 625:
Spindle Speed (RPM): Start very conservatively. For a 1/8″ end mill, you might be looking at 100-300 RPM. The exact speed depends on your machine’s rigidity, the specific end mill, and the coating. Lower RPM is generally safer to avoid overheating and chatter.
Feed Rate (IPM or mm/min): This is crucial. You want a feed rate that allows the tool to cut rather than rub. A good starting point for a 1/8″ tool in Inconel is often between 1-5 IPM (25-127 mm/min). The goal is to achieve an appropriate chip load (chip thickness) – approximately 0.0005″ to 0.001″ (0.012 to 0.025 mm) per tooth per revolution. Your feed rate is calculated by:
Feed Rate = (RPM) x (Number of Flutes) x (Chip Load per Tooth)
For example: 200 RPM x 2 flutes x 0.00075″ chip load = 0.3 IPM. This is a very light chip load, which is often necessary for a small tool in a tough material. It’s advisable to consult manufacturer recommendations if available.
Depth of Cut (DOC): Keep your depth of cut shallow. For a 1/8″ end mill, a radial depth of cut (how far you step over sideways) might be 25-50% of the tool diameter (0.031″ – 0.062″). For axial depth of cut (how deep you cut into the material), start with 0.050″ – 0.100″ (1.27 – 2.54 mm). You can gradually increase this if the machine is rigid and the cut is clean, but never push it too far.
Cutting Fluid/Lubrication: This is non-negotiable for Inconel.
Flood Coolant: A dedicated coolant system that delivers a constant flow of cutting fluid is ideal. This helps dissipate heat, flush chips away, and lubricate the cutting edge.
Mist Coolant: A mist system can also be effective for smaller operations.
Lubricants: If flood coolant isn’t an option, use a specialized high-temperature cutting lubricant designed for difficult-to-machine metals. Apply it directly to the cutting zone. Never machine Inconel dry.
Chip Evacuation: Constantly monitor chip Cccumulation. If chips start to pack into the flutes or recut, stop the machine, clear the chips, and check your parameters. The reduced neck helps, but good chip evacuation is still key.
Machining Strategies:
Climb Milling vs. Conventional Milling:
Climb Milling: The cutter rotates in the same direction as the workpiece travel. This results in a thinner chip at the start of the cut and a thicker chip at the end, which can be beneficial for reducing chatter and heat. Modern CNC machines are best suited for climb milling. Ensure your machine has no backlash for this.
Conventional Milling: The cutter rotates against the direction of workpiece travel. This creates thicker chips at the start, which can lead to more tool wear and chatter. It’s generally only used when backlash issues prevent climb milling.
Peck Drilling (for deep pockets): If you are deep pocketing, use a pecking cycle to intermittently retract the tool and clear chips.
Finishing Passes: Consider a light finishing pass with a slightly higher feed rate to achieve a better surface finish.
The Role of Low Runout
Let’s revisit runout. Imagine a small 1/8″ drill bit wobbling erratically as it spins. Now imagine a 1/8″ end mill doing the same while trying to cut Inconel. It’s a recipe for disaster.
Consistent Chip Thickness: With low runout, the chip thickness remains relatively constant on each pass. This allows the tool to cut efficiently. With high runout, the chip thickness varies wildly, leading to some teeth taking a huge bite (overload) and others barely touching (rubbing, generating heat). A 0.0005″ runout on a 1/8″ end mill can effectively double the tool’s effective diameter at certain points, drastically increasing cutting forces and heat.
Reduced Vibration and Chatter: A precise spinning tool is much less likely to vibrate. This means smoother cutting, less stress on the tool and workpiece, and a better surface finish.
Extended Tool Life: When the cutting forces are predictable and balanced, the carbide tool wears more evenly and lasts significantly longer.
For Inconel, striving for the lowest possible runout in your tooling system – from the spindle and tool holder to the collet and the end mill itself – is paramount.
Example Machining Scenario: Pocketing Inconel 625
Let’s say you need to mill a small pocket 0.250″ deep in a block of Inconel 625 using your 1/8″ 2-flute AlTiN coated carbide end mill with a 6mm shank and reduced neck.
Assumptions:
Machine: A rigid benchtop CNC mill.
Tool: 1/8″ 2-flute AlTiN coated carbide end mill, reduced neck, low runout.
Workpiece: Inconel 625 block.
Coolant: Mist coolant or high-temp lubricant.
Parameters:
Spindle Speed: 250 RPM
Chip Load per Tooth: 0.00075″
Feed Rate: 250 RPM 2 flutes 0.00075″/flute = 0.375 IPM (approx. 9.5 mm/min)
Axial Depth of Cut: 0.080″ (2 mm) per pass
Radial Depth of Cut: 0.040″ (1.27 mm) (50% of diameter)
Strategy: Climb milling.
Steps:
1. Setup: Secure the Inconel block firmly in a vise. Insert the 1/8″ end mill into a precision collet chuck, ensuring low runout. Apply coolant or lubricant.
2. First Pass: Program a shallow pocketing operation. Start at 0.080″ depth, milling at 0.375 IPM and 250 RPM with a 0.040″ step-over.
3. Monitor: Listen to the sound. Watch the chip formation. Does it sound like a clean cut or a screech? Are chips evacuating well?
4. Subsequent Passes: Increment the Z-depth by 0.080″ for each pass until you reach the target depth of 0.250″. If the cut remains smooth and chips are clear, you can consider slightly increasing the depth of cut or feed rate on later passes, but err on the side of caution.
5. Finishing: For the final pass, you might increase the axial depth of cut to the full 0.250″ but reduce the radial step-over to 0.020″ and slightly increase the feed rate to, say, 0.500 IPM for a better surface finish.
Tools and Accessories You’ll Likely Need
Here’s a list of essential tools and accessories to have on hand when working with Inconel and your specialized end mill:
Milling Machine: A sturdy, rigid mill (manual or CNC).
Precision Collet Chuck/Tool Holder: For secure and low-runout tool holding.
ER Collets (6mm): High-quality collets are critical.
1/8″ Carbide End Mill: As specified (6mm shank, reduced neck, for Inconel, low runout, AlTiN coating recommended).
**Rigid Vise