A 1/8 inch carbide end mill, especially one designed for hardened steel (HRC 60) and with an 8mm shank and high material removal rate (MRR), is your key to cutting tough materials smoothly and efficiently. It allows for precise and fast material removal, even in hard metals, making your machining tasks much easier.
Working with hardened steel can feel like a daunting task, especially when you’re just starting out with milling. That stubborn material often fights back, leading to frustration, tool breakage, and less-than-perfect results. Many beginners shy away from hardened steel projects altogether, thinking it requires advanced skills or expensive machinery. But what if I told you that with the right tool, tackling hardened steel can be surprisingly manageable and even enjoyable? The secret often lies in choosing the correct cutting tool. Today, we’re diving deep into a real game-changer: the 1/8 inch carbide end mill designed specifically for hardened steel. We’ll explore why this small but mighty tool is perfect for beginners and how it can unlock a whole new world of precision machining for you. Get ready to transform those challenging cuts into effortless work!
Why a 1/8 Inch Carbide End Mill for Hardened Steel?
Before we get too deep, let’s understand why this specific tool is so special. When we talk about “hardened steel,” we’re referring to steel that has been treated to significantly increase its strength and hardness. This makes it incredibly durable but also very difficult to machine with standard tools. Traditional high-speed steel (HSS) end mills can quickly become dull, overheat, and even break when trying to cut hardened materials. This is where carbide shines, and a 1/8 inch carbide end mill takes it a step further for specific applications.
The Power of Carbide
Carbide, or tungsten carbide, is a composite material known for its extreme hardness and wear resistance. It can withstand higher cutting temperatures and pressures than HSS, making it the go-to material for cutting hard metals like hardened steel. For beginners, this means less worry about tool wear and breakage, translating to more successful cuts and a much better machining experience.
The 1/8 Inch Advantage
A 1/8 inch (approximately 3.175mm) diameter end mill is a versatile size. It’s small enough for intricate details and light-duty work, but with the right material and geometry, it can still remove material efficiently. For beginners, smaller tools often mean less risk. If something goes wrong, the forces involved are generally lower than with larger tools, making it easier to control and less likely to cause damage to your workpiece or machine.
Designed for Hardened Steel (HRC 60)
This is the crucial part. A standard carbide end mill might struggle with steel hardened to a Rockwell C hardness of 60. Tools specifically designed for HRC 60 hardened steel have special coatings and flute geometries optimized to handle the toughness and abrasive nature of such materials. They are engineered to maintain their sharpness and cutting ability under extreme conditions.
The 8mm Shank and High MRR
The mention of an “8mm shank” is important for tool holder compatibility, as it’s a common size in many milling machines. “High MRR” (Material Removal Rate) means the tool is designed to cut material quickly and efficiently without overheating or suffering excessive wear. For a beginner, a high MRR tool can mean faster project completion and less time spent on tedious operations.
Key Features to Look For
When you’re shopping for a 1/8 inch carbide end mill for hardened steel, a few specific features will make a big difference. Understanding these will help you make the right choice and avoid common pitfalls.
Number of Flutes: For hardened steel, you’ll typically want an end mill with fewer flutes.
2 Flutes: Often preferred for milling harder materials. They provide more chip clearance, which is essential when cutting tough, stringy materials. This also reduces the cutting load per flute.
4 Flutes: Can be used for harder materials, but require more careful speed and feed selection to prevent chip recutting and overheating. They offer a smoother finish and higher MRR in less demanding applications.
Stubbier Length: Shorter or “stub” length end mills are generally more rigid and less prone to vibration and deflection, which is a huge plus when cutting hard materials.
Coatings: A good coating can dramatically extend the life of your end mill and improve its performance.
TiAlN (Titanium Aluminum Nitride): A very common and effective coating for high-temperature machining of steels. It provides excellent heat resistance and hardness.
AlTiN (Aluminum Titanium Nitride): Similar to TiAlN but often offers even better performance at higher temperatures.
ZrN (Zirconium Nitride): Offers good lubricity and is good for aluminum, but less common for hardened steel.
Corner Radius/Chamfer: Some end mills have a slight radius or a chamfer on the cutting edges.
Corner Radius: A small radius (e.g., 0.010″ or 0.25mm) on the cutting corner can significantly increase tool strength and reduce chipping, especially important when machining hard materials.
Sharp Edges: While a radius adds strength, some specialized end mills for hardened steel might have very sharp edges designed for precise profiling. However, rounded corners are generally more beginner-friendly due to their durability.
Material: As discussed, we’re looking for solid carbide. The grade of carbide matters, with finer grain carbides offering better toughness and wear resistance.
Essential Gear for Using Your 1/8 Inch End Mill
Before you even think about starting a cut, you need to make sure you have the right supporting equipment. This isn’t just about having the right tool; it’s about using it safely and effectively.
1. A Sturdy Milling Machine
While a 1/8 inch end mill is relatively small, it still requires a milling machine capable of handling it. A good benchtop CNC mill or a manual milling machine is ideal. Ensure it has good rigidity and can maintain consistent speeds. Even a powerful drill press can be used for some very light milling tasks, but it’s far from ideal and significantly increases risk.
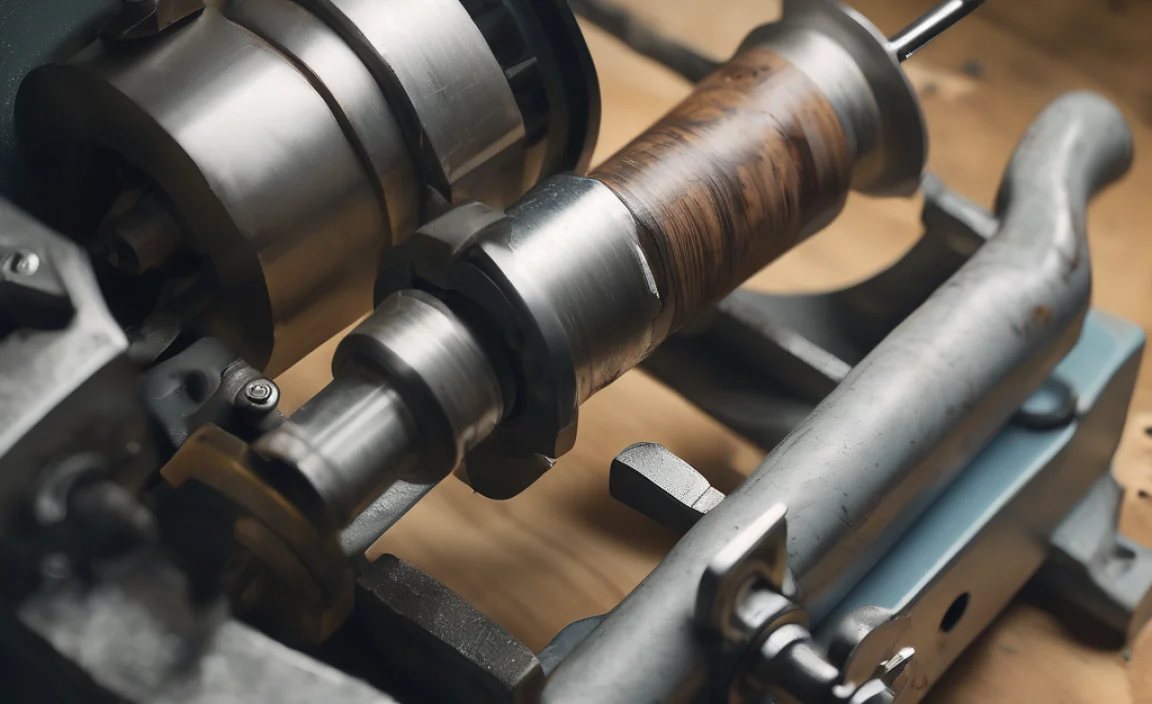
2. Tool Holders and Collets
You’ll need a way to securely hold the end mill in your machine.
Collets: For a 1/8 inch end mill, you’ll likely use a collet system (like ER-11, ER-16, etc.). Ensure you have a collet that precisely matches the 1/8 inch shank. A well-fitting collet is crucial for runout accuracy and preventing vibration.
Tool Holders: The collet will then fit into a tool holder that mounts to your machine’s spindle.
3. Workholding
This is paramount for safety and accuracy. You need to hold your workpiece securely so it doesn’t move during the cut.
Vise: A milling vise is the most common workholding device. Ensure it’s robust and capable of gripping your material firmly without the jaws slipping.
Clamps: For certain operations, specialized clamps might be necessary.
Fixturing: For repetitive tasks or complex shapes, custom fixtures might be required, but for beginners, a good vise is usually sufficient. For hardened steel, a vise with hardened jaws or carbide jaw inserts can prevent damage.
4. Measuring Tools
Precision is key.
Calipers: For measuring your workpiece and verifying dimensions.
Micrometers: For more precise measurements.
Height Gauge: Useful for setting tool heights.
5. Safety Gear – Non-Negotiable!
This cannot be stressed enough. Milling, especially hardened steel, generates chips and can have unforeseen events.
Safety Glasses: Always, always, always! Wear ANSI Z87.1 rated safety glasses. Full face shields are even better.
Hearing Protection: Milling machines can be loud.
Gloves: While you might wear heavier gloves when handling material, avoid wearing loose-fitting gloves while the machine is running. They can get caught and cause serious injury. Tighter-fitting gloves that won’t snag are acceptable for some tasks, but during actual machining, it’s often best to have bare hands to maintain dexterity and feel.
Apron/Shop Coat: To protect your clothing.
6. Lubrication and Coolant
Cutting hardened steel generates significant heat. Proper lubrication and cooling are vital to prolong tool life, improve finish, and prevent thermal shock to the workpiece.
Cutting Fluid/Coolant: A specialized cutting fluid designed for hard metals will help. You can apply it manually with a brush or use a spray mist system if your machine is equipped. For beginners, a good quality paste or spray coolant is often easier to manage than a full flood system.
Rust Prevention: After machining, clean and protect your workpiece and tools from rust.
Step-by-Step Guide: Milling Hardened Steel with Your 1/8 Inch Carbide End Mill
Let’s get down to business! This guide assumes your workpiece is already securely fixtured in your milling machine and you have your 1/8 inch carbide end mill ready to go.
Step 1: Machine Setup and Tool Installation
1. Clean Your Machine: Ensure your machine’s spindle, tool holders, and collets are clean and free of debris. Contamination can lead to runout and poor performance.
2. Install the Collet: Insert the correct collet (e.g., 1/8 inch ER-16) into the tool holder.
3. Insert the End Mill: Carefully insert the 1/8 inch carbide end mill into the collet. Ensure it’s seated properly – you don’t want it sticking out too far, as this reduces rigidity. Leave just enough flute exposed to make your cut.
4. Tighten the Collet: Secure the collet nut onto the tool holder and tighten it firmly using the appropriate wrench. Make sure the end mill is securely held and doesn’t wobble.
5. Mount the Tool Holder: Install the tool holder with the end mill into your machine’s spindle.
Step 2: Setting Up Your Workpiece and Z-Axis Zero
1. Verify Fixturing: Double-check that your workpiece is clamped securely in the vise or fixture. It should absolutely not move.
2. Locate X and Y: Using your machine’s controls, jog the spindle so the tip of the end mill is precisely positioned for your first cut on the X and Y axes.
3. Set Z-Axis Zero: This is a critical step.
With a Touch Probe: If your machine has a touch probe, follow its procedure to accurately find the top surface of your workpiece.
Manually: Bring the spindle down carefully until the cutting edge of the end mill just touches the surface of your workpiece. You can use a piece of paper slid between the tool and the workpiece – when the paper can no longer move freely, you’re at zero. Be extremely gentle! Once you’ve touched off, engage the Z-axis DRO (Digital Readout) to zero. Record this value; it’s your Z=0.
Step 3: Determining Speeds and Feeds (The Tricky Part!)
This is where things get a little technical, but don’t worry. We’ll break it down. The goal is to find speeds and feeds that allow the end mill to cut efficiently without overheating or chipping. For hardened steel, you’ll typically use slower spindle speeds (RPM) and moderate feed rates.
Spindle Speed (RPM): Hardened steel requires lower RPMs than softer materials. A good starting point for a 1/8 inch carbide end mill in HRC 60 steel might be between 1,500 and 3,000 RPM. Always consult the end mill manufacturer’s recommendations if available.
Feed Rate (IPM or mm/min): This is how fast the cutter moves through the material. You want it fast enough to create a noticeable chip but not so fast that it overloads the tool. For a 1/8 inch end mill in HRC 60, you might start in the range of 5-15 IPM (inches per minute) or 120-380 mm/min.
How to Calculate or Estimate:
1. Manufacturer Data: The best source is the end mill manufacturer. They usually provide recommended surface speeds (SFM – Surface Feet per Minute) or cutting speeds (m/min).
To convert SFM to RPM: RPM = (SFM 12) / (π Diameter in inches)
Example: If a manufacturer recommends 100 SFM for HRC 60 steel with a 1/8″ end mill:
RPM = (100 12) / (3.14159 0.125) ≈ 3056 RPM. You might dial this back due to the small diameter and rigidity concerns.
2. Online Calculators: Many websites offer cutting speed calculators. Input your material, tool material, diameter, desired SFM/m/min, and number of flutes.
3. Rule of Thumb (Very General): Carbide in hardened steel often runs much slower than in softer materials.
Chip Load: A related concept is chip load, which is the thickness of the chip removed by each cutting edge.
Chip Load = (Feed Rate) / (RPM Number of Flutes)
For a 1/8″ end mill in hardened steel, you’re looking for a chip load around 0.001″ to 0.003″ (0.025mm to 0.075mm) per tooth.
Starting Point Recommendation:
For a 1/8″ 2-flute carbide end mill in HRC 60 steel on a typical hobbyist CNC:
RPM: 2,000 – 2,500
Feed Rate: 8 – 12 IPM (200 – 300 mm/min)
Depth of Cut (DOC): Start conservatively. Maybe 0.010″ to 0.020″ (0.25mm to 0.5mm) per pass. For slotting (cutting a full circle groove), you’ll need a much shallower DOC.
Crucially: Listen to the sound! A nice, consistent “shhhk-shhhk” sound is good. A high-pitched squeal means you’re going too fast on RPM or feeding too slowly. A loud, ragged clattering means you’re feeding too fast or taking too deep a cut.
###Step 4: Applying Lubrication/Coolant
As the end mill begins to spin and before plunging or engaging the material, apply your cutting fluid or mist coolant.
Ensure the cutting area is constantly lubricated. You might need to cycle the spray or apply manually.
###Step 5: Engaging the Material – Plunge and Feed
1. Plunge into Material (if creating a slot or hole):
Slow Plunge: Use a slow, controlled plunge rate, often significantly slower than your feed rate. Many CNC machines have a specific “Plunge Feed Rate” setting. 5-10 IPM (120-250 mm/min) is a good starting point. If manual, lower the Z-axis very slowly until the tip engages.
Avoid “Shock Plunging”: Don’t just drop the tool into the material.
2. Engage for Cutting (X or Y direction):
Once the tool is at depth, engage your feed rate in the desired direction.
Climb Milling vs. Conventional Milling: For hardened steel, climb milling is generally preferred. This means the cutter rotates in the same direction as it moves into the material. It results in a thinner chip at the start of the cut and avoids “digging in” or chatter, leading to a better surface finish and longer tool life. On most CNC knee mills and some bed mills, this means feeding away from the column/headstock. On a typical vertical CNC, this means feeding in the direction of rotation.
Manual Milling: Control the feed rate smoothly. Don’t force it.
###Step 6: Making the Cut – Depth of Cut (DOC) and Stepover
Depth of Cut (DOC): For roughing cuts in hardened steel, aim for a conservative DOC. For a 1/8 inch end mill, typically you won’t want to go deeper than 0.050″ (1.25mm) per pass, and often much less for HRC 60. For finishing passes, the DOC is usually very shallow (e.g., 0.005″ – 0.010″).
Stepover: This is the amount the end mill moves sideways in each pass when doing contouring or pocketing. For hardened steel, a smaller stepover is often better to reduce the load and heat. Start with 20-30% of the tool diameter (0.024″ – 0.036″ or 0.6mm – 0.9mm for a 1/8″ tool).
###Step 7: Monitoring and Adjusting
Listen: Pay close attention to the sound of the cut.
Screeching/Squealing: RPM too high, feed too low, or not enough coolant.
Chatter/Vibration: Feed too high, DOC too deep, worn tool, insufficient rigidity, or incorrect speeds.
Smooth cutting sound: Ideal.
Look: Observe the chips produced.
Powdery/Dusty chips: Too little material being removed, or tool is rubbing. You might need to increase feed or DOC.
* Small, well