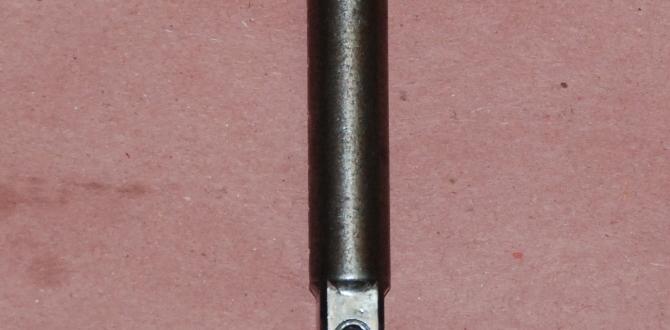
The 1/8 inch carbide end mill, especially those with an 8mm shank and extra length, is crucial for machining Aluminum 7075. It offers precision, durability, and the ability to handle this tough material, minimizing deflection for cleaner cuts.
Hey there, fellow makers and machinists! Daniel Bates here from Lathe Hub. Ever stared at a beautiful, but notoriously tough, block of Aluminum 7075 and wondered how to get those crisp, clean cuts without the tool shuddering and chattering? You’re not alone. Machining this alloy can be a real head-scratcher for beginners. The good news? The right tool makes all the difference. Today, we’re diving deep into why a specific little hero – the 1/8 inch carbide end mill, particularly with an 8mm shank and extended reach – is your absolute secret weapon for tackling Aluminum 7075. We’ll unpack everything you need to know to get those perfect results, keeping things simple and safe every step of the way.
Why Aluminum 7075 Demands the Right Tool
Aluminum 7075 is a popular choice for a reason. It’s strong – often compared to steel – yet relatively lightweight. This makes it fantastic for aerospace components, high-performance bicycle parts, and many other demanding applications. However, this strength also means it can be gummy and prone to work hardening when you try to cut it. This is where many beginner machinists run into trouble.
Trying to machine 7075 with the wrong kind of end mill can lead to:
- Tool Chatter: That annoying vibration that leaves a rough surface finish and can damage both your workpiece and your tool.
- Tool Breakage: The tool getting stuck, overheated, and snapping off.
- Poor Surface Finish: Cuts that are ragged and require extensive post-machining cleanup.
- Work Hardening: The material becoming even harder to cut as you chip away at it.
The key is to use a tool that can handle the material’s toughness while maintaining stability. This is precisely where our star, the 1/8 inch carbide end mill, shines.
Introducing the 1/8 Inch Carbide End Mill
So, what makes a 1/8 inch carbide end mill so special for Aluminum 7075? Let’s break it down:
Carbide: The Material Matters
Carbide (specifically tungsten carbide) is a super-hard, brittle material. Unlike High-Speed Steel (HSS), carbide can withstand much higher cutting temperatures and maintain its hardness. This is critical for Aluminum 7075 because you need to cut it fairly quickly to keep it from gumming up the tool. The heat generated needs to be managed, and carbide does a far better job of this than HSS.
Benefits of Carbide for Aluminum 7075:
- High Hardness: Resists wear and stays sharp longer.
- Heat Resistance: Can handle the higher speeds needed for aluminum without losing its edge.
- Rigidity: Generally more rigid than HSS, contributing to better surface finishes.
The 1/8 Inch Size: Precision and Control
Why 1/8 inch? This smaller diameter is often perfect for detailed work where you might be cutting thin features, intricate shapes, or pockets. For Aluminum 7075, a smaller diameter can also help reduce the forces involved in the cut, which is beneficial for minimizing deflection, especially on smaller milling machines or with less rigid setups. It allows for precise material removal without needing to hog out large amounts at once. For a material like 7075, taking lighter, more controlled cuts is often the path to success.
The 8mm Shank: Stability and Grip
Many of the specialized end mills designed for aluminum come with an 8mm shank, even if the cutting diameter is metric or imperial. Why 8mm? It’s a common size in many European and Asian milling machines and collet systems. An 8mm shank provides a good balance of rigidity and shank engagement. A larger shank diameter generally means a stronger, more stable tool holder connection, reducing the chance of runout (wobble) and improving the overall accuracy of your cuts. For tough materials like 7075, this stability is paramount.
Extra Length: Reaching the Unreachable
An “extra long” or “extended reach” end mill is designed with a longer shank relative to its cutting diameter. This is incredibly useful for several reasons:
- Accessing Deep Pockets: Allows you to machine deeper features without having the spindle housing or tool holder collide with your workpiece.
- Reduced Deflection: While it might seem counterintuitive, a longer shank can sometimes lead to less deflection at the cutting flute if the overall rigidity of the tool holder system is maintained, as it can allow for a more robust clamping in the collet. However, you must be mindful that a longer flute length itself increases deflection. The “extra long” often refers to the shank for reach, not necessarily an excessively long flute.
- Clearing Obstructions: Can help you clear any raised features on your part when machining complex geometries.
When machining Aluminum 7075 with a 1/8 inch end mill, you’re often dealing with fine details or trying to achieve a high-quality finish. The extra length capability, when balanced with rigidity, is a significant advantage.
Key Features to Look For in a 1/8 Inch Carbide End Mill for 7075
Not all carbide end mills are created equal, especially when it comes to machining aluminum. Here’s what you should keep an eye out for:
1. Flute Count (Number of Cutting Edges)
For aluminum, you typically want an end mill with a low flute count. This means:
- 2 Flutes: This is often the sweet spot for softer, gummy metals like aluminum. The larger chip gullets (the space between the flutes) allow chips to evacuate more easily. This prevents chip recutting and reduces the tendency for aluminum to stick to the cutting edge.
- 3 Flutes: Can sometimes be used for certain aluminum alloys or if you need a slightly better surface finish and can manage chip evacuation well. However, for general 7075 machining, 2 flutes is usually preferred.
- 4+ Flutes: Generally not recommended for soft aluminum. They have smaller chip gullets and are more prone to loading up with material.
2. Helix Angle
The helix angle is the angle of the cutting edges spiraling around the tool. For aluminum, you generally want a high helix angle (typically 35-45 degrees).
- High Helix: This provides a sharper, more shearing cutting action, which is excellent for smoothly cutting aluminum. It helps to “slice” through the material rather than “push” it, reducing the forces and the risk of gumming.
3. Coatings
While a plain uncoated carbide end mill can work, certain coatings can offer benefits for aluminum:
- ZrN (Zirconium Nitride): This coating is a golden-yellow color and is specifically designed for machining aluminum and other non-ferrous metals. It provides excellent lubricity, significantly reducing friction and preventing material buildup (welding) on the cutting edge. This is often highly recommended.
- AlTiN (Aluminum Titanium Nitride) / TiAlN (Titanium Aluminum Nitride): While excellent for steel and stainless steel, these coatings can sometimes cause more adhesion with aluminum unless specific machining parameters are used.
- Uncoated: A good quality, polished uncoated carbide end mill is often sufficient, especially if using appropriate cutting fluid and parameters. The key is the polished flute which aids chip evacuation.
4. End Type
For general machining, a square end is common. If you need to create specific shapes or features, you might look at ball nose or corner radius end mills, but for basic slotting and profiling, a square end is your go-to.
5. Material Grade
Look for end mills made from high-quality carbide grades. Though for most hobbyist and entry-level professional use, standard micro-grain carbide is usually fine.
Essential Parameters and Techniques for Machining Aluminum 7075
Having the right tool is only half the battle. How you use it is just as important. Here are some key parameters and techniques when working with a 1/8 inch carbide end mill on Aluminum 7075.
1. Cutting Speed (Spindle Speed)
This is how fast the tool spins. For Aluminum 7075 with a carbide end mill, you generally want to run at a relatively high surface speed. A good starting point for a 1/8 inch carbide end mill in 7075 is often between 300-500 surface feet per minute (SFM). To convert this to RPM (revolutions per minute) for your machine, you can use the formula:
RPM = (SFM 3.25) / Diameter (inches)
For a 1/8 inch (0.125 inch) end mill:
RPM = (SFM 3.25) / 0.125
RPM = SFM 26
So, for 300 SFM: 300 26 = 7800 RPM. For 500 SFM: 500 26 = 13000 RPM.
Always start at the lower end of the recommended range and increase if your machine can handle it smoothly and chips are evacuating well.
2. Feed Rate
This is how fast the tool moves through the material. You want a feed rate that allows the tool to take a proper chip, not rub. For aluminum, you’re often looking for a relatively fast feed rate to achieve a good surface finish and avoid heating.
A common starting point for chip load (the thickness of the material being removed by each cutting edge) with a 1/8 inch end mill in 7075 is around 0.001 to 0.002 inches per tooth. Since we recommend a 2-flute end mill:
Feed Rate (IPM) = Chip Load (inches/tooth) Number of Flutes RPM
Example: Using 0.0015 inches/tooth chip load, 2 flutes, and 8000 RPM:
Feed Rate = 0.0015 2 * 8000 = 24 inches per minute (IPM)
Key Tip: Listen to your machine! You want a consistent humming sound, not a high-pitched squeal (too fast) or a grinding noise (too slow or rubbing). The feed rate is also closely tied to the spindle speed and the depth of cut.
3. Depth of Cut (DOC) and Stepover
Since we’re using a smaller 1/8 inch end mill, you’ll likely be taking shallower cuts to maintain rigidity and minimize deflection, especially if you’re using an “extra long” shank type. For Aluminum 7075:
- Axial Depth of Cut (DOC): For roughing, you might try 0.1 to 0.2 inches. However, for finishing or if you experience chatter, reduce this significantly. For a 1/8 inch end mill in 7075, taking more shallow passes is often better.
- Radial Depth of Cut (Stepover): This is how much the end mill cuts across the width of its diameter. For general milling, a stepover of 30-50% of the tool diameter is common. For finishing passes, you might reduce this to 10-20% for a superior surface finish.
Minimizing Deflection: To minimize deflection with a long, thin end mill, especially in a tough material like 7075:
- Take lighter axial cuts (shallower depth of cut).
- Ensure your workpiece is rigidly clamped.
- Use a rigid milling setup – a solid machine, a good quality collet for your end mill, and avoid extensions if possible.
- Consider climb milling (where the cutter rotation direction is the same as the feed direction) as it can reduce cutting forces compared to conventional milling. However, be aware that climb milling can sometimes lead to chatter if not set up perfectly.
4. Lubrication and Chip Evacuation
This is crucial for aluminum. You need to keep the cutting area cool and clear of chips.
- Flood Coolant: Ideal if your machine supports it. A good quality soluble oil coolant helps considerably.
- Mist Coolant: A good alternative for hobby machines, providing lubrication and cooling.
- Cutting Fluid/Lubricant: Use a dedicated aluminum cutting fluid. Apply it generously.
- Air Blast: A strong blast of compressed air can help clear chips, but it doesn’t provide the cooling and lubrication of a liquid.
Never let chips build up in the flutes! This leads to tool breakage and a poor finish. Ensure your coolant or air blast is directed right at the cutting zone.
Steps for Machining Aluminum 7075 with a 1/8 Inch Carbide End Mill
Let’s walk through a typical process. Imagine you’re slotting a groove or profiling an outer edge.
Step 1: Secure Your Workpiece
Ensure your Aluminum 7075 stock is held very securely in your milling machine vise or on your machine’s table. Any movement here spells disaster with a small, delicate end mill. Use parallels if needed to get a good grip on the material.
Step 2: Install the End Mill
Insert your 1/8 inch carbide end mill (ideally with an 8mm shank for stability) into a clean collet. Ensure the collet is the correct size for the shank. Tighten the collet securely in your machine’s spindle. Make sure the end mill is held firmly and doesn’t stick out excessively, balancing the need for reach with rigidity.
Step 3: Set Your Zero Point
Using your machine’s DRO (Digital Readout) or CNC controls, carefully establish your X, Y, and Z zero points on your workpiece. For the Z-axis, it’s common to set zero on the top surface of your material.
Step 4: Program or Manually Set Your Toolpath
For CNC users, this involves creating your CAM program. For manual machining, you’ll be feeding the machine by hand. Key considerations:
- Depth of Cut: Start conservatively, perhaps 0.1 inch axial depth.
- Feed Rate: Use your calculated IPM (e.g., 24 IPM for our example).
- Spindle Speed: Set your RPM (e.g., 8000 RPM).
- Stepover: For slotting, this is 100% of the tool diameter (0.125 inch). For profiling, 30-50%.
- Milling Direction: Decide if you’ll use conventional or climb milling. Climb milling is often preferred for aluminum to reduce forces.
Step 5: Apply Lubrication/Coolant
Before you start cutting, turn on your coolant or mist system, or have your cutting fluid ready to apply manually. Ensure it’s directed at the point where the tool will engage the material.
Step 6: Engage the Material and Cut
Slowly bring the spinning end mill down to the set Z-depth. Once it’s at depth, begin feeding the machine along your programmed or intended X/Y path at your set feed rate. Listen to the sound of the cut. It should be a consistent, smooth whirring or buzzing.
- If it sounds rough: Stop the feed. Check your parameters. You may need to reduce the DOC, adjust the feed rate, or reduce the stepover.
- If chips aren’t clearing: Ensure your coolant/air blast is effective. You might need to “peck” the cut – retracting the tool slightly every so often to clear chips.
Step 7: Completing the Cut
Continue feeding until you have completed your slot, pocket, or profile. Once the cut is finished, retract the tool in the Z-axis and then move it clear in X and Y before turning off the spindle.
Step 8: Inspection and Cleaning
Inspect your workpiece for the desired dimensions and surface finish. Clean any chips and coolant residue from your machine and workpiece. If you’re not satisfied, you can perform a finishing pass with a lighter depth of cut and a slower feed rate, or a higher stepover for surface finish.