A 3/16″ carbide end mill with a 10mm shank is essential for precise MDF work, offering durability and clean cuts for your projects.
Working with MDF (Medium-Density Fibreboard) can be a rewarding experience for crafters and DIYers. It’s a versatile material, but getting clean, crisp cuts, especially for intricate designs, can sometimes feel a bit tricky. You might find yourself battling rough edges or dealing with tools that wear out quickly. That’s where the right tool makes all the difference. A specific type of cutting tool, known as a carbide end mill, is a game-changer for MDF. In this guide, we’ll dive into why a 3/16-inch carbide end mill with a 10mm shank is your new best friend for MDF projects and how to use it effectively. Get ready to achieve smoother finishes and tackle more complex designs with confidence!
Why a 3/16″ Carbide End Mill is Your MDF Go-To Tool
When you’re cutting into MDF, you need a tool that’s up to the task – tough, precise, and capable of producing a clean finish. That’s precisely what a 3/16-inch carbide end mill with a 10mm shank delivers. Let’s break down why this specific combination is so important for anyone working with MDF.
The Magic of Carbide
First off, let’s talk about “carbide.” This isn’t just any metal. Carbide, specifically tungsten carbide, is an incredibly hard and durable material. It’s much harder than the steel you often find in standard drill bits or other cutting tools. Think of it like comparing a diamond to a piece of glass – carbide is much more resistant to wear and tear.
When you’re cutting MDF, you’re essentially abrading and slicing through a composite material made of wood fibers, resin, and wax. This process can be tough on cutting edges. Carbide’s superior hardness means it can maintain its sharp edge for a lot longer, even when cutting dense materials like MDF. This translates to:
Longer Tool Life: You won’t be replacing your end mill as often.
Consistent Cutting Quality: The cuts remain sharp and precise throughout the tool’s lifespan.
Reduced Heat Buildup: While cutting can generate heat, carbide’s hardness helps it resist this more effectively than softer materials.
The 3/16-Inch Sweet Spot
The size of the cutting tool matters a lot for the detail you can achieve. A 3/16-inch (which is approximately 4.76mm) end mill is a fantastic size for many common MDF projects.
Fine Detail: It’s small enough to handle intricate patterns, lettering, and delicate cutouts without being overly fragile.
Surface Finishing: It’s also substantial enough to efficiently remove material for larger areas or when you need a good surface finish.
Versatility: This size strikes a balance – it’s not too thin to break easily, but it’s slim enough for detailed work. It’s ideal for engraving, pocketing (removing material from a recessed area), and profile cutting (cutting out a shape).
The Importance of the 10mm Shank
Now, about that “10mm shank.” The shank is the part of the end mill that gets held by your milling machine’s collet or chuck. A 10mm shank is a common size in many milling machines, especially those used in hobbyist and light industrial settings.
Secure Grip: A 10mm shank generally offers a robust and secure grip within the collet. This is crucial for high-speed machining to prevent the tool from slipping, which can cause inaccurate cuts or even tool breakage.
Machine Compatibility: It ensures that the end mill will properly fit into the collet or chuck of milling machines designed to accept 10mm tools. This is a standard size, making it widely compatible.
Stiffness: A larger shank diameter, like 10mm, often provides more rigidity to the overall tool setup, which helps in reducing vibration and improving cutting accuracy.
Long Reach and MDF?
While the keyword mentions “long reach,” it’s important to note that the primary benefit of a 3/16″ end mill for MDF is its cutting ability and precision at this size. “Long reach” typically refers to end mills with an extended flute length, allowing them to cut into deeper cavities or reach areas farther from the workpiece surface. For most standard MDF CNC routing tasks, a standard length 3/16″ carbide end mill is sufficient and often preferred for its rigidity. If your project specifically requires reaching deep into an MDF piece, then a “long reach” version becomes relevant. For typical surface cutting and shallow pockets, the standard length is perfect.
MQL Friendly
“MQL” stands for Minimum Quantity Lubrication. It’s a system that uses a very small amount of lubricant, often delivered as a fine mist, to cool and lubricate the cutting tool and workpiece during machining. Some carbide end mills are designed with specific flute geometries or coatings that make them particularly suited for MQL. Using MQL with your end mill can help keep the tool cooler, extend its life, and improve the surface finish of your MDF.
Choosing the Right 3/16″ Carbide End Mill for MDF
Not all carbide end mills are created equal, especially when it comes to a material like MDF. Here’s what to look for:
1. Number of Flutes
Flutes are the helical grooves on the cutting end of the end mill. For MDF, the number of flutes impacts chip evacuation and surface finish.
2 Flutes: Excellent for MDF. The fewer flutes mean larger chip gullets (the space between flutes). This is great for MDF because it produces a lot of fine dust. The larger gullets help to efficiently clear these chips away from the cutting area, preventing clogging, overheating, and a poor finish. They also tend to produce a slightly rougher surface finish than 3 or 4-flute mills but are generally preferred for MDF due to their chip-clearing capabilities.
3-4 Flutes: While good for metals and some harder plastics, 3 or 4-flute end mills can sometimes struggle to clear MDF dust effectively. The smaller chip gullets can become packed with MDF dust, leading to increased friction, heat, and a potentially worse finish. However, if you are using a very shallow depth of cut and good dust collection, they can sometimes offer a smoother finish than a 2-flute mill due to more cutting edges engaging the material. For beginners, sticking with a 2-flute is often the safest bet for MDF.
2. Type of Cutters (Up-cut, Down-cut, Straight)
End mills come in different flute designs that affect how they cut.
Up-cut Spiral: These end mills pull chips upward away from the workpiece. This is great for clearing material and can help lift dust out of deeper pockets. For MDF, up-cut is a common choice.
Down-cut Spiral: These end mills push chips downward. They are excellent for achieving a smooth finish on the top surface of the workpiece because they hold the material down. However, they can pack chips at the bottom of a cut or pocket, which might require a separate pass or excellent dust collection. For profiling (cutting out a shape from the material), a down-cut can leave a very clean top edge.
Straight Flute: Less common for CNC routing in MDF, but can be used for general-purpose cutting. They don’t have the helical angle that helps with chip evacuation and cutting directionality.
For MDF, a 2-flute up-cut spiral is often the most recommended for general routing and pocketing due to its excellent chip evacuation. A 2-flute down-cut spiral is fantastic for cutting out profiles where a super-smooth top edge is paramount.
3. Coatings
Some carbide end mills have special coatings (like TiN, TiAlN, or ZrN) applied to their surface. These coatings can enhance hardness, reduce friction, and improve heat resistance. For MDF, coatings aren’t as critical as they are for machining metals, but a good quality uncoated carbide end mill is usually sufficient. If you’re going for a premium tool and plan to push your machine a bit harder, a coating might offer marginal benefits.
4. Material Quality
Ensure you’re buying from a reputable tool manufacturer. Higher quality carbide will maintain its edge longer and be less prone to chipping.
Using Your 3/16″ Carbide End Mill: A Step-by-Step Guide
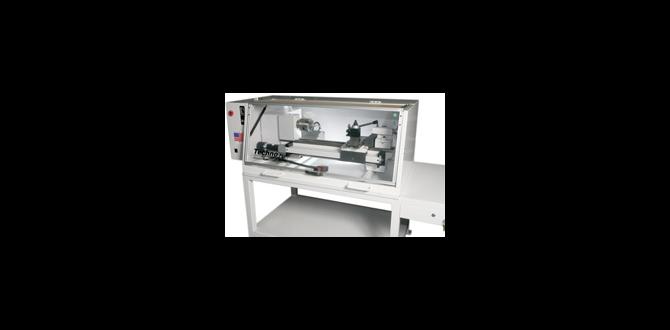
Here’s how to get the best results from your 3/16-inch carbide end mill when working with MDF. We’ll assume you’re using it with a CNC router, as this is where end mills are most commonly employed for detailed work.
Step 1: Safety First! (Always!)
Before you even think about powering up your machine, safety is paramount.
Eye Protection: Wear safety glasses or a face shield. MDF dust and small chips can fly unexpectedly.
Dust Collection: MDF dust is fine and can be irritating to your lungs. Use a good dust extraction system connected to your CNC router. Consider wearing a dust mask even with collection.
Secure Workpiece: Ensure your MDF sheet is securely clamped or held down to the spoilboard. A loose workpiece is a major safety hazard and will ruin your cut.
Machine Awareness: Know your machine. Understand how to operate it safely, emergency stop procedures, and be aware of moving parts.
Step 2: Mount the End Mill Correctly
Proper mounting ensures stability and prevents tool failure.
1. Cleanliness: Make sure the shank of the end mill and the inside of your collet are clean and free of dust, oil, or debris.
2. Insert into Collet: Gently insert the 10mm shank of the end mill into the correct-sized 10mm collet.
3. Tighten the Collet: Insert the collet with the end mill into the spindle of your CNC router. Tighten the collet nut securely. Do not overtighten, as this can damage the collet or the end mill shank, but it needs to be snug enough to prevent any movement. You want a firm, even grip.
Step 3: Set Up Your Design and Toolpath in Your CAM Software
This is where you tell your CNC machine what to cut.
1. Import Design: Load your design into your Computer-Aided Manufacturing (CAM) software.
2. Define Material: Tell the software you are working with MDF.
3. Select Tool: Choose your 3/16-inch (or often specified as 4.76mm) 2-flute end mill from your tool library. If you can’t find it, you’ll need to input its parameters:
Diameter: 3/16″ (4.76mm)
Shank Diameter: 10mm
Number of Flutes: 2
Flute Length: (Measure your tool)
Overall Length: (Measure your tool)
4. Set Cutting Strategy:
Pocketing: Use strategies like “Offset” or “Raster” to clear out areas.
Profiling: Use “On Path,” “Inside,” or “Outside” depending on whether you want to cut exactly on your line, inside it, or outside it. For example, if you have a drawing of a star and want to cut out the star shape, you’d select “Outside” for the profile cut.
5. Define Cutting Depths and Feeds: This is crucial for MDF.
Depth of Cut (DOC): This is how deep each pass of the end mill goes. For MDF with a 3/16″ end mill, a common starting point for a full-depth cut might be 1/8″ to 1/4″ (3mm to 6mm) per pass. You might be able to go deeper, but it’s better to start cautiously.
Stepover: For pocketing, this is how much the end mill moves sideways on each pass. A stepover of 30-50% of the tool diameter (e.g., 0.06″ to 0.09″ for a 3/16″ end mill) is a good starting point for a balance between speed and surface finish.
Feed Rate: This is how fast the end mill moves through the material in inches or millimeters per minute. This is heavily dependent on your CNC machine’s rigidity, spindle power, and the exact MDF density. For a 3/16″ carbide end mill in MDF, typical feed rates might range from 300 to 700 mm/min (or 12 to 28 inches/min). Always start conservatively and increase if your machine handles it well, or decrease if you hear excessive straining or see chatter.
Spindle Speed (RPM): This is how fast the spindle motor spins. For MDF and carbide, a common range is between 15,000 and 24,000 RPM. Higher RPMs generally require faster feed rates to maintain the correct chip load.
6. Generate G-code: Your CAM software will generate the G-code instructions that your CNC machine will follow.
Step 4: Set Your Zero Point (Work Zero)
This tells your CNC machine where to start cutting on your MDF workpiece.
1. Machine Home: Return your CNC machine to its home position.
2. Position Tool: Move the tip of the end mill to the desired starting point on your MDF. This is often a corner of your design or workpiece.
3. Set X, Y, Z Zero: Use your CNC controller software to set the X, Y, and Z zero (origin) at the tool tip’s position. For Z-zero, it’s typically set at the top surface of your MDF.
Step 5: Perform a Dry Run
Before cutting into the material, always perform a “dry run.”
1. Raise Z-axis: Make sure the Z-axis is raised high enough so the end mill won’t touch the material.
2. Run G-code: Execute the G-code program. Watch carefully as the machine moves through its path without cutting. This helps you spot any collisions or unexpected movements in your toolpath.
Step 6: Make the Cut!
With everything set up and checked, it’s time to cut.
1. Turn on Dust Collection: Ensure your dust extraction is running.
2. Turn on Spindle: Start your spindle at the programmed speed.
3. Run the Program: Start the G-code program from your CNC controller.
4. Monitor: Keep an eye on the cutting process. Listen for any unusual noises (like straining or chattering) and watch for excessive dust buildup or signs of the cutter overheating. Be ready to hit the emergency stop if necessary.
5. Finishing Passes: For very clean edges, especially on the top surface when profiling, you might consider a final “spring pass.” This is a shallow pass (e.g., 0.002″ – 0.005″ or 0.05mm – 0.1mm) at the same feed rate. The end mill cuts only a tiny amount of material, which can smooth out any minor imperfections left by previous, deeper passes.
Step 7: Clean Up
Once the cut is complete, remove the cut parts and clean your machine and workpiece. A brush or compressed air can help remove any remaining dust.
When to Use a 3/16″ Carbide End Mill for MDF: Project Ideas
The versatility of a 3/16-inch carbide end mill makes it perfect for a wide array of MDF projects. Here are just a few ideas:
Cabinetry and Furniture Components: Precise dados (grooves for joining), rabbets (grooves on the edge), and cutouts for hinges or drawer slides.
Sign Making: Cutting out crisp lettering, logos, or decorative shapes.
Home Decor: Creating intricate wall art, stencils for painting, or decorative inlays.
Prototyping: Quickly making functional prototypes of parts and enclosures.
Jigs and Fixtures: Crafting custom jigs for woodworking or assembly.
Speaker Boxes: Cutting precise baffles and enclosure panels.
Educational Models: Creating detailed models for schools or presentations.
MDF and CNC Routing: Tips for Best Results
MDF, while great for projects, has some quirks when it comes to CNC routing. Keeping these in mind will help you get amazing results.
Dust is Your Enemy (and Friend): MDF creates a lot of fine dust. Efficient dust collection is non-negotiable not just for health, but for the quality of your cut and the longevity of your machine. The dust can clog flutes, cause friction, and lead to burnt edges.
Tool Path Direction Matters: For profiling cuts, consider whether you need a clean top edge (use a down-cut spiral end mill) or if you need to evacuate chips well from a slot (use an up-cut spiral end mill). You might even use a combination – an up-cut for roughing out and a down-cut for a final finishing pass.
Feed and Speed Tuning: This is key. You’ll need to experiment slightly based on your specific MDF density, machine, and spindle. When in doubt, start slower and take shallower passes until you get a feel for how your setup performs. Too fast, and you risk breaking the tool or chattering. Too slow, and you can overheat and melt the MDF’s binder, leading to a burnt, gooey mess.
Hold it Down: MDF can resist the cutting force, causing it to lift or vibrate. Always use an effective hold-down method, such as vacuum hold-down, clamps, or spoilboard surfacing to create a perfectly flat mating surface for your material.
* **Spoilboard