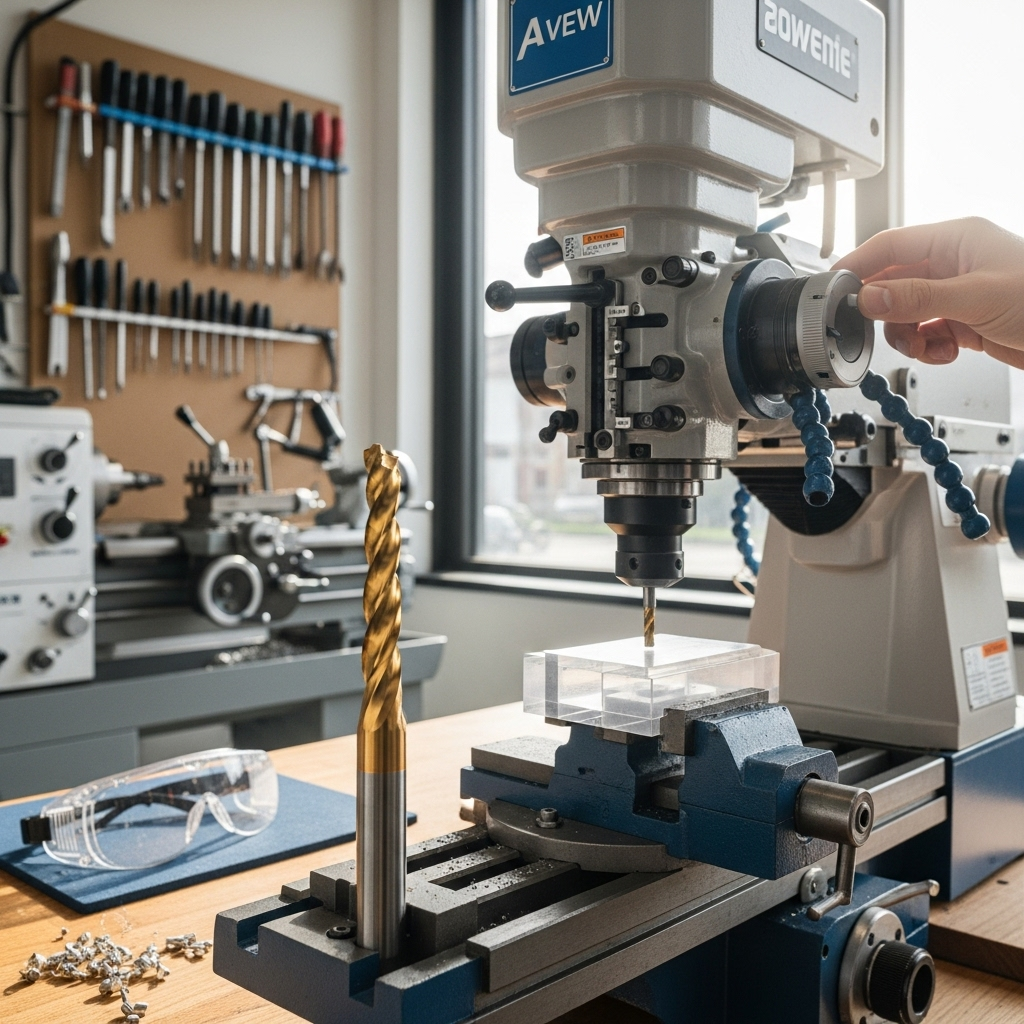
To effectively mill polycarbonate with a 3/16-inch carbide end mill, focus on reducing chatter by using appropriate speeds, feeds, and bit selection. This guide provides beginner-friendly tips for smooth, clean cuts and to prevent that annoying vibration.
Hey there, fellow makers! Ever tried to cut polycarbonate and ended up with a noisy, vibrating mess? That annoying chatter can ruin your workpiece and your day. It’s a common frustration for anyone using a milling machine, especially when working with plastics like polycarbonate. The good news is, it’s totally fixable! With a few simple adjustments and the right approach, you can achieve smooth, clean cuts every time. We’re going to dive deep into how to tame that chatter and get the best results from your 3/16-inch carbide end mill on polycarbonate. Stick around, and let’s turn that frustrating vibration into satisfying precision!
Understanding Polycarbonate and Why It Chills
Polycarbonate is a fantastic material. It’s strong, clear, and impact-resistant, making it perfect for everything from machine guards to custom enclosures. However, it can be a bit tricky to machine. Unlike metals, plastics can melt and gum up your tools, leading to poor finishes and, you guessed it, chatter. This vibration happens when the cutting edge of your tool isn’t consistently engaging with the material. It’s like a skipping record – the bit digs in, lifts slightly, digs in again, and creates that unpleasant sound and surface finish.
Several factors contribute to chatter when milling polycarbonate:
- Tool Rigidity: A flimsy tool or an excessive tool extension can easily flex and vibrate.
- Spindle Speed (RPM): Too fast or too slow a spindle speed can cause the cutting edge to bounce.
- Feed Rate: If you’re feeding too slowly, the tool can rub instead of cut. Too fast, and you can overload the bit or the machine.
- Chip Load: This is the thickness of the material removed by each cutting edge of the end mill. An improper chip load is a major cause of chatter.
- Tool Geometry: The number of flutes, the rake angle, and the helix angle all play a role.
- Machine Rigidity: Any play or looseness in your milling machine’s components will transmit vibration.
- Workholding: A loose workpiece can vibrate independently, leading to chatter.
Choosing the Right 3/16-Inch Carbide End Mill for Polycarbonate

Not all end mills are created equal, especially when it comes to plastics. For polycarbonate, you want an end mill designed to create a clean cutting action and efficiently remove material without melting. A 3/16-inch carbide end mill is a common size, but its specific design is crucial for reducing chatter.
Key Features to Look For:
- Number of Flutes: For plastics like polycarbonate, fewer flutes are generally better. A 2-flute end mill is often ideal. Why? Because each flute has more space to clear chips. With plastics, melting and chip recutting are big concerns. More space means chips can escape easily, preventing them from reheating the material and causing that gummy buildup that leads to chatter. A 3-flute or 4-flute end mill might be too crowded, leading to poor chip evacuation and heat build-up.
- Rake Angle: Plastics benefit from tools with a positive rake angle. This means the cutting edge is slightly angled forward, allowing it to slice through the material more easily and with less force. This slicing action reduces the tendency for the material to gum up and helps create a smoother cut, thus minimizing chatter.
- Helix Angle: A steeper helix angle (often around 30-45 degrees) can help with chip evacuation and provide a smoother cutting action. It allows the tool to bite into the material more aggressively but in a controlled way.
- Coatings: While not always necessary for polycarbonate, certain coatings, like TiN (Titanium Nitride), can reduce friction and heat, which always helps with plastic machining. However, for polycarbonate, the geometry is usually more important than the coating.
- Material: Carbide is an excellent choice because it stays sharp longer and can handle higher cutting speeds than High-Speed Steel (HSS). This means a more consistent cut and less chance of the tool degrading and causing chatter.
When searching for an end mill, you might come across descriptions like “plastic cutting end mill” or “single flute end mill for plastics.” These are often great to consider. For a 3/16-inch size, an “extra long” shank offers more reach but can sometimes be less rigid. If you’re not drilling deep pockets, a standard length is usually more rigid and better for chatter reduction.
Optimizing Cutting Parameters: Speed and Feed
This is where the magic happens. Getting the right speed and feed rate is probably the single most impactful step in reducing chatter when milling polycarbonate. It’s a delicate balance, and there isn’t one exact setting that works for every machine and every situation. However, we can establish some excellent starting points.
Spindle Speed (RPM)
Polycarbonate can melt if you generate too much heat. Generally, you want to use a moderate to high spindle speed for plastics to ensure a clean shearing action rather than rubbing or melting. However, this must be balanced with your feed rate.
- Starting Point: For a 3/16-inch carbide end mill in polycarbonate, aim for a spindle speed between 10,000 and 20,000 RPM.
- Considerations: If your router or spindle can’t achieve these speeds, you might need to adjust your feed rate accordingly or use a different type of bit. Very high RPMs can sometimes induce vibration if the machine or setup isn’t perfectly rigid.
Feed Rate
The feed rate is how fast the cutter moves through the material. This is directly tied to your spindle speed and the chip load you’re trying to achieve. The goal is to remove material efficiently without letting the tool rub or melt.
- Chip Load Concept: Chip load is the amount of material removed by each cutting edge per revolution. For a 3/16-inch (0.1875 inch) 2-flute end mill in polycarbonate, a good starting chip load is around 0.001 to 0.003 inches per tooth.
- Calculating Feed Rate: Feed Rate (IPM) = Spindle Speed (RPM) × Number of Flutes × Chip Load (inches/tooth)
- Example Calculation: Let’s say you’re running at 15,000 RPM with a 2-flute end mill and aiming for a chip load of 0.002 inches/tooth:
Feed Rate = 15,000 RPM × 2 flutes × 0.002 inches/tooth = 60 inches per minute (IPM)
- Adjusting for Chatter: If you hear chatter, try increasing the feed rate slightly. If the cut seems too aggressive or you’re getting melting, decrease the feed rate or spindle speed. It’s often better to err on the side of a slightly faster feed rate when milling plastics to ensure a shearing cut.
Depth of Cut (DOC) and Width of Cut (WOC)
How deep and how wide you’re cutting also significantly impacts chatter. Taking too deep a bite at once can overload your end mill and machine, leading to vibration.
- Depth of Cut (DOC): For polycarbonate with a 3/16-inch end mill, start with a shallow depth of cut. Try about 0.1 to 0.2 times the diameter of the end mill. So, for a 3/16-inch (0.1875″) bit, that’s roughly 0.018″ to 0.037″. You can often take multiple shallow passes to achieve a larger total depth.
- Width of Cut (WOC): When slotting (cutting a full-width groove), the WOC is equal to the diameter of the end mill (e.g., 3/16″). For pocketing or profiling, try to keep the WOC to about 50% of the end mill diameter or less (e.g., 0.093″ or 3/32″). This reduces the cutting load on each flute.
Table: Recommended Starting Parameters for 3/16″ Carbide End Mill in Polycarbonate
| Parameter | Recommendation | Notes |
|---|---|---|
| End Mill Type | 2-Flute Carbide Plastic/Solid Carbide | Positive rake, sharp edges, good chip clearance. |
| Spindle Speed (RPM) | 10,000 – 20,000 RPM | Higher speeds for better shearing. Adjust based on feedback. |
| Chip Load (per tooth) | 0.001″ – 0.003″ | Crucial for preventing melt and chatter. |
| Feed Rate (IPM) | 60 – 120 IPM (example based on above) | Calculated from RPM, flutes, and chip load. Adjust to sound and finish. |
| Depth of Cut (DOC) | 0.010″ – 0.040″ (approx. 0.05x – 0.2x diameter) | Take multiple shallow passes for deeper cuts. |
| Width of Cut (WOC) | 0.093″ (50% of diameter) or less for profiling/pocketing | Full diameter for slotting. |
Remember, these are starting points. Always listen to your machine and watch your cut. If it sounds smooth and the chips are forming nicely, you’re likely in a good zone. If you hear that irritating chatter, make small, incremental adjustments to your feed rate first, then consider your spindle speed or depth of cut.
Workholding and Fixturing: Keeping Things Stable

A solid setup is fundamental to preventing chatter. If your workpiece is moving, vibrating, or not held securely, your end mill will struggle to make a clean cut. Chatter can be amplified by poor workholding.
Securing Your Polycarbonate
- Clamps: Use robust clamps to hold your material firmly to the machine table. Ensure the clamps are positioned to avoid interfering with the tool path. Use soft jaws or protective pads if you’re worried about marring the surface.
- Double-Sided Tape: For thinner sheets or smaller pieces, strong double-sided manufacturing tape can be effective. Make sure the surface is clean and dry for good adhesion. This is often used by CNC hobbyists for temporary fixturing.
- Vacuum Fixturing: If you work with polycarbonate frequently and have the setup, a vacuum table can provide excellent hold-down force over the entire surface of the part.
Minimizing Vibration and Flex
- Support Backing: If you’re milling thin polycarbonate, place a piece of wood or MDF underneath it on the machine table. This provides extra support and can help prevent the material from flexing downwards as the end mill cuts, which can contribute to chatter.
- Tool Extension: Use the shortest possible tool extension. If your end mill has a long shank (e.g., “extra long”), and you don’t need that reach, a shorter, more rigid tool or a different collet setup might be necessary. A tool sticking out too far is much more prone to vibration.
- Collet Quality: Ensure your collet nut and collet are clean and properly seated. A worn or dirty collet can cause runout (wobble) in the end mill, leading to inconsistent cutting and chatter. High-quality ER collets offer excellent runout performance, which is crucial for smooth milling.
A common mistake for beginners is not clamping the material firmly enough. Imagine trying to carve a delicate pattern into something wobbling in your hand – it’s impossible. The same applies to your milling machine. Double-check that your workpiece is absolutely stationary before you start your cut.
Techniques to Further Reduce Chatter
Beyond the basic settings and fixturing, there are a few advanced tips and techniques that can help you achieve even smoother results and eliminate chatter.
Aspirated Cutting and Chip Evacuation
As mentioned, good chip evacuation is key. If your machine has a dust collection port near the spindle, ensure it’s on and directed to help clear chips. Some operators use a small air blast to keep the cutting zone clear. For polycarbonate, this also helps keep the chips from re-welding to the material or the tool.
Climb Milling vs. Conventional Milling
This refers to the direction the cutter engages the material relative to the feed direction.
- Conventional Milling: The cutter rotates against the direction of feed. This tends to push the workpiece away slightly and can reduce chatter in softer or gummy materials. It tends to create a rougher surface finish but is more forgiving of machine backlash.
- Climb Milling: The cutter rotates in the same direction as the feed. This pulls the workpiece into the cutter, leading to a finer surface finish and less tool wear. It requires a more rigid machine with minimal backlash.
For polycarbonate, climb milling is often preferred because it creates a shearing action that results in a smoother finish and is less prone to melting. However, if you experience chatter with climb milling, and your machine has some play (backlash) in the lead screws, try conventional milling. You might need to experiment to see which works best for your specific setup.
Tool Path Strategy
The way the end mill moves through the material can also affect chatter. For example, when starting a plunge cut into polycarbonate, it’s often smoother to:
- Ramp In: Instead of plunging straight down, program the end mill to move downwards at an angle (e.g., 5-10 degrees). This allows the cutter to engage the material gradually, creating a “ramp” and reducing shock.
- Helical Interpolation: For pocketing, you can use a helical motion to enter the material. The end mill moves in a spiral path, gradually increasing its diameter until it reaches the desired pocket size. This is a very smooth way to enter the material.
Many CAM (Computer-Aided Manufacturing) software packages offer these advanced toolpath strategies, making them easy to implement even for beginners.
Cooling and Lubrication (Use with Caution!)
While not always necessary or recommended for all plastics, sometimes a small amount of coolant or lubricant can help. For polycarbonate, you want to avoid anything that will make the plastic sticky or gummy.
- Compressed Air: Often the best “coolant” for polycarbonate as it blows chips away and provides some cooling without residue.
- Water-Based Coolant: Some light, water-soluble coolants can be used sparingly, like a mist coolant. Avoid oil-based lubricants, as they tend to make polycarbonate gummy and difficult to machine.
- Rubbing Alcohol: For very light cutting, a little isopropyl alcohol sprayed on can help reduce friction, but it evaporates quickly.
Always test any coolant or lubricant in an inconspicuous area first to ensure it doesn’t negatively affect the polycarbonate’s appearance or properties. For most hobbyist applications, focusing on speeds, feeds, tool geometry, and chip evacuation is more than sufficient.
Troubleshooting Common Chatter Issues

Even with the best intentions, you might still encounter chatter. Here’s a quick guide to diagnosing and fixing common problems.
Issue: Chatter Only Happens at the Beginning/End of a Cut
Possible Causes:
- Tool entering or exiting the material too abruptly.
- Loose workholding at the start or end point.
- Machine backlash in the axes controlling entry/exit.
Solutions:
- Implement ramp-in or helical interpolation for tool entry.
- Ensure workpiece is clamped securely on all sides, if possible.
- Check and adjust machine backlash settings if applicable.
Issue: Chatter Occurs on Specific Pass Depths
Possible Causes:
- Resonance: The machine and workpiece might be vibrating at a specific frequency related to the depth of cut.
- Tool flexibility: At certain depths, the tool might have too much overhang.
Solutions:
- Adjust the depth of cut slightly (even a small change can sometimes break resonance).
- Try to reduce tool overhang.
- Ensure excellent chip clearing at that depth.
Issue: Chatter is Persistent and Loud
Possible Causes:
- Incorrect spindle speed or feed rate combination.
- Dull or damaged end mill.
- Excessive tool extension

