Quick Summary
A digital readout (DRO) for your lathe is a game-changer for precision. It replaces manual dialing with clear digital displays, making measurements accurate, repeatable, and easy. This essential upgrade reduces errors significantly, speeds up your work, and is surprisingly accessible for hobbyists and beginners.
Hey fellow makers! Daniel Bates here from Lathe Hub, your go-to spot for all things lathes. Ever found yourself squinting at dial indicators or second-guessing those handwheel turns? You’re not alone. Many of us start out with the trusty old ways, but in today’s workshop, precision matters more than ever, whether you’re crafting a delicate part for a model engine or turning a sturdy piece of hardwood. The good news is, there’s a straightforward upgrade that can transform your lathe experience: a digital readout, or DRO. It’s like giving your lathe a superpower – clear, instant, and accurate measurements at your fingertips. Stick around, and I’ll show you exactly why a DRO is an essential upgrade and how it can boost your confidence and your projects.
Why a Digital Readout (DRO) is a Lathe Essential
Let’s talk about why a digital readout for your lathe isn’t just a fancy accessory, but a fundamental improvement. For beginners, it’s about building good habits and achieving predictable results from the start. For seasoned pros, it’s about efficiency and eliminating guesswork.
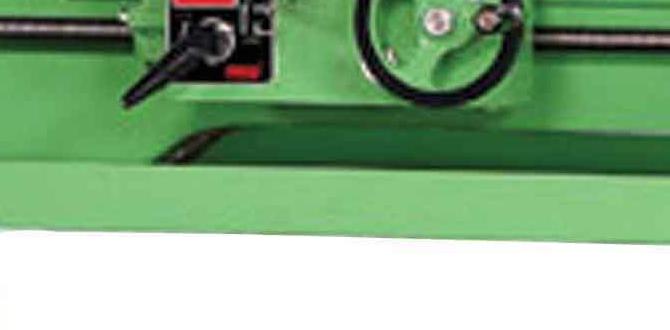
The Problem with Traditional Dials
Traditional lathes rely on handwheels with graduated dials to measure movement. While they’ve served us well for decades, they have inherent limitations:
- Reading Errors: Interpreting dial markings, especially on older or less precise machines, can lead to small, cumulative errors. It’s easy to miscount a full revolution or misread a fractional increment.
- Parallax: Looking at a dial from an angle can throw off your reading. This “parallax error” is subtle but can affect accuracy.
- Repetitive Tasks: When you need to make multiple passes or repeat a specific depth of cut, constantly re-setting and reading dials can be slow and prone to mistakes.
- Wear and Tear: Over time, the internal mechanisms of handwheels can wear, leading to backlash or a less-than-accurate feel, making precise measurements even harder.
The DRO Advantage: Precision at Your Fingertips
A digital readout system replaces these mechanical dials with electronic sensors and a display unit. Here’s what that means for you:
- Crystal Clear Accuracy: A bright digital display shows your exact position down to thousandths of an inch (or hundredths of a millimeter). No more guessing or interpreting lines!
- Reduced Errors: The digital nature virtually eliminates reading and parallax errors, ensuring your measurements are correct every time.
- Easier Setups & Repetitive Cuts: Setches (zeroing the display) are instantaneous. Need to take off 0.050 inches? Set the DRO to zero, move the tool 0.050 inches, and you’re done. Repeating the same depth on multiple passes is effortless.
- Improved Efficiency: Less time spent measuring and re-measuring means more time actually machining. This is crucial for project completion and learning.
- “Tell-Tale” Memory: Some DRO systems can remember positions or tool offsets, which is incredibly useful for more advanced operations.
Think of it like upgrading from a ruler with markings to a digital caliper. The difference in speed, confidence, and accuracy is immense. It’s one of the most impactful upgrades you can make to your lathe, especially when you’re learning.
Understanding the Components of a Lathe DRO System
Before we dive into installation, let’s quickly look at what makes up a digital readout system. Knowing these parts will make the whole process clearer.
1. Linear Scales (Encoders)
These are the heart of the DRO. They are long, slim devices that attach to the moving parts of your lathe – typically the carriage (X-axis) and the cross-slide (Z-axis). Some systems also include a scale for the compound rest (Y-axis).
- How they work: Inside the scale, an optical or magnetic encoder reads the precise position as the scale moves. Tiny, extremely accurate markings on the scale are interpreted by the encoder.
- Types: You’ll most commonly find optical scales, which are very robust and reliable for machining environments. Magnetic scales are also available and can be even more resistant to coolant and dust.
- Mounting: They mount rigidly onto the machine’s ways, with a “read head” that travels along the scale as the machine’s components move.
2. The Readout Box (Display Unit)
This is the familiar digital display you’ll see. It connects to the linear scales via cables and shows the real-time position of each axis.
- Features: Modern DRO boxes offer a variety of features, including:
- Axis Display: Shows the position for each axis (X, Y, Z).
- Zero/Preset: Allows you to set any position to zero, or input a specific value.
- Absolute/Incremental Mode: Switch between showing your position from the last zero set (incremental) or from the system’s origin point (absolute).
- Tool Memory: Some advanced units can store tool lengths or offsets.
- mm/inch Conversion: Easily switch between metric and imperial units.
- Mounting: The readout box is usually mounted in a convenient location on the lathe bed or headstock so it’s easily visible and accessible.
3. Cables and Connectors
These are simply the conduits that connect the linear scales to the readout box. They are usually durable and designed to withstand the workshop environment.
4. Mounting Brackets and Hardware
This is the collection of metal pieces, screws, nuts, and sometimes specialized mounting arms that allow you to securely attach the scales and readout box to your specific lathe model. This part can vary significantly depending on your lathe and the DRO kit.
Choosing the Right Digital Readout for Your Lathe
With various options available, picking the right DRO can seem daunting. Here’s a breakdown to help you make an informed decision.
Factors to Consider:
1. Lathe Size and Type:
- Small Hobby Lathes: Often require shorter scales and a simpler DRO system.
- Larger or Industrial Lathes: Need longer scales and potentially a more robust system capable of higher travel.
- Specific Machine Models: Some manufacturers offer DRO kits tailored to popular lathe models, which often simplify installation as the mounting hardware is pre-designed.
2. Number of Axes:
- 2-Axis: For most metalworking lathes, this is standard, covering the carriage (X) and cross-slide (Z) movements.
- 3-Axis: Includes the compound rest (Y-axis). This is beneficial for complex angled cuts or when significant compound rest adjustments are needed. For woodworking, a 2-axis system on the carriage and cross-slide is typically sufficient.
3. Resolution and Accuracy:
- Resolution: This is the smallest unit of measurement the DRO can display (e.g., 0.0005″ or 0.01mm). For most hobbyists and even many professional tasks, 0.0005″ is more than adequate.
- Accuracy: This refers to how close the DRO’s reading is to the actual position. Reputable brands provide specifications on accuracy. Ensure it meets your project needs.
4. Brand and Quality:
- Established brands often mean better reliability, customer support, and longer-lasting products. Some popular brands in the DRO market include iGaging, Accu-Rite, Acu-Rite (different from Accu-Rite), and various other aftermarket manufacturers that source components from Asia.
- Read reviews! See what other users with similar lathes think about the DRO’s performance and ease of installation.
5. Budget:
- Prices vary significantly. Basic 2-axis systems can be found for a few hundred dollars, while high-end, multi-axis units with advanced features can cost upwards of $1000 or more.
- Consider the long-term value. A slightly more expensive, reliable DRO will likely save you frustration and potentially costly mistakes down the line.
Example DRO System Comparison Table
Here’s a simplified look at what you might find:
| Feature | Basic 2-Axis DRO | Mid-Range 2-Axis DRO | Advanced 3-Axis DRO |
|---|---|---|---|
| Number of Axes | 2 (X, Z) | 2 (X, Z) | 3 (X, Y, Z) |
| Typical Price Range | $150 – $300 | $300 – $600 | $500 – $1000+ |
| Resolution | 0.001″ / 0.02mm | 0.0005″ / 0.01mm | 0.0005″ / 0.01mm |
| Display Features | Zeroing, mm/inch | Zeroing, mm/inch, Absolute/Incremental | Zeroing, mm/inch, Absolute/Incremental, basic tool memory |
| Application | Entry-level hobbyist, wood lathes | Hobbyist, DIY, light metalwork | Serious hobbyist, prototyping, advanced metalwork |
| Included Mounting Hardware | Often generic or basic | Varies, some model-specific kits | Often needs custom fitting or specific kit |
Remember to check if the scales are long enough for your lathe’s maximum travel on each axis. Measuring your machine’s travel is a key step before purchasing.
How to Install a Digital Readout on Your Lathe (Step-by-Step)
This is where the magic happens! While every lathe is a bit different, the general principles for installing a DRO are the same. Take your time, be methodical, and enjoy the process. This guide is geared towards a typical metal lathe setup.
Tools You’ll Likely Need:
- Your DRO kit (scales, readout box, cables, brackets, hardware)
- Hex keys (Allen wrenches) / Wrench set
- Screwdrivers (Phillips and flathead)
- Measuring tape or ruler
- Calipers (digital or dial)
- Drill and drill bits (if modifications are needed)
- Tap and die set (if drilling and tapping holes)
- Center punch
- Magnet (strong one, for holding parts temporarily)
- Safety glasses (always!)
- A friend to help if needed (especially when positioning the scales)
Step 1: Inspect and Prepare Your Lathe
Cleanliness is Key: Thoroughly clean the ways (the tracks the carriage and cross-slide run on) and any surfaces where you’ll be mounting parts. Dirt and grit are enemies of precision.
Measure Travel: Measure the maximum travel your carriage and cross-slide have. Ensure the scales you purchased are long enough for this travel, with a little extra room at the ends.
Identify Mounting Points: Look for suitable, rigid mounting locations on your lathe’s bed, saddle, and tailstock. Often, there are existing tapped holes you can use. If not, you may need to drill and tap new ones, or use sturdy clamps.
Step 2: Install the X-Axis Scale (Carriage Travel)
This scale measures the in-and-out movement of the carriage along the lathe bed.
- Positioning: The scale is typically mounted on the lathe bed, parallel to the ways, with the read head moving along with the carriage. Alternatively, some kits mount directly to the carriage itself, with the scale fixed to the bed. Your kit’s instructions will guide you.
- Rigid Mounting: Use the provided brackets and hardware. Ensure the scale is perfectly parallel to the machine ways. Even a slight misalignment can cause binding or inaccurate readings. If you need to drill and tap holes, use a center punch to mark locations accurately and drill pilot holes before tapping.
- Read Head Attachment: Attach the read head to the carriage. Ensure its travel path along the scale is unobstructed through the full range of carriage movement.
- Cable Routing: Plan how the cable from the scale will run to the readout box. It should be routed to avoid getting pinched or caught by moving parts. Use zip ties or cable clips to secure it neatly, leaving enough slack for full movement.
Step 3: Install the Z-Axis Scale (Cross-Slide Travel)
This scale measures the in-and-out movement of the cross-slide (where the tool post typically sits).
- Positioning: The scale is usually mounted onto the carriage, parallel to the cross-slide ways, with the read head moving with the cross-slide.
- Rigid Mounting: Similar to the X-axis scale, ensure this scale is mounted solidly and is perfectly parallel to the cross-slide ways. This is critical for accuracy.
- Read Head Attachment: Attach the read head to the cross-slide. Check for clear travel.
- Cable Routing: Route the second scale’s cable neatly to the readout box, ensuring it has enough slack and won’t snag.
Step 4: Install the Readout Box
This is where all your measurements come together.
- Location: Find a convenient spot on your lathe where you can easily see and reach the DRO display. Many lathe DRO kits come with a swing-arm bracket for mounting to the headstock or bed.
- Secure Mounting: Mount the readout box securely. It should not vibrate or shift during operation.
- Connect Cables: Plug the cables from the X and Z axis scales into the correct ports on the readout box. They are typically labeled or keyed to prevent incorrect connection.
Step 5: Initial Power-Up and Testing
This is the moment of truth!
- Double Check Connections: Before powering on, ensure all cables are securely plugged in.
- Power On: Turn on the DRO. The display should light up, likely showing zeros initially or the last saved position.
- Test X-Axis: Carefully move the carriage along the bed. Watch the X-axis display. It should show movement corresponding to your handwheel turns. Try setting a zero at a certain point, then move the carriage. Does the display return to zero when you go back? Does it show proportional movement?
- Test Z-Axis: Do the same for the cross-slide, watching the Z-axis display.
- MM/Inch Conversion: Test the mm/inch button to ensure it switches units correctly.
- Zero/Preset Function: Test the zeroing function at various points. Make sure it zeroes out the selected axis reliably.
Step 6: Fine-Tuning and Calibration (If Necessary)
Most modern DRO systems are factory-calibrated and don’t require extensive user calibration. However:
- Parallelism: If you notice any binding or inconsistent readings, re-check the parallelism of your scales to the machine ways. This is the most common cause of issues.
- Scale Alignment: Ensure the read heads are tracking perfectly along their scales. Some kits have minor adjustment screws for alignment.
- Software Calibration: Some high-end systems allow for software compensation for any minor machine inaccuracies. Refer to your DRO manual for details.
Important Considerations for Safety:
- Machine Off: Always ensure the lathe is turned off and de-energized before working on it, especially when drilling or tapping.
- Clearance: Ensure no DRO components or cables will interfere with the chuck, workpiece, tailstock, or any other moving parts during operation.
- Cable Management: Proper cable routing is crucial to prevent damage and ensure reliable operation.
- Read the Manual: Your specific DRO kit will come with a manual. Read it thoroughly! It contains vital information tailored to your system.
Beyond the Basics: Advanced DRO Features and Benefits
Once you’ve got your DRO installed and are enjoying the immediate benefits, you might start exploring what else it can do. Even basic DROs offer advantages that go beyond simply reading measurements.