Have you ever watched a piece of wood spin on a lathe? It’s like magic! The tool carves it into beautiful shapes. But what if you want to make your own tools? DIY mini lathe tool rest is a fantastic project for beginners. It helps you control your cuts better, leading to smoother pieces.
Creating your own tool rest can be fun and rewarding. You can customize it to fit any size lathe. Imagine making it from scrap wood! You save money and learn at the same time. Isn’t that cool?
Let’s dive into the world of tool making. You might be surprised by how easy and enjoyable it is. With just a few steps, you can build something that improves your woodworking skills. Are you ready to start this mini adventure?
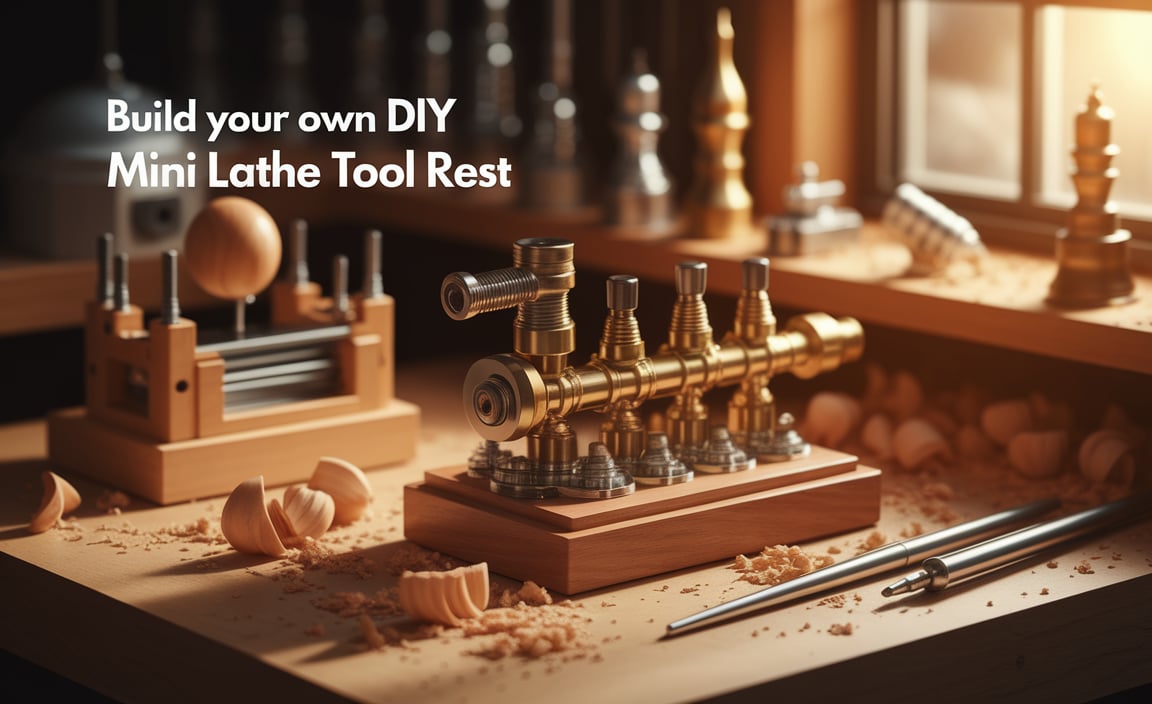
Diy Mini Lathe Tool Rest: A Comprehensive Guide For Woodworkers
Creating a DIY mini lathe tool rest can be easy and fun. This project allows woodworkers to enhance their lathe’s performance with a stable tool rest. Key steps include measuring the lathe bed and using sturdy materials like wood or metal. Using a simple design helps keep costs low and creativity high. Did you know that even small changes can lead to big improvements in your work? With a little effort, you can make your turning projects smoother and more precise.

Understanding Mini Lathes
Definition and applications of mini lathes in woodworking. Advantages of using a mini lathe for DIY projects.
Mini lathes are small machines that help in shaping wood. They turn a piece of wood while tools carve it. This makes it easy to create various items, like bowls or spindles. Using a mini lathe has many benefits. They are compact and fit well in small spaces. They are easy to use, making them great for beginners. Plus, they produce smooth finishes on projects. This tool opens the door to fun DIY woodworking adventures!
What are the advantages of using a mini lathe?
Many people choose mini lathes for their projects. Here are some key points:
- Easy to handle: Perfect for beginners.
- Small size: Fits in any workshop.
- Affordable: Cheaper than larger lathes.
- Precision: Creates fine details.
Importance of a Tool Rest in Woodturning
Role of a tool rest in achieving precision and safety. How a custom tool rest can improve your workflow and results. A tool rest plays a starring role in woodturning. It helps keep your tools steady for precise cuts, like a friend holding your hand during a scary movie. With a custom tool rest, your workflow gets a major boost. You’ll spend less time fixing mistakes and more time creating masterpieces. Who doesn’t want that? Plus, a good tool rest makes for safer work. So, it’s not only about looking cool; it’s about becoming a woodturning wizard!
| Benefits | Description |
|---|---|
| Precision | Helps you create smoother and exact shapes. |
| Safety | Reduces risk of mistakes and accidents. |
| Workflow | Makes the turning process quicker and easier. |
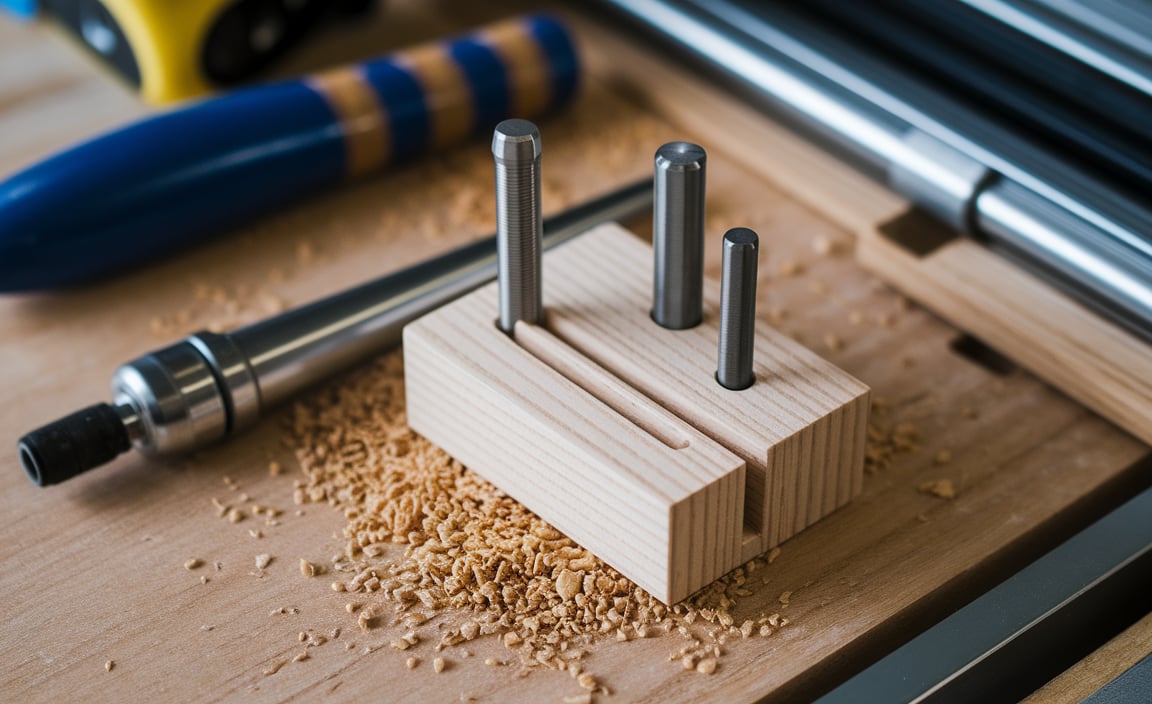
Materials Needed for DIY Tool Rest
List of essential materials (metal, wood, fasteners). Recommended tools for constructing a mini lathe tool rest.
To build your mini lathe tool rest, you’ll need some specific supplies. First, gather metal for strength and stability, wood for a solid base, and fasteners to hold it all together. Don’t forget the tools! A saw, drill, and screwdriver are must-haves. Remember, just like in cooking, if you don’t have the right ingredients, you end up with a recipe for disaster!
| Material | Purpose |
|---|---|
| Metal | Provides strength |
| Wood | Serves as a base |
| Fasteners | Connects all pieces |
With these materials and tools, you’re on your way to creating a fantastic tool rest. Remember, safety first: keep your fingers away from the saw blade and keep the snacks nearby!
Step-by-Step Instructions for Building Your Own Tool Rest
Detailed guidelines on measuring and cutting materials. Assembly instructions with tips for stability and adjustment. Start by choosing your materials wisely. You’ll need some sturdy wood, screws, and a few basic tools. Measure the wood carefully using a tape measure. Cut it into lengths for the base and the rest. Remember, a wrong cut can make your tool rest look like a wobbly jelly! When assembling, ensure everything fits snugly. Stability is key; use wood glue for extra strength. Adjust your tool rest by fine-tuning its height and angle. A tool rest that dances around isn’t what you want!
| Material | Measurement | Tip |
|---|---|---|
| Wood | Length: 24in, Width: 4in | Use a level to check flatness. |
| Screws | 1.5in screws | Pre-drill to avoid cracking. |
| Glue | N/A | Let it dry completely before using. |
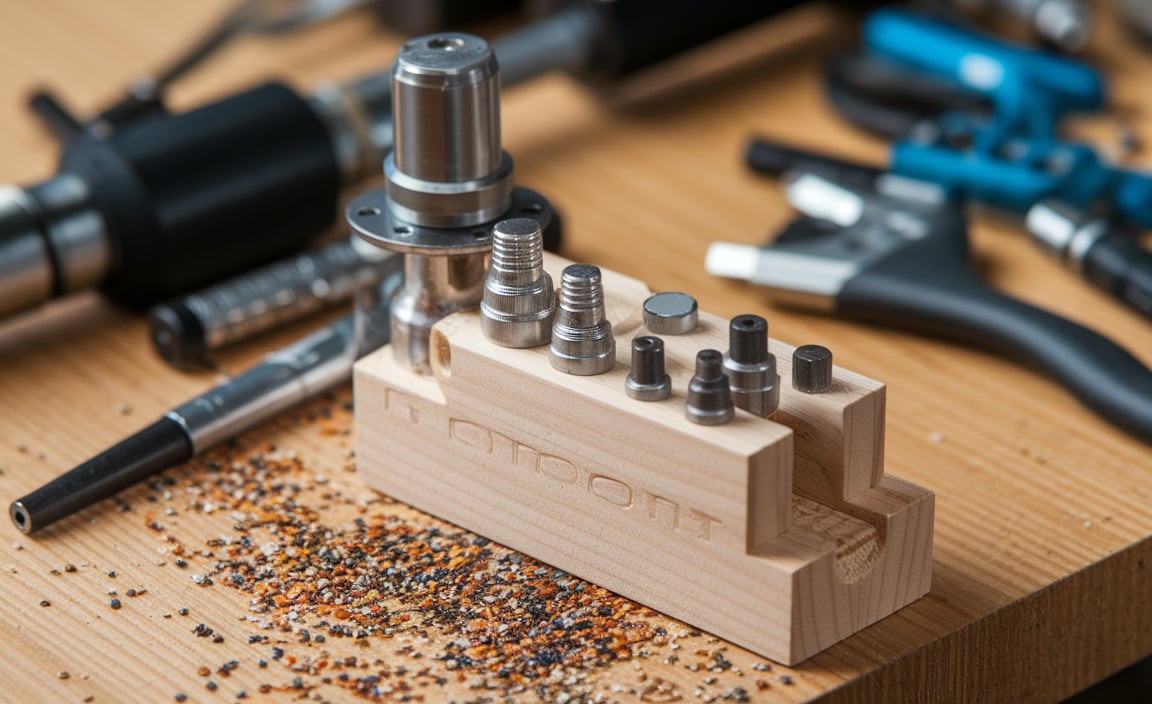
Customization Options for Your Tool Rest
Suggestions for adjustable heights and angles. Ideas for adding features like a sliding mechanism or interchangeable components.
Making your tool rest unique can be fun! You can try adjusting its height and angle for better comfort. Think about adding a sliding mechanism to move your tools freely. Interchangeable parts can also give you more options. Here are some ideas:
- Adjustable height settings for different projects.
- A pivoting arm for varying angles.
- Interchangeable tips for different tool shapes.
These features will enhance your DIY mini lathe tool rest, making it work better for you.
What are good customization options for my tool rest?
Some great ideas include adding adjustable heights and angles. You can also use a sliding mechanism for more flexibility. Interchangeable components can help you tailor your tool rest to fit your projects perfectly.
Common Mistakes to Avoid When Making a DIY Tool Rest
List of frequent errors in design and construction. Tips for troubleshooting and improving your build process.
Building a DIY tool rest can be a fun adventure, but mistakes happen. A common error is using the wrong materials. Make sure your tools fit together snugly. Otherwise, you might end up with a wobbly rest that resembles a dancing chair! Forgetting to measure carefully is another biggie. Measure twice, cut once! Lastly, don’t ignore the need for smooth surfaces; rough edges can ruin your workpiece. Here’s a quick table to help you steer clear of pitfalls:
| Error | Tip |
|---|---|
| Wrong materials | Choose strong, stable options |
| Poor measurements | Always double-check sizes! |
| Rough edges | Sand for a smooth finish |
A little extra care goes a long way in making your tool rest sturdy and reliable!
Maintenance of Your Mini Lathe Tool Rest
Recommended cleaning and upkeep practices. Signs of wear and when to replace or upgrade your tool rest.
Keeping your mini lathe tool rest in top shape is important for smooth woodworking. Regular cleaning with a soft cloth will keep it shiny and happy. Look out for signs like rust or deep grooves—these mean it’s time for a change. If the tool rest starts to play hide and seek with your tools or gets wobbly, it’s probably time to upgrade. A well-maintained tool rest makes for happier projects!
| Maintenance Activity | Frequency |
|---|---|
| Clean with soft cloth | Weekly |
| Inspect for wear | Monthly |
| Replace if rusty or uneven | As needed |
Benefits of a Custom Tool Rest Over Store-Bought Options
Costeffectiveness of DIY solutions. Tailoring features to match your specific lathe and projects.
A custom tool rest can save you money and give you more control. DIY versions often cost less than storebought ones. You can also change the size and shape to fit your own lathe. This way, your tool rest can match your projects perfectly.
- Cost-effective solutions lead to budget savings.
- Custom features improve work effectiveness.
- Projects are easier with a tool rest that fits your needs.
Making your own ensures it fits your style and needs. Tailoring it allows for creativity and fun. Enjoy the process and make your projects easier!
Why Choose a Custom Tool Rest?
A custom tool rest can enhance your DIY experience. It allows you to create the perfect fit for your lathe and projects. You save money and get exactly what you want. This makes it a smart choice for any hobbyist!
Real-Life Examples and Success Stories
Case studies of woodworkers who successfully built their own tool rests. Visuals or descriptions of their finished projects for inspiration.
Imagine crafting your very own tool rest! Many woodworkers have done just that, transforming their projects with creativity and skill. One woodworker, Sam, built his own mini lathe tool rest and now creates beautiful bowls. He said, “It feels great to make something unique!” His finished projects showcase stunning designs, inspiring others to try the DIY route. Below are a few success stories that show what creativity can do:
| Woodworker | Project Description |
|---|---|
| Sam | Handcrafted bowl using a personal lathe tool rest. |
| Lisa | Unique candle holders made with her custom tool rest. |
| Tom | Stylish wooden toys designed with a DIY lathe setup. |
These stories show how building your own tool rest can lead to amazing projects. So, grab some tools, and let your imagination run wild!
Conclusion
In summary, a DIY mini lathe tool rest is a fun and useful project. It helps you create smoother surfaces and better shapes in your work. By using simple materials, you can make one at home. We encourage you to explore more about tool rest designs and get started on your own project. Happy crafting!
FAQs
Sure! Here Are Five Related Questions On The Topic Of Diy Mini Lathe Tool Rests:
Sure! Here are five questions about DIY mini lathe tool rests: 1. What is a DIY mini lathe tool rest? A DIY mini lathe tool rest is a flat support for tools that you make yourself. It helps you keep tools steady while you work. 2. How do you make a tool rest? You can make one from wood or metal. Cut it to the right length, then attach it to the lathe. 3. Why are tool rests important? Tool rests keep your tools steady. This helps you make better shapes when you’re turning wood. 4. Can I customize my tool rest? Yes! You can change its shape or size to fit your projects better. 5. What tools do I need to build a tool rest? You’ll need a saw, a drill, and some screws. These tools help you cut and put together your tool rest.
Sure! Please give me the question you want me to answer.
What Materials Are Best For Constructing A Durable Diy Mini Lathe Tool Rest?
For a strong DIY mini lathe tool rest, you can use hardwood like oak or maple. These woods are tough and last a long time. You can also use metal, like steel or aluminum, which is very strong. Make sure the base is heavy so it won’t move when you use it.
How Do You Determine The Optimal Height And Length For A Mini Lathe Tool Rest?
To find the best height for your mini lathe tool rest, you want it to be level with the center of your workpiece. This makes it easier to control your tools. For length, you should choose a size that covers your project but isn’t too long. We can adjust it until it feels comfortable for us to use. Always test it out and see what feels right!
What Design Features Should Be Incorporated To Ensure Stability And Ease Of Use In A Diy Mini Lathe Tool Rest?
To make a DIY mini lathe tool rest stable and easy to use, we should focus on a few key features. First, use strong materials like wood or metal to make it sturdy. Next, the base should be wide to prevent tipping over. We can also add adjustable parts so you can change the height and angle easily. Finally, make sure everything is smooth to help tools slide without getting stuck.
Are There Any Specific Techniques Or Tips For Attaching The Tool Rest Securely To A Mini Lathe?
To attach the tool rest to a mini lathe, first, make sure it fits snugly. You can use the lock knob to tighten it. Check that it’s level and not wobbly before you start. If it feels loose, tighten the knob more. Always double-check your setup before using the lathe to stay safe!
How Can I Customize A Diy Tool Rest For Specific Turning Projects Or Different Types Of Lathe Tools?
You can customize a DIY tool rest by adjusting its height and width. First, measure your lathe tools to see how long they are. Next, use wood or metal to build the tool rest to fit those sizes. You can also add angles to better support different shapes you want to create. This way, your tool rest works great for every project!
{“@context”:”https://schema.org”,”@type”: “FAQPage”,”mainEntity”:[{“@type”: “Question”,”name”: “Sure! Here Are Five Related Questions On The Topic Of Diy Mini Lathe Tool Rests:”,”acceptedAnswer”: {“@type”: “Answer”,”text”: “Sure! Here are five questions about DIY mini lathe tool rests: 1. What is a DIY mini lathe tool rest? A DIY mini lathe tool rest is a flat support for tools that you make yourself. It helps you keep tools steady while you work. 2. How do you make a tool rest? You can make one from wood or metal. Cut it to the right length, then attach it to the lathe. 3. Why are tool rests important? Tool rests keep your tools steady. This helps you make better shapes when you’re turning wood. 4. Can I customize my tool rest? Yes! You can change its shape or size to fit your projects better. 5. What tools do I need to build a tool rest? You’ll need a saw, a drill, and some screws. These tools help you cut and put together your tool rest.”}},{“@type”: “Question”,”name”: “”,”acceptedAnswer”: {“@type”: “Answer”,”text”: “Sure! Please give me the question you want me to answer.”}},{“@type”: “Question”,”name”: “What Materials Are Best For Constructing A Durable Diy Mini Lathe Tool Rest?”,”acceptedAnswer”: {“@type”: “Answer”,”text”: “For a strong DIY mini lathe tool rest, you can use hardwood like oak or maple. These woods are tough and last a long time. You can also use metal, like steel or aluminum, which is very strong. Make sure the base is heavy so it won’t move when you use it.”}},{“@type”: “Question”,”name”: “How Do You Determine The Optimal Height And Length For A Mini Lathe Tool Rest?”,”acceptedAnswer”: {“@type”: “Answer”,”text”: “To find the best height for your mini lathe tool rest, you want it to be level with the center of your workpiece. This makes it easier to control your tools. For length, you should choose a size that covers your project but isn’t too long. We can adjust it until it feels comfortable for us to use. Always test it out and see what feels right!”}},{“@type”: “Question”,”name”: “What Design Features Should Be Incorporated To Ensure Stability And Ease Of Use In A Diy Mini Lathe Tool Rest?”,”acceptedAnswer”: {“@type”: “Answer”,”text”: “To make a DIY mini lathe tool rest stable and easy to use, we should focus on a few key features. First, use strong materials like wood or metal to make it sturdy. Next, the base should be wide to prevent tipping over. We can also add adjustable parts so you can change the height and angle easily. Finally, make sure everything is smooth to help tools slide without getting stuck.”}},{“@type”: “Question”,”name”: “Are There Any Specific Techniques Or Tips For Attaching The Tool Rest Securely To A Mini Lathe?”,”acceptedAnswer”: {“@type”: “Answer”,”text”: “To attach the tool rest to a mini lathe, first, make sure it fits snugly. You can use the lock knob to tighten it. Check that it’s level and not wobbly before you start. If it feels loose, tighten the knob more. Always double-check your setup before using the lathe to stay safe!”}},{“@type”: “Question”,”name”: “How Can I Customize A Diy Tool Rest For Specific Turning Projects Or Different Types Of Lathe Tools?”,”acceptedAnswer”: {“@type”: “Answer”,”text”: “You can customize a DIY tool rest by adjusting its height and width. First, measure your lathe tools to see how long they are. Next, use wood or metal to build the tool rest to fit those sizes. You can also add angles to better support different shapes you want to create. This way, your tool rest works great for every project!”}}]}