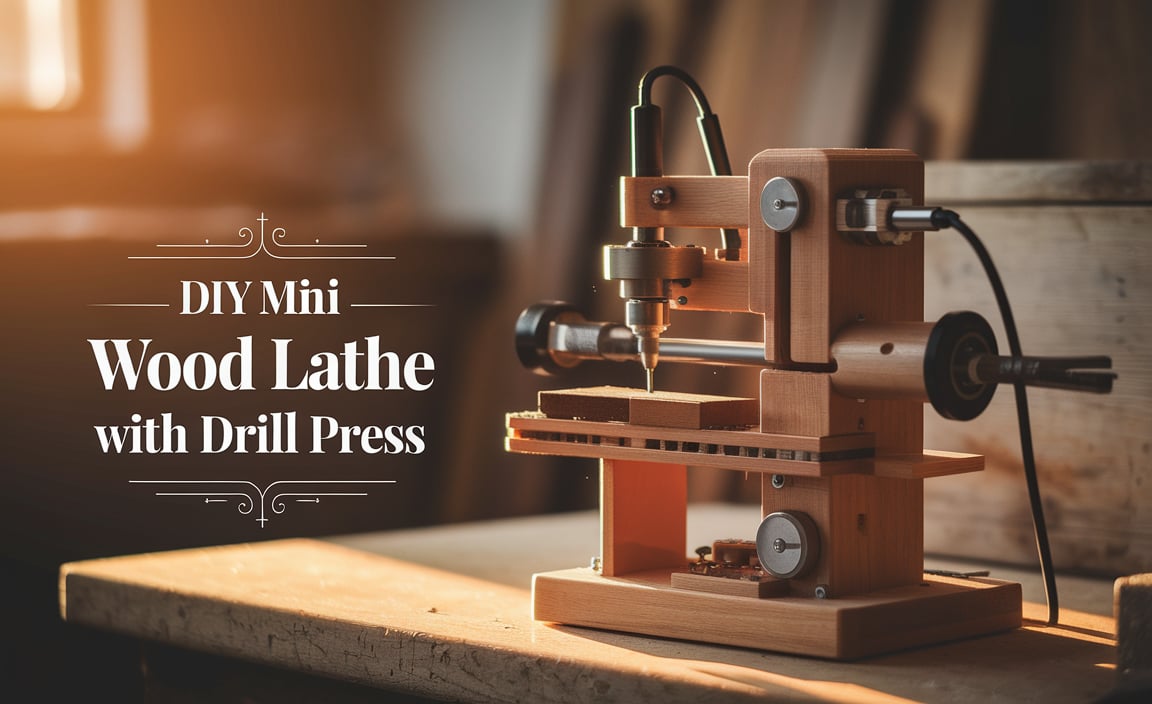
Are you wondering if you can turn a drill press into a functional mini wood lathe? Yes, you absolutely can! With a few simple modifications and readily available materials, you can transform your drill press into a surprisingly capable DIY mini wood lathe, perfect for small turning projects. This guide will show you exactly how to do it safely and effectively.
Making your own tools can be incredibly rewarding, especially when you need something specific but don’t want to break the bank. Many woodworkers and DIY enthusiasts find themselves wishing for a small lathe to create custom knobs, pens, or small decorative items. Buying a dedicated mini lathe can be an expense, and sometimes, you might already have the perfect base for a DIY version hiding in your workshop: a drill press!
It might sound a little unconventional, but with the right approach, a drill press can be safely and effectively adapted into a mini wood lathe. We’ll guide you through each step, from selecting the right components to the actual assembly and safe operation. By the end of this article, you’ll have a clear roadmap to building your own essential DIY mini wood lathe.
Why Build a DIY Mini Wood Lathe with a Drill Press?
The thought of converting a drill press into a lathe might raise a few eyebrows, but there are some compelling reasons why this DIY project is not just possible, but often a smart choice for hobbyists. Whether you’re on a tight budget, have limited workshop space, or simply enjoy the challenge of building your own tools, a drill press conversion offers a unique solution.
- Cost-Effective: This is usually the biggest driver. If you already own a drill press, the cost of converting it is significantly less than purchasing a new mini lathe. You’ll mainly be buying a few specialized parts and some scrap wood.
- Space-Saving: A drill press can perform many functions, and by converting it, you avoid needing a separate, dedicated machine for small turning tasks. This is a huge advantage for those with compact workshops.
- Skill-Building: The process of designing and building this setup is a fantastic learning experience. You’ll gain hands-on skills in tool adaptation and understanding mechanical principles.
- Satisfying Project: There’s a unique sense of accomplishment that comes from creating a functional tool from existing equipment. It’s a testament to your ingenuity and resourcefulness as a maker.
- Ideal for Small Projects: For turning pens, small bowls, handles, or decorative elements, a mini lathe built from a drill press is perfectly up to the task. It excels at smaller, less demanding turning work.
Understanding the Basics: How it Works
The core idea behind turning a drill press into a lathe is simple: we need to hold the wood to be turned and provide a way for it to spin at a controlled speed, while a sharp tool removes material. Your drill press already excels at providing controlled, consistent rotation (the drill bit) and a stable base. We just need to adapt it for wood.
The drill press motor and chuck will serve as the “headstock,” spinning the wood. The drill press table will be modified to support the “tool rest,” where you’ll hold your turning chisels. For stability, we’ll often add a tailstock or a support system. The overall concept is to create a stable platform that allows for precise rotation and tool placement.
This setup primarily uses the drill press for its spindle and motor. The depth adjustment on the drill press is essentially unused, as we’ll be controlling the cutting action manually with the tool rest. The key is to keep everything aligned and secure, ensuring smooth rotation and precise cuts.
Essential Components & Tools
Converting your drill press requires a few specific items. Don’t worry, most of these are quite common or easy to source. Remember, safety first! Ensure any wood you use is solid and free from cracks or knots that could cause it to break apart during turning.
Materials You’ll Need:
- Wood Blanks: Start with a stable, dense hardwood like maple, oak, or cherry. Avoid softwoods or plywood for your first attempts.
- Lathe Tool Rest: This is a crucial piece. You can buy a simple, adjustable tool rest designed for mini lathes, or you can fabricate one from a sturdy piece of metal (like a 1×2″ steel bar) and mount it onto an angle bracket. The length of the rest should be sufficient to support your tools comfortably.
- Mounting Hardware: This will include bolts, nuts, washers, and potentially some wood blocks or metal plates to securely attach the tool rest to the drill press table.
- Wood for Base/Support (Optional but Recommended): If your drill press table isn’t very robust, you might need to build a supplementary support.
- Wood Screws: To assemble any custom support or mounting blocks.
- Center Adapters or Drive Centers: To attach your workpiece securely to the drill press chuck (headstock). These can be screw centers that you thread into the wood or spur drives that impale the wood.
- Live Center or Revolving Tailstock Center: This supports the other end of the workpiece and spins freely. This is vital for stability and preventing wobbling. You can adapt a tailstock from a small commercial lathe or build a simple, sturdy support that allows the wood to spin.
- Sandpaper: Various grits for finishing your turned pieces.
Tools You’ll Need:
- Drill Press: Ensure it’s in good working order. A drill press with a variable speed setting is ideal.
- Wood Lathe Chisels/Gouges: For beginners, a few basic tools like a spindle gouge, a skew chisel, and a parting tool are essential. Look for sets specifically designed for mini lathes.
- Wrenches and Sockets: For tightening hardware.
- Measuring Tape and Ruler: For precise placement.
- Safety Glasses: Non-negotiable! Always wear them.
- Dust Mask: Wood dust can be harmful.
- Hearing Protection: Drill presses can be noisy.
- Clamps: To hold pieces during assembly if needed.
- Woodworking Pencils: For marking measurements.
- Optional Fabricating Tools: If you’re making your own tool rest, you might need a metal saw, drill bits for metal, and possibly a grinder.
Step-by-Step DIY Mini Wood Lathe Conversion
Now, let’s get down to building! Remember to work methodically and prioritize safety at every stage. This guide assumes you have a standard drill press with an adjustable table.
Step 1: Prepare Your Drill Press
First, ensure your drill press is unplugged. Clean the drill press table. Remove any chuck key or accessories that could fall off or interfere with the operation. Check that the drill press runs smoothly and the speed adjustments work correctly. If your drill press allows for the head to be rotated, consider how this might affect your setup – for a lathe, a fixed, perpendicular head is usually best.
Speed Considerations: For turning wood, lower RPMs are generally safer and more effective, especially for beginners and with a DIY setup. High speeds can cause thin pieces to shatter. Aim for speeds typically between 500-1500 RPM. If your drill press has extensive speed ranges, start at the lowest setting. You can find general guidance on woodturning speeds from resources like the Woodworking Network.
Step 2: Mount the Tool Rest
This is where your drill press table becomes the backbone of your lathe. You need to securely attach a sturdy tool rest parallel to the drill press spindle.
- If Using a Commercial Tool Rest: These often have a mounting post. You can drill a hole in your drill press table (if it’s metal, use appropriate metal bits and lubrication) or create a wooden block that clamps firmly to the table and has a hole to accept the post. Ensure the post is vertical and the rest is at a comfortable working height (usually a few inches below the center of where your workpiece will be).
- If Fabricating a Tool Rest:
- Take a sturdy piece of flat metal (e.g., 1×2 inch steel bar).
- Attach it to a robust angle bracket.
- Mount this bracket to a solid block of wood or a metal plate.
- The block/plate should then be securely clamped, screwed, or bolted to your drill press table. Position it so the metal rest extends towards the area where your workpiece will spin, running parallel to the spindle.
Crucial Point: The tool rest must be absolutely solid. Any wobble here will make turning impossible and dangerous. Ensure the height is adjustable or set at a good working level – the edge of the tool rest should be just slightly below the center line of the rotating workpiece. This allows your chisels to pivot and cut effectively.
Step 3: Create the Headstock (Drill Press Chuck) Setup
The drill press chuck is your primary driving mechanism. You need a way to attach your wood securely to this.
- Screw Centers: For smaller, solid pieces of wood, a screw center is excellent. You drill a pilot hole in the exact center of your wood blank, then thread the screw center into it. The threaded part of the center grabs the wood.
- Spur Drives: These have sharp spurs that are driven into the end of the wood. You then use a separate “live center” in the tailstock to push the wood against the spur drive, making it rotate.
Insert your chosen drive center into the drill press chuck and tighten it firmly. Many DIY setups use a screw center that is spun directly in the chuck, or a spur drive that is held in the chuck.
Step 4: Implement the Tailstock (Support)
This is arguably the most critical part for stability and safety. The tailstock supports the other end of the wood blank and allows it to spin freely. Without it, the wood will wobble violently or even break loose.
- Option A: A Simple Fixed Support: For very short pieces, a simple block of wood or a sturdy metal stand placed under the end of the wood blank can provide minimal support. However, this is not ideal as it doesn’t spin freely with the wood, causing friction and uneven turning.
- Option B: A Live Center Setup: This is the preferred method. You need a “live center” – a pointed piece of metal mounted on a bearing that spins freely.
- DIY Tailstock Mount: You can create a simple tailstock by taking a sturdy block of wood or metal and mounting a live center into a hole drilled in it.
- Securing the Tailstock: This mount needs to be securely fastened to the drill press table or a supplementary base, positioned directly opposite the headstock. The point of the live center should align perfectly with the center of the wood and be firmly pressed into the end of the blank. You can use another screw or a bolt mechanism to apply pressure to the live center, pushing it into the wood.
- Commercial Mini Lathe Tailstock: If you can find a small, used, or inexpensive mini lathe tailstock, it can be adapted. You would then need to create a base to mount this tailstock securely to your drill press setup.
Alignment is Key: Ensure your headstock (drill press chuck with drive) and tailstock (live center) are perfectly aligned. Any misalignment will cause stress on the workpiece and could lead to failure.
Step 5: Workpiece Mounting and First Spin
Once your tool rest and tailstock are in place, it’s time to mount your first workpiece. Select a good quality, stable piece of hardwood, cut to a manageable length. Ensure it’s squared up as much as possible.
- Attach the Drive Center: If using a screw center, screw it firmly into the end of your wood blank. If using a spur drive, use a mallet to gently hammer the spurs into the wood.
- Mount in Headstock: Place the end with the drive center into the drill press chuck and tighten securely.
- Contact Tailstock: Position the live center into the other end of the wood blank. Apply gentle pressure to secure it, ensuring it’s seated properly.
- Initial Spin Test: With the drill press unplugged, manually rotate the wood by hand to ensure it spins freely without hitting anything. Check all clearances.
- Slow Speed Test: Plug in the drill press. Start the motor at the lowest speed setting. Observe the rotation carefully. Listen for any unusual noises and check for wobbling. The wood should spin relatively smoothly. If there’s excessive wobble, stop immediately and reassess your tailstock alignment and workpiece mounting.
Step 6: Safety Checks and Adjustments
Before you even think about touching the wood with a chisel, perform these critical safety checks:
- Tool Rest Stability: Push firmly on the tool rest. It should not budge.
- Workpiece Security: Grab the spinning wood very gently (wearing gloves is NOT recommended here and can be dangerous, but be extremely cautious if you must touch it). It should feel very secure.
- Tailstock Pressure: Ensure the tailstock is applying enough pressure to keep the wood from moving, but not so much that it prevents free spinning or strains the drill press motor.
- Clearance: Ensure there’s ample clearance between the spinning wood, the tool rest, the drill press column, and your hands.
- Emergency Stop: Know exactly where your drill press’s power switch is and be ready to hit it immediately if anything goes wrong.
Tool Rest Height: Adjust the tool rest so its top surface is just below the center line of the spinning workpiece by about 1/8 inch. This allows your tools to “catch” the wood and remove shavings effectively.
External Resource: For more in-depth insights into safe workshop practices, the National Institute for Occupational Safety and Health (NIOSH) provides valuable information on woodworking machinery safety.
Step 7: Making Your First Turning Cuts
With everything set up and all safety checks completed, you can start turning. Remember, go slow and steady.
- Grip Your Tools: Hold your wood chisels firmly with both hands.
- The First Cut (Scraping): For the very first cut, especially on a rough blank, a scraper tool can be useful. Rest the tool on the tool rest and gently move it into the spinning wood to begin shaping.
- Using a Gouge/Chisel: Once the blank is somewhat round, you can use a spindle gouge. Rest the shank of the gouge on the tool rest. With the tool handle angled slightly upwards, present the bevel of the gouge to the spinning wood. Let the tool do the work; don’t force it.
- Controlled Movements: Move the tool smoothly along the workpiece, maintaining consistent contact with the tool rest. Avoid digging the tool in too deeply all at once.
- Work from End to End: Generally, you’ll work from one end of the blank toward the other, gradually shaping it.
- Tool Rest Position: As you shape the wood, you might need to slightly adjust the tool rest’s position to maintain the optimal cutting angle.
- Speed Adjustments: As the wood becomes rounder and more balanced, you might be able to slowly increase the drill press speed, but always err on the side of caution.
Beginner Tip: For your first project, aim to simply round a square piece of wood. This will help you get a feel for the tools and the machine without the complexity of shaping.
Table: Drill Press Lathe vs. Commercial Mini Lathe – Pros and Cons
To help you understand where the DIY drill press lathe shines and where it has limitations, here’s a quick comparison:
| Feature | DIY Drill Press Lathe | Commercial Mini Lathe |
|---|---|---|
| Cost | Very Low (if you own a drill press) | Moderate to High |
| Space Required | Uses existing drill press footprint | Requires dedicated space |
| Power & Speed Control | Limited by drill press motor and settings | Often more powerful, wider speed range, sometimes digital |
| Stability & Rigidity | Can be very good if built robustly, but may be less rigid than a dedicated machine. | Generally high due to engineered design and heavier base. |
| Tool Rest System | DIY required, might lack fine adjustment | Designed for optimal performance and adjustment |