Build a functional DIY mini wood lathe from an electric motor with this proven guide. It’s an affordable way to start turning wood, perfect for small projects and learning lathe basics safely.
Do you dream of shaping wood into beautiful bowls or intricate spindles, but feel overwhelmed by the cost of a professional lathe? You’re not alone. Many hobbyists find the price of commercial lathes hard to justify, especially when just starting out. But what if you could build your own capable mini wood lathe using readily available parts and an old electric motor? This guide will show you exactly how to do that, step-by-step. We’ll take a common household item and transform it into a reliable tool for your workshop, proving that you don’t need deep pockets to start turning wood. Get ready to discover a rewarding DIY project that will unlock your creativity!
Why Build a DIY Mini Wood Lathe?
Building your own mini wood lathe might seem daunting, but it’s a fantastic project for several reasons. Firstly, it’s incredibly cost-effective. You can often salvage key components, drastically reducing the expense compared to buying a new machine. This makes it accessible for beginners and those on a tight budget. Secondly, it’s a superb learning experience. You’ll gain a deeper understanding of how lathes work, mechanical assembly, and basic electrical safety. This knowledge is invaluable if you ever decide to upgrade to a commercial machine or tackle other DIY workshop projects. Most importantly, it’s a confidence booster! Successfully building a functional tool from scratch is incredibly rewarding and opens up a world of possibilities for creating unique wooden items.
Key Benefits of a DIY Mini Lathe:
- Cost Savings: Significantly cheaper than buying a new lathe.
- Educational Value: Learn about mechanics, motors, and tool building.
- Customization: Tailor it to your specific needs and available space.
- Sense of Accomplishment: The pride of building something with your own hands.
- Skill Development: A great starting point for learning woodturning techniques.
Essential Components and Tools
Before we dive into the build, let’s gather everything you’ll need. Having all your parts and tools ready makes the building process smooth and enjoyable. We’ll focus on commonly available items, aiming for a simple yet effective design.
The Heart: Electric Motor
The motor is the powerhouse of your lathe. You’ll want a motor that has enough torque to spin wood effectively but isn’t excessively powerful for a mini lathe. A common choice is a salvaged washing machine motor, a treadmill motor, or even a repurposed bench grinder motor (though ensure it’s suitable for continuous rotation). Aim for a motor in the range of 1/4 to 1/2 horsepower (HP). Most motors operate at high RPMs (e.g., 1750 or 3450 RPM), and we’ll address speed reduction later if needed.
The Spine: Bed and Support Structure
The bed of the lathe provides a stable platform for the tool rest and the tailstock. For a mini lathe, a sturdy piece of wood, such as a 2×4 or 2×6 board, often serves as the bed. You’ll also need material for the headstock and tailstock – blocks of wood or metal are common. Mounting the motor securely to the bed is also crucial for vibration reduction.
The Turning Point: Headstock and Tailstock
- Headstock: This houses the drive center that spins the workpiece. For a DIY build, you can create a simple headstock by mounting a piece of metal (like a substantial bolt or a threaded rod) into a block of wood. This threaded rod will be where your drive center or chuck attaches.
- Tailstock: The tailstock supports the other end of the workpiece. It typically houses a live center or a drill chuck if you plan to drill into the end of your workpiece. Similar to the headstock, it will likely be a wooden block with a way to adjust its position along the bed.
Tool Rest: For Support and Control
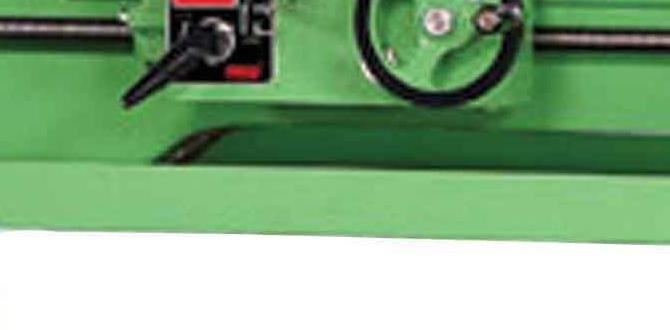
The tool rest is where you’ll hold your chisels and gouges as they shape the wood. This needs to be sturdy and adjustable. A piece of metal angle iron or a thick steel rod mounted on an adjustable post works well. You’ll want to be able to move it closer or further from the workpiece and adjust its height.
Drive and Live Centers: Gripping the Wood
- Drive Center: Also known as a spur center, this attaches to the headstock and bites into the wood to make it spin. You can buy these or make a simple one from a bolt.
- Live Center: This attaches to the tailstock. It spins with the wood, reducing friction and providing a stable pivot point. A simple screw with a rounded or ball-bearing head can sometimes suffice for lighter work.
Electrical Components
For safety and functionality, you’ll need:
- A power cord with a plug
- A switch (toggle or rocker switch)
- Wire connectors (wire nuts or crimp connectors)
- Electrical tape
- A mounting bracket for the motor
- Possibly a capacitor (if your motor requires one for starting/running)
Basic Tools Required:
Here’s a list of tools you’ll likely need for this project:
- Measuring tape
- Pencil
- Saw (hand saw, jigsaw, or miter saw)
- Drill and drill bits
- Screwdrivers
- Wrenches or socket set
- Clamps
- Sandpaper
- Safety glasses (essential!)
- Hearing protection
Step-by-Step: Building Your DIY Mini Wood Lathe
Let’s get building! We’ll break this down into manageable steps to make the process clear and easy to follow.
Step 1: Preparing the Motor
First, ensure your electric motor is functional. If it’s salvaged, clean it up. Identify the mounting holes. Many motors come with a shaft that might need adapting. If your motor shaft is smooth, you might need to press or thread a drive pulley onto it. If it has a threaded shaft, you can directly thread on a faceplate or a custom mounting for your drive center.
Safety First: If you’re not comfortable with basic electrical wiring, get help from someone who is. Always disconnect power before working on wiring. For detailed information on motor types and wiring, consult resources like the U.S. Department of Labor’s Occupational Safety and Health Administration (OSHA) guidelines on machinery guarding and electrical safety.
Step 2: Constructing the Bed
Take your chosen lumber (e.g., a 2×6 or 2×8) and cut it to a suitable length – typically 3 to 4 feet for a mini lathe. This will be the main bed. Sand down any rough edges.
Step 3: Mounting the Headstock and Motor
The headstock will be the fixed end of your lathe. You can create this by firmly attaching a sturdy block of wood (e.g., a 4×4 post) to the end of the bed. Drill a hole in this block to accommodate the motor’s mounting points, ensuring the motor shaft extends outwards. Secure the motor tightly to this block using bolts, nuts, and washers. Make sure it’s perfectly aligned so the shaft is parallel to the bed.
For the drive mechanism, you’ll need something to connect the motor shaft to your workpiece. A common method is to use a v-belt pulley on the motor shaft. You can then mount a larger pulley onto a threaded rod that will act as your drive spindle, protruding from the headstock block. The larger pulley on the spindle, driven by a smaller pulley on the motor shaft via a v-belt, will reduce the RPMs and increase torque, making it more suitable for woodturning.
Tip: Ensure the motor is mounted securely. Any wobble will translate into vibrations during operation, which is undesirable. Use large washers to distribute the load and a locknut to prevent bolts from loosening.
Step 4: Building the Tailstock
The tailstock needs to be movable along the bed to accommodate workpieces of different lengths. Create a tailstock by building a compact wooden block assembly that can slide or be clamped onto the bed. A simple approach is to use a base piece that’s wider than the bed and has a slot or channel so it can slide along. A taller block on top of this base will hold your tailstock center.
To create the adjustable tailstock spindle, drill a hole through the upper block and insert a threaded rod. You can then attach a live center or a drill chuck to the end of this rod. A handwheel or wing nut can be used to advance or retract the live center into the workpiece.
Step 5: Crafting the Tool Rest
The tool rest needs to be adjustable and strong. A simple design involves a metal rod (like a 1/2-inch steel rod) that’s threaded at one end. This threaded end passes through a hole in an adjustable mounting bracket. The bracket itself can be a simple wooden block with a slot that allows it to slide and be clamped anywhere along the bed. The tool rest rod is what your chisels will rest on.
You’ll want to be able to pivot the tool rest slightly and adjust its height and distance from the workpiece. The adjustable bracket allows you to position it correctly for different turning operations.
Step 6: Wiring the Motor and Switch
This is a critical safety step. You’ll need to wire the motor to a power cord and an on/off switch. Most AC motors have three wires: hot, neutral, and ground. If your motor has a capacitor, you’ll need to wire that in according to the motor’s diagram.
General Wiring Steps (Consult your motor’s manual for specifics!):
- Connect the hot wire from the power cord to one terminal of the switch.
- Connect the other terminal of the switch to the motor’s hot terminal.
- Connect the neutral wire from the power cord directly to the motor’s neutral terminal.
- Connect the ground wire from the power cord to the motor’s ground terminal (usually a green screw).
- Ensure all connections are secure and insulated with wire connectors and electrical tape.
- Mount the switch in a convenient location on the lathe bed.
For More Detailed Electrical Safety: The Electrical Safety Foundation International (ESFI) offers excellent resources on electrical safety for DIY projects and homeowners.
Step 7: Assembling the Drive System
Now, connect the motor pulley to the spindle pulley using a v-belt. Ensure the belt has proper tension – not too loose, not too tight. The speed reduction from the pulleys is crucial. A good starting ratio might be a 1:3 or 1:4 ratio (motor pulley diameter to spindle pulley diameter).
Example Pulley Setup:
| Component | Description | Purpose |
|---|---|---|
| Motor Pulley | Small diameter pulley (e.g., 2 inches) | Connects to motor shaft, spins fast |
| Spindle Pulley | Large diameter pulley (e.g., 8 inches) | Connects to headstock spindle, spins slower |
| V-Belt | Appropriate size for pulleys | Transfers power from motor to spindle |
This pulley system can reduce a 1750 RPM motor down to around 400-500 RPM, which is a good starting speed for faceplate turning or small bowls.
Step 8: Final Checks and Testing
Before turning on the motor, double-check all connections, bolts, and belt tension. Ensure the workpiece area is clear. Also, make sure your tool rest and tailstock are positioned correctly and securely clamped. Once everything looks good, plug it in, turn on the switch, and let the motor run. Listen for any unusual noises or vibrations. Check that the spindle spins true.
Safety Check: Ensure there are no exposed wires. The moving belt and pulleys should ideally be covered with a simple guard made from sheet metal or sturdy plastic for protection.
If your motor has a capacitor, ensure it’s wired correctly and safely enclosed. Capacitors can store a charge even when power is off, so handle them with care. Consult an electrician or experienced DIYer if you are unsure about any electrical step.
Operating Your DIY Mini Lathe Safely
Now that your lathe is built, let’s talk about using it. Safety is paramount when working with any power tool, especially one you built yourself.
Workpiece Mounting
For your first few tests, use small, lightweight pieces of wood. Secure them firmly between the drive center (headstock) and the live center (tailstock). Ensure the live center can be advanced just enough to put gentle pressure on the wood, but not so much that it stresses the motor or causes binding.
Tool Technique
Hold your chisels and gouges firmly against the tool rest. Let the tool do the cutting; don’t force it. Start with gentle cuts and gradually increase the depth as you become more comfortable. Always maintain three points of contact: the tool rest, the tool in your hands, and the workpiece. Never remove the tool rest while the lathe is spinning.
Essential Safety Gear:
- Safety Glasses: Absolutely non-negotiable. Wear them at all times.
- Dust Mask: Wood dust can be harmful.
- Hearing Protection: Motors and wood turning can be loud.
- No Loose Clothing or Jewelry: These can get caught in the spinning parts.
- Appropriate Footwear: Closed-toe shoes are a must.
Speed Considerations: Different wood types and workpiece sizes require different speeds. Larger workpieces and softer woods generally need slower speeds to prevent them from flying off. Smaller, denser pieces can often be turned at higher speeds. If your motor is direct drive without pulleys, it might spin too fast for safe woodturning. The pulley system described earlier is highly recommended for speed control.
Troubleshooting Common Issues
Even with a well-built lathe, you might encounter minor issues. Here are a few to be aware of:
| Problem | Possible Cause | Solution |
|---|---|---|
| Excessive Vibration | Motor not mounted securely; unbalanced workpiece; bent shaft. | Tighten motor mounts; ensure workpiece is centered and balanced; check shaft for straightness. |
| Belt Slipping | Belt too loose; worn belt or pulleys. | Adjust belt tension; replace worn components. |
| Motor Overheating | Motor too small for the task; prolonged continuous use; poor ventilation. | Reduce workload; allow motor to cool; ensure motor has adequate airflow. Consider a larger or more robust motor if this is frequent. |
| Workpiece Not Spinning True | Bent shaft; loose drive center; damaged center point. | Check and straighten spindle; ensure drive center is tight; repair or replace drive/live centers. |
If you experience significant electrical issues or the motor doesn’t run, retrace your wiring steps carefully. Always prioritize safety; if in doubt, consult a qualified electrician.
FAQ: Your Beginner Questions Answered
Here are some common questions from folks just starting with DIY lathes:
Q1: What kind of electric motor is best for a DIY mini wood lathe?
A1: A 1/4 to 1/2 horsepower AC induction motor is ideal. Motors from old washing machines, treadmills, or even sewing machines can work. Look for one with a relatively low RPM (e.g., 1750 RPM) if possible, though pulley systems can adjust speed.
Q2: How safe is it to build and use a DIY lathe?
A2: It can be very safe if built and operated correctly. Always wear safety glasses, use guards for moving parts, and understand the electrical connections. Never compromise on safety measures.
Q3: What’s the minimum size of wood I can turn on this lathe?
A3: This depends on the motor power and the rigidity of your build. Typically, you can turn small items like pens, small bowls, or spindles. For larger projects, a more robust commercial lathe is recommended.
Q4: Do I really need a belt and pulley system? Can’t I just attach the wood directly to the motor shaft?
A4: While you could attach directly, it’s generally not recommended for woodturning. A pulley system offers crucial speed reduction, which increases torque (the turning force) and allows for safer operation, especially with larger or softer woods. Direct drive from many typical motors would be too fast and lack the necessary power.