Build your own DIY mini wood lathe kit to shape wood on a small scale. This guide provides essential steps and considerations for a functional, beginner-friendly project, perfect for small workshops and intricate projects.
Ever dreamed of shaping beautiful wooden pieces right in your own workshop, but felt overwhelmed by the cost of professional tools? You’re not alone! Many woodworking enthusiasts hit this snag. Buying a quality mini wood lathe can be a big investment, especially when you’re just starting out or have limited space. But what if you could build one yourself? A DIY mini wood lathe kit offers a fantastic, budget-friendly way to get your hands into turning. It’s a project that’s both incredibly practical and deeply rewarding. Imagine creating custom parts, delicate ornaments, or unique handles with a tool you built with your own hands. This guide is your personal roadmap, breaking down the process of building a DIY mini wood lathe kit into simple, manageable steps. We’ll cover everything from choosing your components to assembly, ensuring you have the confidence and knowledge to bring your lathe to life. Get ready to discover the satisfaction of DIY machining!

Why Build a DIY Mini Wood Lathe Kit?
The allure of a DIY mini wood lathe kit isn’t just about saving money, though that’s a huge perk. It’s about understanding the mechanics, gaining valuable skills, and creating a tool tailored to your specific needs. For beginners, it’s an unparalleled learning experience. You’ll explore the fundamental principles of lathe operation and construction in a way that simply reading a manual or watching a video can’t replicate.

Key Advantages of a DIY Approach:
Cost-Effectiveness: Purchasing all the components individually and assembling them often costs significantly less than buying a pre-made mini lathe.
Customization: You can design your lathe to fit your workspace, power requirements, and specific project needs. Want it more compact? Need a different motor speed? You control the design.
Learning Experience: Building the lathe from scratch provides an intimate understanding of how it works, from the motor and drive system to the ways and tailstock. This knowledge is invaluable for maintenance and troubleshooting later on.
Skill Development: This project sharpens your measuring, cutting, drilling, and assembly skills, which are transferable to many other DIY and woodworking endeavors.
Sense of Accomplishment: There’s immense satisfaction in creating a functional tool that allows you to produce other creative works.
Essential Components of Your DIY Mini Wood Lathe Kit
Before you begin construction, it’s crucial to understand the core parts that make up a functional wood lathe. For a mini lathe, these components are scaled down but operate on the same principles. Think of this as your essential shopping list and blueprint.
The Bed
This is the foundation of your lathe, providing a stable platform for all other components. It needs to be rigid and flat to ensure accurate turning.
Materials:
Thick angle iron
Extruded aluminum profiles
Solid wood beams (with proper bracing for stability)
Considerations: The length of the bed determines the maximum workpiece length you can turn. Rigidity is paramount to minimize vibration.
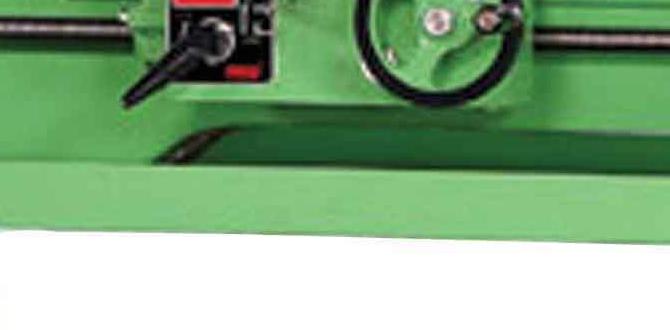
The Headstock
This houses the motor and the spindle that rotates your workpiece. It’s where the cutting action starts.
Components:
Motor: For a mini lathe, a 1/4 HP to 1/2 HP motor is generally sufficient. Consider variable speed options if your budget allows.
Drive Motor Pulley: Connects the motor shaft to the belt.
Spindle: The shaft that the workpiece is mounted on. It needs to be threaded to accept faceplates and drive centers. Look for a sturdy rod or rod designed for lathe spindles.
Headstock Bearing(s): To support the spindle and allow smooth rotation. Pillow block bearings are a common and accessible choice for DIY builds.
Headstock Housing: A bracket or frame to mount the motor and bearings securely.
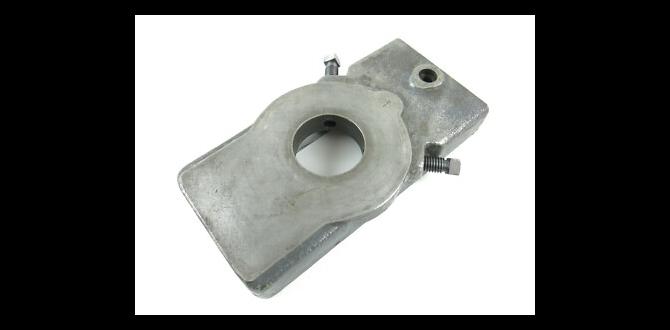
The Tailstock
This part is positioned at the opposite end of the headstock and typically supports the free end of longer workpieces, preventing them from sagging. It can also hold drilling bits for boring operations.
Components:
Tailstock Body: A housing that slides along the bed.
Quill: A movable rod within the tailstock that extends and retracts, usually operated by a handwheel.
Tailstock Bearing (optional but recommended): For smoother movement along the bed.
Mounting Hardware: To secure it to the bed.
The Tool Rest
This is a simple but critical component that provides a support for your turning tools. It allows you to maintain a consistent cutting angle relative to the workpiece.
Design: A simple steel rod or a shaped piece of metal mounted to an adjustable post that slides along the bed.
Key Feature: It must be adjustable in height and position along the bed.
The Drive Center and Live Center (Optional but Recommended)
Drive Center: This is mounted on the headstock spindle and bites into the end of the workpiece, transferring the rotational force from the motor. A screw-in type is common for DIY builds.
Live Center: This is typically mounted in the tailstock quill and has a bearing that allows it to spin freely with the workpiece, reducing friction and preventing the wood from binding.
Power Transmission
How the motor’s power gets to the spindle.
Belt Drive: The most common method for mini lathes. A belt connects the motor pulley to a pulley on the spindle. Different pulley sizes allow for different speed ratios.
Planning Your DIY Mini Wood Lathe Kit Project
A well-thought-out plan is the bedrock of any successful DIY build. For a mini wood lathe, this means sketching out your design, gathering the right materials, and ensuring you have the necessary tools and safety gear.
Step 1: Design and Sketching
Before buying a single bolt, grab some paper and start sketching.
Determine your size: How much space do you have? What’s the largest piece you envision turning? This dictates the bed length and overall footprint.
Component placement: Where will the motor, headstock, and tailstock sit? Ensure there’s enough travel for the tailstock and that the tool rest can reach most of the turning area.
Material choices: Consider the strengths and weaknesses of different materials for the bed (e.g., stability of steel vs. ease of working wood).
Motor power: A 1/4 HP motor is a good starting point for very small projects. A 1/2 HP motor offers more versatility.
Speed Control: Will you use a fixed-speed motor with interchangeable pulleys, or a variable speed setup using a speed controller? Variable speed offers more flexibility but adds complexity.
Step 2: Material and Component Sourcing
Once you have a clear design, it’s time to gather your parts.
Bed Material: Steel angle iron or robust aluminum extrusions are excellent choices for rigidity. Even a sturdy hardwood beam can work if properly constructed and reinforced.
Motor: Look for an old washing machine motor (often 1/4 HP to 1/2 HP) or purchase a new bench grinder motor. Ensure it has a suitable shaft for a pulley.
Bearings: Pillow block bearings are widely available online from industrial supply stores or on auction sites. Ensure they match the diameter of your spindle rod.
Spindle and Rods: Steel rods for the spindle and tailstock quill. Threaded rod can be useful for the quill mechanism.
Pulleys and Belt: Motorcycle or industrial V-belts and corresponding pulleys are readily available. Multiple pulley sizes will allow you to experiment with different speeds.
Hardware: Bolts, nuts, washers, and screws will be needed for assembly.
Optional: A simple lathe tool rest often uses a steel rod and a mounting bracket.
Step 3: Tooling Up: What You’ll Need
Having the right tools makes the build process much smoother and safer.
Measuring and Marking: Tape measure, ruler, marking knife, scribe, measuring squares.
Cutting: Hacksaw (for metal), handsaw or power saw (for wood), metal file.
Drilling: Drill press (highly recommended for accuracy) or a hand drill, various drill bits for metal and wood.
Assembly: Wrenches, screwdrivers, clamps, possibly a vise.
Safety Gear: ESSENTIAL! Safety glasses, hearing protection, dust mask.
Step-by-Step Assembly Guide
Now that you’re prepared, let’s get building. This guide outlines a common approach. Remember, your specific design might require slight variations.
Step 1: Construct the Bed
For Steel Angle Iron: Cut two lengths of angle iron to your desired bed length. Cut shorter pieces to act as cross-braces. Weld or bolt these together to form a rigid, U-shaped or rectangular frame. Ensure everything is square.
For Aluminum Extrusion: Cut your extrusions to length and use specialized connectors or drill and bolt them together. Aluminum is lighter but may require more reinforcement for rigidity.
For Wood: Select hardwood like oak or maple. Lay out two parallel beams. Cut and attach cross-braces between them to form a strong, flat base. Consider adding a metal plate or even a section of angle iron on top of the wooden beams to act as a way for the headstock and tailstock to slide on, providing a smoother and more durable surface.
Ensure the top surface of your bed is perfectly flat and parallel. This is critical for proper alignment.
Step 2: Build the Headstock Assembly
This is where the magic of rotation happens.
1. Mount Bearings: Secure your chosen pillow block bearings to a sturdy mounting block (this could be a piece of metal, a solid wood block, or part of your lathe’s frame). The distance between the bearings should support your spindle rod with minimal flex.
2. Install Spindle: Slide your main spindle rod through the bearings. One end will be threaded for your drive center and faceplate.
3. Motor Mount: Fabricate a bracket or a base to securely mount your motor. This mount needs to be adjustable to allow for belt tensioning.
4. Pulley System:
Attach a pulley to the motor shaft.
Attach a larger pulley to the spindle rod. For stability and ease of mounting, you might need to create a collar or flange on the spindle that the pulley can be bolted to.
Ensure the pulleys are aligned perfectly to prevent belt wear and vibration.
5. Mount Headstock to Bed: Secure the entire headstock assembly (motor, bearings, spindle) to one end of your lathe bed. The spindle should be perfectly parallel to the bed.
Step 3: Construct the Tailstock Assembly
The tailstock provides support and can be used for drilling.
1. Create Sliding Mount: Build a base that can slide smoothly along the lathe bed. This might involve adding a piece of angle iron or a runner that fits the bed’s profile.
2. Build Tailstock Body: Construct a housing that will hold the quill. This could be a simple box section.
3. Quill Mechanism:
Drill a hole through the tailstock body to accept a rod for the quill.
Fashion a quill rod. Often, a threaded rod is used, with a handwheel attached to one end for turning to extend/retract the quill.
A simple way to make this adjustable is to drill and tap a hole in the tailstock body for a threaded rod, which then pushes or pulls the quill rod. Alternatively, a simple lever or screw mechanism can be used to lock the quill in place.
Ensure the quill rod can be securely locked in position.
4. Mount Tailstock to Bed: Attach the sliding mount to the tailstock body. Test its movement along the bed to ensure it slides freely but with enough friction to stay put.
Step 4: Fabricate the Tool Rest
Post: Create a vertical post that can slide along the bed. This might be a threaded rod or a smooth rod that fits into a clamp or bracket.
Rest Arm: Fashion a horizontal arm that mounts securely to the post. This arm is where your gouges and chisels will rest. A simple steel rod or a flat piece of metal with a slightly rounded edge works well.
Adjustability: Ensure the post can be clamped securely at any point along the bed, and that the height of the rest arm can be adjusted.
Step 5: Final Assembly and Alignment
Mount all Components: Position the headstock and tailstock on the bed. The headstock spindle needs to be perfectly parallel to the bed surface. The tailstock, when extended, should align perfectly with the headstock spindle. You can check this by removing the drive center and live center and seeing if they touch a ruler held between them at both ends, dead center.
Belt Tension: Install the belt and adjust the motor mount to achieve proper tension. Not too tight (strains bearings/motor) and not too loose (slips).
Testing: With extreme caution, plug in the motor at its lowest speed (if variable).
Check for smooth rotation.
Listen for unusual noises or vibrations.
Perform a test spin with a small piece of scrap wood mounted between centers.
Safety First! Operating Your DIY Lathe
Using any lathe, especially a DIY one, demands respect for safety. Your lathe is a tool that spins wood at high speeds, and mishaps can happen if you’re not careful.

Crucial Safety Practices:
Wear Safety Glasses: Always, no exceptions. Wood chips flying at high speed are dangerous.
Hearing Protection: Motors can be loud, and the turning process can contribute to noise.
Dust Mask: Wood dust can be harmful to inhale, especially fine particles.
Secure Your Work: Ensure your workpiece is firmly mounted between centers or on a faceplate.
Tool Rest Placement: Position the tool rest as close as possible to the workpiece, typically about 1/8 inch away, and never beyond the “danger zone” where it could catch the spinning wood.
Tool Sharpness: Use sharp tools. Dull tools require more force, making them more likely to catch.
Controlled Cuts: Make light, controlled cuts. Don’t try to remove too much material at once.
Stationary Machine: Never leave a running lathe unattended.
No Loose Clothing: Avoid loose sleeves, jewelry, or anything that could get caught. Tie back long hair.
Know Your Limits: If something feels wrong, stop the lathe and investigate. Don’t push yourself or the machine beyond its capabilities.
Grounding: Ensure your electrical setup is properly grounded. Consult with an electrician if unsure. For more information on electrical safety in the workshop, look for resources from organizations like the Occupational Safety and Health Administration (OSHA) at https://www.osha.gov/.
Maintaining Your DIY Mini Wood Lathe
Just like any tool, your DIY lathe will perform best and last longer with regular maintenance.
Routine Maintenance Checklist:
Regular Cleaning: Keep the bed, ways, and all moving parts clean of sawdust and debris.
Lubrication: Lubricate the tailstock quill and any sliding components regularly. A light machine oil is usually sufficient.
Belt Check: Inspect the drive belt for signs of wear or cracking. Replace if necessary. Check belt tension periodically.
Fastener Check: Periodically check that all bolts and screws are tight. Vibration can loosen them over time.
Motor Care: Ensure the motor’s cooling vents are clear of dust. Most small motors require little other maintenance.
* Bearing Inspection: Listen for any unusual noises from the headstock bearings. If they start to sound rough, they may need replacement.
Frequently Asked Questions About DIY Mini Wood Lathes
Q1: What is the minimum HP motor I should use for a DIY mini wood lathe?
A1: For very light turning of small projects (like pen blanks), a 1/4 HP motor can work. For more versatility and to handle slightly larger or denser woods, a 1/3 HP or 1/2 HP motor is recommended for a DIY mini wood lathe kit.
Q2: Can I use scrap wood for the lathe bed?
A2: While possible, it’s not ideal for long-term stability. If you use wood, choose a dense hardwood like oak or maple and ensure it’s well braced and very flat. Metal bedways (angle iron, aluminum extrusion) offer superior rigidity and durability.
Q3: How do I ensure my DIY lathe is accurate?
A3: Accuracy comes from precise construction. Ensure the bed is perfectly flat, and the headstock spindle is precisely parallel to the bed. The tailstock must also align perfectly with the headstock spindle. Measure twice, cut once!
Q4: What kind of wood is suitable for turning on a mini lathe?
A4: Most common hardwoods like maple, cherry, walnut, and oak are excellent for mini lathes. Softer woods like pine can be turned but are more prone to tear-out. Always ensure your wood is dry and properly prepared.
Q5: Is a variable speed motor necessary for a DIY mini wood lathe?
A5: Not strictly necessary, but highly advantageous. Variable speed allows you to adjust the RPM based on the wood’s size, shape, and hardness, which is crucial for safety and cut quality. You can achieve some speed control with different pulley sizes on a fixed-speed motor.
Q6: Where can I find plans for DIY mini wood lathes?
A6: Many online woodworking communities, forums, and YouTube channels offer free and paid plans for DIY mini wood lathes. Searching for “DIY mini lathe plans” will yield numerous results. Look for designs that match your skill level and available materials.
Conclusion: Your Turning Journey Begins!
Building your own DIY mini wood lathe kit is more than just a project