Build your own mini wood lathe from a salvaged motor for a cost-effective solution to start turning wood. This guide offers a clear, step-by-step process, focusing on safety and simplicity for beginners, turning an everyday motor into a functional woodworking tool.
Hey there, fellow makers! Daniel Bates from Lathe Hub here. Ever look at an old washing machine motor or a similar appliance motor and wonder if you could give it a new life? Many beginner woodworkers face the challenge of affording a proper lathe, which can be a significant investment. You might have a powerful motor sitting idle, and the idea of turning it into a mini wood lathe seems appealing but maybe a bit daunting. Don’t worry! We’re going to break down how to build a DIY mini wood lathe from a motor. It’s a project that’s both incredibly rewarding and surprisingly achievable, even for those new to the workshop. Get ready to transform that motor into your very own turning machine!
What is a Mini Wood Lathe and Why Build One?
A mini wood lathe is essentially a compact machine used for shaping wood into symmetrical forms. Think bowls, spindles, pens, and other turned items. Unlike larger, industrial lathes, mini lathes are designed for smaller projects and home workshops, making them more accessible. The core principle involves spinning a piece of wood at a controlled speed while a sharp tool is applied to shave away material, creating the desired shape.
Why build your own mini wood lathe from a motor? There are several compelling reasons:
- Cost Savings: New mini lathes can range from a couple of hundred to over a thousand dollars. Building one from a salvaged motor can drastically reduce this cost, often to just the price of some basic hardware and materials.
- Learning Experience: It’s an excellent hands-on project that teaches fundamental mechanical principles, motor integration, and basic woodworking tool construction.
- Customization: You can build it to suit your specific workshop space and project needs.
- Recycling and Sustainability: Give a new purpose to an old appliance motor, reducing waste.
- Satisfaction: There’s immense pride in using a tool you built with your own hands!
This project isn’t about creating a high-precision, heavy-duty machine. It’s about building a functional, safe lathe for smaller projects that can help you learn the craft of woodturning. We’ll focus on making it straightforward and robust enough for beginners to get started.
Understanding the Core Components
Before we dive into the build, let’s quickly look at the essential parts of a wood lathe:
- Motor: The power source that spins the workpiece. For this DIY build, we’ll be using a salvaged electric motor.
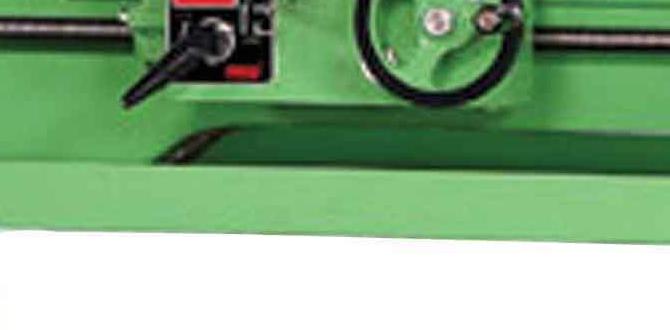
- Headstock: This houses the spindle and bearings where the workpiece is mounted. It’s driven by the motor.
- Tailstock: Located at the opposite end of the bed, it supports the free end of the workpiece and can hold drill bits for hollowing out bowls or spindles.
- Bed: The main structure of the lathe that connects the headstock and tailstock and provides a way for the tool rest to slide.
- Tool Rest: A sturdy bar that the cutting tool rests on, allowing you to guide it against the spinning wood.
- Faceplate/Chuck: This attaches to the spindle and holds the workpiece. A faceplate is good for larger, flat pieces, while a chuck grips thinner spindles.
For our DIY build, we’ll simplify some of these, focusing on the essential functions and making them as sturdy as possible for a mini setup.
Gathering Your Materials and Tools
This project requires a mix of salvaged items and readily available hardware. The better your starting materials, the better your finished lathe will be. Safety first! Always wear eye protection and gloves when working with tools and salvaged equipment.
Essential Materials:
- Electric Motor: A universal motor (like those from old sewing machines or power tools) or an AC induction motor (from washing machines, fans, or older appliances). Aim for something around 1/2 HP to 1 HP for decent power. Ensure it runs smoothly and has a shaft with a diameter suitable for mounting. Check out resources on motor types for DIY projects, such as those from Energy Star for efficient electric motors, to understand basic motor principles, though many DIY builds use older, less efficient motors.
- Bed Structure: Sturdy lumber (e.g., a 2×6 or 2×8, at least 3 feet long) or even a piece of angle iron or channel steel if you have metalworking skills.
- Headstock Spindle: This is crucial. You’ll need a threaded rod or a piece of steel rod that can be precisely centered. Sometimes, a threaded spindle from an old lathe or even a repurposed bolt can work if sturdy enough.
- Tailstock Spindle: Similar to the headstock spindle, but it often needs to be retractable. A threaded rod and a nut can create a simple screw mechanism.
- Bearings: Two pillow block bearings that fit your motor shaft and your headstock spindle. These reduce friction and allow smooth rotation.
- Mounting Hardware: Various bolts, nuts, washers, wood screws, and possibly some metal brackets.
- Faceplate or Chuck: For this DIY, a sturdy metal faceplate (a flat disc with a threaded hole in the center that matches your spindle or a separate adapter) is often the easiest to implement. You can purchase these from woodworking suppliers, or sometimes repurpose parts.
- Tool Rest Material: A thick steel rod or pipe, or a piece of flat steel bar.
- On/Off Switch: A simple toggle switch or paddle switch suitable for the motor’s power rating.
- Power Cord: A heavy-duty power cord.
- Optional: Speed controller (if using a universal motor), variable speed pulley system (for AC motors).
Essential Tools:
- Safety Gear: Safety glasses, work gloves, hearing protection (if using loud tools).
- Measuring Tools: Tape measure, ruler, caliper.
- Cutting Tools: Handsaw or power saw (circular saw, miter saw), drill with various drill bits (including bits for metal and wood), possibly a metal cutting saw or hacksaw.
- Fastening Tools: Screwdrivers, wrenches, socket set, pliers.
- Clamping: C-clamps, vise.
- Optional: Angle grinder (for shaping metal parts), bench vise, access to a welding machine (if using metal components).
The exact components will depend on the motor you find and your available materials. Don’t be afraid to adapt!
Step-by-Step Build Guide
Let’s get building! Remember to take your time and prioritize safety at each step. Patience is key in DIY projects.
Step 1: Prepare the Motor
First, clean your motor thoroughly. Identify its mounting points and the shaft size. If the motor shaft isn’t threaded, you might need to create a way to attach a drive pulley or a faceplate later. Some motors have a face or mounting holes that can be used directly. If you’re using a universal motor, it will likely need a different type of speed control than a standard AC induction motor.
Safety Note: If the motor has any exposed wiring, ensure you understand basic electrical safety or consult someone knowledgeable. Never work with live wires. For AC motors, ensure it’s properly grounded. You can find guidance on basic electrical safety from organizations like the Occupational Safety and Health Administration (OSHA).
Step 2: Build the Lathe Bed
This is the main support for your lathe. Cut your lumber or metal to the desired length. A common length is around 3 feet, but you can adjust this based on your available space and the size of projects you plan to turn.
Ensure the bed is flat and stable. If using wood, you might want to reinforce it or attach it securely to a workbench. The key is that it needs to be absolutely straight and rigid, as this will dictate the quality of your turning.
Step 3: Prepare and Mount the Headstock
The headstock will consist of your motor, its bearings, and the spindle. This is where the magic happens. We need to securely mount the motor to the bed and create a way for its shaft to turn the workpiece. This can be done in a few ways:
- Direct Drive (Simpler): If your motor shaft is the right size and length, you can try to directly mount a faceplate or chuck adapter to it. This requires precise alignment.
- Pulley System (More Complex but Recommended): Use a pulley on the motor shaft and a larger pulley on your headstock spindle. This allows for some speed adjustment and can accommodate different shaft sizes.
For a simpler build, let’s focus on direct drive or a simple pulley adapter:
Option A: Direct Drive with Faceplate
- Mount two pillow block bearings side-by-side onto the lathe bed, ensuring they are perfectly aligned. These will support your headstock spindle.
- Install your headstock spindle into the pillow block bearings. Ensure it spins freely and smoothly.
- You’ll need a way to connect the motor shaft to this spindle. This might involve a coupler, or if the motor shaft is directly accessible and has a compatible diameter, you might be able to attach it.
- Securely mount the motor behind the headstock, ensuring its shaft is perfectly aligned with the headstock spindle. This connection is critical. A flexible shaft coupler can help with minor misalignments.
- Mount a faceplate directly onto the headstock spindle.
Option B: Pulley Drive Adapter
- Mount pillow block bearings as described above.
- Create a sturdy adapter that bolts to your headstock spindle on one end and has a shaft or a pulley mount for a belt on the other.
- Mount a pulley onto your motor shaft.
- Mount the motor securely behind the headstock, aligning the motor pulley with the headstock pulley.
- Fit a strong belt (like a V-belt) between the two pulleys.
Regardless of the method, the headstock assembly must be very rigid and precisely aligned with the lathe bed.
Step 4: Construct the Tailstock
The tailstock supports the workpiece and can hold tools for drilling. A simple tailstock can be made from a sturdy piece of wood or metal that slides along the bed. It needs to:
- Be long enough to hold a workpiece between the headstock and tailstock.
- Have a way to secure it to the bed (e.g., through bolts or a clamp system) so it doesn’t move while turning.
- Have a spindle that can be advanced into the workpiece. A common method is to use a threaded rod that passes through a nut mounted on the tailstock body. Turning the rod advances or retracts a point or drill bit holder.
Mounting this to the bed so it slides smoothly but can be locked down firmly is key. You might use wooden runners that fit snugly on the bed, with a bolt to tighten them in place.
Step 5: Fabricate the Tool Rest
This is where your chisel or gouge will sit. It needs to be strong and adjustable.
A simple tool rest can be made from a sturdy piece of metal rod or pipe (e.g., 1/2 inch diameter or larger) that slides into holders mounted on the bed. The holders should allow the rest to be adjusted up and down, and also rotated to different angles.
The top surface of the tool rest should be smooth and straight, parallel to the line between the headstock and tailstock centers. Its height should be adjustable so it can be set just below the center line of your workpiece.
Step 6: Wiring and Safety Features
This is a critical step that requires caution. If you are not comfortable with electrical wiring, seek help from someone who is.
For AC Induction Motors:
- Connect the power cord to your on/off switch.
- Connect the switch to the motor using the appropriate terminals for your motor type (often forward/reverse or single speed).
- Ensure proper grounding of the motor casing and the lathe’s metal parts. You can find wiring diagrams for common AC motor types online. For example, the Electronics Hub offers detailed explanations of AC motor operation and wiring.
For Universal Motors (DC/AC):
- Universal motors often have speed control options, sometimes integrated.
- Wire a suitable switch inline with the motor.
- Pay close attention to the motor’s voltage and current requirements.
Safety Guards: While this is a mini lathe, it’s good practice to consider any potential pinch points or areas where debris could fly. If possible, add simple guards around moving parts, especially the belt and pulleys if you use them.
Step 7: Assembly and Testing
Mount the motor, headstock assembly, tailstock, and tool rest assembly onto the lathe bed. Ensure everything is aligned and can be securely locked in place. Place a piece of scrap wood between the headstock and tailstock centers (you might need to create temporary centers if you don’t have them). Turn on the motor and let it run at a slow speed.
Listen for any unusual noises. Check for excessive vibration. Ensure the workpiece spins true and centered. If not, re-check the alignment of your headstock bearings and motor.
First Turning Test:
- Mount a small, soft piece of wood (like pine) onto the headstock faceplate (or in your chuck if using one). Make sure it’s securely attached.
- Position the tool rest close to the wood.
- Turn on the lathe at a low speed.
- Gently touch your chisel or gouge to the spinning wood. Start by just scraping it to create rough shavings.
- Gradually increase speed and refine cuts. Listen to the motor and the wood. If it struggles, you might need a more powerful motor or a better belt/pulley system.
Speed Considerations: The ideal speed depends on the motor, the diameter of your workpiece, and the type of wood. For small pieces, speeds from 500-2000 RPM are common. A common setup for home builds involves a motor with a primary pulley and a larger secondary pulley on the headstock, connected by a belt. This reduction in speed can give you more torque. If using a universal motor, a speed controller is highly recommended.
Design Variations and Tips
There are many ways to build a DIY mini wood lathe. Here are some common variations and helpful tips:
Motor Selection Guide
The choice of motor significantly impacts performance. Here’s a quick look:
| Motor Type | Pros | Cons | Best For |
|---|---|---|---|
| Washing Machine Motor (AC Induction) | Often powerful (1/2 HP+), durable, readily available (sometimes free). | Can be heavy, requires capacitor to start, fixed speed (unless modified). | Spindle turning, bowls. |
| Vacuum Cleaner Motor (Universal) | Lightweight, can be high RPM, some have speed control. | Less torque, can overheat on continuous use, noisy, brushes wear out. | Pen turning, very small projects. |
| Sewing Machine Motor (DC/Universal) | Variable
Related Posts |