Build a sturdy DIY small wood lathe stand to elevate your woodworking, offering stability and preventing wobbling. This essential build provides a solid foundation for precise turning, improving safety and your workpiece finish. Follow our easy, step-by-step guide designed for beginners.
Working with a small wood lathe can be incredibly rewarding, opening up a world of creative possibilities. However, a wobbly or unstable lathe can quickly turn that joy into frustration, jeopardizing both your projects and your safety. Many beginners start by simply placing their lathe on a workbench, only to discover that vibrations can cause significant issues. This leads to rougher finishes, inaccurate cuts, and even the risk of the lathe “walking” across the bench.
Fear not! Building a dedicated, robust stand for your small wood lathe is a straightforward and highly beneficial project. It’s more accessible than you might think, even if you’re new to woodworking. This guide will walk you through every step, from choosing materials to the final assembly. We’ll break down the process into manageable chunks, so you can build a stable, reliable platform that will serve you well for years to come. Get ready to transform your turning experience!
Why Build a Dedicated DIY Small Wood Lathe Stand?
Placing your small wood lathe directly on a standard workbench might seem like the easiest solution initially. However, this setup often lacks the necessary rigidity to handle the forces generated during turning. Lathes vibrate, especially when working with larger pieces or at higher speeds. This vibration can be transmitted to your workbench, leading to a cascade of problems:
- Reduced Accuracy: Vibrations can cause your tools to chatter against the wood, resulting in a rough, uneven finish that requires extra sanding.
- Tool Wear: Constant jarring puts extra stress on your lathe’s components and your turning tools, potentially leading to premature wear.
- Workpiece Movement: Heavy vibrations can cause the workpiece itself to shift or detach, which is dangerous.
- Noise: A wobbly lathe amplifies noise, making your workshop a less pleasant environment.
- “Lathe Walk”: Over time, vibrations can actually cause the lathe to slowly move across the surface it’s resting on.
A well-built DIY small wood lathe stand addresses all these issues. It acts as a dedicated shock absorber, isolating the lathe from its surroundings. It provides a solid, immovable foundation, ensuring your lathe stays put and operates smoothly. This stability directly translates into better results and a safer working environment. Plus, a well-designed stand can incorporate useful features like storage for your tools and accessories, making your workshop more organized.
Essential Considerations Before You Build
Before you grab your tools and lumber, taking a moment to plan will save you time and ensure a better outcome. Here are some key things to think about:
Lathe Dimensions and Weight
Your stand needs to be appropriately sized for your specific lathe. Measure the footprint of your lathe (the distance from front to back and side to side when it’s mounted). Also, consider the weight of your lathe, as this will influence the strength of the materials you need.
Height and Ergonomics
The ideal height for your lathe stand is crucial for comfortable and safe operation. You should be able to stand at the lathe with your elbows bent at roughly a 90-degree angle. This allows for good control over your tools and reduces strain on your back and shoulders. A good rule of thumb is to measure from the floor to your elbow while standing relaxed, and then subtract the height of your lathe bed. You can also research general ergonomic guidelines for woodworking machinery. For instance, the Occupational Safety and Health Administration (OSHA) provides valuable resources on workplace ergonomics that can be adapted for your home workshop.
Stability and Rigidity
This is the primary goal. Your stand needs to be heavy enough or designed in a way that it won’t tip or move. This often means using thicker materials, wider bases, and robust joinery. Consider adding weight if necessary, such as metal plates in the base, though a solid, well-braced wooden structure is often sufficient for small lathes.
Storage Needs
Do you want to store chisels, chucks, or other accessories directly on or in your stand? Planning for shelves or compartments now can save you from building a separate storage solution later.
Footprint and Shop Space
How much space do you have available in your workshop? Design your stand to fit comfortably without being a tripping hazard. A wider base generally increases stability but takes up more floor space.
Material Choice
For a sturdy stand, hardwood or good quality softwood like pine is excellent. Plywood can also be used for shelves and bracing. The key is to use materials that are free of major knots and defects that could weaken the structure.
Materials and Tools You’ll Need
This project is designed to be achievable with common woodworking tools and materials. Here’s a general list, but always adapt it based on your specific design and preferences.
Materials:
- Lumber: The exact quantities will depend on your design, but common choices include:
- 4×4 posts (or doubled-up 2x4s) for the legs.
- 2×4 or 2×6 lumber for the aprons (the horizontal pieces connecting the legs).
- 3/4-inch plywood for the top surface and any shelves.
- Fasteners:
- Wood screws (e.g., 2.5-inch and 1.5-inch construction screws).
- Wood glue (a good quality PVA glue is essential for strong joints).
- Optional: Lag bolts and washers for attaching the lathe to the stand.
- Finishing Supplies:
- Sandpaper (various grits from 80 to 220).
- Wood finish (polyurethane, varnish, or even a simple oil finish).
Tools:
- Measuring and Marking:
- Tape measure
- Pencil
- Combination square or speed square
- Chalk line (optional, for long cuts)
- Cutting Tools:
- Circular saw or miter saw for cutting lumber to length.
- Jigsaw or handsaw for any curves or cutouts (e.g., for chip collection).
- Table saw (optional, but helpful for precise cuts and dadoes if you plan them).
- Assembly Tools:
- Cordless drill/driver with various drill bits and driver bits.
- Clamps (bar clamps, pipe clamps, or an assembly table with clamps are very useful).
- Hammer (for persuasion, rarely needed with good joinery).
- Orbital sander or sanding block for smoothing surfaces.
- Safety Gear: ALWAYS wear safety glasses, hearing protection, and a dust mask when cutting or sanding.
Simple DIY Small Wood Lathe Stand Designs
Here are a couple of common and effective design approaches for a DIY small wood lathe stand. We’ll focus on a simple, robust design suitable for beginners.
Option 1: The Classic Table-Style Stand
This is a straightforward design that resembles a sturdy work table. It typically involves four legs connected by aprons, with a strong top surface. It’s easy to build and offers good stability.
Option 2: The Cabinet-Style Stand
This design incorporates panels between the legs to create an enclosed cabinet. This provides more storage and can add significant structural bracing, increasing rigidity. It’s slightly more complex but very effective.
For this guide, we’ll detail a robust table-style stand that prioritizes stability and ease of construction. You can adapt it to include cabinet elements later if you wish.
Step-by-Step Build Guide: The Robust Table-Style Stand
Let’s get building! This guide will assume a stand that is approximately 30-36 inches tall (adjustable to your ergonomic needs), with a footprint designed to be stable for a typical small lathe.
Step 1: Finalize Your Design and Cut List
Before cutting any wood, draw out your stand. Decide on the exact height, width, and depth. For a 30-inch tall stand, using 4 legs and aprons, a typical cut list might look something like this (adjust based on your lathe):
Example Cut List:
| Component | Material | Quantity | Dimensions |
|---|---|---|---|
| Legs | 4×4 lumber | 4 | 30 inches long |
| Long Aprons | 2×4 lumber | 2 | 24 inches long |
| Short Aprons | 2×4 lumber | 2 | 12 inches long |
| Top Supports (optional, for reinforcing under plywood) | 2×4 lumber | 3 | 20 inches long |
| Top Surface | 3/4″ Plywood | 1 | 30 inches x 18 inches (adjust as needed) |
| Lower Shelf (optional) | 3/4″ Plywood | 1 | 24 inches x 12 inches (adjust as needed) |
| Bracing (optional, for lower shelf supports) | 2×4 lumber | 2 | 10 inches long |
Tip: It’s often best to cut leg pieces to their final length first. Then, you can trim the aprons and other pieces to fit between or around them, ensuring a snug fit.
Step 2: Cut Your Lumber
Using your chosen saw (miter saw or circular saw), carefully cut all your lumber pieces to the dimensions on your cut list. Ensure your cuts are square (90 degrees) for tight-fitting joints. Take your time and measure twice, cut once.
Safety First: Always wear safety glasses and hearing protection when operating saws. If using a circular saw, clamp your lumber securely before cutting.
Step 3: Prepare the Legs for Apron Attachment
You have a few options for attaching the aprons to the legs. A simple and strong method is to use screws and glue, screwing through the apron into the leg. If you want a cleaner look and stronger joint, you can cut dados (grooves) into the inside faces of the legs for the aprons to sit in. This requires a table saw or router and a dado blade set.
For a beginner-friendly approach, we’ll focus on the screw and glue method:
- Mark the locations where the aprons will attach to the legs. Typically, aprons are inset slightly from the top of the legs, perhaps 1-2 inches down.
- If you’re not cutting dados, position an apron against the leg at your marks.
- Pre-drill pilot holes through the apron and into the leg. This prevents the wood from splitting. Make sure the drill bit is slightly smaller than the screw diameter.
- Apply wood glue to the end of the apron that will meet the leg.
- Assemble one corner of the stand by screwing the apron to the leg.
Step 4: Assemble the Leg Frames
You’ll build two identical end frames first. Each frame will consist of two legs joined by a short apron and a long apron.
- Take two legs and one short apron.
- Apply wood glue to the ends of the short apron.
- Position the short apron between the two legs at your marked height.
- Pre-drill and screw through the apron into the legs. Ensure the assembly is square by checking diagonal measurements.
- Repeat for the long apron, attaching it to the other side of the same two legs.
- You now have one end frame. Repeat steps 1-5 to build the second end frame with the remaining two legs and aprons.
Tip: Use clamps to hold pieces together while you screw them. This ensures a tight joint while the glue cures.
Here’s a visual representation of an end frame assembly:

Step 5: Connect the End Frames
Now you’ll join the two completed end frames using the remaining aprons and any top supports.
- Stand the two end frames upright.
- Position one of the long aprons between the two frames, aligning it with the top of the legs (or your designated apron height).
- Apply glue to the ends of the apron where it meets the legs.
- Pre-drill and screw the apron into both legs of each frame.
- Repeat for the other long apron on the opposite side.
- If you are using top supports, position them as needed (e.g., running front-to-back between the long aprons) to create a solid base for the plywood top. Glue and screw them in place.
At this point, you should have a sturdy rectangular base structure.
Step 6: Add Stability Features (Optional but Recommended)
For enhanced stability, especially for larger small lathes, consider these additions:
- Lower Shelf: Cut a piece of plywood to fit inside the base frame. Use 2×4 pieces as cleats screwed to the inside of the aprons to support the shelf. Glue and screw the plywood shelf to these cleats. This adds significant mass to the base.
- Diagonal Bracing: If you are concerned about racking (sideways wobble), you can add diagonal braces between the legs, either on the inside or outside of the frame, or between the legs and aprons. You can cut these at 45-degree angles.
Step 7: Install the Top Surface
This is the platform your lathe will sit on.
- Place your cut plywood top onto the assembled base. Ensure it’s centered and overhangs slightly and equally on the sides if desired.
- From underneath, secure the plywood top to the aprons and any top support pieces using wood glue and screws. Pre-drill pilot holes to avoid splitting the plywood.
Tip: If your lathe has mounting holes, you can also plan to drill through the plywood top and into the base structure later to bolt your lathe directly down for maximum security.
Step 8: Sand and Finish
Take time to sand all surfaces smooth. Start with a coarser grit (e.g., 80 or 120) to remove any mill marks or rough spots, then move to finer grits (e.g., 180 or 220) for a smooth finish. Pay close attention to edges and corners.
Once sanded, apply your chosen wood finish. A couple of coats of polyurethane or varnish will protect the wood and give it a professional look. Follow the manufacturer’s instructions for application and drying times. Make sure to finish all surfaces, including the underside and inside, to help prevent moisture damage.
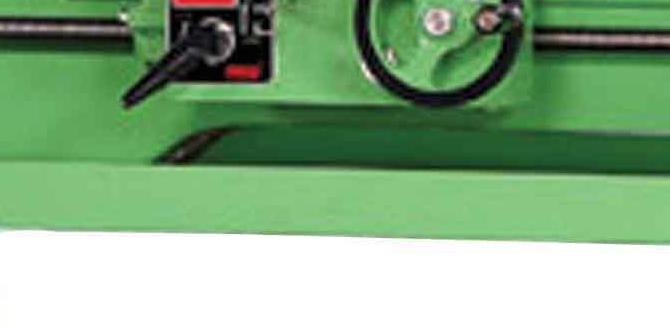
Step 9: Mount Your Lathe
Once the finish is completely dry, carefully place your wood lathe onto the stand. If your lathe has mounting flanges or holes, mark and drill corresponding holes through the plywood top. Secure the lathe to the stand using appropriate bolts, washers, and nuts. This is a critical step for safety and performance. Check the Wood Magazine website for additional safety tips when mounting and operating lathes.
Essential Safety Enhancements for Your Stand
Beyond the structural integrity of the stand itself, consider these optional enhancements to further improve safety:
- Chip Deflector: Woodturning produces chips and dust. You can create a simple plywood deflector that attaches to the back of the lathe or the stand to direct chips away from you and your electrical components.
- Tool Tray/Storage: Integrate a simple tray or shelves to keep your turning tools within easy reach but safely stored, preventing them from falling.
- Locking Casters: If you need to move your lathe around your workshop, install heavy-duty locking casters. Ensure they have stout wheel locks and that the stand is