Your wood lathe banjo part is worn out or broken? Don’t worry! This guide will show you how to replace your DIY wood lathe banjo with simple steps, clear instructions, and safety tips. Get your lathe back to perfect working order without a fuss.
Woodworking can be incredibly rewarding, but sometimes, a small part can cause big headaches. If your wood lathe’s banjo feels loose, wobbles, or just isn’t holding your tools steady anymore, it’s probably time for a replacement. The banjo is a crucial part of your lathe, connecting your tool rest to the lathe bed. A worn-out banjo means less control, less precision, and can even be a safety concern. But before you panic about expensive parts or complicated repairs, let’s talk about something simpler: a DIY solution. This guide, straight from Lathe Hub, is made for you, the beginner woodworker or DIYer, to tackle this common issue with confidence. We’ll break down the process into easy-to-follow steps, so you can get back to turning beautiful wood projects in no time.
Why Your Wood Lathe Banjo Needs Attention
The banjo on a wood lathe is that sturdy piece that slides along the lathe bed and holds your tool rest. It’s designed to be moved and locked in place over and over again. Over time, the parts that allow it to slide and tighten can wear down. This wear and tear can manifest in a few ways:
- Sloppiness or Wobble: If your banjo feels loose even when you tighten the lever, the mating surfaces might be worn.
- Difficulty Locking: The banjo might not lock securely, or it might slip during use.
- Scored or Damaged Surfaces: You might notice visible wear, scratches, or gouges on the part of the banjo that contacts the lathe bed.
- Inconsistent Tool Placement: You’ll find it hard to get your tool rest in the exact same spot consistently, affecting accuracy.
These issues aren’t just annoying; they can impact the quality of your work and, more importantly, your safety. A wobbling tool rest can cause the tool to jump, leading to kickback or an accident. Thankfully, addressing this is often well within the reach of a DIYer.
Understanding Your Wood Lathe Banjo
Before we dive into the replacement, let’s get a clear picture of what we’re dealing with. Most wood lathe banjos consist of a few core components. The exact design can vary between lathe models, but the basic principle is the same: a mechanism to slide along the bed and lock down firmly.
Common Banjo Components
A typical banjo assembly includes:
- The Main Body: This is the primary structure that holds everything together.
- Slide Mechanism: This part mates with the lathe bed, allowing it to move smoothly yet securely. It might have “gib” strips or wear pads to adjust for wear.
- Locking Lever/Wheel: This is what you tighten to secure the banjo in place.
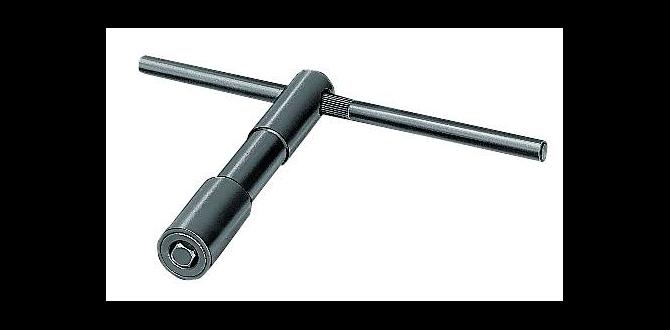
- Tool Rest Post Holder: The hole or provision where your tool rest post inserts.
When a banjo needs replacement, it’s usually because the slide mechanism or the locking mechanism has become worn, making it impossible to achieve a secure fit against the lathe bed.
DIY Banjo Replacement: What You’ll Need
The beauty of DIY is leveraging what you have and sourcing affordable parts. For this project, you won’t need a full machine shop, but a few essential tools will make the job smoother and safer.
Essential Tools and Materials
Here’s a list of what you should gather before you start:
- Your New Banjo: This is the most critical part. We’ll discuss sourcing options.
- Wrench Set or Socket Set: For removing and installing bolts.
- Screwdriver Set: Phillips and flathead, as needed.
- Allen Wrench Set (Hex Keys): Many lathe parts use Allen bolts.
- Grease or Lubricant: For the new banjo’s sliding surfaces.
- Rag or Shop Towels: For cleaning.
- Safety Glasses: Always wear these when working with tools!
- Gloves (Optional): To keep your hands clean.
- Measuring Tape or Ruler: To ensure correct fit.
- Drill and Drill Bits (if fabricating): If you’re going the custom route.
- Metal File (if fabricating): For minor adjustments.
Where to Find a Replacement Banjo
This is often the trickiest part for a beginner. Here are your best options:
- Manufacturer Parts: If you know your lathe’s make and model, contact the manufacturer or an authorized dealer. This is usually the most direct and guaranteed fit.
- Specialty Lathe Parts Suppliers: Online stores that specialize in woodworking lathe parts are excellent resources. A quick search for “wood lathe parts” should yield results.
- Online Marketplaces: Websites like eBay can sometimes have new or used parts available, often at a lower cost. Be sure to check seller reviews and part specifications carefully.
- DIY/Fabrication: If you’re adventurous and have some metalworking skills, you can fabricate a replacement banjo yourself. This is a more advanced option but gives you complete control. For beginners, purchasing a made part is highly recommended.
When choosing a replacement, always verify the dimensions and mounting style to ensure it’s compatible with your specific lathe bed.
Step-by-Step Guide: Replacing Your Wood Lathe Banjo
Let’s get down to business. This process is straightforward, but taking your time and being methodical will lead to the best results.
Step 1: Preparation and Safety First
- Turn Off and Unplug the Lathe: Absolutely essential for your safety. Ensure the lathe cannot be accidentally turned on.
- Clear Your Workspace: Make sure you have enough room to work comfortably and that there are no tripping hazards.
- Wear Safety Glasses: Protect your eyes from any dust or debris.
Step 2: Remove the Old Banjo
This step varies slightly depending on your lathe’s locking mechanism.
- Loosen the Locking Lever/Wheel: Completely loosen the mechanism that secures your current banjo to the lathe bed. You want it to be free to slide.
- Slide Off the Old Banjo: Gently slide the old banjo off the nearest end of the lathe bed. If it’s stiff, check if you’ve fully loosened the locking mechanism. Sometimes a little wiggling is needed.
- Inspect Lathe Bed: While the banjo is off, take a moment to inspect the lathe bed where the banjo slides. Clean off any dust, debris, or dried lubricant with a clean rag. A clean bed leads to smoother operation for the new banjo.
Step 3: Prepare the New Banjo
Your new banjo might come lightly oiled, or it might be bare metal.
- Inspect the New Banjo: Check for any visible manufacturing defects or damage from shipping. Ensure all bolts or fasteners are snug.
- Lubricate Sliding Surfaces: Apply a thin, even coat of grease or suitable lubricant to the sliding surfaces of the new banjo – the parts that will contact the lathe bed. This ensures smooth movement and prevents premature wear. A general-purpose bearing grease or a specific lathe bed lubricant works well. For more information on lathe maintenance, check out resources from organizations like the Woodturners Guild of Ontario, which often share best practices for tool care.
Step 4: Install the New Banjo
This is the reverse of the removal process.
- Position the New Banjo: Carefully slide the new banjo onto the lathe bed, ensuring the lubricated surfaces are making contact with the bed.
- Slide into Place: Gently maneuver the banjo to your desired starting position. It should slide relatively smoothly if properly lubricated.
- Tighten the Locking Mechanism: Once in position, engage the locking lever or wheel firmly. You want it to feel snug and secure.
Step 5: Test for Security and Smoothness
This is where you confirm everything is working correctly.
- Check for Rocking: With the banjo locked down, try to rock it side-to-side. There should be no perceptible movement. If there’s any wobble, try tightening the locking mechanism a bit more. If it’s still loose, the replacement part might not be a perfect fit, or more adjustment is needed (depending on your banjo’s design, some have adjustable gibs).
- Test Sliding: Unlock the banjo. It should slide along the bed with moderate resistance – smooth but not so loose that it moves on its own. Lock it again at a different position and re-test for rocking.
- Insert Tool Rest: Place your tool rest into the new banjo’s post holder. Ensure it fits snugly and can be adjusted freely.
Congratulations! You’ve just replaced your wood lathe banjo.
Troubleshooting Common Banjo Replacement Issues
Even with careful steps, you might encounter a hiccup. Here are some common problems and how to solve them:
Issue 1: New Banjo is Too Loose/Wobbly
- Cause: The new banjo’s internal dimensions or the mating surface with the lathe bed isn’t quite right for your specific lathe.
- Solution:
- Ensure the locking lever is fully tightened without forcing it.
- Some banjos have “gib” adjustments or shims that can compensate for minor differences. Check your banjo’s design or manufacturer’s manual. You might be able to add thin strips of material (like brass shim stock, often available at good hardware stores) to take up slack.
- If it’s excessively loose, the banjo might be incompatible, or there could be significant wear on your lathe bed itself.
Issue 2: New Banjo Slides Too Stiffly or Gets Stuck
- Cause: Insufficient lubrication, debris on the lathe bed, or the banjo is binding.
- Solution:
- Make sure the lathe bed is perfectly clean.
- Ensure the banjo is evenly lubricated on all sliding surfaces.
- Unlock the banjo completely and slide it carefully to ensure it’s moving straight. Sometimes, a slight twist can cause binding.
- If a specific part of the bed is problematic, you might need to address that with fine sandpaper or a specialized lathe bed lubricant. For more on keeping your lathe in top shape, “The Complete Manual of Woodworking” (published by The Taunton Press, a reputable publisher of woodworking books) has excellent sections on lathe maintenance.
Issue 3: Locking Lever Won’t Tighten Enough
- Cause: Wear in the lever mechanism itself, or the banjo isn’t engaging properly with the bed.
- Solution:
- Double-check that the banjo is fully seated and square against the bed before tightening.
- If your banjo has adjustable components, consult its manual for proper adjustment.
- It might indicate that the thread on the locking mechanism is damaged or stripped, or the internal clamping mechanism is worn out. This may require a different replacement part or repair.
Maintaining Your Wood Lathe for Longevity
A new banjo is great, but preventing future issues is even better. Regular maintenance is key to keeping your lathe running smoothly and safely for years to come.
Key Maintenance Tips
- Keep it Clean: Regularly dust and wipe down your lathe. Wood dust can get into mechanisms and cause wear.
- Lubricate Regularly: The lathe ways (bed) and banjo sliding surfaces should be kept lightly lubricated. Follow the manufacturer’s recommendations for lubricant type and frequency.
- Check for Wear: Periodically inspect the banjo and tool rest for any signs of excessive wear or damage. Catching issues early can save you a lot of trouble.
- Proper Locking: Always ensure your banjo is securely locked before starting any turning operation.
- Store Properly: If you use your lathe infrequently, consider covering it to protect it from dust and moisture.
Frequently Asked Questions (FAQ)
Q1: How often should I replace my wood lathe banjo?
A1: You don’t need to replace it on a schedule. Replace it when you notice it no longer locks securely, it’s excessively wobbly, or it significantly hinders your ability to turn accurately and safely.
Q2: Can I use a banjo from a different brand of lathe?
A2: Sometimes, yes, if the mounting style and dimensions match your lathe bed perfectly. However, it’s always best to buy a banjo specifically designed or recommended for your lathe model to ensure a good fit and reliable performance.
Q3: My new banjo is a little tight. Should I force it?
A3: No, never force it. A slight stiffness can be eased with lubrication and breaking it in. Excessive tightness might mean it’s incompatible or needs an adjustment. Re-check cleaning and lubrication steps first.
Q4: What’s the difference between a banjo and the tool rest?
A4: The banjo is the part that slides and locks onto the lathe bed. The tool rest is the bar/support that the turning tool rests on, and it inserts into the banjo.
Q5: Is it safe to use my lathe with a worn-out banjo?
A5: No, it’s not recommended. A worn banjo can’t hold the tool rest securely, increasing the risk of the tool jumping, which can lead to kickback and serious injury. Safety should always be your top priority.
Q6: Can I fabricate my own banjo if I can’t find a replacement part?
A6: Yes, it’s possible if you have metalworking skills and tools. However, for beginners, it’s much easier and safer to purchase a compatible replacement banjo, as precise dimensions and a secure fit are critical for safe operation.
Conclusion
Replacing your wood lathe banjo might seem like a daunting task at first, but as you’ve seen, it’s a manageable DIY project. By following these steps, using the right tools, and prioritizing safety, you can successfully swap out a worn-out part for a new, reliable one. A secure banjo is fundamental to accurate and safe woodturning, allowing you to focus on the creative process and produce beautiful results with confidence. Remember to keep your lathe clean and lubricated, and small issues like a loose banjo won’t become major problems. Happy turning, and enjoy the renewed stability and control your newly replaced banjo provides!