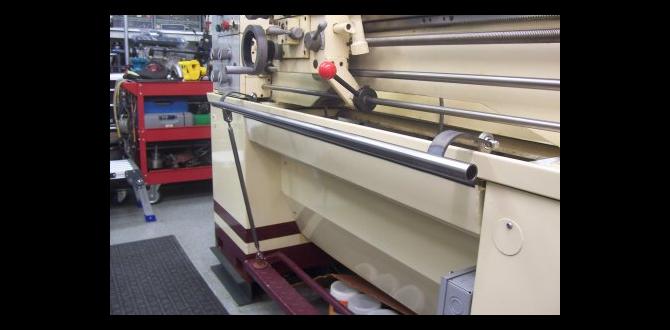
Learn to build your own simple DIY wood lathe duplicator for pens. This guide makes it easy to create identical pen bodies by hand, ensuring consistent results every time. No fancy tools needed!
Hey there, fellow makers! Daniel Bates here from Lathe Hub. Ever found yourself wanting to make a batch of pens, only to struggle with getting each one to look exactly the same? It’s a common challenge, especially when you’re starting out. That little bit of difference in each piece can be frustrating. But don’t worry, I’ve got a simple, effective solution that’s proven to work wonders. We’re going to build a DIY wood lathe duplicator that’s perfect for pens. It’s straightforward, beginner-friendly, and will give you the confidence to produce beautiful, consistent pen bodies. Stick around, and I’ll show you exactly how to do it, step by step!
Why You Need a Pen Duplicator
Creating multiple identical turned items, like pen bodies, can be surprisingly tricky. Your hand can only hold the tool with so much consistency. Even slight variations in pressure or angle result in noticeable differences between pieces. This is where a duplicator comes in handy. It’s essentially a jig that guides your cutting tool, ensuring it follows the same path on every workpiece. This leads to remarkable consistency and saves you a ton of time and frustration.
For pen turning, precise duplication is key. You want the threaded section to reliably screw into the cap, the grip section to feel comfortable, and the overall shape to be seamless from one pen to the next. A simple duplicator attachment for your wood lathe can achieve this without breaking the bank or requiring advanced machining skills.
Understanding How a Lathe Duplicator Works
At its core, a lathe duplicator works by using a template to guide a follower arm. This follower arm is connected to a tool holder. As you move the follower along the template, the tool holder moves in tandem, taking a precise copy of the template’s shape and transferring it to your workpiece. For pen turning, this template can be a simple wooden block with the desired pen body shape carved into it.
The beauty of a DIY duplicator is its simplicity. You don’t need complex mechanisms. Just a sturdy way to hold your template, a way to guide your cutting tool precisely along the template, and a way to ensure your tool consistently cuts the wood to match the template’s contour. This guide focuses on a very accessible design using commonly found materials.
Materials and Tools You’ll Need
Building this DIY wood lathe duplicator for pens is designed to be accessible. You likely have many of these items in your workshop already. If not, they are readily available at hardware stores or online.
Essential Materials:
- Wood for the Duplicator Body: Two pieces approximately 1×4 inches and 18 inches long (hardwood like oak or maple is ideal for durability).
- Wood for the Template: A piece of scrap hardwood, about 1 inch thick, that’s long enough to accommodate your pen body design (e.g., 6-8 inches).
- Metal Angle Bracket: Two small, strong angle brackets (around 2-3 inches).
- Knobs or Wing Nuts: Two to four knobs or wing nuts with matching bolts for securing adjustments.
- Small Bearings or Gliders: Two small, smooth-rolling bearings (like those from old rollerblades or inline skates) or hard nylon gliders. These will act as the followers.
- Hardware: Various wood screws, machine screws, washers, and nuts as needed for assembly.
- Wood Glue: For initial assembly of the template.
- Sandpaper: Assorted grits for smoothing.
Tools You’ll Need:
- Wood Lathe: Obviously!
- Standard Lathe Tools: Including a roughing gouge, spindle gouge, skew chisel, and parting tool.
- Measuring Tape and Ruler: For accurate measurements.
- Pencil: For marking.
- Drill and Drill Bits: For creating mounting holes and pilot holes.
- Saw: A handsaw, bandsaw, or table saw for cutting wood.
- Screwdrivers: To match your screws.
- Wrench or Socket Set: For nuts and bolts.
- Clamps: To hold pieces while gluing or drilling.
- Optional: Bandsaw or Scroll Saw: For more intricate template shaping.
Step-by-Step Guide to Building Your DIY Pen Duplicator
Let’s get building! This duplicator is designed to mount onto your lathe’s banjo or tool rest post. It provides a stable platform for your template and a guided system for your cutting tool.
Step 1: Prepare the Duplicator Body
Take your two 1×4, 18-inch boards. These will form the main structure of your duplicator. On one of these boards, you’ll mount your template. On the other, you’ll mount the follower system for your tool. For now, simply ensure both pieces are clean and smooth.
Step 2: Create the Template
This is where you define the shape of your pen body.
- Draw Your Design: On your template wood, draw the exact profile of the pen body you want to replicate. Include any tapers, curves, or distinct sections like the grip or barrel. Remember to account for the length and diameter of your pen blank and the kit components.
- Cut Out the Template: Carefully cut out this profile. A bandsaw or scroll saw is ideal for smooth curves, but a jigsaw or even careful work with chisels and sandpaper can achieve a good result. The key is a clean, smooth edge that your follower can trace accurately.
- Refine the Template: Sand the edges of your template until they are perfectly smooth. Any bumps or imperfections will be transferred to your pens.
- Attach to Duplicator Body: Using wood glue and clamps, attach your finished template to one of the 1×4 duplicator boards. Position it so it}s centered along the board and leaves enough space for the follower mechanism to operate. Let the glue dry completely.
Step 3: Build the Follower Mechanism
This part guides your tool. It needs to be able to move freely along the template.
- Mount the Bearings/Gliders: On the second 1×4 duplicator board, attach your bearings or gliders. These should be positioned directly opposite the template on the other board when the duplicator is assembled. The idea is that these bearings will ride against the edge of your template, allowing the tool to be held at a consistent distance from it.
- Positioning is Crucial: The distance between the bearings and the cutting edge of your tool needs to be precisely the distance from the tool’s cutting edge to the template. Think of it as the duplicator mirroring your tool’s position relative to the template. You might need a small metal plate or block to attach these bearings if they don’t have a suitable mounting system.
Step 4: Assemble the Duplicator Structure
Now we bring the two halves together.
- Use Angle Brackets: Place the two 1×4 boards parallel to each other, with the template facing one way and the bearings facing the other. Use your metal angle brackets to join the ends of these boards. This creates a rigid, U-shaped structure.
- Allow for Adjustment: You want the distance between the template and the follower bearings to be adjustable. This is where your knobs and bolts come in. Drill holes through both boards at each end. Use bolts with washers and knobs or wing nuts to secure the two boards together, tightening them enough to prevent movement but allowing for slight adjustments. You might only need one adjustable connection point initially.
- Test the Movement: With your follower bearings against the template, the tool holder (which you’ll add next) should maintain a consistent relationship to the template.
Step 5: Create the Tool Holder
This is where your lathe tool will sit.
- Mount a Rest Style Holder: The easiest way is to create a simple tool rest that attaches to the U-shaped duplicator. You can fashion this from a piece of hardwood or metal. It needs to be positioned so that your lathe tool can rest securely on it, directly in line with the follower bearings and perfectly mirroring the template’s contour.
- Adjustable Height: Ideally, this tool holder should have some ability to adjust vertically. This allows you to set the cutting depth accurately and ensure your tool aligns perfectly with the template. Again, use bolts and knobs for adjustability.
Step 6: Mount the Duplicator to Your Lathe
The duplicator needs to be securely attached to your lathe so it doesn’t vibrate or shift during operation.
- Identify Mounting Point: Most tool rests on wood lathes can be removed or have a post that can be adapted. Look for a way to securely bolt or clamp your duplicator’s frame to this post. You might need to drill holes in the duplicator body to accept a mounting bolt.
- Ensure Stability: It’s vital that the duplicator is rigidly fixed. Any wobble will translate into imperfections on your pens. Use strong hardware and tighten everything securely.
Using Your DIY Pen Duplicator: Effortlessly Effortless
With the duplicator built and mounted, it’s time to turn some pens! The process is designed to be intuitive.
Step 1: Prepare Your Pen Blanks
Turn your pen blanks to a rough cylinder that is slightly larger than the widest part of your desired pen body. This gives you material to remove down to the template shape. Ensure the ends are squared off.
Step 2: Mount the Blank on the Lathe
Mount your prepared pen blank between centers or on your preferred chuck setup on the lathe. Make sure it’s spinning true.
Step 3: Engage the Duplicator
Position your DIY duplicator so that the template is facing the blank. Ensure the follower bearings are resting against your template’s edge. Now, bring your cutting tool into position on the tool holder. Lightly engage the tool to touch the surface of the spinning blank.
Step 4: The Duplication Process
This is where the magic happens.
- Start Cutting: Begin turning at a slow to moderate lathe speed.
- Follow the Template: Gently move the tool back and forth along the length of the blank, keeping the follower firmly against the template. The template’s shape will dictate the tool’s path, and the tool will cut your pen blank to match.
- Take Light Passes: It’s crucial to take light cuts. Let the duplicator do the work. Resist the urge to hog off material. Multiple light passes will result in a cleaner finish and a more accurate duplication.
- Check and Adjust: Periodically stop the lathe and check your progress. Ensure the follower is always firmly in contact with the template. You may need to adjust the tension on your duplicator’s adjustable points as you go.
Step 5: Finishing Touches
Once the entire blank has been shaped according to the template, you can remove the duplicator and use your standard lathe tools for fine-tuning, sanding, and polishing, just as you would with any turned pen body. The bulk of the shaping work will already be done accurately!
Best Practices and Tips for Success
To get the most out of your DIY wood lathe duplicator, keep these tips in mind.
- Template Accuracy is King: The smoother and more accurate your template, the better your duplicated pens will be. Spend time refining it.
- Smooth Follower Action: Ensure your bearings or gliders move absolutely friction-free. Any binding will ruin the duplication. Lubrication might be necessary.
- Rigid Mounting: A wobbly duplicator is useless. Double-check all your connections and mounting hardware.
- Consistent Pressure: Always maintain light, consistent pressure on the follower against the template.
- Sharp Tools: Use sharp lathe tools to ensure clean cuts and reduce strain on the duplicator mechanism. You can learn more about sharpening techniques at resources like Fine Woodworking’s sharpening guides.
- Material Choice for Template: Harder woods like maple, cherry, or even acrylic are excellent choices for templates as they resist wear better.
- Start Simple: Begin with a simple pen body design. As you gain confidence, you can create more complex templates.
- Practice on Scrap: Before turning your best pen blanks, practice on some scrap wood to get a feel for the duplicator.
Comparing DIY Duplicator Designs vs. Commercial Options
It’s worth noting that there are commercial duplicators available for lathes. These often feature more robust construction, precision-engineered parts, and sometimes offer more complex capabilities. However, they also come with a significant price tag.
Our DIY approach offers immense value by utilizing common materials and relatively simple construction. The key differences are often in:
| Feature | DIY Duplicator | Commercial Duplicator |
|---|---|---|
| Cost | Low (material costs) | High (often hundreds of dollars) |
| Complexity of Build | Beginner to Intermediate | N/A (purchased, not built) |
| Customization | Highly customizable (template design) | Limited by manufacturer design |
| Precision/Durability | Dependent on build quality | Generally high, built for longevity |
| Learning Curve (Usage) | Moderate (understanding the mechanics) | Moderate to Low (often more intuitive) |
For the beginner or hobbyist, a well-built DIY duplicator can perform 90% of what a commercial unit can for a fraction of the cost. The process of building it also provides valuable learning experience about jigs and fixtures, which is a cornerstone of efficient workshop practice.
Troubleshooting Common Issues
Even with the best intentions, you might run into a few snags. Here’s how to tackle them:
- Inconsistent Cuts: This is usually caused by movement in the duplicator itself, loose hardware, or the follower not maintaining constant contact with the template. Check all connections and ensure a smooth glide.
- Worn Template/Followers: If your pens start looking less consistent over time, inspect your template for wear or damage. Also, check if your bearings are still spinning freely. Worn parts need replacement. You can find replacement bearings for inline skates or scooters at many sporting goods stores or online.
- Tool Chatter: This can happen if your tool isn’t sharp or if the duplicator or tool rest isn’t stable. Ensure your tool is adequately supported and sharp.
- Difficulty Achieving Fine Details: Very intricate designs on small pen bodies can be challenging for simple duplicators. For extreme detail, hand-tooling might still be superior, or a more advanced duplicator design may be needed.
Frequently Asked Questions (FAQ)
What is a wood lathe duplicator?
A wood lathe duplicator is a jig that attaches to your lathe. It uses a template profile to guide your cutting tool, allowing you to accurately copy a shape onto multiple workpieces, ensuring consistency.
Can I make one for other projects besides pens?
Absolutely! The concept of a duplicator can be applied to making identical table legs, spindles, or any turned item where consistency is desired. You just need to create a template for that specific shape.
How precise will my duplicated pens be?
With careful construction and an accurate template, you can achieve very high precision. Expect your pen bodies to be nearly identical, making assembly easier.
What kind of wood is best for the template?
Hard, dense hardwoods like maple, oak, or cherry are best. They resist wear from the follower mechanism better than softwoods, ensuring the template lasts longer and maintains accuracy.
Is a DIY duplicator safe to use?
Yes, when built and used correctly. Always ensure the duplicator is rigidly mounted to the lathe and that your tools are sharp. Follow safe lathe operating procedures, which you can often find in your lathe’s manual or resources like the Woodwork Safety guidelines.
How do I maintain my DIY duplicator?
Regularly check that all hardware is tight and that the follower bearings/gliders are clean and spin freely. Inspect your


